https://www.cnblogs.com/exmyth/p/7171857.html
以前见过一个swagger2的接口文档,特别好用,好看,对接口中入参描述的很详细;适合用于项目的开发
后来自己做项目的时候,没有找到这个swagger版本
        <dependency>
            <groupId>io.springfox</groupId>
            <artifactId>springfox-swagger2</artifactId>
            <version>2.9.2</version>
        </dependency>
        <dependency>
            <groupId>io.springfox</groupId>
            <artifactId>springfox-swagger-ui</artifactId>
            <version>2.9.2</version>
        </dependency>
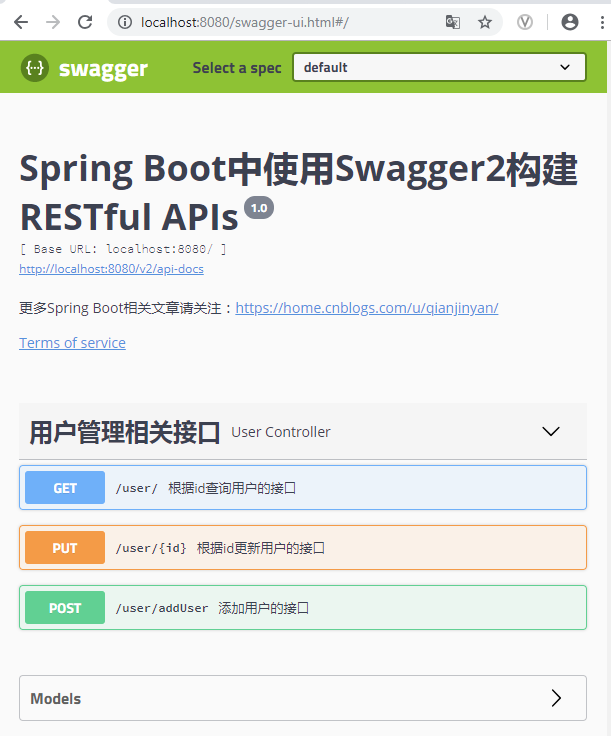
这个版本的风格如下:
备注:
@Api: 描述类/接口的主要用途
@ApiOperation: 描述方法用途
@ApiImplicitParam: 描述方法的参数
@ApiImplicitParams: 描述方法的参数(Multi-Params)
@ApiParam:请求属性
@ApiIgnore: 忽略某类/方法/参数的文档
@ApiResponses:响应集配置
@ResponseHeader: 响应头设置
@ApiModelProperty:添加和操作模型属性的数据
        <dependency>
            <groupId>io.springfox</groupId>
            <artifactId>springfox-swagger2</artifactId>
            <version>2.2.2</version>
        </dependency>
        <dependency>
            <groupId>io.springfox</groupId>
            <artifactId>springfox-swagger-ui</artifactId>
            <version>2.2.2</version>
        </dependency>
换了个版本,三个2的版本,
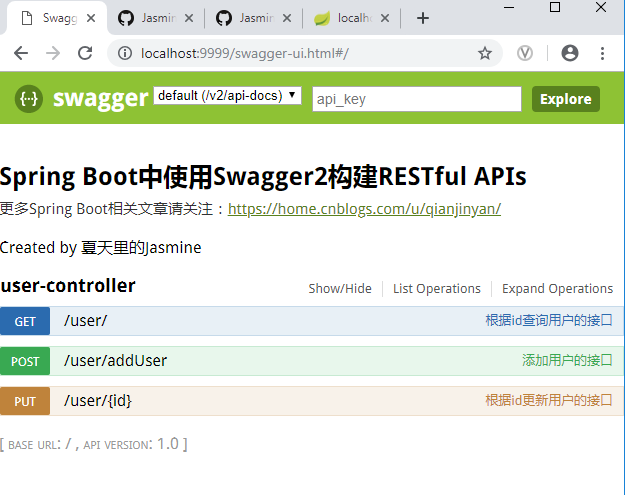
高版本UI展示变了,高版本能显示实体类中的对象属性
不是之前我看到的,还是要继续寻找更好的API接口文档展示方式。。。。
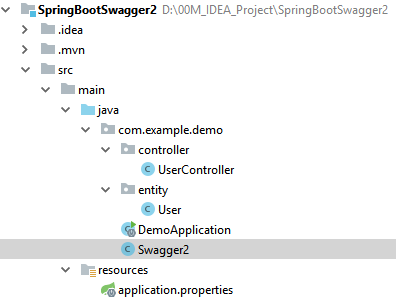
项目测试的代码
@Configuration
@EnableSwagger2  //通过@EnableSwagger2注解启用Swagger2
public class Swagger2 {

    @Bean
    public Docket createRestApi() {
        return new Docket(DocumentationType.SWAGGER_2)
                .apiInfo(apiInfo())
                .select()
                .apis(RequestHandlerSelectors.basePackage("com.example.demo"))
                .paths(PathSelectors.any())
                .build();
    }
    private ApiInfo apiInfo() {
        return new ApiInfoBuilder()
                .title("Spring Boot中使用Swagger2构建RESTful APIs")
                .description("更多Spring Boot相关文章请关注:https://home.cnblogs.com/u/qianjinyan/")
                .termsOfServiceUrl("https://github.com/JasmineQian/")
                .contact("夏天里的Jasmine")
                .version("1.0")
                .build();
        //配置一个Docket Bean,这个Bean中,配置映射路径和要扫描的接口的位置,
        // 在apiInfo中,主要配置一下Swagger2文档网站的信息,
        // 例如网站的title,网站的描述,联系人的信息,使用的协议等等。
    }
}
package com.example.demo.entity;


import io.swagger.annotations.ApiModel;
import io.swagger.annotations.ApiModelProperty;

@ApiModel
public class User {

    @ApiModelProperty(value = "用户id")
    private int id;

    @ApiModelProperty(value = "用户名")
    private String name;

    @ApiModelProperty(value = "用户地址")
    private String address;

省略getters and setters


    void addUser(int id,String name,String address){
        this.address=address;
        this.id=id;
        this.name=name;
    }
}
package com.example.demo.controller;

import com.example.demo.entity.User;
import io.swagger.annotations.Api;
import io.swagger.annotations.ApiImplicitParam;
import io.swagger.annotations.ApiImplicitParams;
import io.swagger.annotations.ApiOperation;
import org.springframework.web.bind.annotation.*;

@RestController
@Api(tags = "用户管理相关接口")
@RequestMapping("/user")
public class UserController {

    @PostMapping("/addUser")
    @ApiOperation("添加用户的接口")
    @ApiImplicitParams({
            @ApiImplicitParam(name = "username", value = "用户名", defaultValue = "李四"),
            @ApiImplicitParam(name = "address", value = "用户地址", defaultValue = "深圳", required = true)}
    )
    public User addUser(String username, @RequestParam(required = true) String address) {
        return new User();
    }

    @GetMapping("/")
    @ApiOperation("根据id查询用户的接口")
    @ApiImplicitParam(name = "id", value = "用户id", defaultValue = "1", required = true)
    public User getUserById(@PathVariable Integer id) {
        User user = new User();
        user.setId(id);
        return user;
    }

    @PutMapping("/{id}")
    @ApiOperation("根据id更新用户的接口")
    public User updateUserById(@RequestBody User user) {
        return user;
    }
}