### 前言
回顾:
[Okhttp的基本用法](https://www.jianshu.com/p/8e404d9c160f)
[Okhttp3源码解析(1)-OkHttpClient分析](https://www.jianshu.com/p/bf1d01b79ce7)
[Okhttp3源码解析(2)-Request分析](https://www.jianshu.com/p/5a85345c8ea7)
[Okhttp3源码解析(3)-Call分析(整体流程)](https://www.jianshu.com/p/4ed79472797a)
上节我们讲了okhttp的整体的流程,里面的核心方法之一是`getResponseWithInterceptorChain()` ,这个方法应该知道吧?通过拦截器层层处理返回Response;这个方法中其实应用了责任链设计模式。今天主要讲一下它是如何应用的!
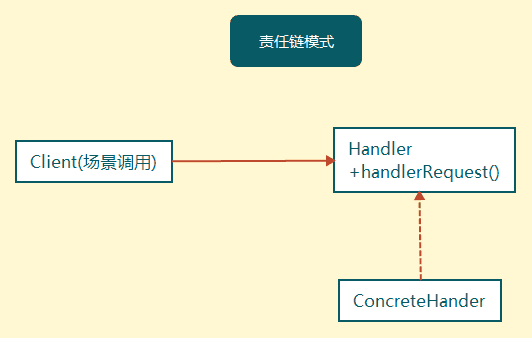
### 责任链设计模式
###### 责任链模式的定义
在责任链模式里,很多对象由每一个对象对其下家的引用而连接起来形成一条链。请求在这个链上传递,直到链上的某一个对象决定处理此请求。发出这个请求的客户端并不知道链上的哪一个对象最终处理这个请求,这使得系统可以在不影响客户端的情况下动态地重新组织和分配责任。
模型:
1.优点
耦合度降低,请求和处理是分开的
2.缺点
责任链太长或者每条链判断处理的时间太长会影响性能。特别是递归循环的时候
不一定被处理,每个职责类的职责很明确,这就需要对写默认的处理了
**责任链模式重要的两点:分离职责,动态组合**
对责任链设计模式不明白的可以去网上那个找找实例看看, 这里就不举例子了。
### 源码中的责任链
话不多说,直接上`getResponseWithInterceptorChain()` 源码
```
Response getResponseWithInterceptorChain() throws IOException {
// Build a full stack of interceptors.
List interceptors = new ArrayList<>();
interceptors.addAll(client.interceptors()); //自定义
interceptors.add(retryAndFollowUpInterceptor); //错误与跟踪拦截器
interceptors.add(new BridgeInterceptor(client.cookieJar())); //桥拦截器
interceptors.add(new CacheInterceptor(client.internalCache())); //缓存拦截器
interceptors.add(new ConnectInterceptor(client)); //连接拦截器
if (!forWebSocket) {
interceptors.addAll(client.networkInterceptors()); //网络拦截器
}
interceptors.add(new CallServerInterceptor(forWebSocket)); //调用服务器拦截器
Interceptor.Chain chain = new RealInterceptorChain(interceptors, null, null, null, 0,
originalRequest, this, eventListener, client.connectTimeoutMillis(),
client.readTimeoutMillis(), client.writeTimeoutMillis());
return chain.proceed(originalRequest);
}
```
方法中大部分上节已经说了,就是 `List`添加自定义、cookie等等的拦截器,今天我们主要看看后半部分:
```
Interceptor.Chain chain = new RealInterceptorChain(interceptors, null, null, null, 0,
originalRequest, this, eventListener, client.connectTimeoutMillis(),
client.readTimeoutMillis(), client.writeTimeoutMillis());
return chain.proceed(originalRequest);
```
首先初始化了 `RealInterceptorChain`,`RealInterceptorChain`是`Interceptor.Chain`的实现类

先看一下`Interceptor.Chain`:
```
public interface Interceptor {
Response intercept(Chain chain) throws IOException;
interface Chain {
Request request();
Response proceed(Request request) throws IOException;
//部分代码省略....
}
}
```
生成了RealInterceptorChain的实例,调用了`proceed()`,返回了最后的Response
我们看下 `RealInterceptorChain`类中的`proceed()`:
```
@Override public Response proceed(Request request) throws IOException {
return proceed(request, streamAllocation, httpCodec, connection);
}
public Response proceed(Request request, StreamAllocation streamAllocation, HttpCodec httpCodec,
RealConnection connection) throws IOException {
if (index >= interceptors.size()) throw new AssertionError();
calls++;
// If we already have a stream, confirm that the incoming request will use it.
if (this.httpCodec != null && !this.connection.supportsUrl(request.url())) {
throw new IllegalStateException("network interceptor " + interceptors.get(index - 1)
+ " must retain the same host and port");
}
// If we already have a stream, confirm that this is the only call to chain.proceed().
if (this.httpCodec != null && calls > 1) {
throw new IllegalStateException("network interceptor " + interceptors.get(index - 1)
+ " must call proceed() exactly once");
}
// Call the next interceptor in the chain.
RealInterceptorChain next = new RealInterceptorChain(interceptors, streamAllocation, httpCodec,
connection, index + 1, request, call, eventListener, connectTimeout, readTimeout,
writeTimeout);
Interceptor interceptor = interceptors.get(index);
Response response = interceptor.intercept(next);
// Confirm that the next interceptor made its required call to chain.proceed().
if (httpCodec != null && index + 1 < interceptors.size() && next.calls != 1) {
throw new IllegalStateException("network interceptor " + interceptor
+ " must call proceed() exactly once");
}
// Confirm that the intercepted response isn't null.
if (response == null) {
throw new NullPointerException("interceptor " + interceptor + " returned null");
}
if (response.body() == null) {
throw new IllegalStateException(
"interceptor " + interceptor + " returned a response with no body");
}
return response;
}
```
经过一系列的判断,看下`proceed()`的核心
```
// Call the next interceptor in the chain.
RealInterceptorChain next = new RealInterceptorChain(interceptors, streamAllocation, httpCodec,
connection, index + 1, request, call, eventListener, connectTimeout, readTimeout,
writeTimeout);
Interceptor interceptor = interceptors.get(index);
Response response = interceptor.intercept(next);
```
如果对责任链模式有认识的朋友看到上面代码,应该直接就能看出来了,**并能分析出:**
- 如果是责任链模式, 那个`intercept()`一定是关键, `Interceptor`是接口,interceptors集合中的拦截器类肯定都实现了 `Interceptor`以及 `interceptor.intercept()`
- 每个拦截器 `intercept() `方法中的chain,都在上一个 `chain`实例的 `chain.proceed() `中被初始化,并传递了拦截器List与 `index `,直接最后一个 `chain实例 `执行即停止。

### 总结:
每个`chain`的`interceptors`与`index`都是由上一个`chain`初始化传递过来的,在`chain.proceed()`中获取对应的`interceptor实例` 并初始化下一个`chain`,直到最后一个`chain`被执行。
这样就清晰了吧?责任链模式的重点在“链上”,由一条链去处理相似的请求,在链中决定谁来处理这个请求,并返回相应的结果。

这节就说到这,希望对大家有所帮助.....
大家可以关注我的微信公众号:「秦子帅」一个有质量、有态度的公众号!