Introduction to Areas
In this article, we will learn the concept of Areas and how to use it with a practical scenario in ASP.NET MVC 4.
By convention in ASP.NET MVC project template, to separate application code based on responsibilities, we have top level folders as Controllers, Views, and Models. In Controllers folder we can have several controllers, each of them is focused on specific group of functionalities. Inside top level Views folder, there are folders, corresponding to controllers (having the same name), and containing views files for the controller. Corresponding to Action names in controller, we have view files (.cshtml file) in it. Finally in top level Models folder we have models which manages the behaviour and data for the application domain.
This approach works well for small applications having less number of controllers and views. As the number of controllers and views grow, we feel the need of grouping the controllers and views. For large applications, we often face such problem to organize the code effectively. In such cases, Areas help us to organize the code.
Areas are logical grouping of Controller, Models and Views and other related folders for a module in MVC applications. By convention, a top Areas folder can contain multiple areas. Using areas, we can write more maintainable code for an application cleanly separated according to the modules.
Debate on Alternate Approach
Few people can argue that instead of using Area to divide the code as per modules in application, we can make folders structure in top level Controllers/Models/Views folders. As shown below:
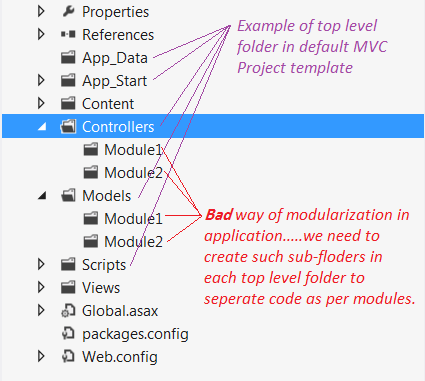
But using such approach for divisions, we may face the following problems in large applications:
- The nature of functionality of modules may be different (there would be less scope of shared code) and you may need to categorize CSS, scripts, models and other related functionalities for modules too. You have to create the same folder structure in every top level folder that mean inside Views, Models, Scripts, and Images, etc.
- There may be name conflict for controller if modules need to have the controllers with same name. For example, many modules in application may like to have its own Home Controller.
- The code of specific module will be more scattered (in comparison to the case of using Area approach for the modules)
So Area provides a better way to separate the code for modules in a much elegant way. We can keep all the specific resources needed for a module in its Area. The reusable and shared resource can be put inside corresponding top level folders in the ASP.NET MVC application. In the next section, we will see how to use Areas in real time application.
How to Avoid Name Conflict
Let's say if there is an area called "Payment" and it is having a "PaymentController". In such cases while using Areas, we need to remember the following three points in case Controller and Area is having the same name:
- In Global.asax.cs file, under the
Application_StartmethodAreaRegistration.RegisterAllAreasmethod must be called in the first place. - In RouteConfig.cs file, under the
RegisterRoutesmethod you must declare namespace to avoid the conflict between same controllers name. - In MenAreaRegistration.cs file, under
RegisterAreamethod you must declare namespace to avoid the conflict between same controllers name.
For another such example, please have a look at this question/answer on stackoverflow. The above steps will be more clear after code walkthrough given below for demo application.
Overview of Demo Application
Usually an e-commerce application has various kinds of products divided into many categories. Each product contains various kinds of information about a product like manufacturing details, availability, price, offers if any, etc. In such kinds of scenarios, it is better to divide the application module using Areas.
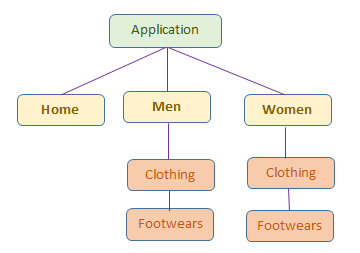
Here for demo, we will develop a simple sample of shopping application. Application will be divided into three modules called Home, Men and Women. As per general scenario, Men and Women are main categories having their own sub categories as shown in the below figure.
- Home: This module will have general information about the application. This is implemented using default controller/views, etc. available with project template. No use of area concept here as it provides face to entire application by having home page and standard information.
- Men: This module will have information about the products for
Men. This is implemented using Area concept. We created a "Men" area inside "Areas" top level folder. It has all sub-module and specific home page for "Men" module. - Women: This module will have information about the products for
Women. It is also implemented usingAreaand similar to "Men" module.
Note:
- In the demo, we will focus only on how to use Areas, so I have used same CSS and dummy data. But in real world application, display requirement in different module may be very specific.
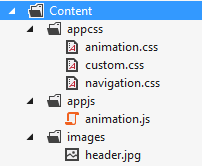
- All common CSS files, JS files and images are placed in top level Content folder as shown below:
- To understand this article better, please download the attached code, have an overview of the code, then follow the steps given in this article.
Final Output: Final output of this sample application will look as shown below:
Creating Demo Application
Let's get started by firing up Visual Studio 2012 and follow the below steps:
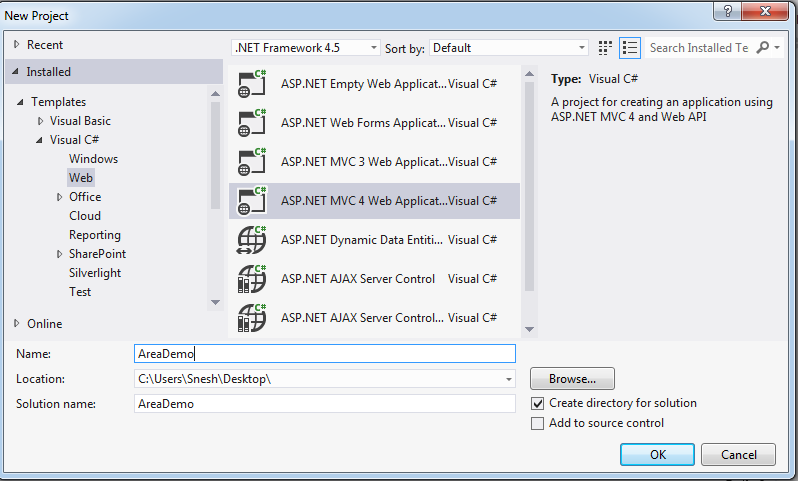
- Create a new Project by selecting ASP.NET MVC4 Web Application template and give it project name as AreaDemo and click OK.
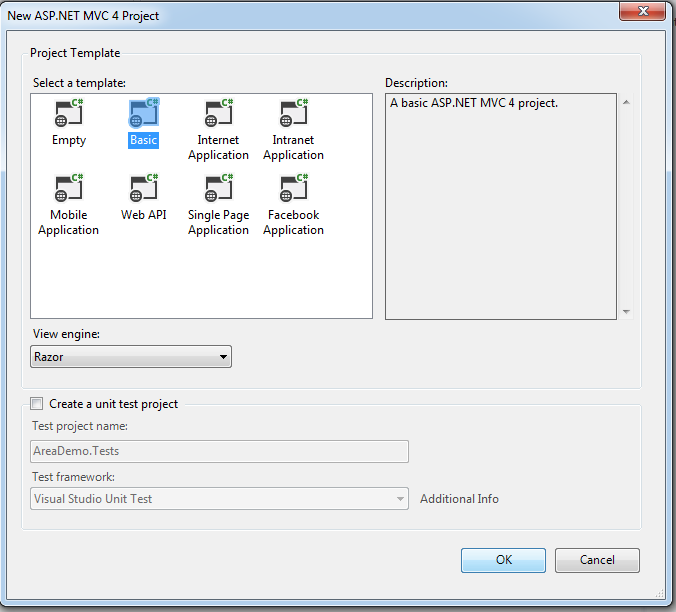
- Select a template as Basic application then click OK. Visual Studio adds AreaDemo project in solution as shown below in screenshot.
- First, we will create the header and menu of application. Please get the required CSS, JavaScript and images from downloaded code.
- Few references are required in _Layout.cshtml file as shown below:
Hide Copy Code
<script src="~/Scripts/jquery-1.8.2.min.js"></script> - Modify the code in _Layout.cshtml file in Shared folder as written below. It will provide common layout (Header and Menu) for all screens.
Hide Shrink
 Copy Code
<body> <div id="container"> <header id="pageHeader"> <img src="~/Content/images/header.jpg" /> <nav> <ul> <li><a href="http://www.codeproject.com/">Home</a></li> <li><a href="~/Men/Home/Index">Men</a> <ul> <li><a href="~/Men/Clothing/Index">Clothing</a></li> <li><a href="~/Men/Footwear/Index">Footwears</a></li> </ul> </li> <li><a href="~/Women/Home/Index">Women</a> <ul> <li><a href="~/Women/Clothing/Index">Clothing</a></li> <li><a href="~/Women/Footwear/Index">Footwears</a></li> </ul> </li> </ul> </nav> </header> <br /> <br /> <div id="pageContainer"> @RenderBody() </div> </div> </body> - So far Menu is created. But if we click on link in menu, nothing would happen because we have not created Areas yet.
- Right click on project (
AreaDemo) in solution explorer, go to add and click on Areas options as shown below: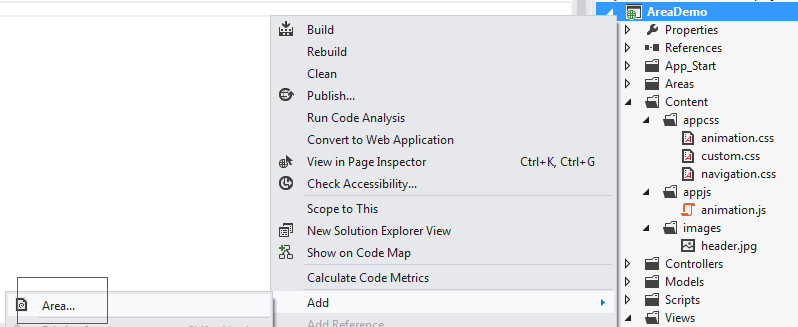
Areas folder will be added to your project. This top level Areas folder is supposed to have areas by convention. Each area has its own Models, Views, Controllers and areaRegistration.cs. areaRegistration.cs file is used to configure the routes for the area.
- Add an Area by right clicking on Areas folder you just created and give name to new area as
Men(Menis module name). Men Area folder is being added to your project as shown below: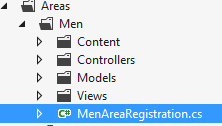
In the above screenshot, Controllers, Models, Views folders and MenAreaRegistration.cs file are being added by Visual Studio. Content folder added by me to have all images required for
Menmodule (get the images from downloaded code).Menmodule may have sub modules as we have forMen’s Clothing and another for Footwear. - Let us implement
Men-> Clothing module. Add three class files under the Models folder as shown below: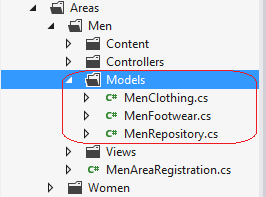
Write the following code in MenClothing.cs file:
Hide Copy Codepublic class MenClothing { public int Id { get; set; } public string Name { get; set; } public int Size { get; set; } public double Price { get; set; } public string imageURL { get; set; } }Write the following code in MenFootwear.cs file:
Hide Copy Codepublic class MenFootwear { public int Id { get; set; } public string Name { get; set; } public int Size { get; set; } public double Price { get; set; } public string imageURL { get; set; } }Write the following code in MenRepository.cs file:
Hide Shrink Copy Codepublic class MenRepository { public List<MenClothing> GetCloths() { List<MenClothing> result = new List<MenClothing> { new MenClothing () { Id = 1, Name = "Formal Shirt", Size= 40, Price = 1200, imageURL="/Areas/Men/Content/images/men_cloths/img_c1.jpg"}, new MenClothing () { Id = 2, Name = "Jeans Pant", Size= 36, Price = 2200, imageURL="/Areas/Men/Content/images/men_cloths/img_c2.jpg"}, new MenClothing () { Id = 3, Name = "Casual Shirt", Size= 40, Price = 1000, imageURL="/Areas/Men/Content/images/men_cloths/img_c3.jpg"}, new MenClothing () { Id = 4, Name = "Formal Pant", Size= 36, Price = 1299, imageURL="/Areas/Men/Content/images/men_cloths/img_c4.jpg"} }; return result; } public List<MenFootwear> GetFootwears() { List<MenFootwear> result = new List<MenFootwear> { new MenFootwear () { Id = 1, Name = "Casual Slipper", Size= 8, Price = 1200, imageURL="/Areas/Men/Content/images/men_footwears/img_f1.jpg"}, new MenFootwear () { Id = 2, Name = "Casual Slipper", Size= 9, Price = 2200, imageURL="/Areas/Men/Content/images/men_footwears/img_f2.jpg"}, new MenFootwear () { Id = 3, Name = "Casual Shoes", Size= 9, Price = 2500, imageURL="/Areas/Men/Content/images/men_footwears/img_f3.jpg"}, new MenFootwear () { Id = 4, Name = "Formal Shoes", Size= 9, Price = 1600, imageURL="/Areas/Men/Content/images/men_footwears/img_f4.jpg"} }; return result; } }The above code snippet is very simple and self-explanatory so hope you can understand it easily.
- Add a controller under the Controllers folder named as Clothing inside
MenArea as shown below: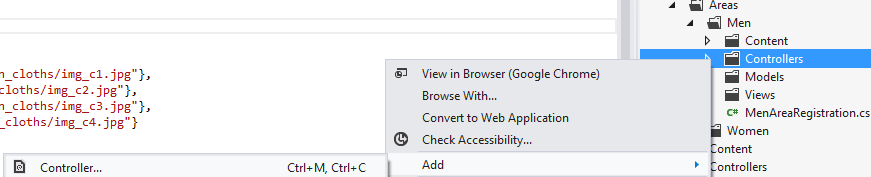
Write the following code inside the
Indexmethod in ClothingController.cs file.Hide Copy Codepublic ActionResult Index() { MenRepository menRepository = new MenRepository(); var cloths = menRepository.GetCloths(); return View(cloths); }Indexis an action method that will return a view havingMenClothingmodel which has list of all clothes forMen. - Right click on
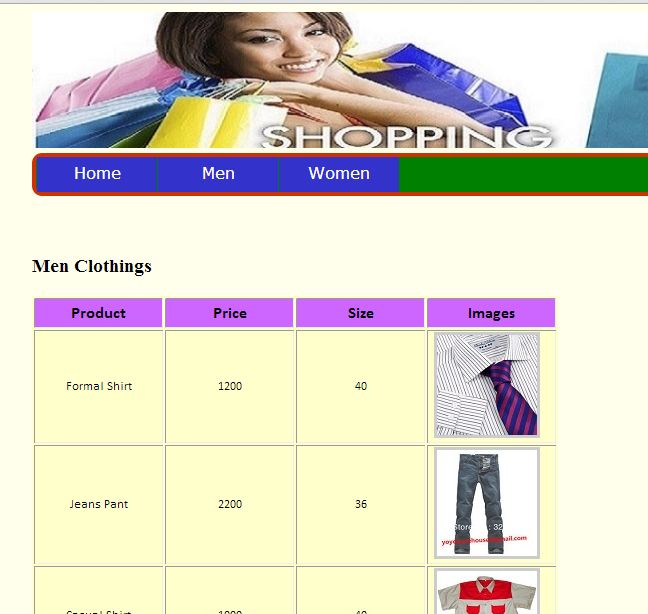
Indexaction method (in ClothingController.cs) to add a view and follow the default options. It will add Index.cshtml file inside Views > Clothing folder. Write the following code in Index.cshtml view. This view will useMenClothingModel as shown below:Hide Shrink Copy Code@model IEnumerable<AreaDemo.Areas.Men.Models.MenClothing> @{ Layout = "~/Views/Shared/_Layout.cshtml"; } <h3 > Men Clothings</h3> <table class="tblStyle"> <tr class="tblHearerRow"> <th class="tblHearerCell">Product </th> <th class="tblHearerCell">Price </th> <th class="tblHearerCell">Size </th> <th class="tblHearerCell">Images </th> </tr> @foreach (var item in Model) { <tr class="tblRow"> <td class="tblColumn"> @Html.DisplayFor(modelItem => item.Name) </td> <td class="tblColumn"> @Html.DisplayFor(modelItem => item.Price) </td> <td class="tblColumn"> @Html.DisplayFor(modelItem => item.Size) </td> <td class="tblColumn"> <div class="thumbnail-item"> <a href="#"> <img src="@item.imageURL" class="thumbnail" /> </a> <div class="tooltip"> <img src="@item.imageURL" alt="" class="imageShadow" /> <span class="overlay"></span> </div> </div> </td> </tr> } </table>The above table will display the products under clothes category for men.
- Open Global.asax.cs file and inside the
Application_Startmethod. It must be having "AreaRegistration.RegisterAllAreas();". Verify this method is having such code:Hide Copy Codeprotected void Application_Start() { AreaRegistration.RegisterAllAreas(); FilterConfig.RegisterGlobalFilters(GlobalFilters.Filters); RouteConfig.RegisterRoutes(RouteTable.Routes); } - Open MenAreaRegistration.cs file under Areas > Men folder. This file is used to define the routes for a particular module/Area. Add the following line of code in
MapRoutemethod as shown below:Hide Copy Codenamespaces: new[] { "AreaDemo.Areas.Men.Controllers" }Finally
RegisterAreamethods must look like shown below: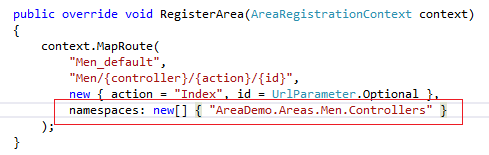
- Open RouteConfig.cs file under App_Start folder and add the following line of code inside
RegisterRoutesmethod as shown below:Hide Copy Codenamespaces: new[] { "AreaDemo.Controllers" }Final
RegisterRoutesmethod looks like shown below: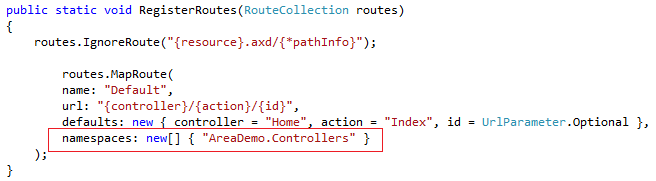
- Add another controller to Controllers folder under the
Men(Area) module named asFootwearController(as we done for Clothing Controller). Write the following code as shown below:Hide Copy Codepublic ActionResult Index() { MenRepository menRepository = new MenRepository(); var footwears = menRepository.GetFootwears(); return View(footwears); } - Right click on
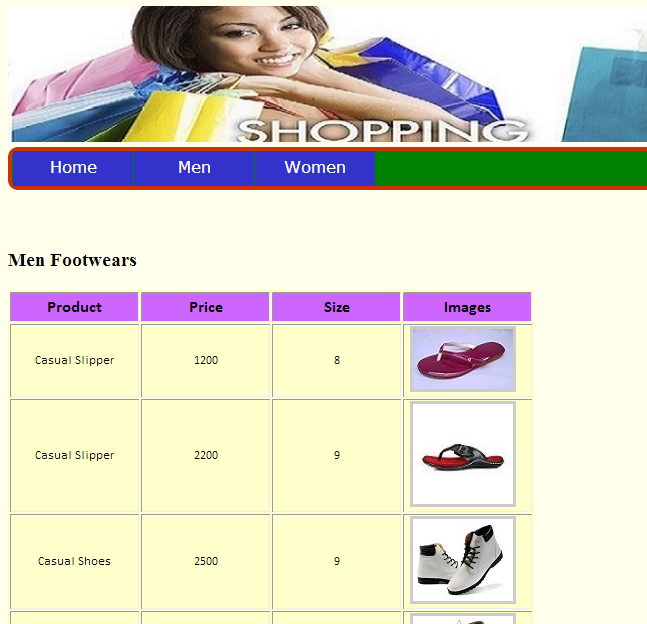
Indexaction method (in FootwearController.cs) to add a view and follow the default options. It will add Index.cshtml file inside Views > Footwear folder. This view will display all footwear for men. Write the following code in Index.cshtml file as shown below:Hide Copy Code@model IEnumerable<AreaDemo.Areas.Men.Models.MenFootwear> @{ Layout = "~/Views/Shared/_Layout.cshtml"; } <h3> Men Footwears</h3> - Add one more controller to Controllers folder under the
Men (Area)module named asHomeController. It will be specific home page forMenModule. Write the following code as shown below:Hide Copy Codepublic ActionResult Index() { return View(); } - Right click on
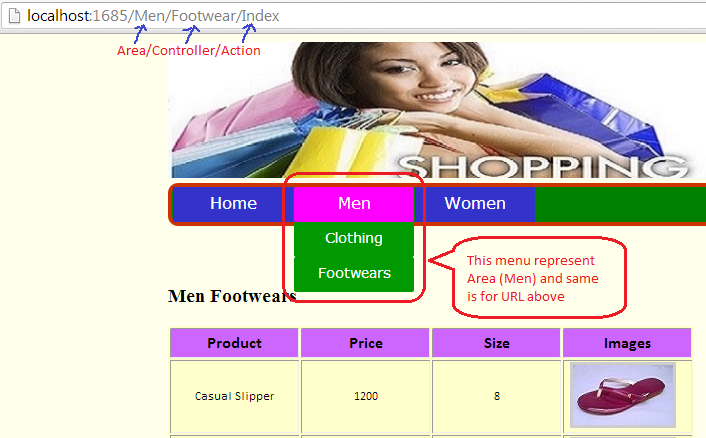
Indexaction method (in HomeController.cs just created) to add a view and follow the default options. It will add Index.cshtml file inside Views > Home folder. Write the following code in this file as shown below:Hide Copy Code@{ Layout = "~/Views/Shared/_Layout.cshtml"; } <div id="homeDiv"> <h2>This is home page for Men module. To view the products in Men module, please select a category from top menu. </h2> - Now run the application and click on Clothing under the Men module. Hope you will get the following screen.
 p
p - Now click on Footwear under the Men module. Hope you will get the following screen.
- To implement the women Module, follow the same step from 6 to 20 steps with different data and images. In case of any confusion, look into the downloaded code having both modules implemented.
Conclusion
In this article, we learned how to use Areas in ASP.NET MVC application. It is a very helpful concept to organize big applications in an elegant way. Your queries and comments are most welcome in this respect. Thanks.