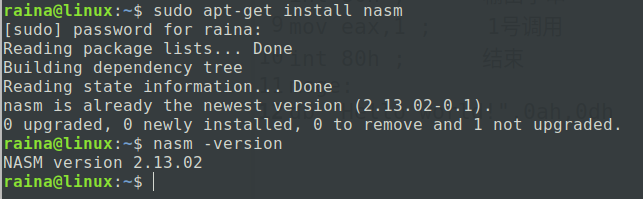
1. 安装
sudo apt-get install nasm
这样nasm就安装好了,终端输入命令:
nasm -version
输出版本信息就说明安装成功
2. 使用
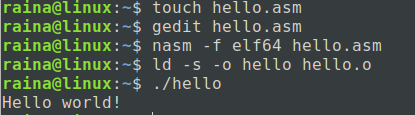
创建"hello.asm"文件:
touch hello.asm
gedit hello.asm
在文件中输入下面的汇编代码
section .data
  hello:     db 'Hello world!',10    ; 'Hello world!' plus a linefeed character
  helloLen:  equ $-hello             ; Length of the 'Hello world!' string
                                     ; (I'll explain soon)

section .text
  global _start

_start:
  mov eax,4            ; The system call for write (sys_write)
  mov ebx,1            ; File descriptor 1 - standard output
  mov ecx,hello        ; Put the offset of hello in ecx
  mov edx,helloLen     ; helloLen is a constant, so we don't need to say
                       ;  mov edx,[helloLen] to get it's actual value
  int 80h              ; Call the kernel

  mov eax,1            ; The system call for exit (sys_exit)
  mov ebx,0            ; Exit with return code of 0 (no error)
  int 80h
保存后退出。
编译
nasm -f elf64 hello.asm
如果是32位系统就把elf64改为elf32
链接
ld -s -o hello hello.o
运行
./hello
终端输出“Hello,world!”就没问题了