在上一章我们分析了SpingBoot启动流程中实例化SpingApplication的过程。
return new SpringApplication(primarySources).run(args);
这篇文章咱么说下run()方法开始之后都做了那些事情。
继续往下跟着源码进入到run()这个是比较核心的一个方法了
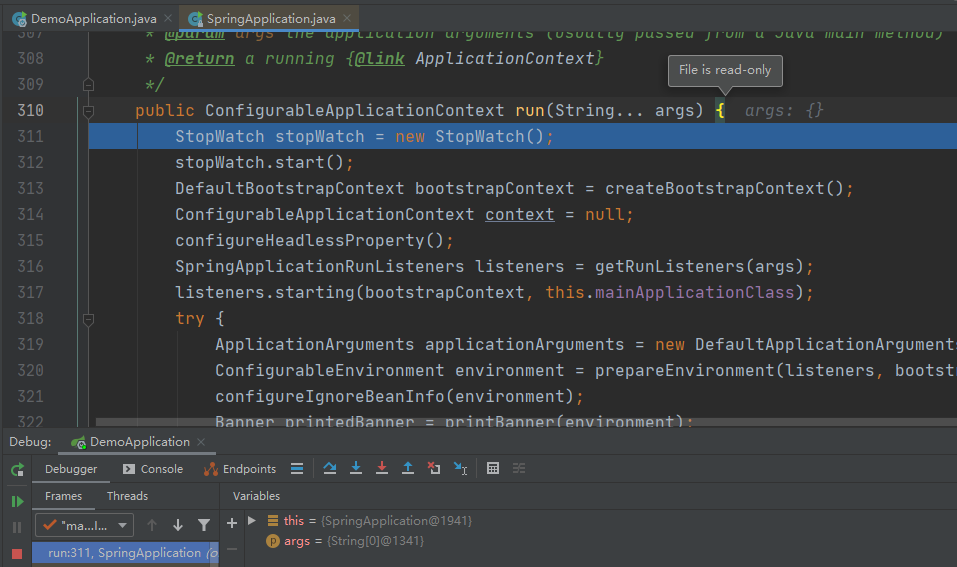
	public ConfigurableApplicationContext run(String... args) {
		StopWatch stopWatch = new StopWatch();
                // 计时器开始
		stopWatch.start();
                // 创建启动上下文对象
		DefaultBootstrapContext bootstrapContext = createBootstrapContext();
		ConfigurableApplicationContext context = null;
                // 配置Handless模式,是在缺少显示屏、键盘或鼠标时的系统配置
                // 默认为true
		configureHeadlessProperty();
                //获取并启动监听器
		SpringApplicationRunListeners listeners = getRunListeners(args);
                // 启动监听器
		listeners.starting(bootstrapContext, this.mainApplicationClass);
		try {
			ApplicationArguments applicationArguments = new DefaultApplicationArguments(args);
                        // 准备环境
			ConfigurableEnvironment environment = prepareEnvironment(listeners, bootstrapContext, applicationArguments);
                        // 忽略配置的bean
			configureIgnoreBeanInfo(environment);
                        // 打印banner,就是启动的时候在控制台的spring图案
			Banner printedBanner = printBanner(environment);
                        // 创建容器
			context = createApplicationContext();
			context.setApplicationStartup(this.applicationStartup);
                        // 准备应用上下文(spring容器前置处理)
			prepareContext(bootstrapContext, context, environment, listeners, applicationArguments, printedBanner);
                        // 刷新容器
			refreshContext(context);
                        // 刷新容器后的扩展接口(spring容器后置处理)
			afterRefresh(context, applicationArguments);
                        // 结束计时器并打印,这就是我们启动后console的显示的时间
			stopWatch.stop();
			if (this.logStartupInfo) {
				new StartupInfoLogger(this.mainApplicationClass).logStarted(getApplicationLog(), stopWatch);
			}
                        // 发布监听应用上下文启动完成(发出启动结束事件)
			listeners.started(context);
                        // 执行runner
			callRunners(context, applicationArguments);
		}
		catch (Throwable ex) {
                        // 异常处理,如果run过程发生异常
			handleRunFailure(context, ex, listeners);
			throw new IllegalStateException(ex);
		}

		try {
                        // 监听应用上下文运行中
			listeners.running(context);
		}
		catch (Throwable ex) {
			handleRunFailure(context, ex, null);
			throw new IllegalStateException(ex);
		}
                // 返回最终构建的容器对象
		return context;
	}
接下来就对上面的关键步骤一一解释
1. 获取所有的监听器
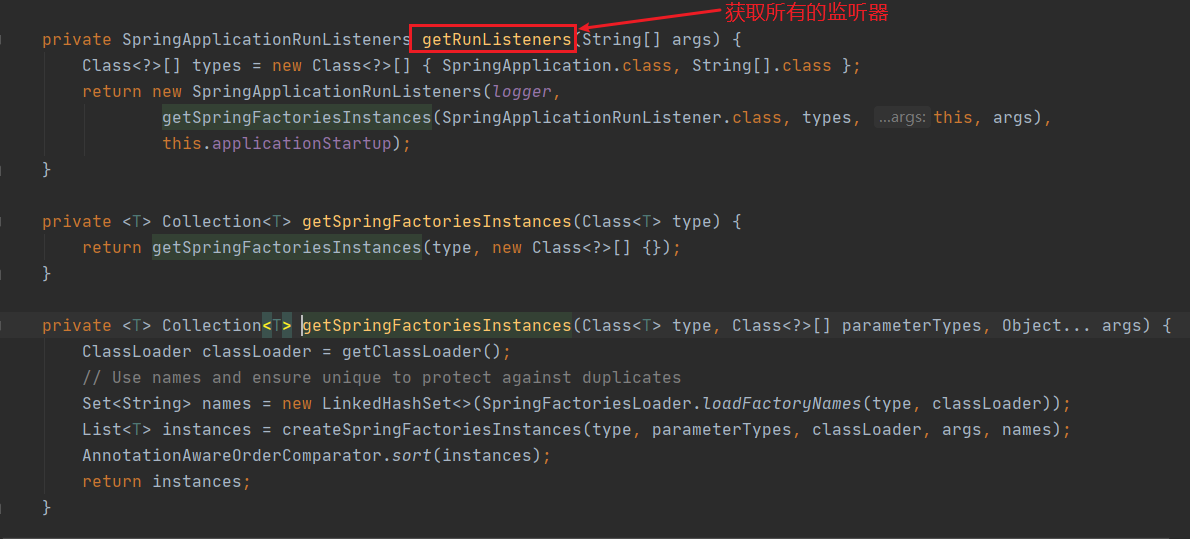
这段代码我们比较熟悉了,上一篇咱么详细介绍过,它的主要作用就是去META-INFO/spring.factories 中加载配置SpringApplicationRunListener的监听器如下
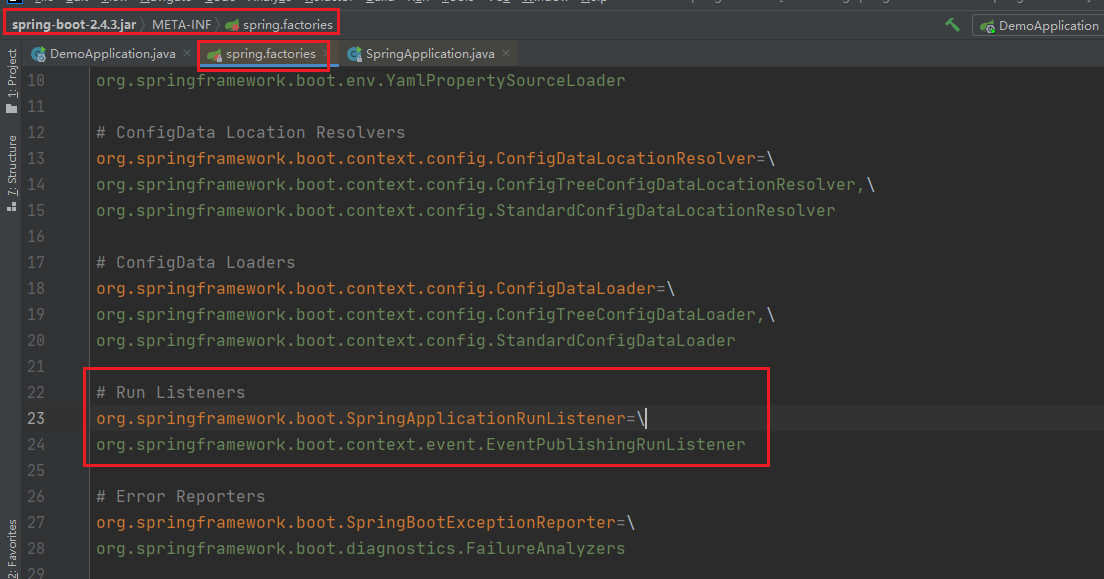
显然只有一个事件发布监听器类,拿到了EventPublishingRunListener启动事件发布监听器,下一步就是开始启动了listeners.starting();我们往下跟源码看
	@Override
	public void starting(ConfigurableBootstrapContext bootstrapContext) {
		this.initialMulticaster
				.multicastEvent(new ApplicationStartingEvent(bootstrapContext, this.application, this.args));
	}
启动的时候实际上是又创建了一个ApplicationStartingEvent对象,其实就是监听应用启动事件。
其中 initialMulticaster是一个SimpleApplicationEventMuticaster
    public void multicastEvent(ApplicationEvent event, @Nullable ResolvableType eventType) {
        ResolvableType type = eventType != null ? eventType : this.resolveDefaultEventType(event);
        // 获取线程池,为每个监听事件创建一个线程
        Executor executor = this.getTaskExecutor();
        // 根据ApplicationStartingEvent事件类型找到对应的监听器,并迭代
        Iterator var5 = this.getApplicationListeners(event, type).iterator();

        while(var5.hasNext()) {
            ApplicationListener<?> listener = (ApplicationListener)var5.next();
            if (executor != null) {
                //
                executor.execute(() -> {
                    this.invokeListener(listener, event);
                });
            } else {
                this.invokeListener(listener, event);
            }
        }

    }
2.准备环境
ConfigurableEnvironment environment = prepareEnvironment(listeners, bootstrapContext, applicationArguments);
	private ConfigurableEnvironment prepareEnvironment(SpringApplicationRunListeners listeners,
			DefaultBootstrapContext bootstrapContext, ApplicationArguments applicationArguments) {
		// Create and configure the environment
                // 这里我们加入了web依赖所以是一个servlet容器
		ConfigurableEnvironment environment = getOrCreateEnvironment();
                // 配置环境
		configureEnvironment(environment, applicationArguments.getSourceArgs());
                // 环境准备完成
		ConfigurationPropertySources.attach(environment);
		listeners.environmentPrepared(bootstrapContext, environment);
		DefaultPropertiesPropertySource.moveToEnd(environment);
		configureAdditionalProfiles(environment);
		bindToSpringApplication(environment);
		if (!this.isCustomEnvironment) {
			environment = new EnvironmentConverter(getClassLoader()).convertEnvironmentIfNecessary(environment,
					deduceEnvironmentClass());
		}
		ConfigurationPropertySources.attach(environment);
		return environment;
	}
由于我们是添加了web的依赖 getOrCreateEnvironment()返回的是一个standardservletEnviroment 标准的servlet环境
2.1 配置环境
	protected void configureEnvironment(ConfigurableEnvironment environment, String[] args) {
		if (this.addConversionService) {
                        // 嵌入式的转换器
			ConversionService conversionService = ApplicationConversionService.getSharedInstance();
			environment.setConversionService((ConfigurableConversionService) conversionService);
		}
                // 配置属性资源文件
		configurePropertySources(environment, args);
                // 配置文件
		configureProfiles(environment, args);
	}
应用嵌入的转换器ApplicationConversionService
	public static void configure(FormatterRegistry registry) {
		DefaultConversionService.addDefaultConverters(registry);
		DefaultFormattingConversionService.addDefaultFormatters(registry);
                // 格式转换
		addApplicationFormatters(registry);
                // 类型转换
		addApplicationConverters(registry);
	}

        ===============格式转换=================
	public static void addApplicationFormatters(FormatterRegistry registry) {
		registry.addFormatter(new CharArrayFormatter());
		registry.addFormatter(new InetAddressFormatter());
		registry.addFormatter(new IsoOffsetFormatter());
	}


        ========================类型转换===================
	public static void addApplicationConverters(ConverterRegistry registry) {
		addDelimitedStringConverters(registry);
		registry.addConverter(new StringToDurationConverter());
		registry.addConverter(new DurationToStringConverter());
		registry.addConverter(new NumberToDurationConverter());
		registry.addConverter(new DurationToNumberConverter());
		registry.addConverter(new StringToPeriodConverter());
		registry.addConverter(new PeriodToStringConverter());
		registry.addConverter(new NumberToPeriodConverter());
		registry.addConverter(new StringToDataSizeConverter());
		registry.addConverter(new NumberToDataSizeConverter());
		registry.addConverter(new StringToFileConverter());
		registry.addConverter(new InputStreamSourceToByteArrayConverter());
		registry.addConverterFactory(new LenientStringToEnumConverterFactory());
		registry.addConverterFactory(new LenientBooleanToEnumConverterFactory());
		if (registry instanceof ConversionService) {
			addApplicationConverters(registry, (ConversionService) registry);
		}
	}
2.2 环境准备完成
同上面启动监听事件,这次的环境准备也是同样的代码
	@Override
	public void environmentPrepared(ConfigurableBootstrapContext bootstrapContext,
			ConfigurableEnvironment environment) {
		this.initialMulticaster.multicastEvent(
                                // 创建一个应用环境准备事件对象
				new ApplicationEnvironmentPreparedEvent(bootstrapContext, this.application, this.args, environment));
	}
debug进去之后代码跟AppLicationstrigevent 事件对象是一样的。不再赘述。
不过这里是7个监听器对象
3.配置忽略的bean
configureIgnoreBeanInfo(environment);
4.打印banner
这是SpringBoot默认的启动时的图标
Banner printedBanner = printBanner(environment);
这个是可以自定义的,也可以是图篇或是文本文件中的图形
5.创建容器
紧接着上一篇,接下来就是创建容器
	protected ConfigurableApplicationContext createApplicationContext() {
		return this.applicationContextFactory.create(this.webApplicationType);
	}
6.准备应用上下文
	private void prepareContext(DefaultBootstrapContext bootstrapContext, ConfigurableApplicationContext context,
			ConfigurableEnvironment environment, SpringApplicationRunListeners listeners,
			ApplicationArguments applicationArguments, Banner printedBanner) {
                // 设置环境参数
		context.setEnvironment(environment);
                // 设置后处理应用上下文
		postProcessApplicationContext(context);
                //把从spring.factories中加载的org.springframework.bt.context.ConfigurationwarningsApplicationContextIitiaLizer,进行初始化操作
		applyInitializers(context);
                //EventPubLishingRunListener发布应用上下文事件
		listeners.contextPrepared(context);
                // 打印启动日志
		bootstrapContext.close(context);
		if (this.logStartupInfo) {
			logStartupInfo(context.getParent() == null);
			logStartupProfileInfo(context);
		}
		// Add boot specific singleton beans

		ConfigurableListableBeanFactory beanFactory = context.getBeanFactory();
		beanFactory.registerSingleton("springApplicationArguments", applicationArguments);
		if (printedBanner != null) {
                         //注册一个字是springAppLicationArguments单例的bean
			beanFactory.registerSingleton("springBootBanner", printedBanner);
		}
		if (beanFactory instanceof DefaultListableBeanFactory) {
			((DefaultListableBeanFactory) beanFactory)
					.setAllowBeanDefinitionOverriding(this.allowBeanDefinitionOverriding);
		}
		if (this.lazyInitialization) {
			context.addBeanFactoryPostProcessor(new LazyInitializationBeanFactoryPostProcessor());
		}
		// Load the sources 获取所有资源
		Set<Object> sources = getAllSources();
		Assert.notEmpty(sources, "Sources must not be empty");
                // 创建BeanDefinitionLoader加载器加载注册所有的资源
		load(context, sources.toArray(new Object[0]));
                // 同之前,发布应用上下文 加载事件
		listeners.contextLoaded(context);
	}
7.刷新应用上下文
刷新应用上下文就进入了spring的源码了
    public void refresh() throws BeansException, IllegalStateException {
        synchronized(this.startupShutdownMonitor) {
            StartupStep contextRefresh = this.applicationStartup.start("spring.context.refresh");
            // Prepare this context for refreshing.
            //准备刷新上下文
            this.prepareRefresh();
            // Tetl the subclass to refresh the internal bean facto
            // 通知子类刷新内部工厂
            ConfigurableListableBeanFactory beanFactory = this.obtainFreshBeanFactory();
            // Prepare the bean factory for use in this context.
            // 准备Bean工厂
            this.prepareBeanFactory(beanFactory);

            try {
                 // Allows post-processing of the bean factory in contex t subc lasses.
                // 允许在上下文子类中对bean工厂进行后处理。
                // Invoke factory processors registered as beans in the context,
                this.postProcessBeanFactory(beanFactory);
                StartupStep beanPostProcess = this.applicationStartup.start("spring.context.beans.post-process");
                this.invokeBeanFactoryPostProcessors(beanFactory);
                // 注册后置处理器。
                this.registerBeanPostProcessors(beanFactory);
                beanPostProcess.end();
                // 初始化信息源
                this.initMessageSource();
                // 初始化上下文事件发布器
                this.initApplicationEventMulticaster();
                // 初始化其他自定义bean
                this.onRefresh();
                // 注册监听器
                this.registerListeners();
                this.finishBeanFactoryInitialization(beanFactory);
                //完成刷新,清缓存,初始化生命周期,事件发布等
                this.finishRefresh();
            } catch (BeansException var10) {
                if (this.logger.isWarnEnabled()) {
                    this.logger.warn("Exception encountered during context initialization - cancelling refresh attempt: " + var10);
                }
                // 销毁bean
                this.destroyBeans();
                // Reset 'active'flag.
                this.cancelRefresh(var10);
                throw var10;
            } finally {
                this.resetCommonCaches();
                contextRefresh.end();
            }

        }
    }
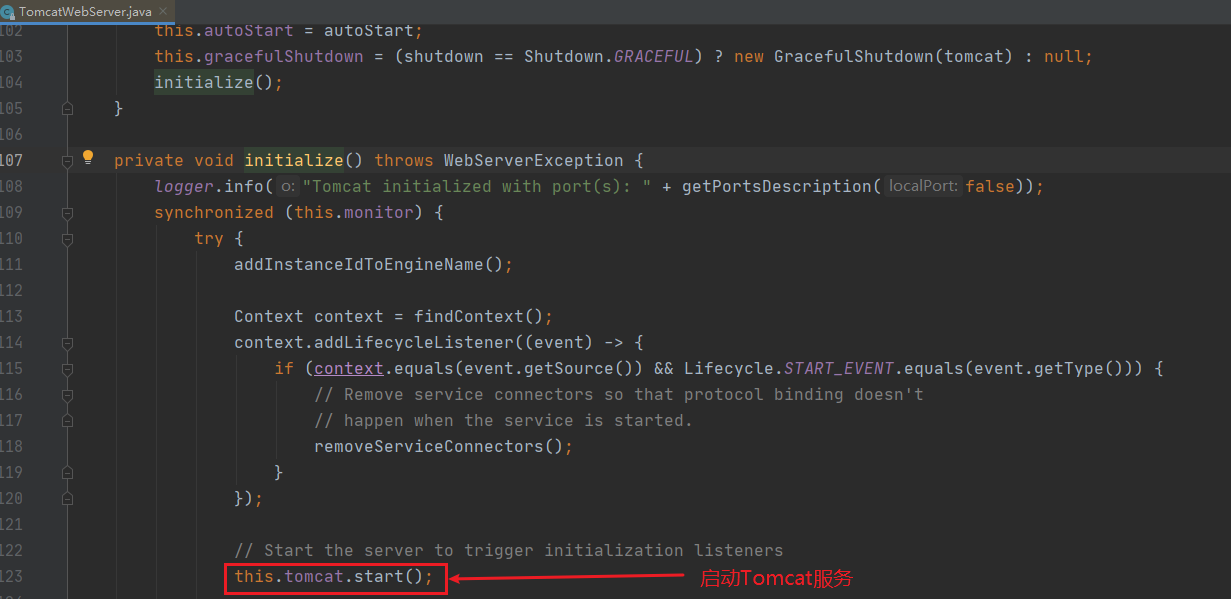
刷新的代码有点深,也是在这时创建了Tomcat对象,这也是SpringBoot** 一键启动**web工程的关键

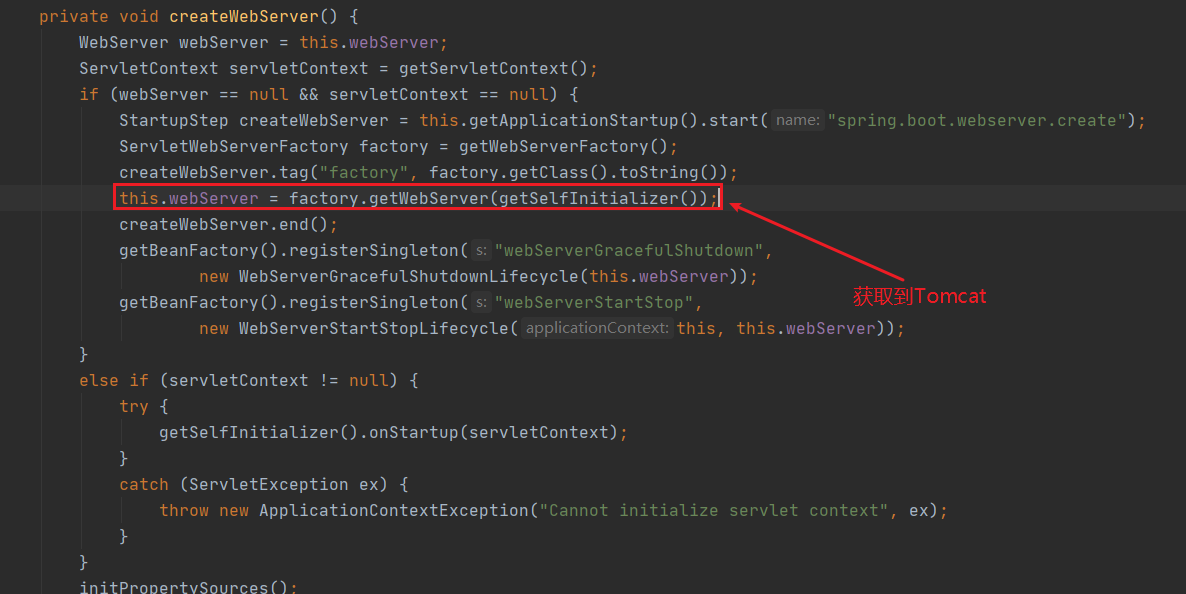
创建了Tomcat对象,并设置参数
	@Override
	public WebServer getWebServer(ServletContextInitializer... initializers) {
		if (this.disableMBeanRegistry) {
			Registry.disableRegistry();
		}
		Tomcat tomcat = new Tomcat();
		File baseDir = (this.baseDirectory != null) ? this.baseDirectory : createTempDir("tomcat");
		tomcat.setBaseDir(baseDir.getAbsolutePath());
		Connector connector = new Connector(this.protocol);
		connector.setThrowOnFailure(true);
		tomcat.getService().addConnector(connector);
		customizeConnector(connector);
		tomcat.setConnector(connector);
		tomcat.getHost().setAutoDeploy(false);
		configureEngine(tomcat.getEngine());
		for (Connector additionalConnector : this.additionalTomcatConnectors) {
			tomcat.getService().addConnector(additionalConnector);
		}
		prepareContext(tomcat.getHost(), initializers);
                // 返回TomcatWebServer服务
		return getTomcatWebServer(tomcat);
	}
8.刷新后处理
afterReftesh();//是个一空实现,留着后期扩展
	/**
	 * Called after the context has been refreshed.
	 * @param context the application context
	 * @param args the application arguments
	 */
	protected void afterRefresh(ConfigurableApplicationContext context, ApplicationArguments args) {
	}
9.发布监听应用启动事件
	@Override
	public void started(ConfigurableApplicationContext context) {
		context.publishEvent(new ApplicationStartedEvent(this.application, this.args, context));
		AvailabilityChangeEvent.publish(context, LivenessState.CORRECT);
	}
这里是调用context.publishEvent()方法,发布应用启动事件ApplicationStartedEvent.
10.执行Runner
获取所有的ApplicationRuner和CommandLineRunner来初始化一些参数,callRuner(是一个回调函数)
	private void callRunners(ApplicationContext context, ApplicationArguments args) {
		List<Object> runners = new ArrayList<>();
		runners.addAll(context.getBeansOfType(ApplicationRunner.class).values());
		runners.addAll(context.getBeansOfType(CommandLineRunner.class).values());
		AnnotationAwareOrderComparator.sort(runners);
		for (Object runner : new LinkedHashSet<>(runners)) {
			if (runner instanceof ApplicationRunner) {
				callRunner((ApplicationRunner) runner, args);
			}
			if (runner instanceof CommandLineRunner) {
				callRunner((CommandLineRunner) runner, args);
			}
		}
	}
11.发布上下文准备完成的事件
listeners.running(context);
	@Override
	public void running(ConfigurableApplicationContext context) {
		context.publishEvent(new ApplicationReadyEvent(this.application, this.args, context));
		AvailabilityChangeEvent.publish(context, ReadinessState.ACCEPTING_TRAFFIC);
	}
这段代码看上去似成相识,前面有很多类似的代码,不同的是这里上下文准备完成之后发布了一个ApplicationReadyEvent事件,声明一下应用上下文准备完成。
小结
这篇主要是介绍了SpringBoot启动过程中run()的这个过程。从中我们也可以发现一些非常好的编码习惯,大家可以在日常的工作中从模仿到内化,慢慢变成自己的东西。
