文章更新时间:2020/04/06
一、一个例子

在上面的例子中,包租婆的核心业务就是签合同,收房租,那么这就够了,灰色框起来的部分都是重复且边缘的事,交给中介商就好了,这就是 AOP 的一个思想:让关注点代码与业务代码分离!
例子解析:
1.在 Package【service】下新建一个【LandlordService】类(核心业务)
/**
 * 包租婆关心的业务~(模拟核心业务)
 */
@Component("landlord")
public class LandlordService {
    public void service() {
        // 仅仅只是实现了核心的业务功能
        System.out.println("签合同");
        System.out.println("收房租");
    }
}
2.在 Package【aspect】下新建一个中介商【BrokerAspect】类(周边功能)
/**
 * 包租婆不关心~
 * 中介关心的业务~(模拟周边功能)
 */
@Component
@Aspect
class BrokerAspect {

    @Before("execution(* service.LandlordService.service())")
    public void before() {
        System.out.println("带租客看房");
        System.out.println("谈价格");
    }

    @After("execution(* service.LandlordService.service())")
    public void after() {
        System.out.println("交钥匙");
    }
}
3.在 applicationContext.xml 中配置自动注入,并告诉 Spring IoC 容器去哪里扫描这两个 Bean
<?xml version="1.0" encoding="UTF-8"?>
<beans xmlns="http://www.springframework.org/schema/beans"
       xmlns:xsi="http://www.w3.org/2001/XMLSchema-instance"
       xmlns:context="http://www.springframework.org/schema/context"
       xmlns:aop="http://www.springframework.org/schema/aop"
       xsi:schemaLocation="http://www.springframework.org/schema/beans
       http://www.springframework.org/schema/beans/spring-beans.xsd http://www.springframework.org/schema/context http://www.springframework.org/schema/context/spring-context.xsd http://www.springframework.org/schema/aop http://www.springframework.org/schema/aop/spring-aop.xsd">

    <context:component-scan base-package="aspect"/>
    <context:component-scan base-package="service"/>

    <!--声明自动为spring容器中那些配置@Aspect切面的bean创建代理,织入切面。-->
    <aop:aspectj-autoproxy/>

</beans>
4.编写测试类
public class TestSpring {
    @Test
    public void test() {
        ApplicationContext context = new ClassPathXmlApplicationContext("applicationContext.xml");
        LandlordService landlord = (LandlordService) context.getBean("landlord", LandlordService.class);
        landlord.service();
    }
}
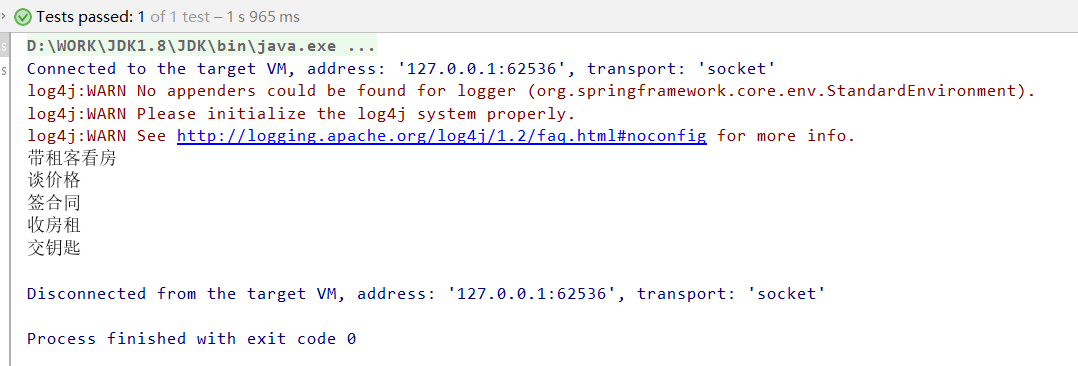
5.查看执行结果

二、使用注解来开发 Spring AOP
第一步:选择连接点
Spring 是方法级别的 AOP 框架,我们主要也是以某个类额某个方法作为连接点,另一种说法就是:选择哪一个类的哪一方法用以增强功能。
    ....
    public void service() {
        // 仅仅只是实现了核心的业务功能
        System.out.println("签合同");
        System.out.println("收房租");
    }
    ....
这里就选择上述 LandlordService 类中的 service() 方法作为连接点。
第二步:创建切面
选择好了连接点就可以创建切面了,我们可以把切面理解为一个拦截器,当程序运行到连接点的时候,被拦截下来,在开头加入了初始化的方法,在结尾也加入了销毁的方法而已,在 Spring 中只要使用 @Aspect 注解一个类,那么 Spring IoC 容器就会认为这是一个切面了:
/**
 * 包租婆不关心~
 * 中介关心的业务~(模拟周边功能)
 */
@Component
@Aspect
class BrokerAspect {

    @Before("execution(* service.LandlordService.service())")
    public void before() {
        System.out.println("带租客看房");
        System.out.println("谈价格");
    }

    @After("execution(* service.LandlordService.service())")
    public void after() {
        System.out.println("交钥匙");
    }
}
PS: 被定义为切面的类仍然是一个 Bean ,需要 @Component 注解标注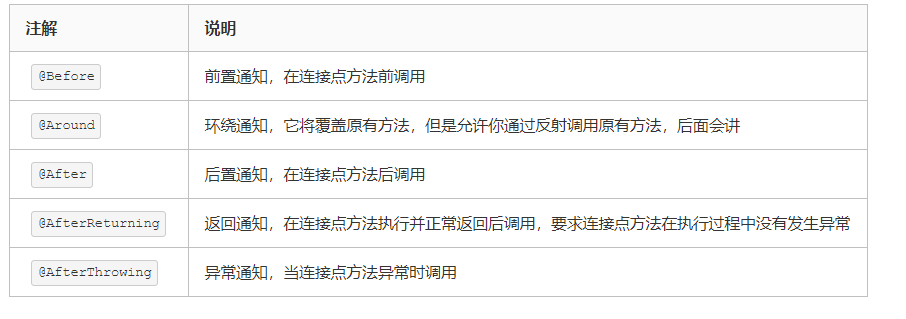
第三步:定义切点
在上面的注解中定义了 execution 的正则表达式,Spring 通过这个正则表达式判断具体要拦截的是哪一个类的哪一个方法:
execution(* service.LandlordService.service())
依次对这个表达式作出分析:
- execution:代表执行方法的时候会触发
- * :代表任意返回类型的方法
- service.LandlordService:代表类的全限定名
- service():被拦截的方法名称
第四步:测试 AOP
我们来探讨一下环绕通知,这是 Spring AOP 中最强大的通知,因为它集成了前置通知和后置通知,它保留了连接点原有的方法的功能,所以它及强大又灵活,让我们来看看:
/**
 * 包租婆不关心~
 * 中介关心的业务~(模拟周边功能)
 */
@Component
@Aspect
class BrokerAspect {

//  注释掉之前的 @Before 和 @After 注解以及对应的方法
//  @Before("execution(* service.LandlordService.service())")
//  public void before() {
//      System.out.println("带租客看房");
//      System.out.println("谈价格");
//  }
//
//  @After("execution(* service.LandlordService.service())")
//  public void after() {
//      System.out.println("交钥匙");
//  }

    //  使用 @Around 注解来同时完成前置和后置通知
    @Around("execution(* service.LandlordService.service())")
    public void around(ProceedingJoinPoint joinPoint) {
        System.out.println("带租客看房");
        System.out.println("谈价格");

        try {
            joinPoint.proceed();
        } catch (Throwable throwable) {
            throwable.printStackTrace();
        }

        System.out.println("交钥匙");
    }
}
运行测试代码,结果仍然正确:
三、使用 XML 配置开发 Spring AOP
注解是很强大的东西,但基于 XML 的开发我们仍然需要了解,我们先来了解一下 AOP 中可以配置的元素:

有了之前通过注解来编写的经验,并且有了上面的表,我们将上面的例子改写成 XML 配置很容易(去掉所有的注解):
<!-- 装配 Bean-->
<bean name="landlord" class="pojo.Landlord"/>
<bean id="broker" class="aspect.Broker"/>

<!-- 配置AOP -->
<aop:config>
    <!-- where:在哪些地方(包.类.方法)做增加 -->
    <aop:pointcut id="landlordPoint"
                  expression="execution(* pojo.Landlord.service())"/>
    <!-- what:做什么增强 -->
    <aop:aspect id="logAspect" ref="broker">
        <!-- when:在什么时机(方法前/后/前后) -->
        <aop:around pointcut-ref="landlordPoint" method="around"/>
    </aop:aspect>
</aop:config>
运行测试程序,看到正确结果: