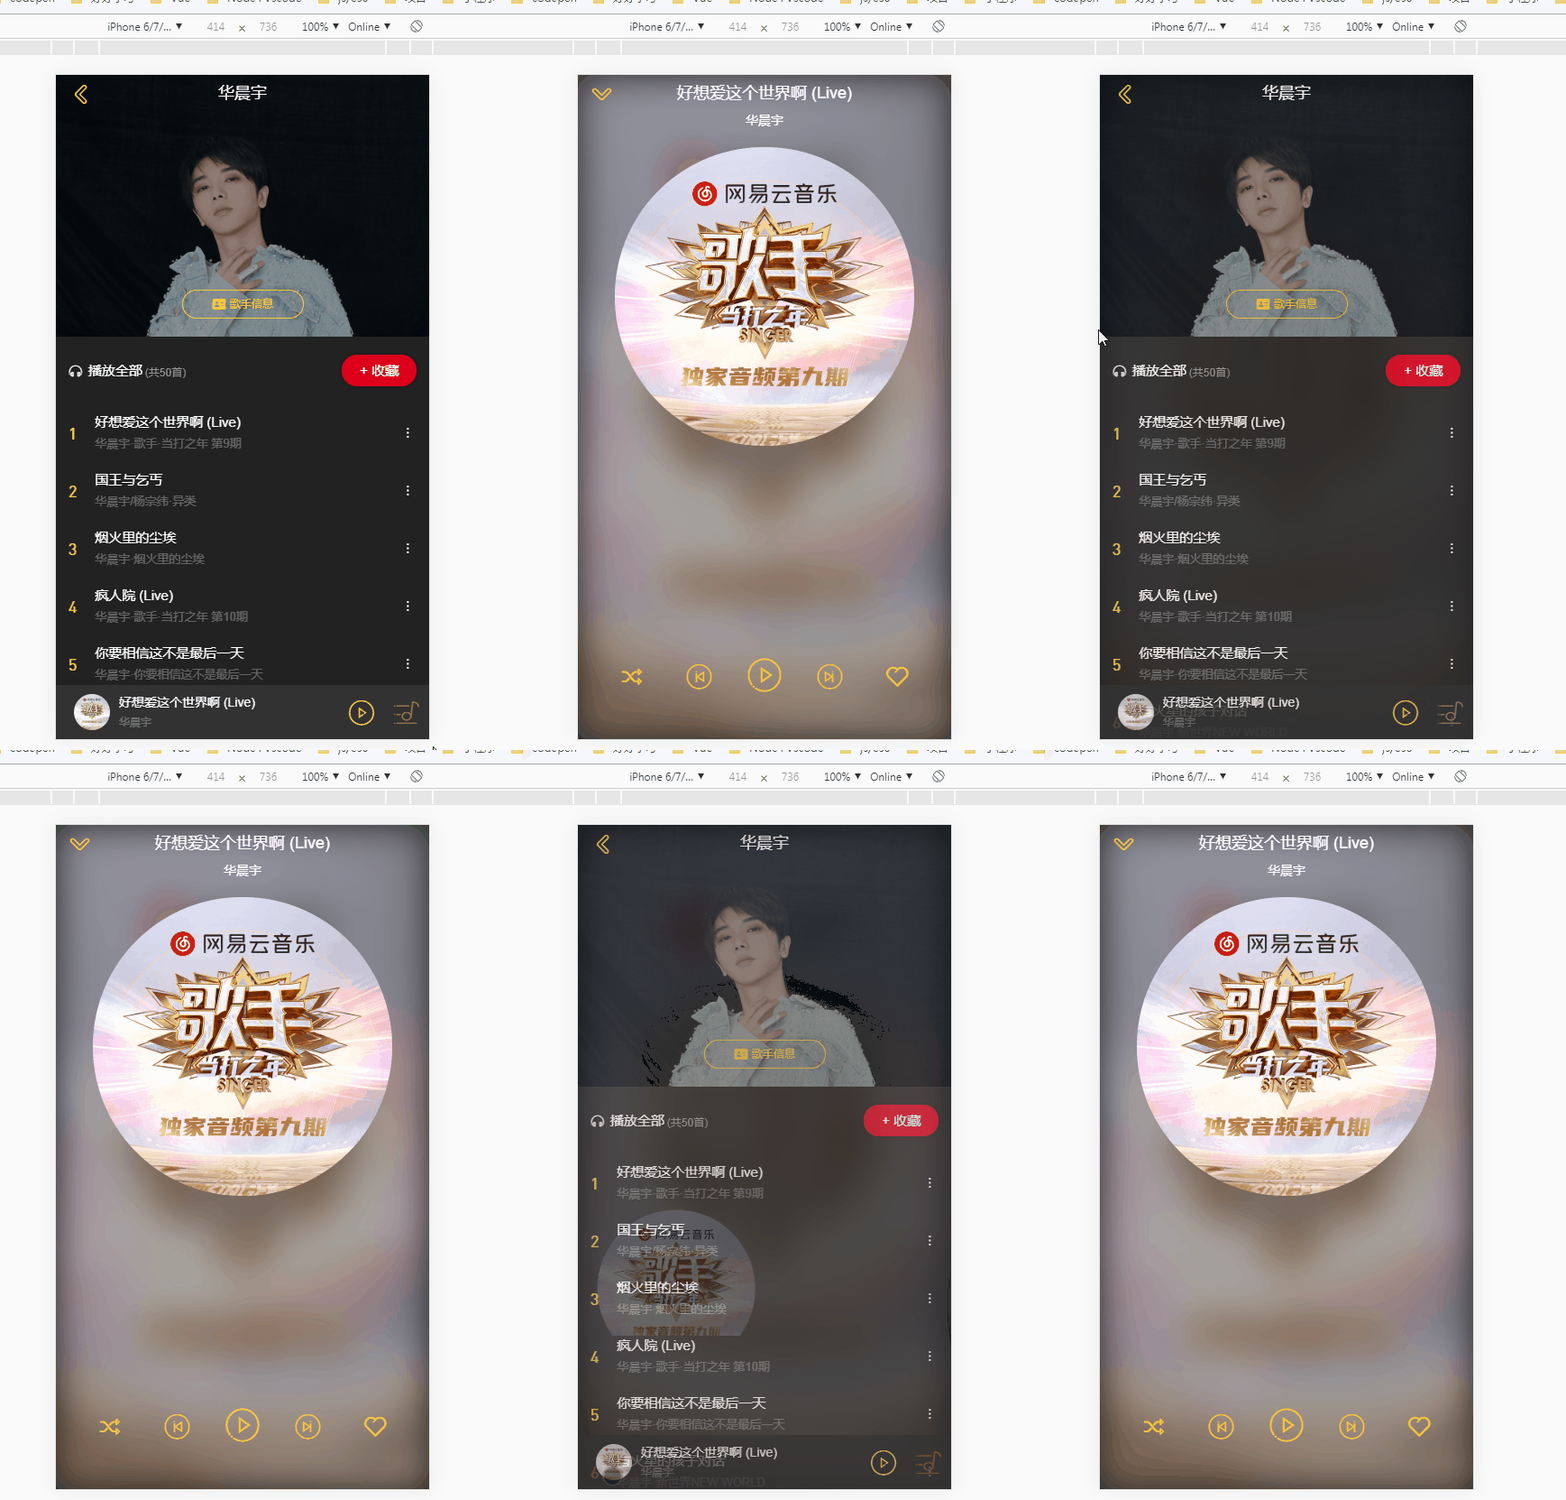
常规的vue动画实现方式很简单,使用内置的transition组件就能轻易的实现,比如一个组件进场之后其子元素的动画可以这么写
<transition name="normal">
<div class="normal-player">
<div class="top">
<div class="back" @click="back">
<i class="iconfont iconfanhui"></i>
</div>
<div class="middle">
</div>
<div class="bottom">
</div>
</div>
</div>
</transition>
.normal-player{
&.normal-enter-active,
&.normal-leave-active {
transition: all 0.4s;
.top,
.bottom {
transition: all 0.4s cubic-bezier(0.86, 0.18, 0.82, 1.32);
}
}
&.normal-enter,
&.normal-leave-to {
opacity: 0;
.top {
transform: translate3d(0, -100px, 0);
}
.bottom {
transform: translate3d(0, 100px, 0);
}
}
}
具体使用方法可以参考vue.js的官方文档,里面有详细说明
https://cn.vuejs.org/v2/api/#transition
这个组件里面的一些js钩子,可以实现较为复杂的动画,比如如下这个动画,再切换的时候有一个对应迷你播放器放大映射到大图的过程

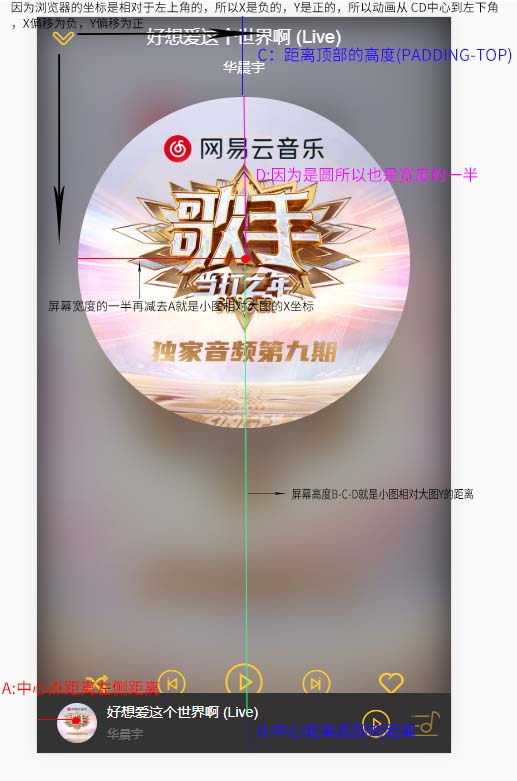
要实现这个动画,首先要获得小图,对于大图的定位,包括scale缩放比例,x,y值,定义一个获取位置的方法函数
    _getPosAndScale() {
      // 算出小图片(中心点)相对大图片(中心点)的距离和缩放比例
      // 底部播放器图片的宽度
      const targetWidth = 40;
      // 底部播放器距离左边的距离(图片的中心点就是宽度一半20加margin-left:20)
      const paddingLeft = 40;
      // 底部播放器底部的距离(图片的中心点也就是高度的一半20加margin-bottom:10)
      const paddingBottom = 30;
      // 唱片容器到顶部为80像素
      const paddingTop = 80;
      // 大播放器图片的宽度是padding-bottom80撑开来的所以是屏幕的宽度*0.8
      const width = window.innerWidth * 0.8;
      // 初始的缩放比例就是小图片除以大图片的宽度
      const scale = targetWidth / width;
      // 初始的x坐标,因为是小图片相对大图片所以是负值宽度
      const x = -(window.innerWidth / 2 - paddingLeft);
      // 初始的y坐标(屏幕的高度减去标题的高度,再减去大图高的一半(因为是圆所以宽高一样),最后再减去底部距离)
      const y = window.innerHeight - paddingTop - width / 2 - paddingBottom;
      console.log(x, y);
      return {
        x,
        y,
        scale
      };
    }
做了一张图方便理解~

有了x,y,scale,接下来就可以借助create-keyframe-animation
当然先npm install create-keyframe-animation --save保存到项目依赖中
import animations from "create-keyframe-animation";
  // vue动画钩子提供两个参数一个EL(动画元素),一个DONE回调函数到afterEnter
    enter(el, done) {
      const { x, y, scale } = this._getPosAndScale();
      let animation = {
        0: {
          // 第0帧的时候,先让图片缩小,显示在右下角(等于和小图重叠)
          transform: `translate3d(${x}px,${y}px,0) scale(${scale})`
        },
        60: {
          // 60%的时候,让图片回到cd中心,变大
          transform: `translate3d(0,0,0) scale(1.1)`
        },
        100: {
          // 变回原来的尺寸,会有一个回弹的效果
          transform: `translate3d(0,0,0) scale(1)`
        }
      };
      // 注册动画:
      animations.registerAnimation({
        name: "move",
        animation,
        presets: {
          duration: 400,
          easing: "linear"
        }
      });
      //运行动画,done也就是钩子中直接到afterEnter
      animations.runAnimation(this.$refs.cdWrapper, "move", done);
    },
    afterEnter() {
      //运行完动画之后,注销掉动画
      animations.unregisterAnimation("move");
      this.$refs.cdWrapper.style.animation = "";
    },
    // leave是指 cd从显示到隐藏的动画
    leave(el, done) {
      // 这里我们只要直接移动变小就可以了
      this.$refs.cdWrapper.style.transition = "all 0.4s";
      const { x, y, scale } = this._getPosAndScale();
      this.$refs.cdWrapper.style[
        transform
      ] = `translate3d(${x}px,${y}px,0) scale(${scale})`;
      // 监听transitionend 事件在 CSS 完成过渡后触发done回调
      this.$refs.cdWrapper.addEventListener("transitionend", done);
    },
    afterLeave() {
      this.$refs.cdWrapper.style.transition = "";
      this.$refs.cdWrapper.style[transform] = "";
    },
动画到这里也就完成了,也不是很复杂,关键是以后的项目中怎么融汇贯通,还是需要多多练习呀