标准库内部如何实现接口的
package main

import (
	"fmt"
	"io"
	"net/http"
	"os"
)

func init() {
	if len(os.Args) != 2 {
		fmt.Println("Usage:./example2 <url>")
		os.Exit(-1)
	}
}

func main() {
	r, err := http.Get(os.Args[1])
	if err != nil {
		fmt.Println(err)
		return
	}

	// 从Body复制到Stdout
	io.Copy(os.Stdout, r.Body)
	if err := r.Body.Close(); err != nil {
		fmt.Println(err)
	}
}
package main

import (
	"bytes"
	"fmt"
	"io"
	"os"
)

func main() {
	var b bytes.Buffer

	// 将字符串写入Buffer
	b.Write([]byte("Hello"))

	// 使用Fprintf将字符串拼接到Buffer
	fmt.Fprintf(&b, "World!")

	io.Copy(os.Stdout, &b)
}
io.Copy(实现了io.Writer接口的值,实现了io.Reader接口的值)
package main

import "fmt"

type notifier interface {
	notify()
}

type user struct {
	name  string
	email string
}

func (u *user) notify() {
	fmt.Printf("Sending user email to %s<%s>
", u.name, u.email)
}

func sendNotification(n notifier) {
	n.notify()
}

func main() {
	u := user{"Bill", "bill@email.com"}
	sendNotification(&u)
}
sendNotification 接受一个实现了notifier接口的值并发送通知
package main

import "fmt"

type user struct {
	name  string
	email string
}

type admin struct {
	user
	level string
}

func (u *user) notify() {
	fmt.Printf("Sending user email to %s<%s>
", u.name, u.email)
}

type notifier interface {
	notify()
}

func sendNotification(n notifier) {
	n.notify()
}

func main() {
	ad := admin{user: user{"jim", "jim@eamil.com"}}
	sendNotification(&ad)
}
方法集定义了接口的接受规则
如果使用指针接收者来实现一个接口,则只有指向那个类型的指针才能实现对应的接口
如果使用值接收者来实现一个接口,则那个类型的值和指针都能实现对应的接口
规范里描述的方法集
Values Method Receivers
T (t T) and (t *T)
*T (t *T)
从接收者的角度来看方法集
Method Receivers Values
(t T) T and *T
(t *T) *T
package main

import "fmt"

type notifier interface {
	notify()
}

type user struct {
	name  string
	email string
}

func (u user) notify() {
	fmt.Printf("Sending user email to %s<%s>
", u.name, u.email)
}

func sendNotification(n notifier) {
	n.notify()
}

func main() {
	u := user{"Bill", "bill@email.com"}
	sendNotification(&u)
	u2 := user{"Bill2", "bill2@email.com"}
	sendNotification(u2)
}
Sending user email to Bill<bill@email.com>
Sending user email to Bill2<bill2@email.com>
接口的多态行为
package main

import "fmt"

type notifier interface {
	notify()
}

type user struct {
	name  string
	email string
}

type admin struct {
	name  string
	email string
}

func (u *user) notify() {
	fmt.Printf("Sending user email to %s<%s>
", u.name, u.email)
}
func (a *admin) notify() {
	fmt.Printf("Sending admin email to %s<%s>
", a.name, a.email)
}

func sendNotification(n notifier) {
	n.notify()
}

func main() {
	u := user{"Bill", "bill@email.com"}
	sendNotification(&u)
	a := admin{"Jim", "jim@email.com"}
	sendNotification(&a)
}
notifier是一个定义了通知类行为的接口
package main

import "fmt"

type user struct {
	name  string
	email string
}

type admin struct {
	user
	level string
}

func (u *user) notify() {
	fmt.Printf("Sending user email to %s<%s>
", u.name, u.email)
}

func main() {
	ad := admin{user: user{"jim", "jim@eamil.com"}}
	// 直接访问内部类型的方法
	ad.user.notify()
	// 内部类型的方法也被提升到外部类型
	ad.notify()
}
直接访问内部类型的方法
内部类型的方法也被提升到外部类型
将外部类型变量的地址传给sendNotification函数。
编译器认为这个指针实现了notifier接口,并接受了这个值的传递。
由于内部类型的提升,内部类型实现的接口会自动提升到外部类型:由于内部类型的实现,外部类型也同样实现了这个接口。
package main

import "fmt"

type user struct {
	name  string
	email string
}

type admin struct {
	user
	level string
}

func (u *user) notify() {
	fmt.Printf("Sending user email to %s<%s>
", u.name, u.email)
}

func (a *admin) notify() {
	fmt.Printf("Sending admin email to %s<%s>
", a.name, a.email)
}

type notifier interface {
	notify()
}

func sendNotification(n notifier) {
	n.notify()
}

func main() {
	ad := admin{user{"jim", "jim@eamil.com"}, "super"}

	// 接口的嵌入的内部类型实现没有提升到外部类型
	sendNotification(&ad)

	// 内部类型的方法没有被提升
	ad.notify()

	// 可以直接访问内部类型的方法
	ad.user.notify()
}
如果外部类型实现了notify方法,则内部类型的实现就不会被提升
如果外部类型实现了内部类型实现的方法,则内部类型的实现就不会被提升
可以通过直接访问内部类型的值,来调用没有被内部类型实现的方法
inspect — Inspect live objects — Python 3.7.4 documentation https://docs.python.org/3/library/inspect.html#module-inspect
https://github.com/Unknwon/the-way-to-go_ZH_CN/blob/master/eBook/11.10.md
reflect - Go 编程语言 https://go-zh.org/pkg/reflect/
http://golang.org/doc/articles/laws_of_reflection.html
反射是用程序检查其所拥有的结构,尤其是类型的一种能力;这是元编程的一种形式。反射可以在运行时检查类型和变量,例如它的大小、方法和 动态的调用这些方法。这对于没有源代码的包尤其有用。
package main

import (
	"fmt"
	"reflect"
)

func main() {
	var x float64 = 3.4
	fmt.Println("type:", reflect.TypeOf(x))
	v := reflect.ValueOf(x)
	fmt.Println("value:", v)
	fmt.Println("type:", v.Type())
	fmt.Println("kind:", v.Kind())
	fmt.Println("value:", v.Float())
	fmt.Println(v.Interface())
	fmt.Printf("value is %5.2e
", v.Interface())
	y := v.Interface().(float64)
	fmt.Println(y)
}
type: float64
value: 3.4
type: float64
kind: float64
value: 3.4
3.4
value is 3.40e+00
3.4
通过反射修改(设置)值
package main

import (
	"fmt"
	"reflect"
)

func main() {
	var x float64 = 3.4
	v := reflect.ValueOf(x)
	// panic: reflect: reflect.Value.SetFloat using unaddressable value
	// v.SetFloat(3.1415)
	fmt.Println("settability of v:", v.CanSet())
	v = reflect.ValueOf(&x)
	fmt.Println("type of v:", v.Type())
	fmt.Println("settability of v:", v.CanSet())
	v = v.Elem()
	fmt.Println("The Elem  of v is: ", v)
	fmt.Println("settability of v:", v.CanSet())
	v.SetFloat(3.1415)
	fmt.Println(v.Interface())
	fmt.Println(v)
}
settability of v: false
type of v: *float64
settability of v: false
The Elem  of v is:  3.4
settability of v: true
3.1415
3.1415
有些时候需要反射一个结构类型。NumField() 方法返回结构内的字段数量;通过一个 for 循环用索引取得每个字段的值 Field(i)。
我们同样能够调用签名在结构上的方法,例如,使用索引 n 来调用:Method(n).Call(nil)。
package main

import (
	"fmt"
	"reflect"
)

type NotknownType struct {
	s1, s2, s3 string
}

func (n NotknownType) String() string {
	return n.s1 + "-" + n.s2 + "-" + n.s3
}

var secret interface{} = NotknownType{"A", "B", "C"}

func main() {
	value := reflect.ValueOf(secret)
	typ := reflect.TypeOf(secret)
	fmt.Println(typ)
	knd := value.Kind()
	fmt.Println(knd)

	for i := 0; i < value.NumField(); i++ {
		fmt.Printf("Field %d: %v
", i, value.Field(i))
		// panic: reflect: reflect.Value.SetString using value obtained using unexported field
		// value.Field(i).SetString("t")
	}

	// call the first method
	results := value.Method(0).Call(nil)
	fmt.Println(results)
}
但是如果尝试更改一个值,会得到一个错误:
panic: reflect.Value.SetString using value obtained using unexported field
这是因为结构中只有被导出字段(首字母大写)才是可设置的;
package main

import (
	"fmt"
	"reflect"
)

type T struct {
	A int
	B string
}

func main() {
	t := T{23, "abc"}
	s := reflect.ValueOf(&t).Elem()
	typeOfT := s.Type()
	for i := 0; i < s.NumField(); i++ {
		f := s.Field(i)
		fmt.Printf("%d: %s %s = %v
", i, typeOfT.Field(i).Name, f.Type(), f.Interface())
	}
	s.Field(0).SetInt(77)
	s.Field(1).SetString("efg")
	fmt.Println("t is now", t)
}
0: A int = 23
1: B string = abc
t is now {77 efg}
python的反射,它的核心本质其实就是利用字符串的形式去对象(模块)中操作(查找/获取/删除/添加)成员,一种基于字符串的事件驱动!
python的反射机制 - 橡皮头 - 博客园 https://www.cnblogs.com/Guido-admirers/p/6206212.html
下面结合一个web路由的实例来阐述python的反射机制的使用场景和核心本质。
def f1():
    print("f1是这个函数的名字!")


s = "f1"

"f1"()  # TypeError: 'str' object is not callable

# s()  # TypeError: 'str' object is not callable
在上面的代码中,我们必须区分两个概念,f1和“f1"。前者是函数f1的函数名,后者只是一个叫”f1“的字符串,两者是不同的事物。我们可以用f1()的方式调用函数f1,但我们不能用"f1"()的方式调用函数。说白了就是,不能通过字符串来调用名字看起来相同的函数!
二、web实例
考虑有这么一个场景,根据用户输入的url的不同,调用不同的函数,实现不同的操作,也就是一个url路由器的功能,这在web框架里是核心部件之一。下面有一个精简版的示例:
D:pyCGlangcd1新建文件夹commons\__init__.py
首先,有一个commons模块,它里面有几个函数,分别用于展示不同的页面,代码如下:
def login():
    print("这是一个登陆页面!")


def home():
    print("这是网站主页面!")
D:pyCGlangcd1新建文件夹visit\__init__.py
其次,有一个visit模块,作为程序入口,接受用户输入,展示相应的页面,代码如下:(这段代码是比较初级的写法)
import commons


def run():
    i = input("请输入您想访问的页面的url:")
    if i == "login":
        commons.login()
    elif i == "home":
        commons.home()
    else:
        print(404)


if __name__ == '__main__':
    run()
D:pyCGlangcd1新建文件夹>tree /F
文件夹 PATH 列表
卷序列号为 0000-D760
D:.
├─commons
│  │  __init__.py
│  │
│  └─__pycache__
│          __init__.cpython-37.pyc
│
└─visit
        __init__.py
D:pyCGlangvenv1Scriptspython.exe D:/pyCGlang/cd1/新建文件夹/visit/__init__.py
请输入您想访问的页面的url:home
这是网站主页面!
这就实现了一个简单的WEB路由功能,根据不同的url,执行不同的函数,获得不同的页面。
然而,让我们考虑一个问题,如果commons模块里有成百上千个函数呢(这非常正常)?。难道你在visit模块里写上成百上千个elif?显然这是不可能的!那么怎么破?
三、反射机制
仔细观察visit中的代码,我们会发现用户输入的url字符串和相应调用的函数名好像!如果能用这个字符串直接调用函数就好了!但是,前面我们已经说了字符串是不能用来调用函数的。为了解决这个问题,python为我们提供一个强大的内置函数:getattr!我们将前面的visit修改一下,代码如下:
import commons


def run():
    i = input("请输入您想访问的页面的url:")
    func = getattr(commons, i)
    func()


if __name__ == '__main__':
    run()
首先说明一下getattr函数的使用方法:它接收2个参数,前面的是一个对象或者模块,后面的是一个字符串,注意了!是个字符串!
例子中,用户输入储存在inp中,这个inp就是个字符串,getattr函数让程序去commons这个模块里,寻找一个叫inp的成员(是叫,不是等于),这个过程就相当于我们把一个字符串变成一个函数名的过程。然后,把获得的结果赋值给func这个变量,实际上func就指向了commons里的某个函数。最后通过调用func函数,实现对commons里函数的调用。这完全就是一个动态访问的过程,一切都不写死,全部根据用户输入来变化。
执行上面的代码,结果和最开始的是一样的。
这就是python的反射,它的核心本质其实就是利用字符串的形式去对象(模块)中操作(查找/获取/删除/添加)成员,一种基于字符串的事件驱动!
这段话,不一定准确,但大概就是这么个意思。
四、进一步完善
上面的代码还有个小瑕疵,那就是如果用户输入一个非法的url,比如jpg,由于在commons里没有同名的函数,肯定会产生运行错误,具体如下:
请输入您想访问的页面的url:43
Traceback (most recent call last):
  File "D:/pyCGlang/cd1/新建文件夹/visit/reflection.py", line 11, in <module>
    run()
  File "D:/pyCGlang/cd1/新建文件夹/visit/reflection.py", line 6, in run
    func = getattr(commons, i)
AttributeError: module 'commons' has no attribute '43'
那怎么办呢?其实,python考虑的很全面了,它同样提供了一个叫hasattr的内置函数,用于判断commons中是否具有某个成员。我们将代码修改一下:
import commons


def run():
    i = input("请输入您想访问的页面的url:")
    if hasattr(commons, i):
        func = getattr(commons, i)
        func()
    else:
        print(404)


if __name__ == "__main__":
    run()
通过hasattr的判断,可以防止非法输入错误,并将其统一定位到错误页面。
其实,研究过python内置函数的朋友,应该注意到还有delattr和setattr两个内置函数。从字面上已经很好理解他们的作用了。
python的四个重要内置函数:getattr、hasattr、delattr和setattr较为全面的实现了基于字符串的反射机制。他们都是对内存内的模块进行操作,并不会对源文件进行修改。
(以上学习练习的代码是不同目录,而不是2个不同的文件)
已测试
D:pyCGlangcd1新建文件夹2>tree /F
文件夹 PATH 列表
卷序列号为 0000-D760
D:.
│ commons.py
│ visit.py
│
└─__pycache__
commons.cpython-37.pyc
五、动态导入模块
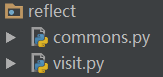
上面的例子是在某个特定的目录结构下才能正常实现的,也就是commons和visit模块在同一目录下,并且所有的页面处理函数都在commons模块内。如下图:
但在现实使用环境中,页面处理函数往往被分类放置在不同目录的不同模块中,也就是如下图:

难道我们要在visit模块里写上一大堆的import 语句逐个导入account、manage、commons模块吗?要是有1000个这种模块呢?
刚才我们分析完了基于字符串的反射,实现了动态的函数调用功能,我们不禁会想那么能不能动态导入模块呢?这完全是可以的!
python提供了一个特殊的方法:__import__(字符串参数)。通过它,我们就可以实现类似的反射功能。__import__()方法会根据参数,动态的导入同名的模块。
我们再修改一下上面的visit模块的代码。
def run():
    i = input("请输入您想访问的页面的url:").strip()
    modules, func = i.split("/")
    obj = __import__(modules)
    if hasattr(obj, func):
        func = getattr(obj, func)
        func()
    else:
        print(404)


if __name__ == "__main__":
    while True:
        run()
D:pyCGlangcd1新建文件夹3>tree /F
文件夹 PATH 列表
卷序列号为 0000-D760
D:.
account.py
commons.py
visit.py
没有子文件夹
D:pyCGlangvenv1Scriptspython.exe D:/pyCGlang/cd1/新建文件夹3/visit.py
请输入您想访问的页面的url:account/find
这是查找页面!
请输入您想访问的页面的url:commons/home
这是网站主页面!
请输入您想访问的页面的url:commons/home2
404
请输入您想访问的页面的url:commons2/home
Traceback (most recent call last):
  File "D:/pyCGlang/cd1/新建文件夹3/visit.py", line 14, in <module>
    run()
  File "D:/pyCGlang/cd1/新建文件夹3/visit.py", line 4, in run
    obj = __import__(modules)
ModuleNotFoundError: No module named 'commons2'
我们来分析一下上面的代码:
首先,我们并没有定义任何一行import语句;
其次,用户的输入inp被要求为类似“commons/home”这种格式,其实也就是模拟web框架里的url地址,斜杠左边指向模块名,右边指向模块中的成员名。
然后,modules,func = inp.split("/")处理了用户输入,使我们获得的2个字符串,并分别保存在modules和func变量里。
接下来,最关键的是obj = __import__(modules)这一行,它让程序去导入了modules这个变量保存的字符串同名的模块,并将它赋值给obj变量。
最后的调用中,getattr去modules模块中调用func成员的含义和以前是一样的。
总结:通过__import__函数,我们实现了基于字符串的动态的模块导入。
todo 对模块是否存在的检查
同样的,这里也有个小瑕疵!
D:pyCGlangcd1新建文件夹4>tree /F
文件夹 PATH 列表
卷序列号为 0000-D760
D:.
│ visit.py
│ __init__.py
│
└─lib
account.py
commons.py
__init__.py
todo python的反射机制 - 橡皮头 - 博客园 https://www.cnblogs.com/Guido-admirers/p/6206212.html
C# 反射(Reflection)_w3cschool https://www.w3cschool.cn/csharp/csharp-reflection.html
反射(Reflection)优点和缺点
优点:
- 1、反射提高了程序的灵活性和扩展性。
- 2、降低耦合性,提高自适应能力。
- 3、它允许程序创建和控制任何类的对象,无需提前硬编码目标类。
缺点:
- 性能问题:使用反射基本上是一种解释操作,用于字段和方法接入时要远慢于直接代码。因此反射机制主要应用在对灵活性和拓展性要求很高的系统框架上,普通程序不建议使用。
- 使用反射会模糊程序内部逻辑;程序员希望在源代码中看到程序的逻辑,反射却绕过了源代码的技术,因而会带来维护的问题,反射代码比相应的直接代码更复杂。
反射(Reflection)的用途
反射(Reflection)有下列用途:
- 它允许在运行时查看属性(attribute)信息。
- 它允许审查集合中的各种类型,以及实例化这些类型。
- 它允许延迟绑定的方法和属性(property)。
- 它允许在运行时创建新类型,然后使用这些类型执行一些任务。
C# Reflection https://www.tutorialspoint.com/csharp/csharp_reflection.htm
Applications of Reflection
Reflection has the following applications −
-
It allows view attribute information at runtime.
-
It allows examining various types in an assembly and instantiate these types.
-
It allows late binding to methods and properties
-
It allows creating new types at runtime and then performs some tasks using those types.