前言
无意间看到一篇Python+OpenCV连接ip摄像头的文章,刚好手上有部装了linux deploy的手机,就想试试,结果遇到各种坑…
本篇文章主要目的是记录自己踩到的坑,以及给遇到同样问题的朋友提供一点参考
顺带吐槽一下,我的另一台手机直接pip就用,真是哔了狗了…
准备工作
linux deploy的安装参考其他朋友的帖子,这里不多做赘述
文中的编译并不是直接使用cmake手动编译,而是通过pip自动编译,也就是说直接使用pip install后会自动执行编译任务
手机是乐视1s,CPU架构为armv8l
root@localhost:~# arch
armv8l
因为架构的特殊性(正经CPU应该是可以直接成功的),需要先装编译工具,否则使用pip安装会直接失败
apt-get update
apt-get install build-essential cmake -y
apt-get install gcc-arm-linux-gnueabihf -y
apt-get install g++-arm-linux-gnueabihf -y
libssl-dev必须要安装,否则会编译失败
apt-get install libssl-dev
编译好后无法正常打开窗口,安装后重新编译
apt-get install libgtk2.0-dev pkg-config -y
编译好后无法正常处理视频,安装ffmpeg后重新编译
apt-get install ffmpeg -y
OpenCV使用的库
apt-get install libjpeg8-dev -y
apt-get install libtiff5-dev -y
apt-get install libjpeg62-turbo -y
apt-get install libavcodec-dev libavformat-dev libswscale-dev libv4l-dev -y
这几个安装可能会报错,可以不用管
apt-get install libjasper-dev -y
apt-get install libpng12-dev -y
apt-get install libatlas-base-dev gfortran -y
换个源,下载更畅快
pip config set global.index-url https://mirrors.aliyun.com/pypi/simple
pip3 install --upgrade pip
安装
以上准备工作做好后就可以直接pip安装了,耐心等待编译结束,时间大概3-4个小时
pip3 install numpy
pip3 install opencv-python
过程中遇到的问题
编译好后无法正常打开窗口,通过安装libgtk2.0-dev pkg-config重新编译后解决
Traceback (most recent call last):
File "/root/Desktop/OpenCV_camera.py", line 3, in <module>
cv2.namedWindow("camera", 1)
cv2.error: OpenCV(4.5.1) /tmp/pip-install-j0nfbd52/opencv-python_f640258f625248cc8542c756aaed77c6/opencv/modules/highgui/src/window.cpp:634: error: (-2:Unspecified error) The function is not implemented. Rebuild the library with Windows, GTK+ 2.x or Cocoa support. If you are on Ubuntu or Debian, install libgtk2.0-dev and pkg-config, then re-run cmake or configure script in function 'cvNamedWindow'
这个报错我的解决方式是安装ffmpeg后重新编译,不过并不建议直接重新编译,最好先检查一遍视频路径之类的看看
Traceback (most recent call last):
File "/root/Desktop/OpenCV_camera.py", line 18, in <module>
cv2.imshow('object detection',image_np)# cv2.resize(image_np, (width, height)))
cv2.error: OpenCV(4.5.1) /tmp/pip-install-84klox5z/opencv-python_26069eb14c4f4d0ba7c2aa8cccfc5b94/opencv/modules/highgui/src/window.cpp:376: error: (-215:Assertion failed) size.width>0 && size.height>0 in function 'imshow'
编译opencv-contrib-python时遇到的报错,虽然解决了,但是编译时老死机,后来就opencv-python装好就没管了
/tmp/pip-install-_uj7vj8_/opencv-contrib-python_da4e858e7358478da2ff250f886960e8/opencv_contrib/modules/xfeatures2d/src/boostdesc.cpp:654:20: fatal error: boostdesc_bgm.i: 没有那个文件或目录
编译过程中的报错,缺少libssl-dev,安装后重新编译即可
Could NOT find OpenSSL, try to set the path to OpenSSL root folder in the system variable OPENSSL_ROOT_DIR (missing: OPENSSL_CRYPTO_LIBRARY OPENSSL_INCLUDE_DIR)
CMake Error at Utilities/cmcurl/CMakeLists.txt:485 (message):
Could not find OpenSSL. Install an OpenSSL development package or
configure CMake with -DCMAKE_USE_OPENSSL=OFF to build without OpenSSL.
-- Configuring incomplete, errors occurred!
See also "/tmp/pip-install-dyk3s54p/cmake_4d784ee7080b4ff090ca04c09d7cefbf/_skbuild/linux-armv8l-3.7/cmake-build/CMakeProject-build/CMakeFiles/CMakeOutput.log".
See also "/tmp/pip-install-dyk3s54p/cmake_4d784ee7080b4ff090ca04c09d7cefbf/_skbuild/linux-armv8l-3.7/cmake-build/CMakeProject-build/CMakeFiles/CMakeError.log".
make[2]: *** [CMakeFiles/CMakeProject-build.dir/build.make:109:CMakeProject-build-prefix/src/CMakeProject-build-stamp/CMakeProject-build-configure] 错误 1
make[1]: *** [CMakeFiles/Makefile2:148:CMakeFiles/CMakeProject-build.dir/all] 错误 2
make: *** [Makefile:130:all] 错误 2
File "/tmp/pip-build-env-hj_tzeo0/overlay/lib/python3.7/site-packages/skbuild/setuptools_wrap.py", line 589, in setup
cmkr.make(make_args, env=env)
File "/tmp/pip-build-env-hj_tzeo0/overlay/lib/python3.7/site-packages/skbuild/cmaker.py", line 507, in make
os.path.abspath(CMAKE_BUILD_DIR())))
最后的结果
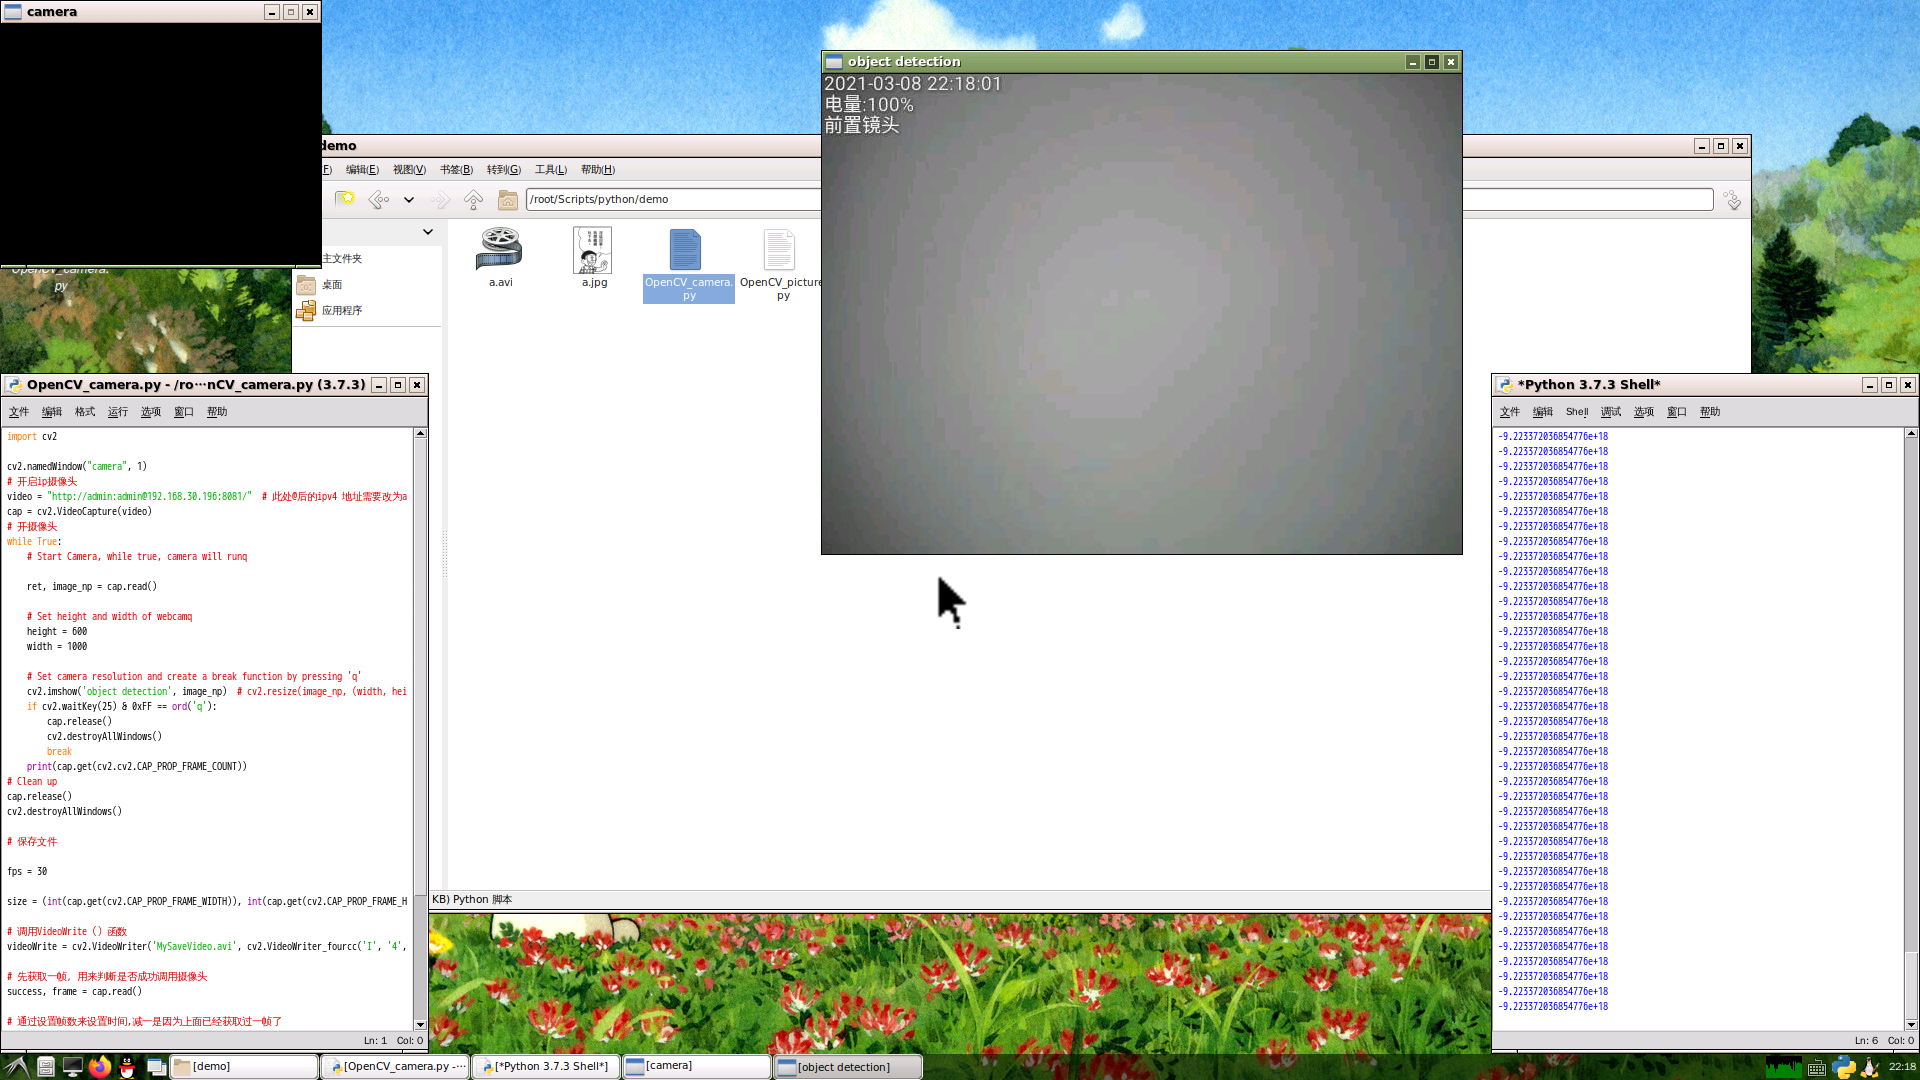
调用手机摄像头
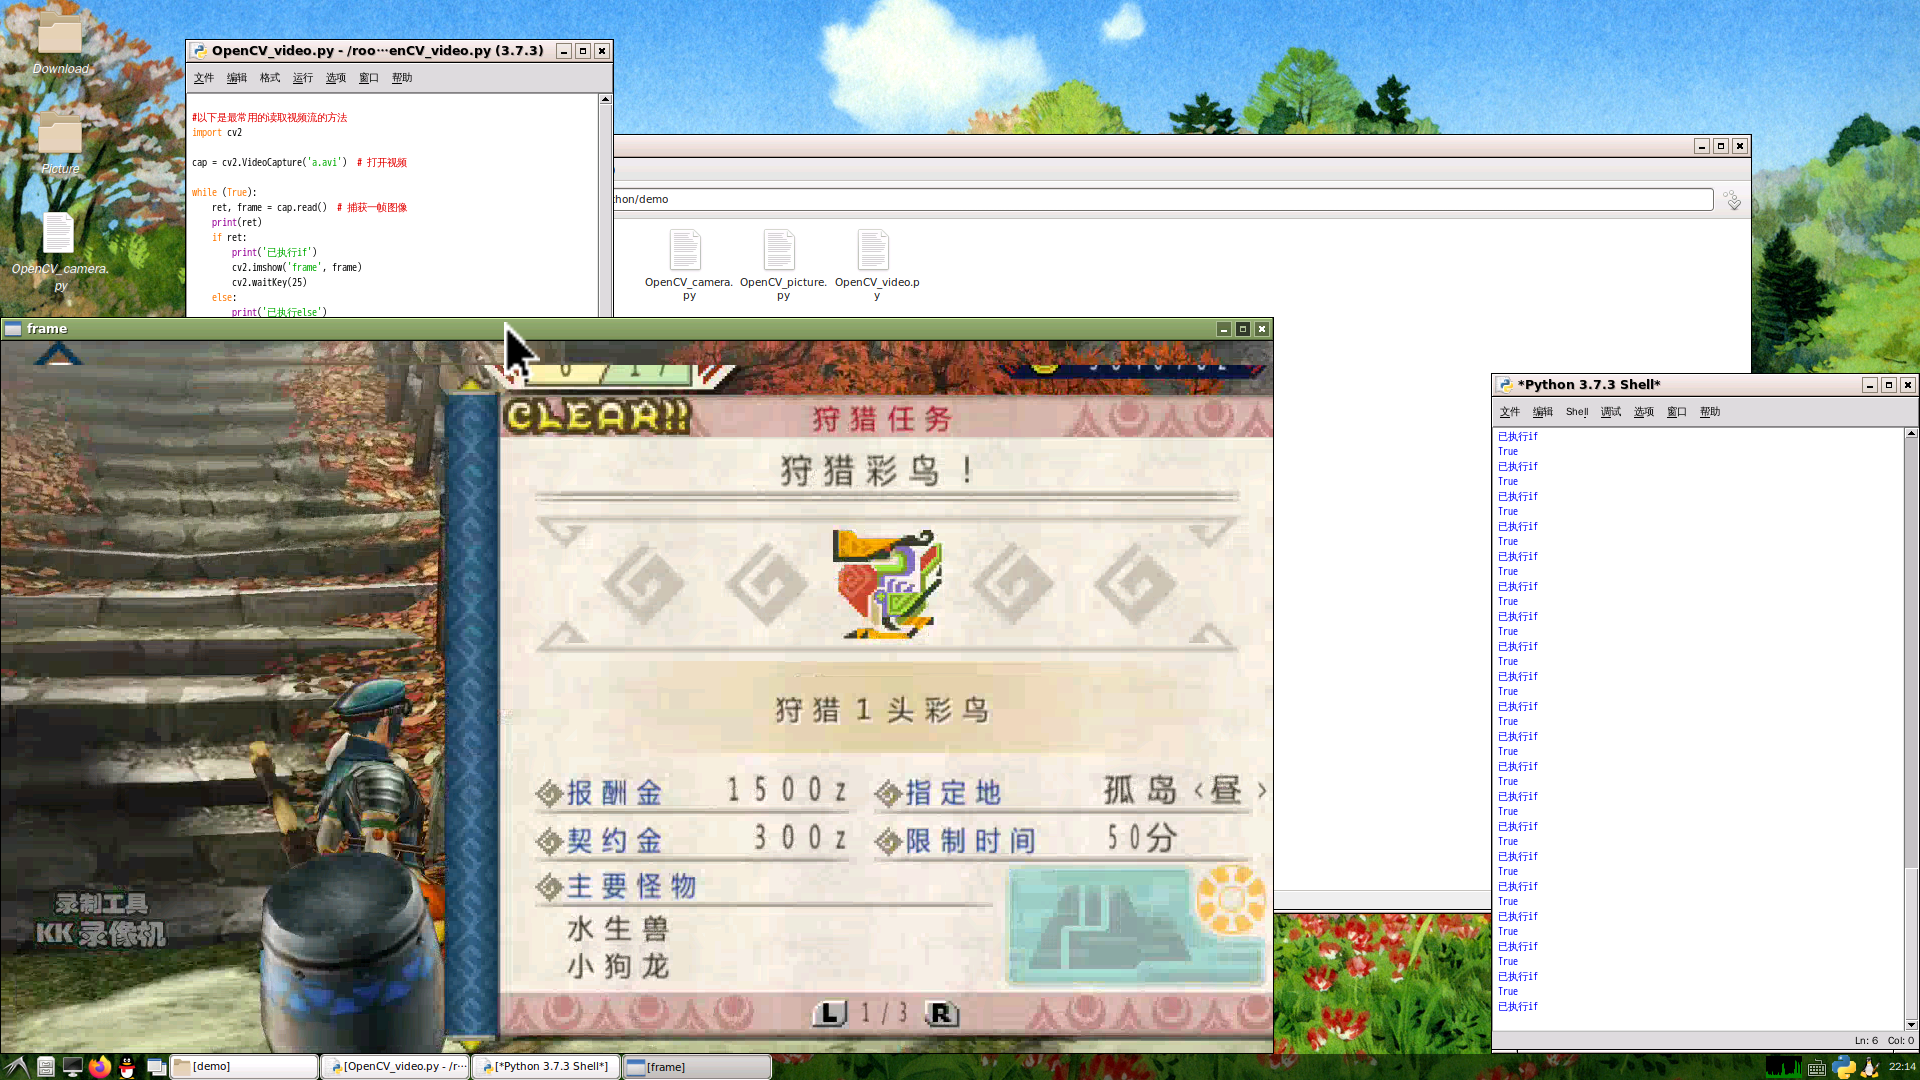
播放视频
后记
安装到完成真是各种折腾,整好了还是很爽的,然后就可以安心放着吃灰了…
本文是我的第一篇文章,如有错误欢迎各位指正