之前在Spring Boot启动过程(二)提到过createEmbeddedServletContainer创建了内嵌的Servlet容器,我用的是默认的Tomcat。
    private void createEmbeddedServletContainer() {
        EmbeddedServletContainer localContainer = this.embeddedServletContainer;
        ServletContext localServletContext = getServletContext();
        if (localContainer == null && localServletContext == null) {
            EmbeddedServletContainerFactory containerFactory = getEmbeddedServletContainerFactory();
            this.embeddedServletContainer = containerFactory
                    .getEmbeddedServletContainer(getSelfInitializer());
        }
        else if (localServletContext != null) {
            try {
                getSelfInitializer().onStartup(localServletContext);
            }
            catch (ServletException ex) {
                throw new ApplicationContextException("Cannot initialize servlet context",
                        ex);
            }
        }
        initPropertySources();
    }
getEmbeddedServletContainerFactory方法中调用了ServerProperties,从ServerProperties的实例方法customize可以看出Springboot支持三种内嵌容器的定制化配置:Tomcat、Jetty、Undertow。
这里直接说TomcatEmbeddedServletContainerFactory的getEmbeddedServletContainer方法了,原因在前面那篇里说过了。不过首先是getSelfInitializer方法先执行的:
    private org.springframework.boot.web.servlet.ServletContextInitializer getSelfInitializer() {
        return new ServletContextInitializer() {
            @Override
            public void onStartup(ServletContext servletContext) throws ServletException {
                selfInitialize(servletContext);
            }
        };
    }
将初始化的ServletContextInitializer传给了getEmbeddedServletContainer方法。进入了getEmbeddedServletContainer方法直接就是实例化了一个Tomcat:
Tomcat tomcat = new Tomcat();
然后生成一个临时目录,并tomcat.setBaseDir,setBaseDir方法的注释说Tomcat需要一个目录用于临时文件并且它应该是第一个被调用的方法;如果方法没有被调用会使用默认的几个位置system properties - catalina.base, catalina.home - $PWD/tomcat.$PORT,另外/tmp从安全角度来说不建议。
接着:
Connector connector = new Connector(this.protocol);
创建Connector过程中,静态代码块:单独抽出来写了。RECYCLE_FACADES属性可以通过启动参数JAVA_OPTS来配置: -Dorg.apache.catalina.connector.RECYCLE_FACADES=,默认是false,配置成true可以提高安全性但同时性能会有些损耗,参考:http://tomcat.apache.org/tomcat-7.0-doc/config/systemprops.html和http://bztax.gov.cn/docs/security-howto.html。其他属性不细说了,Connector构造的逻辑主要是在NIO和APR选择中选择一个协议,我的是org.apache.coyote.http11.Http11NioProtocol,然后反射创建实例并强转为ProtocolHandler。关于apr,似乎是更native,性能据说更好,但我没测,相关文档可参考:http://tomcat.apache.org/tomcat-8.5-doc/apr.html。这里简单提一下coyote,它的主要作用是将socket接受的信息封装为request和response并提供给上Servlet容器,进行上下层之间的沟通,文档我没找到比较新的:http://tomcat.apache.org/tomcat-4.1-doc/config/coyote.html。STRICT_SERVLET_COMPLIANCE也是启动参数控制,默认是false,配置项是org.apache.catalina.STRICT_SERVLET_COMPLIANCE,默认情况下会设置URIEncoding = "UTF-8"和URIEncodingLower = URIEncoding.toLowerCase(Locale.ENGLISH),相关详细介绍可参考:http://tomcat.apache.org/tomcat-7.0-doc/config/systemprops.html。Connector的创建过程比较关键,容我单独写一篇吧。
Connector实例创建好了之后tomcat.getService().addConnector(connector),getService的getServer中new了一个StandardServer,StandardServer的初始化主要是创建了globalNamingResources(globalNamingResources主要用于管理明明上下文和JDNI上下文),并根据catalina.useNaming判断是否注册NamingContextListener监听器给lifecycleListeners。创建Server之后initBaseDir,先读取catalina.home配置System.getProperty(Globals.CATALINA_BASE_PROP),如果没取到则使用之前生成的临时目录,这段直接看代码吧:
    protected void initBaseDir() {
        String catalinaHome = System.getProperty(Globals.CATALINA_HOME_PROP);
        if (basedir == null) {
            basedir = System.getProperty(Globals.CATALINA_BASE_PROP);
        }
        if (basedir == null) {
            basedir = catalinaHome;
        }
        if (basedir == null) {
            // Create a temp dir.
            basedir = System.getProperty("user.dir") +
                "/tomcat." + port;
        }

        File baseFile = new File(basedir);
        baseFile.mkdirs();
        try {
            baseFile = baseFile.getCanonicalFile();
        } catch (IOException e) {
            baseFile = baseFile.getAbsoluteFile();
        }
        server.setCatalinaBase(baseFile);
        System.setProperty(Globals.CATALINA_BASE_PROP, baseFile.getPath());
        basedir = baseFile.getPath();

        if (catalinaHome == null) {
            server.setCatalinaHome(baseFile);
        } else {
            File homeFile = new File(catalinaHome);
            homeFile.mkdirs();
            try {
                homeFile = homeFile.getCanonicalFile();
            } catch (IOException e) {
                homeFile = homeFile.getAbsoluteFile();
            }
            server.setCatalinaHome(homeFile);
        }
        System.setProperty(Globals.CATALINA_HOME_PROP,
                server.getCatalinaHome().getPath());
    }
然后又实例化了个StandardService,代码并没有什么特别的:
        service = new StandardService();
        service.setName("Tomcat");
        server.addService( service )
server.addService( service )这里除了发布了一个PropertyChangeEvent事件,也没做什么特别的,最后返回这个server。addConnector的逻辑和上面addService没什么区别。然后是customizeConnector,这里设置了Connector的端口、编码等信息,并将“bindOnInit”和对应值false写入了最开头说的静态代码块中的replacements集合,IntrospectionUtils.setProperty(protocolHandler, repl, value)通过反射的方法将protocolHandler实现对象的setBindOnInit存在的情况下(拼字符串拼出来的)set为前面的false,这个方法里有大量的判断比如参数类型及setter的参数类型,比如返回值类型以及没找到还会try a setProperty("name", "value")等,setProperty可以处理比如AbstractEndpoint中有个HashMap<String, Object> attributes的属性时会attributes.put(name, value)。如果是ssl还会执行customizeSsl方法,设置一些SSL用的属性比如协议比如秘钥还有可以用上秘钥仓库等。如果配置了压缩,这里还会给协议的相关setter设置值。tomcat.setConnector(connector)不解释。tomcat.getHost().setAutoDeploy(false),getHost方法中创建了StandardHost并设置host名(例如localhost),并getEngine().addChild( host );然后设置host的自动部署。configureEngine(tomcat.getEngine()),getEngine中如果engine为null就初始化标准引擎,设置名字为Tomcat,设置Realm和service.setContainer(engine),不过这里engine已经在getHost初始化过了所以直接返回;configureEngine方法先设置引擎的后台进程延迟,并将引擎的Value对象注册给引擎的pipeline,此时尚无value对象实例。这里简单说明一下:value对象在Tomcat的各级容器中都有标准类型,并且各级容器都有一个pipeline,在请求处理过程中会从各级的第一个value对象开始依次执行一遍,value用于加入到对应的各级容器的逻辑,默认有一个标注value实现,名字类似StandardHostValue。
prepareContext(tomcat.getHost(), initializers),initializers这里是AnnotationConfigEmbeddedWebApplicationContext,Context级的根;准备Context的过程主要设置Base目录,new一个TomcatEmbeddedContext并在构造中判断了下loadOnStartup方法是否被重写;注册一个FixContextListener监听,这个监听用于设置context的配置状态以及是否加入登录验证的逻辑;context.setParentClassLoader;设置各种语言的编码映射,我这里是en和fr设置为UTF-8,此处可以使用配置文件org/apache/catalina/util/CharsetMapperDefault .properties;设置是否使用相对地址重定向useRelativeRedirects=false,此属性应该是Tomcat 8.0.30版本加上的;接着就是初始化webapploader,这里和完整版的Tomcat有点不一样,它用的是虚拟机的方式,会将加载类向上委托loader.setDelegate(true),context.setLoader(loader);之后就开始创建Wapper了,至此engine,host,context及wrapper四个层次的容器都创建完了:
    private void addDefaultServlet(Context context) {
        Wrapper defaultServlet = context.createWrapper();
        defaultServlet.setName("default");
        defaultServlet.setServletClass("org.apache.catalina.servlets.DefaultServlet");
        defaultServlet.addInitParameter("debug", "0");
        defaultServlet.addInitParameter("listings", "false");
        defaultServlet.setLoadOnStartup(1);
        // Otherwise the default location of a Spring DispatcherServlet cannot be set
        defaultServlet.setOverridable(true);
        context.addChild(defaultServlet);
        addServletMapping(context, "/", "default");
    }
connector从socket接收的数据,解析成HttpServletRequest后就会经过这几层容器,有容器各自的Value对象链依次处理。
接着是是否注册jspServlet,jasperInitializer和StoreMergedWebXmlListener我这里是都没有的。接着的mergeInitializers方法:
    protected final ServletContextInitializer[] mergeInitializers(
            ServletContextInitializer... initializers) {
        List<ServletContextInitializer> mergedInitializers = new ArrayList<ServletContextInitializer>();
        mergedInitializers.addAll(Arrays.asList(initializers));
        mergedInitializers.addAll(this.initializers);
        return mergedInitializers
                .toArray(new ServletContextInitializer[mergedInitializers.size()]);
    }

configureContext(context, initializersToUse)对context做了些设置工作,包括TomcatStarter(实例化并set给context),LifecycleListener,contextValue,errorpage,Mime,session超时持久化等以及一些自定义工作:
        TomcatStarter starter = new TomcatStarter(initializers);
        if (context instanceof TomcatEmbeddedContext) {
            // Should be true
            ((TomcatEmbeddedContext) context).setStarter(starter);
        }
        context.addServletContainerInitializer(starter, NO_CLASSES);
        for (LifecycleListener lifecycleListener : this.contextLifecycleListeners) {
            context.addLifecycleListener(lifecycleListener);
        }
        for (Valve valve : this.contextValves) {
            context.getPipeline().addValve(valve);
        }
        for (ErrorPage errorPage : getErrorPages()) {
            new TomcatErrorPage(errorPage).addToContext(context);
        }
        for (MimeMappings.Mapping mapping : getMimeMappings()) {
            context.addMimeMapping(mapping.getExtension(), mapping.getMimeType());
        }

Session如果不需要持久化会注册一个DisablePersistSessionListener。其他定制化操作是通过TomcatContextCustomizer的实现类实现的:

context配置完了作为child add给host,add时给context注册了个内存泄漏跟踪的监听MemoryLeakTrackingListener。postProcessContext(context)方法是空的,留给子类重写用的。
getEmbeddedServletContainer方法的最后一行:return getTomcatEmbeddedServletContainer(tomcat)。
    protected TomcatEmbeddedServletContainer getTomcatEmbeddedServletContainer(
            Tomcat tomcat) {
        return new TomcatEmbeddedServletContainer(tomcat, getPort() >= 0);
    }
TomcatEmbeddedServletContainer的构造函数:
    public TomcatEmbeddedServletContainer(Tomcat tomcat, boolean autoStart) {
        Assert.notNull(tomcat, "Tomcat Server must not be null");
        this.tomcat = tomcat;
        this.autoStart = autoStart;
        initialize();
    }
initialize的第一个方法addInstanceIdToEngineName对全局原子变量containerCounter+1,由于初始值是-1,所以addInstanceIdToEngineName方法内后续的获取引擎并设置名字的逻辑没有执行:
    private void addInstanceIdToEngineName() {
        int instanceId = containerCounter.incrementAndGet();
        if (instanceId > 0) {
            Engine engine = this.tomcat.getEngine();
            engine.setName(engine.getName() + "-" + instanceId);
        }
    }
initialize的第二个方法removeServiceConnectors,将上面new的connection以service(这里是StandardService[Tomcat])做key保存到private final Map<Service, Connector[]> serviceConnectors中,并将StandardService中的protected Connector[] connectors与service解绑(connector.setService((Service)null);),解绑后下面利用LifecycleBase启动容器就不会启动到Connector了。
之后是this.tomcat.start(),这段比较复杂,我单独总结一篇吧。
TomcatEmbeddedServletContainer的初始化,接下来是rethrowDeferredStartupExceptions,这个方法检查初始化过程中的异常,如果有直接在主线程抛出,检查方法是TomcatStarter中的private volatile Exception startUpException,这个值是在Context启动过程中记录的:
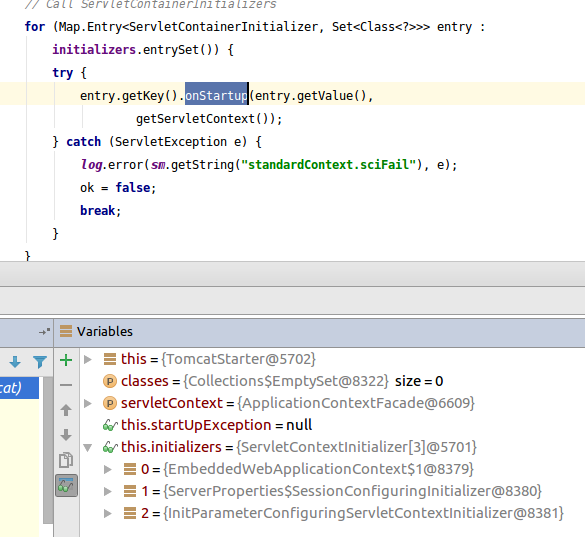
    @Override
    public void onStartup(Set<Class<?>> classes, ServletContext servletContext)
            throws ServletException {
        try {
            for (ServletContextInitializer initializer : this.initializers) {
                initializer.onStartup(servletContext);
            }
        }
        catch (Exception ex) {
            this.startUpException = ex;
            // Prevent Tomcat from logging and re-throwing when we know we can
            // deal with it in the main thread, but log for information here.
            if (logger.isErrorEnabled()) {
                logger.error("Error starting Tomcat context. Exception: "
                        + ex.getClass().getName() + ". Message: " + ex.getMessage());
            }
        }
    }
Context context = findContext():
    private Context findContext() {
        for (Container child : this.tomcat.getHost().findChildren()) {
            if (child instanceof Context) {
                return (Context) child;
            }
        }
        throw new IllegalStateException("The host does not contain a Context");
    }
绑定命名的上下文和classloader,不成功也无所谓:
                try {
                    ContextBindings.bindClassLoader(context, getNamingToken(context),
                            getClass().getClassLoader());
                }
                catch (NamingException ex) {
                    // Naming is not enabled. Continue
                }
startDaemonAwaitThread方法的注释是:与Jetty不同,Tomcat所有的线程都是守护线程,所以创建一个非守护线程(例:Thread[container-0,5,main])来避免服务到这就shutdown了:
    private void startDaemonAwaitThread() {
        Thread awaitThread = new Thread("container-" + (containerCounter.get())) {

            @Override
            public void run() {
                TomcatEmbeddedServletContainer.this.tomcat.getServer().await();
            }

        };
        awaitThread.setContextClassLoader(getClass().getClassLoader());
        awaitThread.setDaemon(false);
        awaitThread.start();
    }
这个await每10秒检查一次是否关闭了:
            try {
                awaitThread = Thread.currentThread();
                while(!stopAwait) {
                    try {
                        Thread.sleep( 10000 );
                    } catch( InterruptedException ex ) {
                        // continue and check the flag
                    }
                }
            } finally {
                awaitThread = null;
            }
            return;
回到EmbeddedWebApplicationContext,initPropertySources方法,用初始化好的servletContext完善环境变量:
    /**
     * {@inheritDoc}
     * <p>Replace {@code Servlet}-related property sources.
     */
    @Override
    protected void initPropertySources() {
        ConfigurableEnvironment env = getEnvironment();
        if (env instanceof ConfigurableWebEnvironment) {
            ((ConfigurableWebEnvironment) env).initPropertySources(this.servletContext, null);
        }
    }
createEmbeddedServletContainer就结束了,内嵌容器的启动过程至此结束。
==========================================================
咱最近用的github:https://github.com/saaavsaaa
微信公众号:
