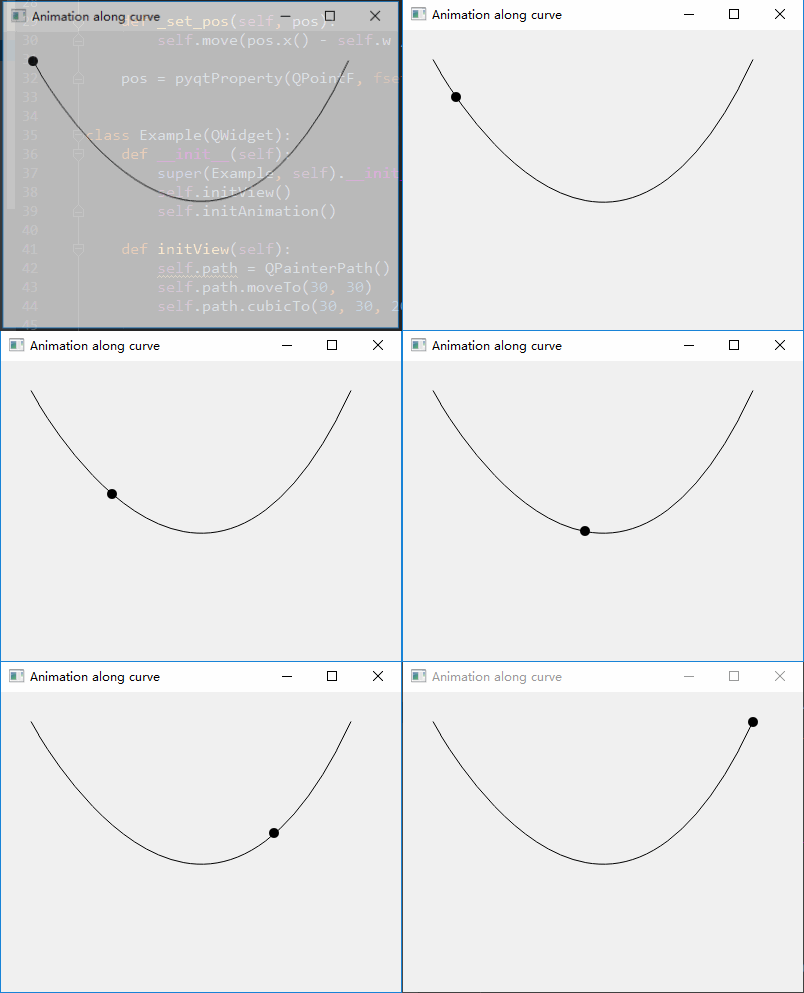
这一篇来讲解自定义控件的移动轨迹
原理:我们采用QPainterPath先画一个弧线,然后加载一个物体让物体移动,设置100个关键帧,每个关键帧物体的坐标位置就是弧线的坐标位置,这样就能达到按照指定轨迹移动
首先,我们重写QLabel,加载一个小黑球到QLabel上
class Ball(QLabel):
    def __init__(self, parent):
        super(Ball, self).__init__(parent)

        self.pix = QPixmap("../ball.png")  # 加载一个ball的图片
        self.h = self.pix.height()  # ball的高度
        self.w = self.pix.width()  # ball的宽度

        self.setPixmap(self.pix)  # 把ball加载到label上

    def _set_pos(self, pos):
        self.move(pos.x() - self.w / 2, pos.y() - self.h / 2)

    pos = pyqtProperty(QPointF, fset=_set_pos)
然后我们用QPainterPath来画弧线,先设置弧线:
    def initView(self):
        self.path = QPainterPath()
        self.path.moveTo(30, 30)
        self.path.cubicTo(30, 30, 200, 350, 350, 30)  # 设置弧线的样子
再通过paintEvent绘制弧线:
    def paintEvent(self, e):
        qp = QPainter()
        qp.begin(self)
        qp.setRenderHint(QPainter.Antialiasing)
        qp.drawPath(self.path)  # 画弧线
        qp.end()
最后组合起来就行了,剩下的不难,下面是完整代码:
#!/usr/bin/python3
# -*- coding: utf-8 -*-

"""
PyQt5 Animation tutorial

This program will show along curve with QPropertyAnimation.

Author: Semishigure 401219180@qq.com
Last edited: 2018.03.02
"""

from PyQt5.QtWidgets import *
from PyQt5.QtGui import *
from PyQt5.QtCore import *
import sys


class Ball(QLabel):
    def __init__(self, parent):
        super(Ball, self).__init__(parent)

        self.pix = QPixmap("../ball.png")  # 加载一个ball的图片
        self.h = self.pix.height()  # ball的高度
        self.w = self.pix.width()  # ball的宽度

        self.setPixmap(self.pix)  # 把ball加载到label上

    def _set_pos(self, pos):
        self.move(pos.x() - self.w / 2, pos.y() - self.h / 2)

    pos = pyqtProperty(QPointF, fset=_set_pos)


class Example(QWidget):
    def __init__(self):
        super(Example, self).__init__()
        self.initView()
        self.initAnimation()

    def initView(self):
        self.path = QPainterPath()
        self.path.moveTo(30, 30)
        self.path.cubicTo(30, 30, 200, 350, 350, 30)  # 设置弧线的样子

        self.ball = Ball(self)
        self.ball.pos = QPointF(30, 30)  # 设置ball起点位置,这里就是弧线的起点位置

        self.setWindowTitle("Animation along curve")
        self.setGeometry(300, 300, 400, 300)
        self.show()

    def paintEvent(self, e):
        qp = QPainter()
        qp.begin(self)
        qp.setRenderHint(QPainter.Antialiasing)
        qp.drawPath(self.path)  # 画弧线
        qp.end()

    def initAnimation(self):
        self.anim = QPropertyAnimation(self.ball, b'pos')
        self.anim.setDuration(3000)
        self.anim.setStartValue(QPointF(30, 30))

        vals = [p / 100 for p in range(0, 101)]

        for i in vals:
            self.anim.setKeyValueAt(i, self.path.pointAtPercent(i))  # 设置100个关键帧

        self.anim.setEndValue(QPointF(350, 30))
        self.anim.start()


if __name__ == '__main__':
    app = QApplication(sys.argv)
    ex = Example()
    sys.exit(app.exec_())
界面预览效果:

备注:
1、关键帧的范围值为0-1,我们在其中创建100个点,即[0.01, 0.02, 0.03, 0.04...0.98, 0.99, 1.00],这里直接使用for循环 vals = [p / 100 for p in range(0, 101)]
2、通过i传递百分比到self.path.pointAtPercent()就可以拿到弧线的对应坐标QPoinF,所以关键帧就可以设置成self.anim.setKeyValueAt(i, self.path.pointAtPercent(i))