WCF服务程序本身不能运行,需要通过其他的宿主程序进行托管才能调用WCF服务功能,常见的宿主程序有IIS,WAS,Windows服务,当然在学习WCF技术的时候一般使用控制台应用程序或WinForm程序进行托管。本文将详细介绍如何使用IIS8托管WCF服务程序以及解决可能会碰到的一些问题。步骤比较多,还需耐心看完!
1.本机器是Win8操作系统,默认没有安装IIS。安装IIS8很简单,具体步骤是:控制面板→程序和功能→启用或关闭Windows功能,勾选Internet信息服务节点下的部分功能,
如图所示:

2.安装完毕,重启系统后,在浏览器中输入 http://localhost/,即可看见IIS8界面,表示安装成功,如图:

3.启用WCF服务中的HTTP激活功能,具体步骤是:控制面板→程序和功能→启用或关闭Windows功能,勾选“.Net Framework 4.5 高级服务”节点下的部分功能,
如图所示:

1.新建解决方案“IISHostWCF”,添加“WCF服务类库”项目,命名为“WCFService”,如图

该WCF服务的功能很简单,根据参数Id获取相应的价格,代码如下:
1)服务接口代码


using System;
using System.Collections.Generic;
using System.Linq;
using System.Text;
using System.Threading.Tasks;
using System.ServiceModel;

namespace WCFService
{
    [ServiceContract]
    public interface IGetPrice
    {
        [OperationContract]
        string GetPriceByProductId(int id);
    }
}
2)实现接口的服务类代码
using System;
using System.Collections.Generic;
using System.Linq;
using System.Text;
using System.Threading.Tasks;

namespace WCFService
{
    public class GetPrice : IGetPrice
    {
        public string GetPriceByProductId(int id)
        {
            string price = "0.00";
            switch (id)
            {
                case 1:
                    price = "12.34";
                    break;
                case 2:
                    price = "45.60";
                    break;
                case 3:
                    price = "78.99";
                    break;
                default:
                    price = "100.00";
                    break;
            }
            return price;
        }
    }
}
2.在解决方案中,添加→新建网站,选择“WCF服务”,命名为“WCFWebSite”,如图

1)把新生成的IService.cs和Service.cs文件删除
2)添加在第一个步骤里新建的WCF服务类库,WCFService.dll

3).修改Service.svc文件

4)使用“WCF服务配置编辑器”编辑web.config文件


web.config代码如下:
<?xml version="1.0" encoding="utf-8"?>
<configuration>

  <appSettings>
    <add key="aspnet:UseTaskFriendlySynchronizationContext" value="true" />
  </appSettings>
  <system.web>
    <compilation debug="false" targetFramework="4.5" />
    <httpRuntime targetFramework="4.5"/>
  </system.web>
  <system.serviceModel>
    <services>
      <service behaviorConfiguration="WCFServiceBehavior" name="WCFService.GetPrice">
        <endpoint address="basic" binding="basicHttpBinding" bindingConfiguration=""
          name="basicEndPoint" contract="WCFService.IGetPrice" />
        <endpoint address="mex" binding="mexHttpBinding" bindingConfiguration=""
          name="mexEndPoint" contract="IMetadataExchange" />
        <host>
          <baseAddresses>
            <add baseAddress="http://localhost:8002/" />
          </baseAddresses>
        </host>
      </service>
    </services>
    <behaviors>
      <serviceBehaviors>
        <behavior name="WCFServiceBehavior">
          <serviceMetadata httpGetEnabled="true" httpsGetEnabled="true" />
          <serviceDebug includeExceptionDetailInFaults="false" />
        </behavior>
      </serviceBehaviors>
    </behaviors>
    <protocolMapping>
        <add binding="basicHttpsBinding" scheme="https" />
    </protocolMapping>
    <serviceHostingEnvironment aspNetCompatibilityEnabled="true" multipleSiteBindingsEnabled="true" />
  </system.serviceModel>
  <system.webServer>
    <modules runAllManagedModulesForAllRequests="true"/>
    <!--
        若要在调试过程中浏览 Web 应用程序根目录,请将下面的值设置为 True。
        在部署之前将该值设置为 False 可避免泄露 Web 应用程序文件夹信息。
      -->
    <directoryBrowse enabled="true"/>
  </system.webServer>

</configuration>
5)发布“WCF服务网站”


1.打开IIS管理器,添加网站,如图

2.添加完网站后,右键菜单→管理网站→浏览,弹出页面,选择浏览“Service.svc”文件,
打开后,发现会报错:

经过查找资料,原来是IIS8默认没有添加处理svc文件的处理程序,需手动添加:
1)添加MIME类型
文件扩展名:.svc;MIME类型:application/octet-stream。


2)添加处理程序映射
请求路径: *.svc;
类型:System.ServiceModel.Activation.HttpHandler;
名称:svc-Integrated


添加完毕后,重新启动网站,再次浏览即可成功:

1.通过VS自带的WCF测试工具
打开“VS2012开发人员命令提示”工具,输入“wcftestclient”,即可打开“WCF测试客户端”:


添加WCF服务测试地址:http://localhost:8001/Service.svc/mex

测试结果如下:

2.新建控制台客户端来测试WCF服务,添加服务引用

以下是简单的测试代码:
using System;
using System.Collections.Generic;
using System.Linq;
using System.Text;
using System.Threading.Tasks;

namespace WCFClient
{
    class Program
    {
        static void Main(string[] args)
        {
            WCFGetPrice.GetPriceClient proxy = new WCFGetPrice.GetPriceClient("basicEndPoint");
            Console.WriteLine(proxy.GetPriceByProductId(3));
            Console.ReadKey();
        }
    }
}
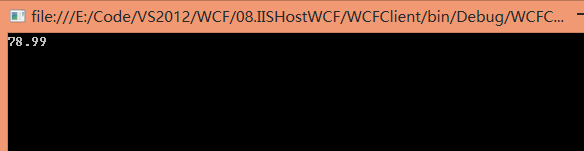
结果如下:
至此使用IIS托管WCF服务应用程序详细步骤完毕。
好困啊~~~