一、vue-router安装与使用
1、安装
进入项目目录中安装vue-router模块
E:vueProjectwebpackProject>cnpm install vue-router --save
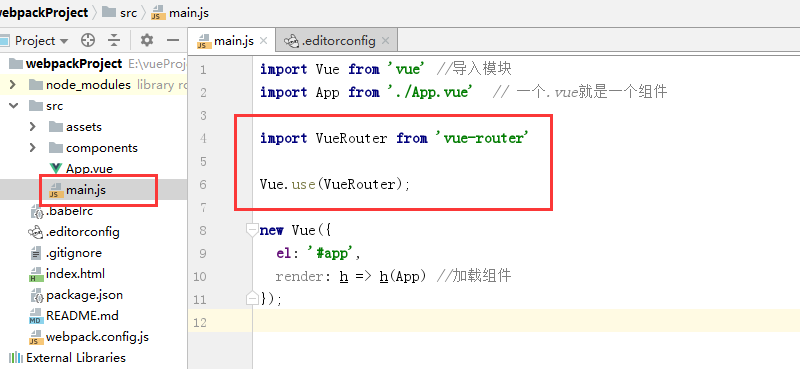
2、在项目main.js文件中导入模块
import VueRouter from 'vue-router'
3、让Vue知道你使用路由
Vue.use(VueRouter);
此时即完成了vue-router的安装配置:
2、使用路由
vue-router方便做单页面的应用,将组件 (components) 映射到路由 (routes),然后告诉 Vue Router 在哪里渲染它们。
为方便起见,先建一个头部的导航,这里使用ElementUI的使用中的导航,进行点击切换路由:
(1)建立组件
导航条中有几个选项,建立几个组件,用于切换路由:
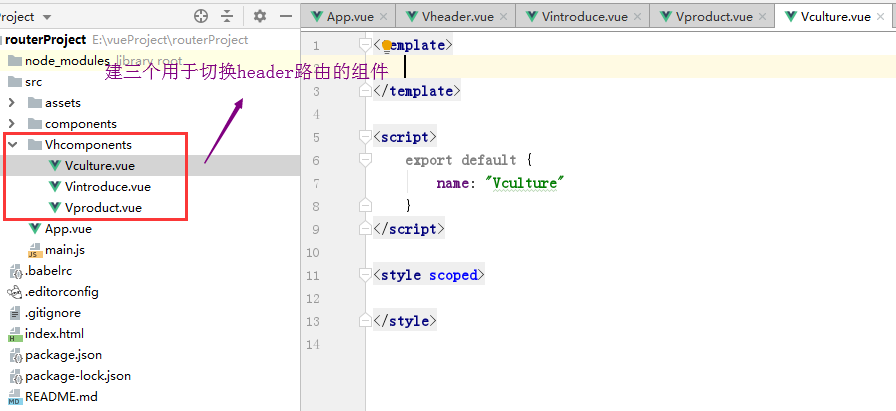
(2)定义路由组件
在main.js文件中引入创建的组件,这里它们就是路由组件了
//定义路由组件
import Vintroduce from 'Vhcomponents/Vintroduce'
import Vproduct from 'Vhcomponents/Vproduct'
import Vculture from 'Vhcomponents/Vculture'
(3)创建 router 实例
在main.js文件中创建router 实例,并且将路由配置注入(一个路由对应一个路由组件)
// 创建 router 实例,然后传 `routes` 配置,也就是一个路由对应一个组件
const router = new VueRouter({
  routes:[
    { path: '/', component: Vintroduce },
    { path: '/product', component: Vproduct },
    { path: '/culture', component: Vculture },
  ]
});
(4)挂载路由实例
在main.js文件中挂载router 实例
//将路由router挂载到Vue根实例上,一个项目只有一个根实例
new Vue({
  el: '#app',
  router, //相当于router:router
  render: h => h(App) //加载组件
});
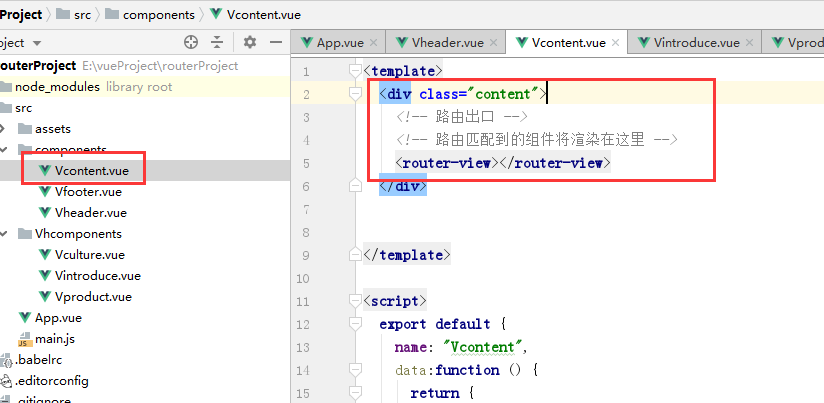
(5)在父组件中进行渲染也就是App.vue组件
<template>
  <!--页面结构-->
  <div id="app">
    <el-menu
      :default-active="activeIndex2"
      class="el-menu-demo"
      mode="horizontal"
      background-color="#545c64"
      text-color="#fff"
      active-text-color="#ffd04b">

      <el-menu-item index="1"> <router-link to="introduce">公司介绍</router-link></el-menu-item>
      <el-menu-item index="3" ><router-link to="product">产品管理</router-link></el-menu-item>
      <el-menu-item index="4"><router-link to="culture">公司文化</router-link></el-menu-item>
    </el-menu>


    <!-- 路由出口 -->
    <!-- 路由匹配到的组件将渲染在这里 -->
    <router-view></router-view>
  </div>
</template>
上述渲染的过程中router-link相当于a标签,to相当于href属性,<router-view></router-view>为路由出口,这样就完成了路由的切换。
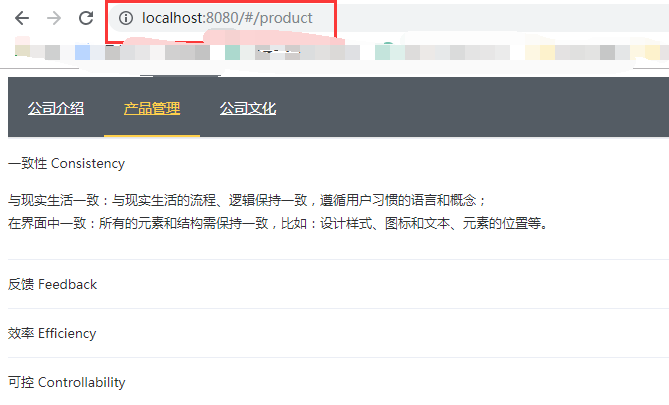


可以在main.js文件中:

// 加入mode:history参数
const router = new VueRouter({
  mode:'history',
  routes: [

        {path: '/introduce', component: Vintroduce},
        {path: '/product', component: Vproduct},
        {path: '/culture', component: Vculture},
  ]
});
二、完整页面结构中使用
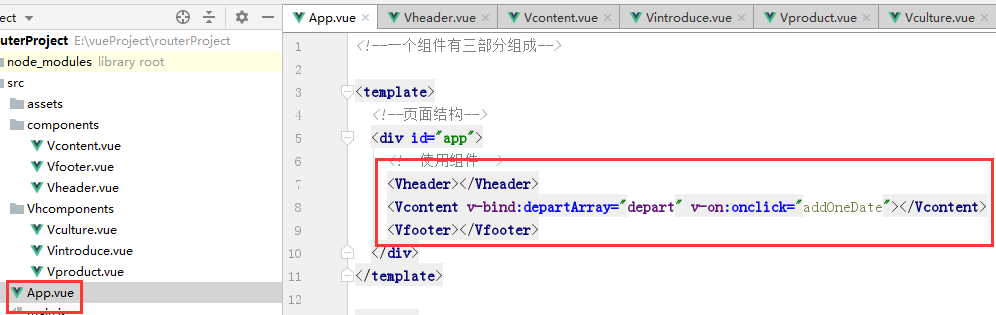
一般页面包含头部header、content、footer三部分,这三部分是三个组件,现在在主页面中App.vue中引入三个组件,而不是直接进行router-link
<template>
  <!--页面结构-->
  <div id="app">
    <!--使用组件-->
    <Vheader></Vheader>
    <Vcontent v-bind:departArray="depart" v-on:onclick="addOneDate"></Vcontent> <!--绑定自定义属性-->
    <Vfooter></Vfooter>
  </div>
</template>
然后再Vheader中进行router-link

而在Vcontent组件中渲染各个页面的内容