网上查了查 ActiveMQ + .net core 的例子很少,自己做一个demo 作为记录,另外FineUI Core基础版要来了,出来后我会用FineUI再做一版,为知识星球的引流...

1.安装SDK 准备ActiveMQ 服务
此处用的 .net core 2.0+
此处用的 apache-activemq-5.9.0
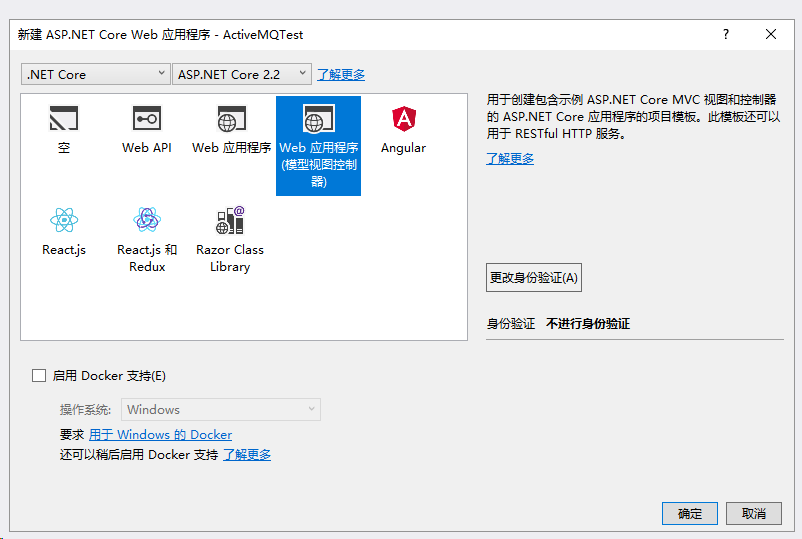
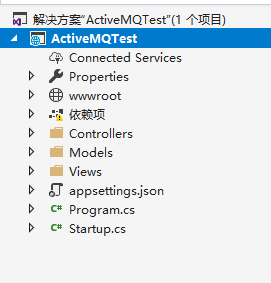
2.创建项目

3.引用样式
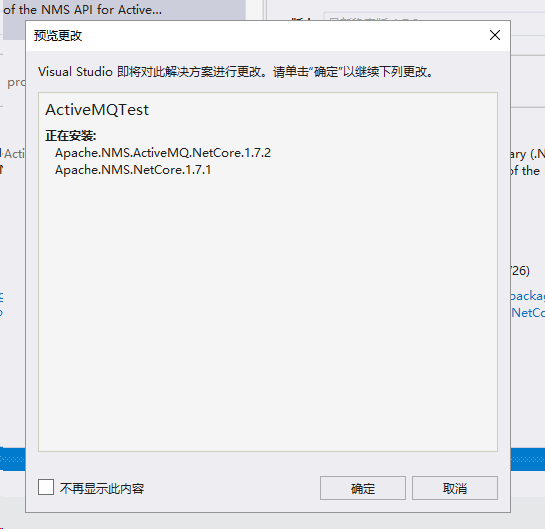
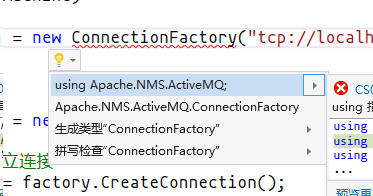
4.引用DLL

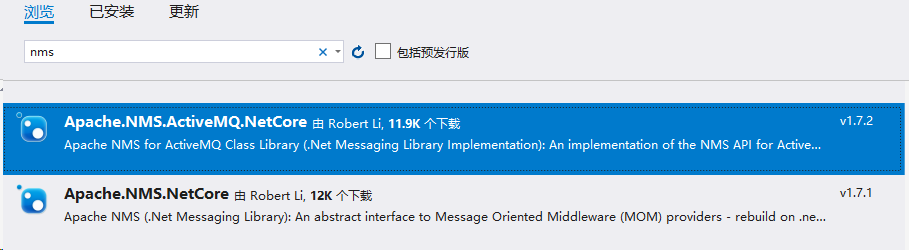
注意:先安装 Apache.NMS.NetCore 再安装 Apache.NMS.ActiveMQ.NetCore
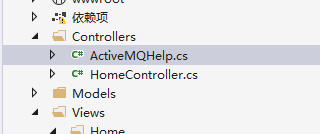
5.抄袭一个ActiveMQHelp
来自 https://blog.csdn.net/PeterPan_hai/article/details/52354913
这里未做任何修改,正常添加引用即可

6.写代码
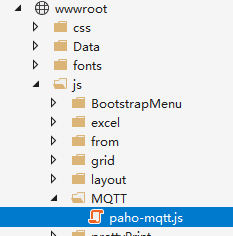
引用 paho-mqtt.js
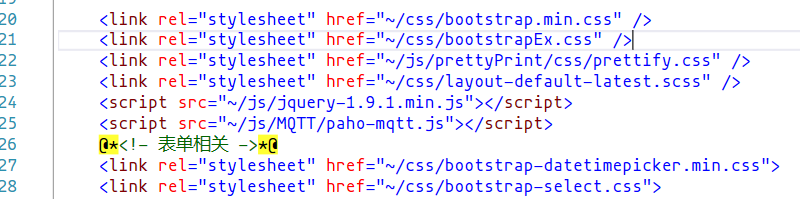
直接重写 View/Home/Index.cshtml
@{
    ViewData["Title"] = "全球都比较大的聊天室";
}
@section body{
    <h2>@ViewData["Title"]</h2>
    <form id="form1"></form>

}
@section Scripts{
    @*框架已经引用了*@
    @*<script src="~/js/MQTT/paho-mqtt.js"></script>*@
    <script>
        $(document).ready(function () {
            InitPage();//准备页面
            ItinPahoClient();//准备链接
        });

        //核心方法:通过MQtt连接
        function ItinPahoClient() {
            //地址 端口 链接名称(不是主题)
            var client = new Paho.Client("没神的IP,大伙都知道", 61614, "jsclient");

            //监听事件
            client.onMessageArrived = function (msg) {
                //收到消息
                messagebox.append("接收到消息:" + msg.payloadString);
                $('#textbox').val('');
            };

            //链接配置
            client.connect({
                onSuccess: function () {
                    messagebox.append('链接成功');
                    //订阅主题为myqueue
                    client.subscribe("myqueue");
                    //发布消息,主题为myqueue2
                    //client.publish("myqueue2", "Message from js client");
                }
            });

        }
        //发送消息
        function setmessage() {
            var v = $('#textbox').val();
            bsEx.dopostback('@Url.Action("SetMessage")', {"msg":v}, function (t) {
                eval('(' + t + ')');
            });
        }

        ///初始化页面
        function InitPage() {
            //表单
            new bsEx.ItemForm({
                id: "form1",
                renderto: '#form1',
                items: [
                    { type: 'textarea', name: 'messagebox', title: '消息', height: '300px' },
                    { type: 'text', name: 'textbox', title: '发送' }
                ],
                colunb: 1, showlabel: false, css: { 'width': '500px' }
            }).init().attr("onkeydown","if(event.keyCode == 13) { return false; }");

            //发送按钮
            var btn = $('#textbox').addbutton("发送");
            btn.on('click', function () {
                setmessage();
            })

            $('#footer span').prepend("v" + $.fn.bsEx);
            //重写append 加个回车
            messagebox = $('#messagebox');
            messagebox.append = function () {
                arguments[0] = arguments[0] +'
  ';
                ($.fn.append).apply(this,arguments);
            }
            messagebox.append('...链接中');
        }

        //再text后面加一个button
        $.fn.addbutton = function (text) {
            $(this).parent().addClass('input-group');
            var bid = $(this).attr('id') + '-btn';
            var b = $('<span class="input-group-addon btn" id="' + bid + '">' + text + '</span >');
            $(this).after(b);
            $(this).attr("onkeydown", "if(event.keyCode == 13) { setmessage(); }");
            return $(b);
        }
    </script>
}
注意:前台的核心方法 ItinPahoClient();
修改 Program.cs
using System;
using System.Collections.Generic;
using System.IO;
using System.Linq;
using System.Threading.Tasks;
using ActiveMQTest.Controllers;
using Microsoft.AspNetCore;
using Microsoft.AspNetCore.Hosting;
using Microsoft.Extensions.Configuration;
using Microsoft.Extensions.Logging;

namespace ActiveMQTest
{
    public class Program
    {
        /// <summary>
        /// MQ
        /// </summary>
        public static ActiveMQHelp mymq { get; set; }

        public static void Main(string[] args)
        {
            //开始链接和订阅主题
            mymq = new ActiveMQHelp(isLocalMachine: false, remoteAddress: "没神的IP,大伙都知道");
        //主题名称 myqueue 与前台一致 ,这里注意区分 topic 和 queue的区别
            Program.mymq.InitQueueOrTopic(topic: true, name: "myqueue", selector: false);

            CreateWebHostBuilder(args).Build().Run();
        }

        public static IWebHostBuilder CreateWebHostBuilder(string[] args) =>
            WebHost.CreateDefaultBuilder(args)
                .UseStartup<Startup>();
    }
}
修改 Controllers/HomeController.cs
using System;
using System.Collections.Generic;
using System.Diagnostics;
using System.Linq;
using System.Threading.Tasks;
using Microsoft.AspNetCore.Mvc;
using ActiveMQTest.Models;

namespace ActiveMQTest.Controllers
{
    public class HomeController : Controller
    {
        public IActionResult Index()
        {
            return View();
        }

        [HttpPost]
        [ValidateAntiForgeryToken]
        public ActionResult SetMessage(string msg)
        {
            //发送
            Program.mymq.SendMessage(msg, "newid", priority: Apache.NMS.MsgPriority.Lowest);
            return Content("console.log(""+ msg + "  发送成功");");
        }
        [HttpPost]
        [ValidateAntiForgeryToken]
        public ActionResult GetMessage()
        {
            //后台拿一次
            return Content("console.log("" + Program.mymq.GetMessage() + "");") ;
        }


        public IActionResult Privacy()
        {
            return View();
        }

        [ResponseCache(Duration = 0, Location = ResponseCacheLocation.None, NoStore = true)]
        public IActionResult Error()
        {
            return View(new ErrorViewModel { RequestId = Activity.Current?.Id ?? HttpContext.TraceIdentifier });
        }
    }
}
至此,代码全部完成,可以运行,只要IP对,基本没啥大问题,不会的问我,源码这里下载
