最近有个需要进行开源的类库,小小的记录一下过程以及过程中的问题,如果有不对的地方还请指出
首先我这里需要把我们的类库传至maven的中央仓库
这里我们首先需要sonatype
一、Sonatype简介
Sonatype是一个软件管理工具提供商,致力于跟踪和监控各个代码模块,Maven的中央仓库就是由Sonatype出资维护的而不是由Apache进行维护的,所以我们要在Sonatype上进行申请上传maven的资格来使用Maven仓库托管服务
Sonatype OSSRH(OSS存储库托管)使用 Sonatype Nexus存储库管理器 为开源项目二进制文件提供存储库托管服务
OSSRH存储库的初始设置需要一些手动步骤和人工检查,然后通常会修改您的部署过程以将组件放入OSSRH,这些都是一次性的步骤
Sonatype 官方介绍:https://www.sonatype.com/company
Sonatype OSSRH官方介绍以及使用说明:https://central.sonatype.org/pages/ossrh-guide.html
二、Sonatype注册
Sonatype注册地址(科学浏览更快些):https://issues.sonatype.org/secure/Signup!default.jspa
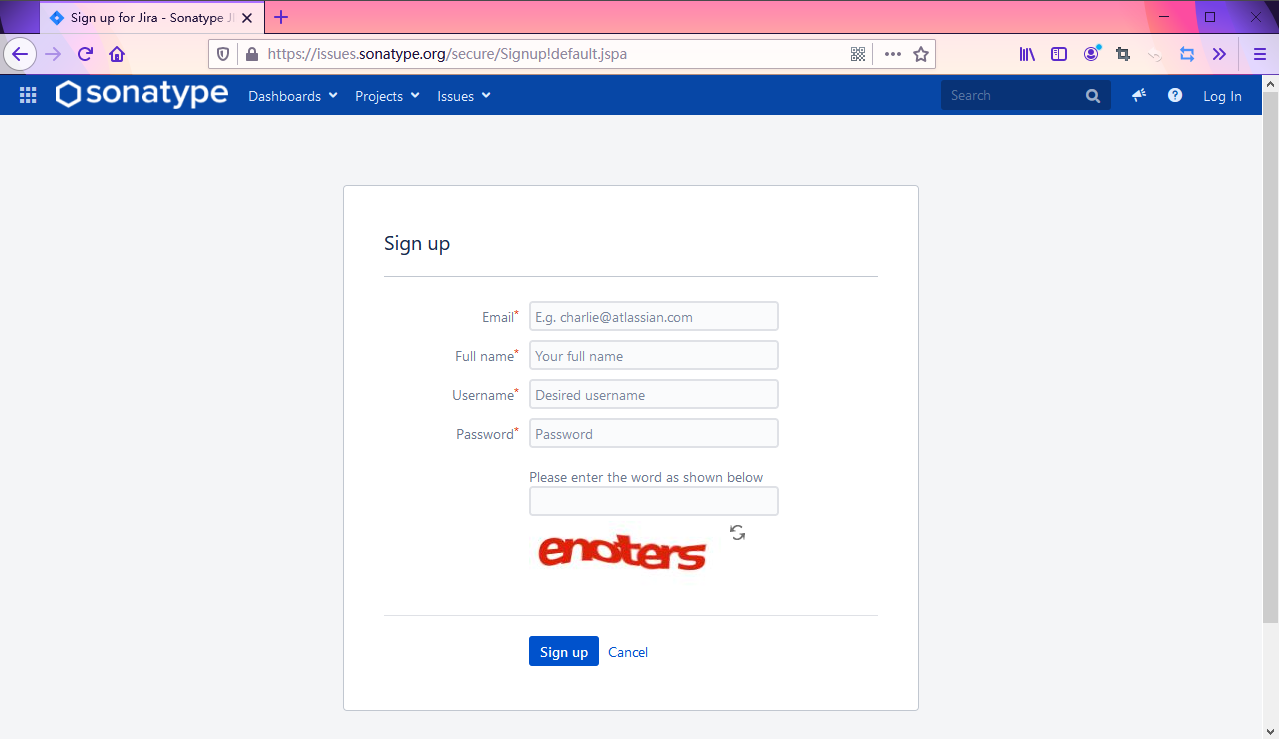
输入信息即可进行注册
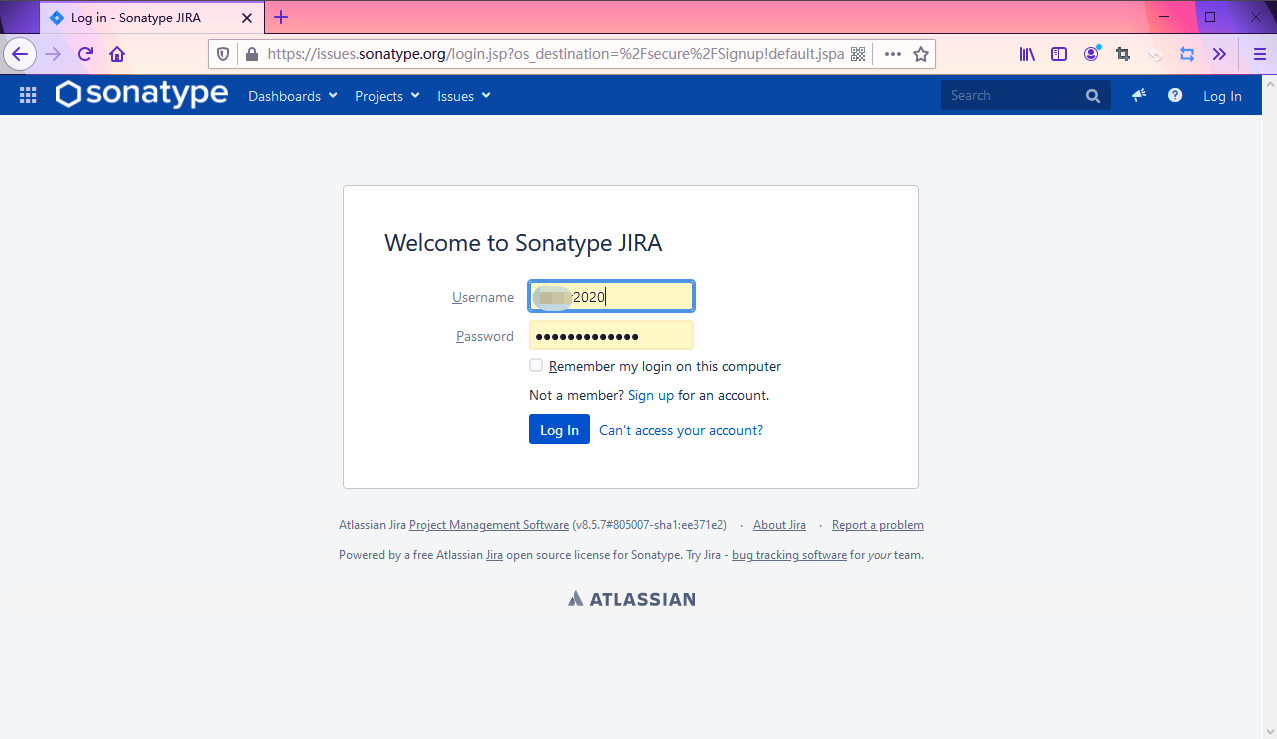
二、Sonatype登录
Sonatype登录地址:https://issues.sonatype.org/login.jsp
三、Sonatype新建issue
点击新建
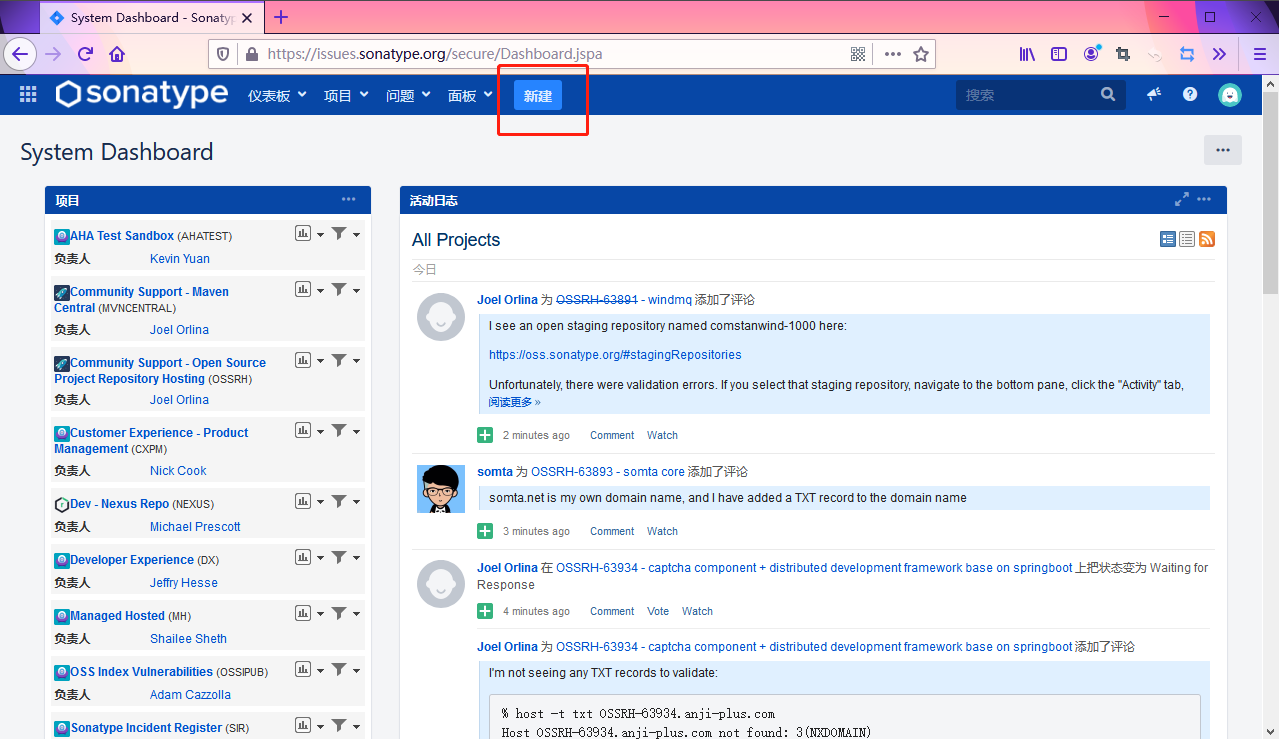
填入信息
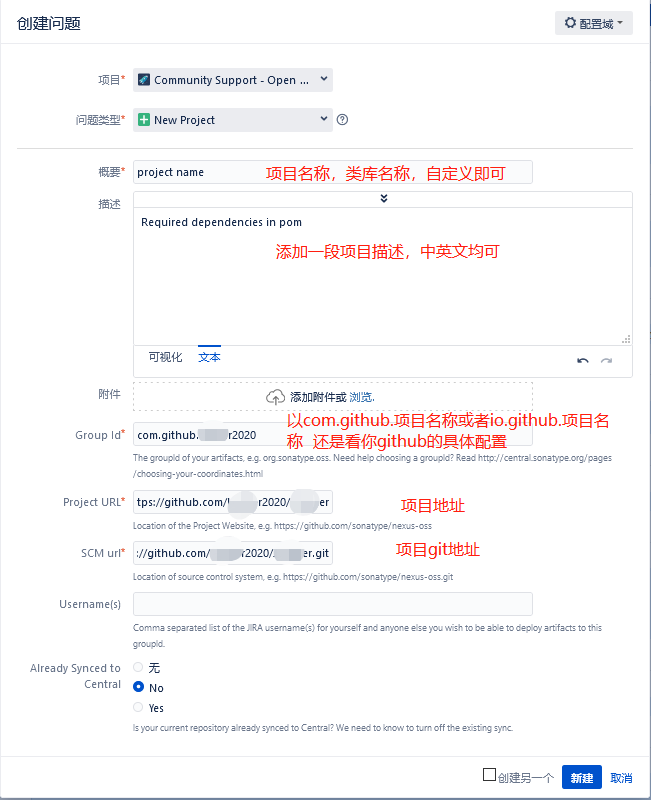
这里需要注意几个问题,不然反复审核时间会非常漫长
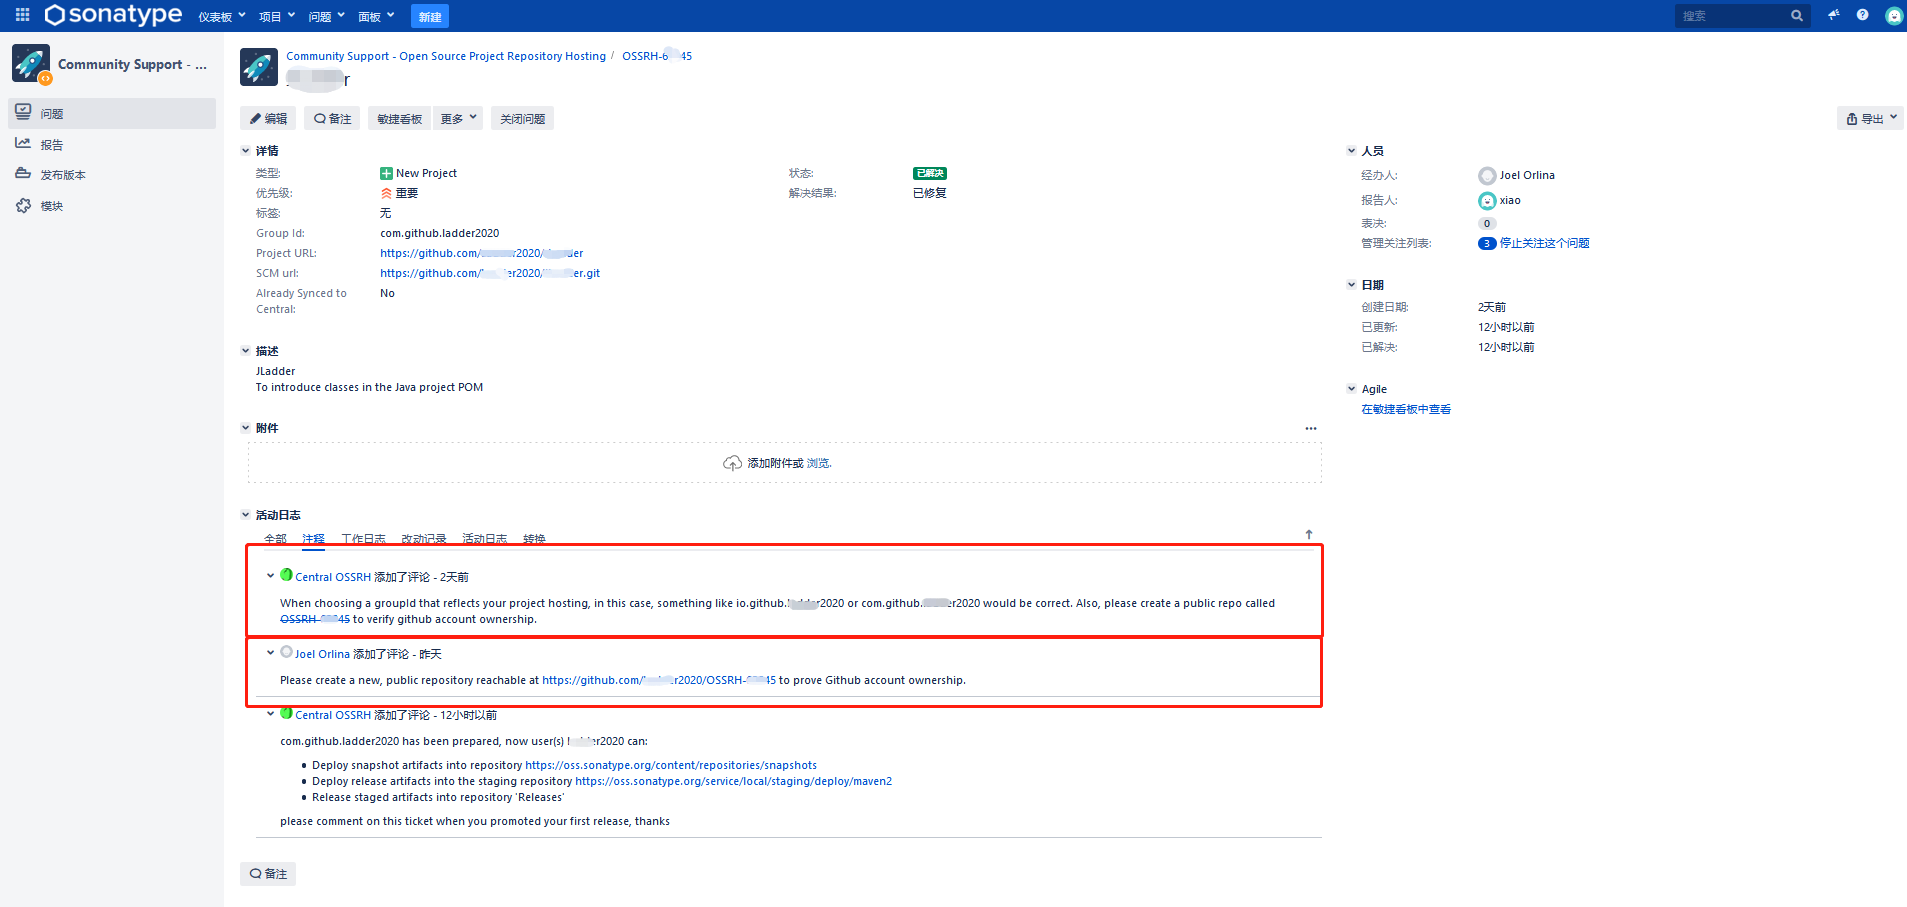
- When choosing a groupId that reflects your project hosting, in this case, something like io.github.2020 or com.github.2020 would be correct. Also, please create a public repo called OSSRH-6666 to verify github account ownership.
这里是Group Id这个选项需要填写正确,基本填io.github.2020 或者 com.github.2020 都是没问题的
- Please create a new, public repository reachable at https://github.com/2020/OSSRH-6666 to prove Github account ownership.
这里是需要在你的github建一个OSSRH-6666(你自己的序号)的一个项目来证明这个项目是你的,建议最好提前在申请的时候就建好,不然再次审核的时间会非常长
四、GPG / PGP签名文件生成
Sonatype要求所有部署的文件都需要使用GPG / PGP.asc签名,并且每个文件都必须包含一个包含签名的文件,所以我们需要生成密钥对
这里我们用到Gpg4win来生成密钥
Gpg4win下载地址:https://www.gpg4win.org/download.html
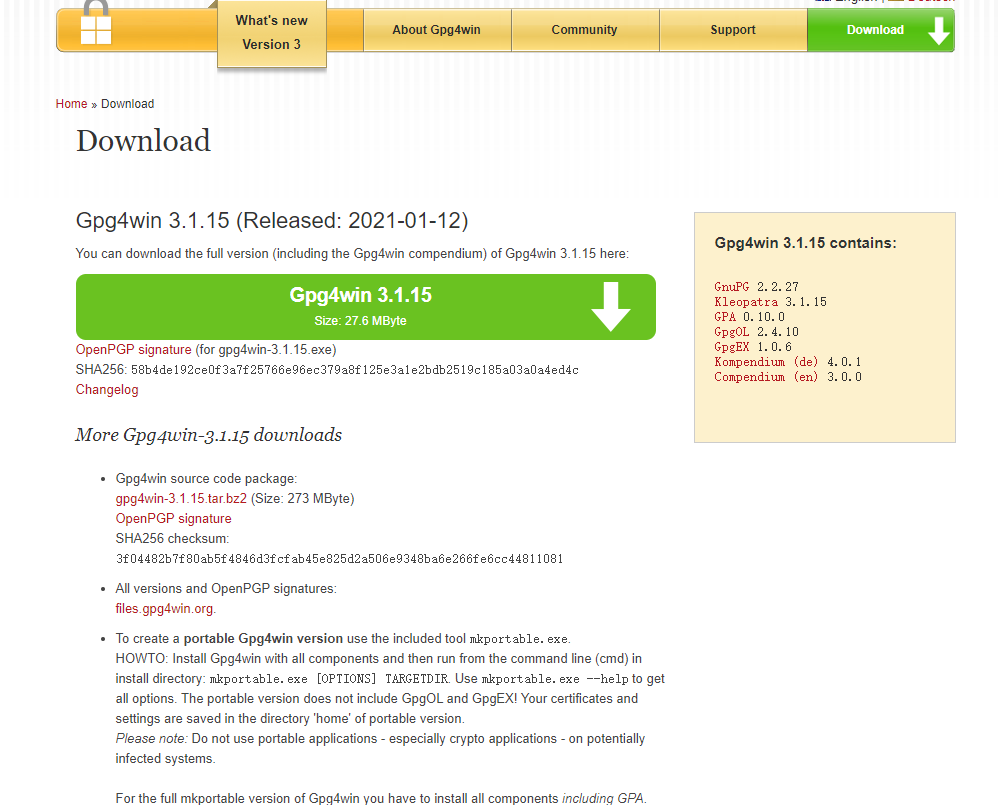
下载需要点击$0 不给它钱
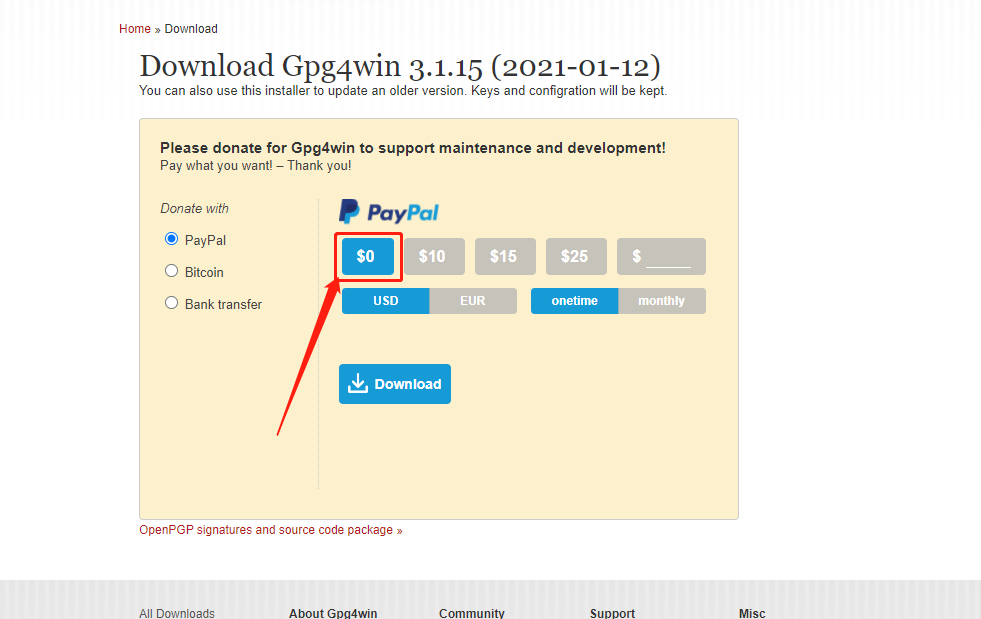
不过网速很是感人
百度网盘:(失效留言)
链接:https://pan.baidu.com/s/1JiUVp0GkB_fSqcRetNkKrA 提取码:vams
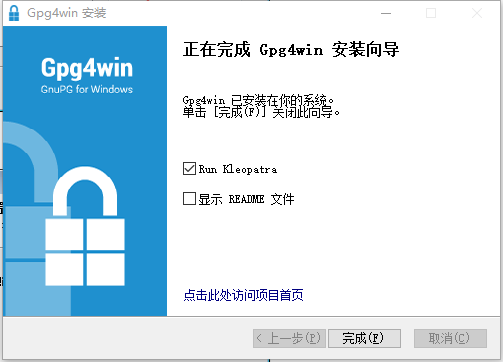
接下来进行安装,我这里是默认安装了kleopatra界面管理的

我们这里使用两种方法来生成密钥对,一种kleopatra桌面管理的方式,一种cmd命令行的方式来生成
- kleopatra生成
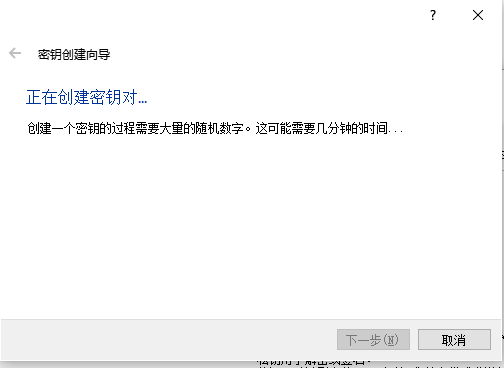
安装之后启动kleopatra,点击新建密钥对

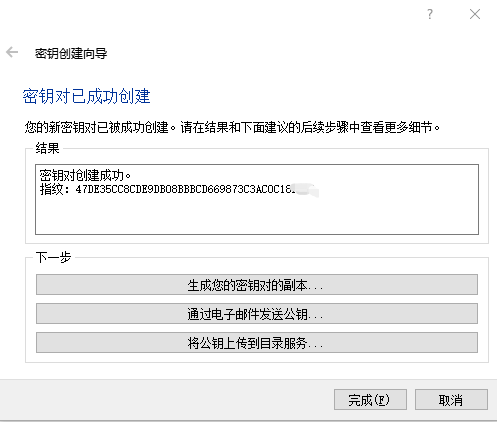
依次输入个人信息进行创建

可以看见密钥已经成功创建,一长串的数字为公钥id
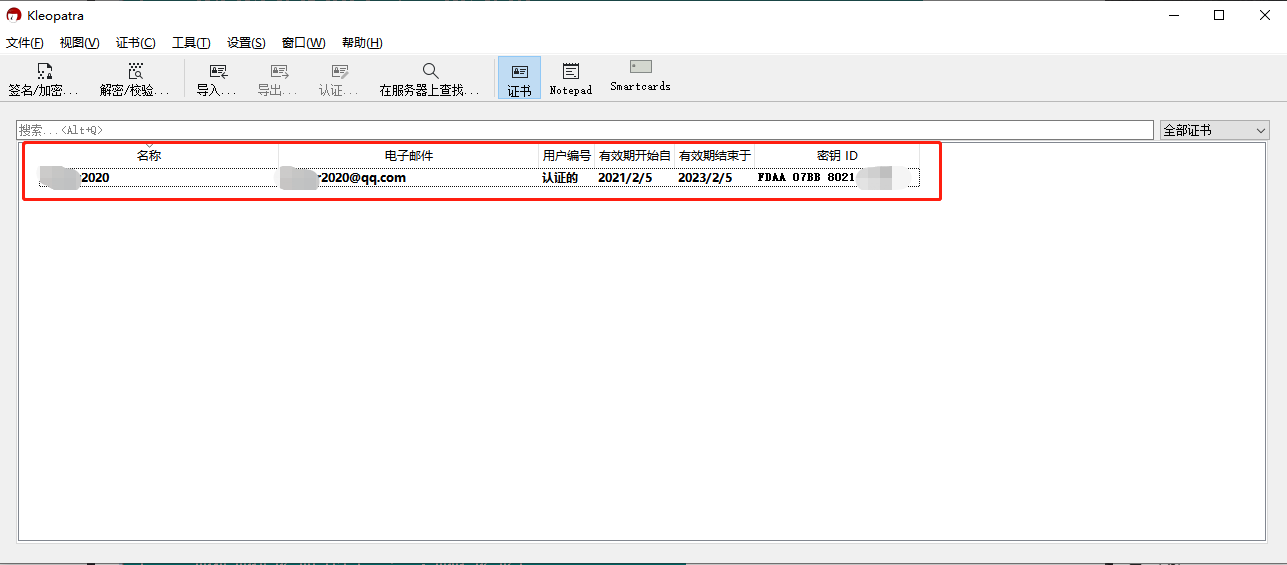
回到主界面可以看到已经增加了一条,生成的key为密钥id下方的数字
那我们再说一下cmd命令行生成
gpg --gen-key
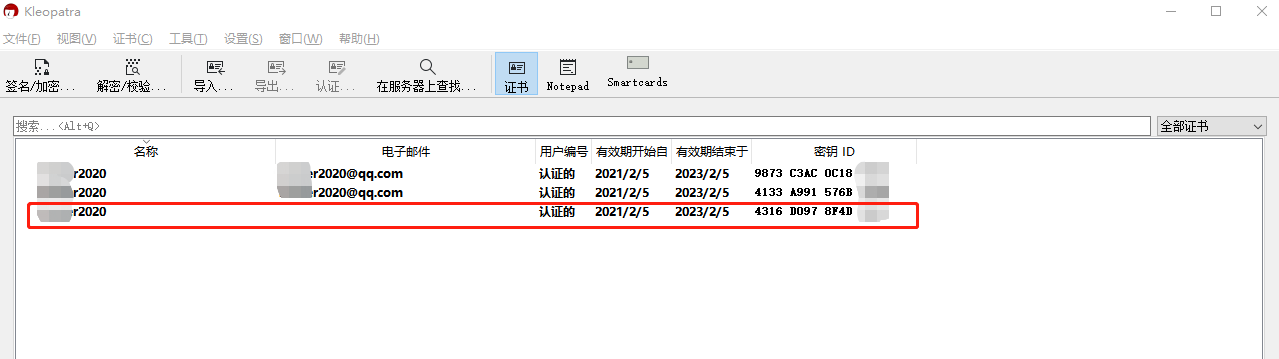
也是输入信息,输入O进行生成,生成之后也可以在管理端进行查看

五、GPG公钥上传至公共密钥服务器
这里是通过公共的密钥服务器来验证jar包
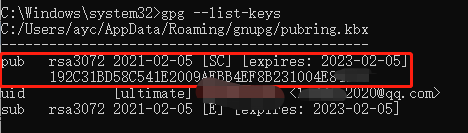
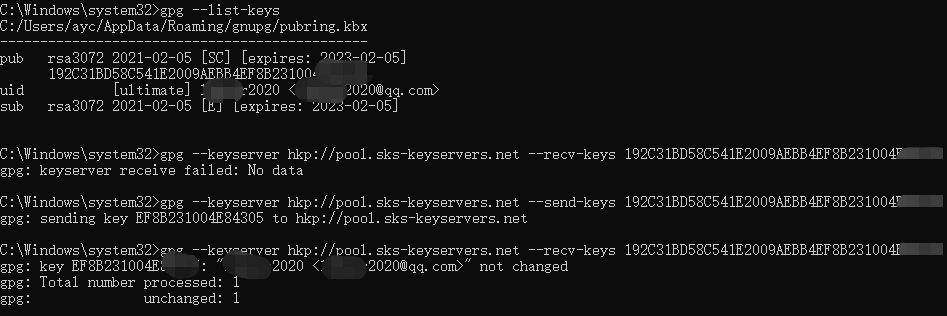
在cmd输入:gpg --list-key查询一下公钥
发布密钥
gpg --keyserver hkp://pool.sks-keyservers.net --send-keys + 公钥或者key
查询是否成功
gpg --keyserver hkp://pool.sks-keyservers.net --recv-keys + 公钥或者key
六、配置文件修改
- 先修改maven的setting.xml的配置,在
标签下增加如下信息
<servers>
<!-- server
| Specifies the authentication information to use when connecting to a particular server, identified by
| a unique name within the system (referred to by the 'id' attribute below).
|
| NOTE: You should either specify username/password OR privateKey/passphrase, since these pairings are
| used together.
|
-->
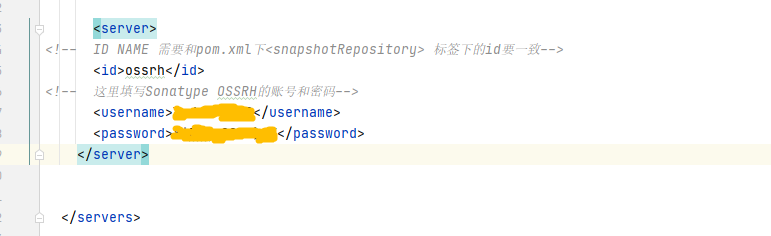
<server>
<!-- ID NAME 需要和pom.xml下<snapshotRepository> 标签下的id要一致-->
<id>ossrh</id>
<!-- 这里填写Sonatype OSSRH的账号和密码-->
<username>username</username>
<password>password</password>
</server>
</servers>
- 再修改一下pom.xml
Sonatype对pom要求还挺多的
官方对于pom的要求解释,javadoc,签名规范等等
官方描述:https://central.sonatype.org/pages/requirements.html
官方demo地址:https://bitbucket.org/simpligility/ossrh-pipeline-demo/src/master/pom.xml
这里我们下拆开说几个部分
6.1 项目命名以及描述

    <!-- 项目信息 -->
    <!--groupId需要为Sonatype的groupId-->
    <groupId> com.github.2020 </groupId>
    <artifactId>name</artifactId>
    <version>3.0.0</version>
    <!--快照版本-->
    <version>3.0.0-SNAPSHOT</version>
    <!--正式版本-->
    <!--<version>3.0.0-RELEASE</version>-->
    <packaging>jar</packaging>
        <name>${project.groupId}:${project.artifactId}</name>
    <description>To introduce classes in the Java project POM</description>
    <url>https://github.com/2020/2020</url>
6.2 许可证信息

开源选择的证书,我这里是MIT
    <!-- 许可证信息 -->
    <licenses>
        <!-- Apache许可证 -->
        <!--        <license>-->
        <!--            <name>The Apache Software License, Version 2.0</name>-->
        <!--            <url>http://www.apache.org/licenses/LICENSE-2.0.txt</url>-->
        <!--        </license>-->
        <!-- MIT许可证 -->
        <license>
            <name>MIT License</name>
            <url>http://www.opensource.org/licenses/mit-license.php</url>
        </license>
    </licenses>
6.3 开发者信息
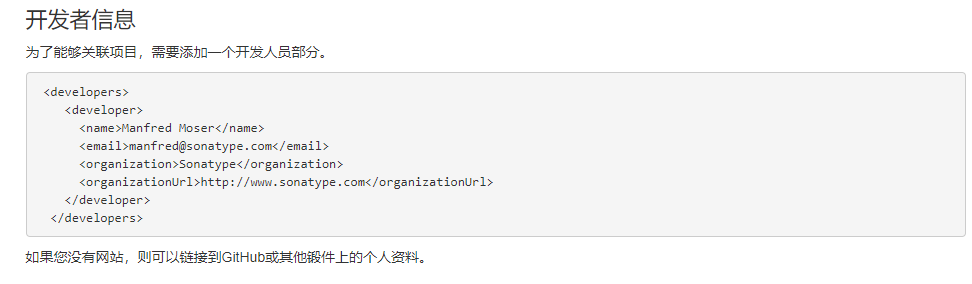
    <!-- 开发者信息 -->
    <developers>
        <developer>
            <name>2020</name>
            <email>2020@qq.com</email>
            <url>https://github.com/2020</url>
        </developer>
    </developers>
6.4 scm信息
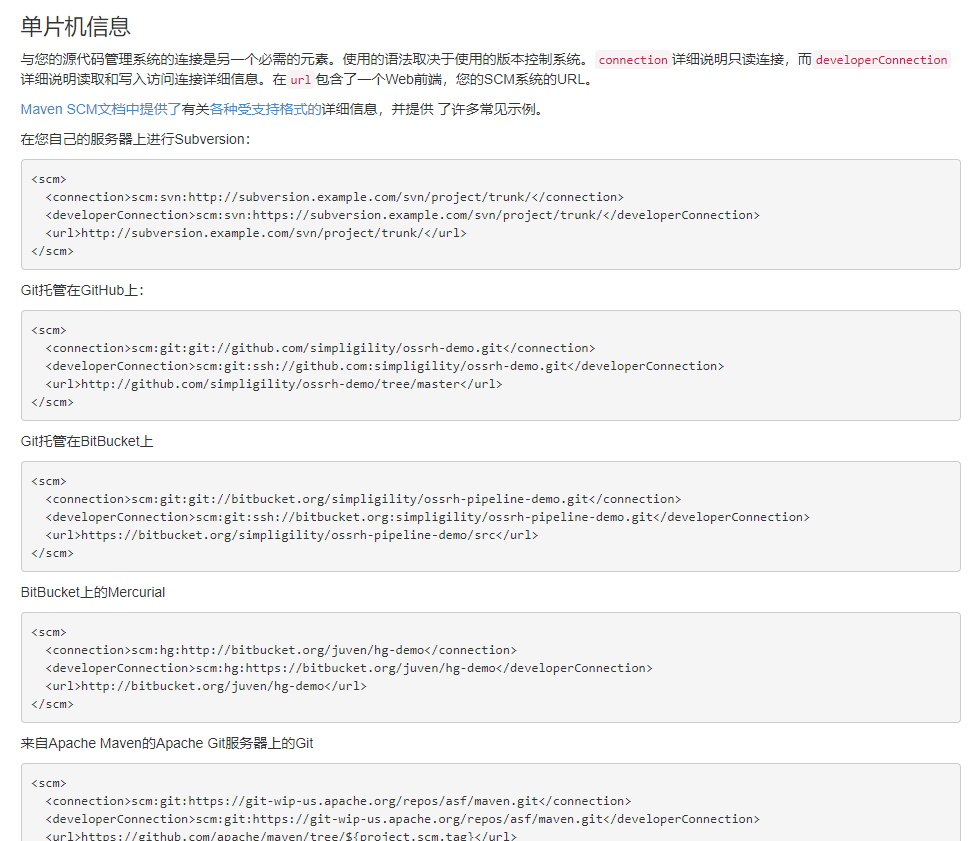
可以理解为托管信息,我这里是github,所以以此举例
    <!-- SCM信息 -> git在github上托管 -->
    <scm>
        <connection>scm:git:git://github.com/Ladder2020/JLadder.git</connection>
        <developerConnection>scm:git:ssh://github.com/Ladder2020/JLadder.git</developerConnection>
        <url>https://github.com/Ladder2020/JLadder.git</url>
    </scm>
6.5 插件
使用个人资料:由于生成javadoc和源jar以及使用GPG签署组件是一个相当耗时的过程,因此这些执行通常与正常的构建配置隔离并移动到配置文件中。然后,在通过激活配置文件执行部署时,将使用此配置文件。
<build>
      <plugins>
            <plugin>
                <groupId>org.apache.maven.plugins</groupId>
                <artifactId>maven-source-plugin</artifactId>
                <version>2.2.1</version>
                <executions>
                    <execution>
                        <id>attach-sources</id>
                        <goals>
                            <goal>jar-no-fork</goal>
                        </goals>
                    </execution>
                </executions>
            </plugin>
            <plugin>
                <groupId>org.apache.maven.plugins</groupId>
                <artifactId>maven-javadoc-plugin</artifactId>
                <version>2.9.1</version>
                <executions>
                    <execution>
                        <id>attach-javadocs</id>
                        <goals>
                            <goal>jar</goal>
                        </goals>
                    </execution>
                </executions>
            </plugin>
            <!--  必须配置GPG插件用于使用以下配置对组件进行签名 -->
            <plugin>
                <groupId>org.apache.maven.plugins</groupId>
                <artifactId>maven-gpg-plugin</artifactId>
                <version>1.5</version>
                <executions>
                    <execution>
                        <id>sign-artifacts</id>
                        <phase>verify</phase>
                        <goals>
                            <goal>sign</goal>
                        </goals>
                    </execution>
                </executions>
            </plugin>
        </plugins>
</build>
6.6 上传地址以及账户信息
    <distributionManagement>
        <snapshotRepository>
            <id>ossrh</id>
            <url>https://oss.sonatype.org/content/repositories/snapshots</url>
        </snapshotRepository>
        <repository>
            <id>ossrh</id>
            <url>https://oss.sonatype.org/service/local/staging/deploy/maven2/</url>
        </repository>
    </distributionManagement>
6.7 注意点
这里有几个特别需要注意的地方

那么想要正式发布的话需要改成
还有在6.6的地方的id需要和setting.xml的id需要一致不然会出现Authorization failed for 403 Forbidden或者Authorization failed for 401 Forbidden
6.8 完整pom.xml
<?xml version="1.0" encoding="UTF-8"?>
<project xmlns="http://maven.apache.org/POM/4.0.0"
         xmlns:xsi="http://www.w3.org/2001/XMLSchema-instance"
         xsi:schemaLocation="http://maven.apache.org/POM/4.0.0 http://maven.apache.org/xsd/maven-4.0.0.xsd">
    <modelVersion>4.0.0</modelVersion>
<!--    <groupId>com.2020</groupId>-->
<!--    groupId需要为Sonatype的groupId-->
    <groupId> com.github.2020 </groupId>
    <artifactId>2020</artifactId>
    <version>3.0.0</version>
<!--    快照版本-->
<!--    <version>3.0.0-SNAPSHOT</version>-->
<!--    正式版本-->
<!--    <version>3.0.0-RELEASE</version>-->
    <packaging>jar</packaging>
        <name>${project.groupId}:${project.artifactId}</name>
<!--    <name>2020</name>-->
    <description>To introduce classes in the Java project POM</description>
    <url>https://github.com/2020/2020</url>
    <!-- 许可证信息 -->
    <licenses>
        <!-- Apache许可证 -->
        <!--        <license>-->
        <!--            <name>The Apache Software License, Version 2.0</name>-->
        <!--            <url>http://www.apache.org/licenses/LICENSE-2.0.txt</url>-->
        <!--        </license>-->
        <!-- MIT许可证 -->
        <license>
            <name>MIT License</name>
            <url>http://www.opensource.org/licenses/mit-license.php</url>
        </license>
    </licenses>

    <!-- SCM信息 ->  -->
    <scm>
        <connection>scm:git:git://github.com/2020/2020.git</connection>
        <developerConnection>scm:git:ssh://github.com/2020/2020.git</developerConnection>
        <url>https://github.com/2020/2020.git</url>
    </scm>
    <!-- 开发者信息 -->
    <developers>
        <developer>
            <name>2020</name>
            <email>2020@qq.com</email>
            <url>https://github.com/2020</url>
        </developer>
    </developers>
    <build>
        <plugins>
            <plugin>
                <groupId>org.apache.maven.plugins</groupId>
                <artifactId>maven-surefire-plugin</artifactId>
                <configuration>
                    <testFailureIgnore>true</testFailureIgnore>
                </configuration>
            </plugin>
            <plugin>
                <groupId>org.apache.maven.plugins</groupId>
                <artifactId>maven-compiler-plugin</artifactId>
                <configuration>
                    <source>1.8</source>
                    <target>1.8</target>
                    <compilerArguments>
                        <verbose/>
                        <bootclasspath>${java.home}/lib/rt.jar${path.separator}${java.home}/lib/jce.jar</bootclasspath>
                        <extdirs>${project.basedir}/src/main/webapp/WEB-INF/lib</extdirs>
                    </compilerArguments>
                </configuration>
            </plugin>
            <plugin>
                <groupId>org.apache.maven.plugins</groupId>
                <artifactId>maven-source-plugin</artifactId>
                <version>2.2.1</version>
                <executions>
                    <execution>
                        <id>attach-sources</id>
                        <goals>
                            <goal>jar-no-fork</goal>
                        </goals>
                    </execution>
                </executions>
            </plugin>
            <plugin>
                <groupId>org.apache.maven.plugins</groupId>
                <artifactId>maven-javadoc-plugin</artifactId>
                <version>2.9.1</version>
                <executions>
                    <execution>
                        <id>attach-javadocs</id>
                        <goals>
                            <goal>jar</goal>
                        </goals>
                    </execution>
                </executions>
            </plugin>
            <!--  必须配置GPG插件用于使用以下配置对组件进行签名 -->
            <plugin>
                <groupId>org.apache.maven.plugins</groupId>
                <artifactId>maven-gpg-plugin</artifactId>
                <version>1.5</version>
                <executions>
                    <execution>
                        <id>sign-artifacts</id>
                        <phase>verify</phase>
                        <goals>
                            <goal>sign</goal>
                        </goals>
                    </execution>
                </executions>
            </plugin>
        </plugins>
    </build>
    <repositories>
    </repositories>
    <pluginRepositories>
        <pluginRepository>
            <id>public</id>
            <name>aliyun nexus</name>
            <url>http://maven.aliyun.com/nexus/content/groups/public/</url>
            <releases>
                <enabled>true</enabled>
            </releases>
            <snapshots>
                <enabled>false</enabled>
            </snapshots>
        </pluginRepository>
    </pluginRepositories>
    <distributionManagement>
        <snapshotRepository>
            <id>ossrh</id>
            <url>https://oss.sonatype.org/content/repositories/snapshots</url>
        </snapshotRepository>
        <repository>
            <id>ossrh</id>
            <url>https://oss.sonatype.org/service/local/staging/deploy/maven2/</url>
        </repository>
    </distributionManagement>


</project>
七、上传jar包到maven中央仓库
接下来到最后一步,进行Maven的上传
因为之前也搭建过maven私服,所以这里比较熟悉,
我这里打包上传演示环境为idea下
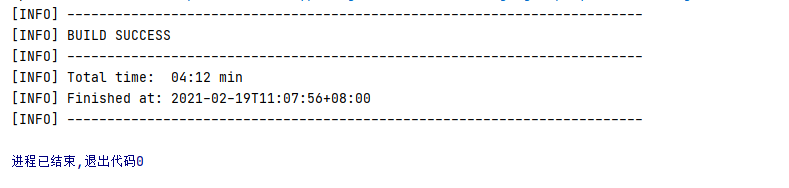
右侧maven下先进行clean,然后在进行deploy构建上传

直到显示BUILD SUCCESS则显示成功
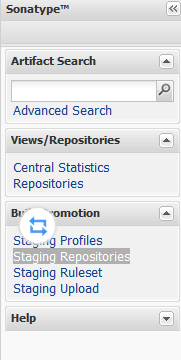
然后我们去oss上进行查看是否上传成功https://oss.sonatype.org/#welcome查找一下
接下来点击左侧菜单Staging Repositories进行同步
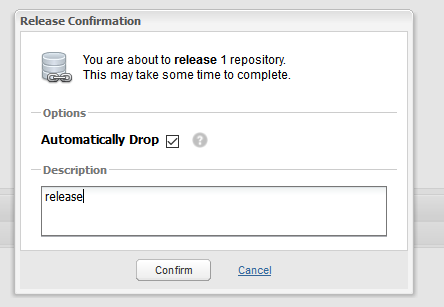
选中项目点击close,进行状态关闭

过了几分钟状态会变成close,之后我们点击Release,填入信息进行提交

提交成功进行等待,然后去https://search.maven.org或者https://mvnrepository.com等中央仓库进行查询你的项目
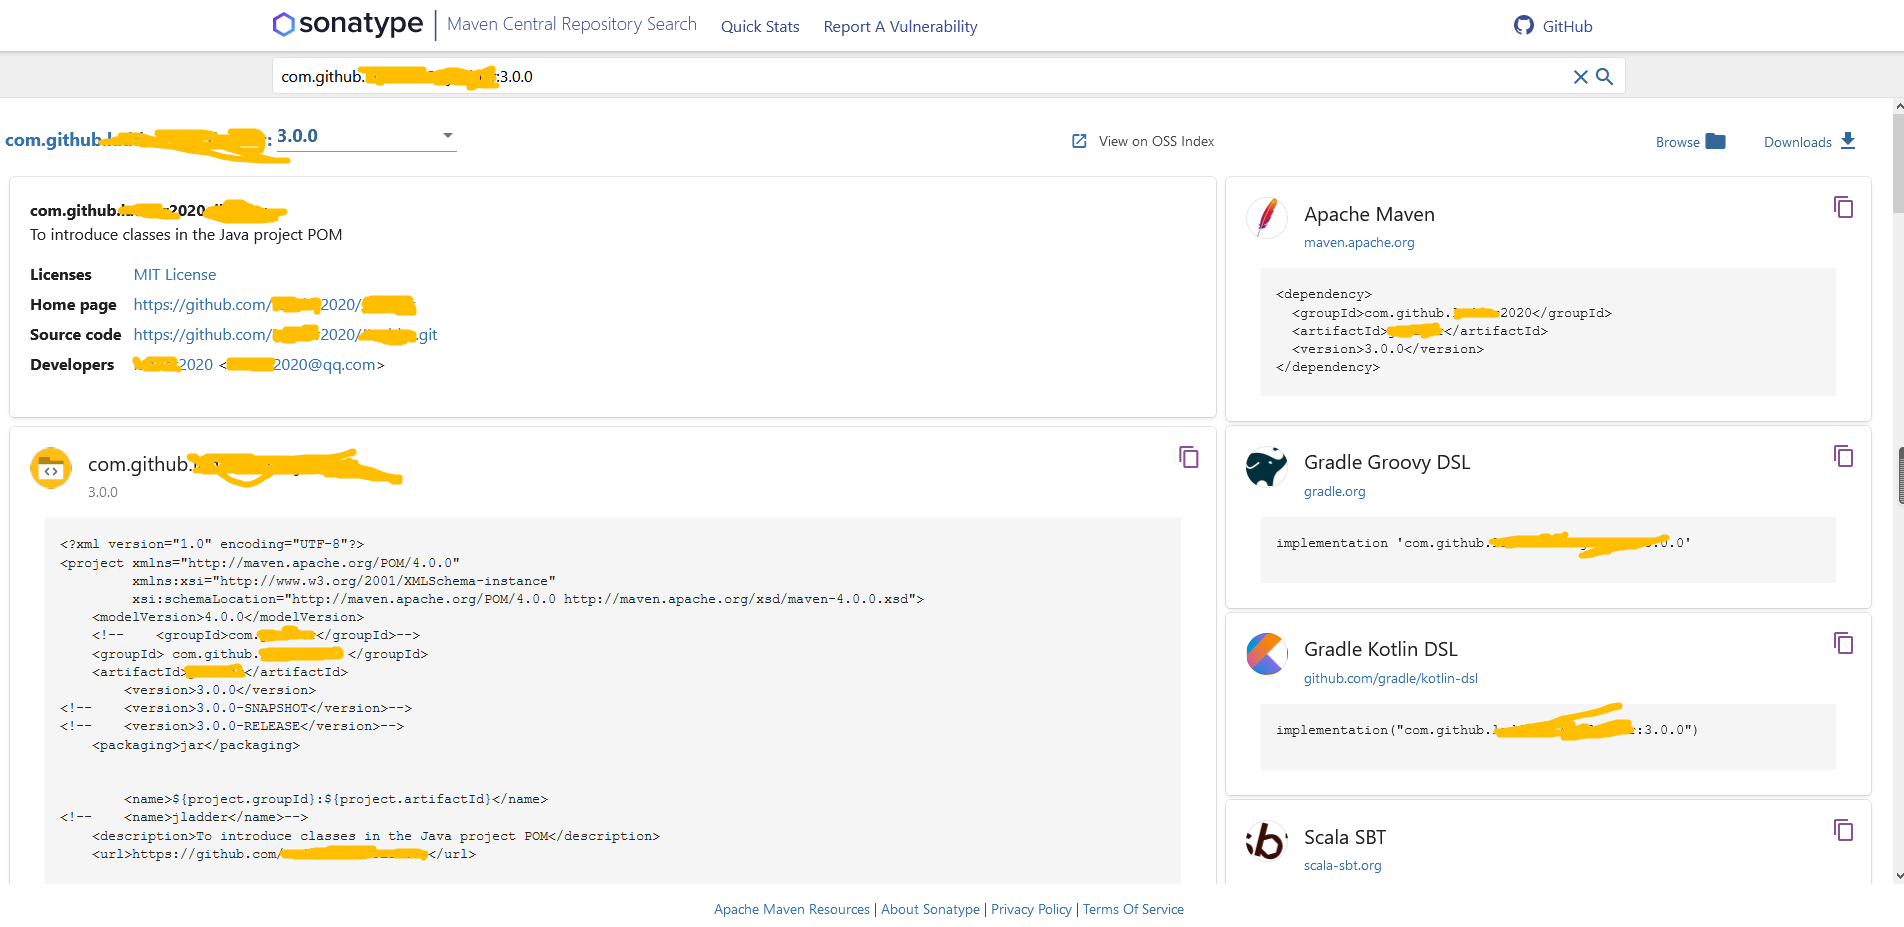

可以看到已经成功上传
然后在我们的项目引用下试试
        <dependency>
            <groupId>com.gitbub.2020</groupId>
            <artifactId>2020</artifactId>
            <version>3.0.0</version>
            <scope>compile</scope>
        </dependency>
我这里就完全ok啦
参考文章:https://blog.csdn.net/qq_38225558/article/details/94381467