算法具体应用
import numpy as np
import matplotlib.pyplot as plt
import matplotlib
from sklearn import datasets
加载手写数据集
digits = datasets.load_digits() #加载手写数据集

手写数据集共有5620个样本,每个样本有64个特征,为手写数据集的像素点,其样本的结果为0-9的手写数字,其数据集描述如下:
样本结构:
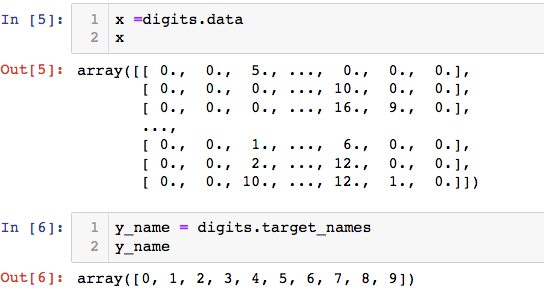
数据可视化,查看某个样本的特征和结果:
x =digits.data
y = digits.target
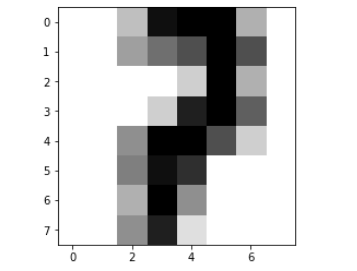
# 数据集中第222个样本
some_digit = x[222]
#一个手写数字有64个特征,将一维数组的特征变为8*8的矩阵
some_digit_image = some_digit.reshape(8, 8)
plt.imshow(some_digit_image, cmap=matplotlib.cm.binary)
plt.show()
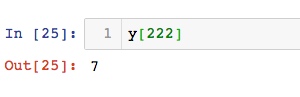
查看此数据的结果:
封装之前的代码,实现手写数据集的预测
定义K近邻算法(KNN.py):
import numpy as np
from math import sqrt
from collections import Counter


class KNNClassifier:
	"""docstring for KNNClassifier"""
	def __init__(self, k):
		"""初始化KNN分类器"""
		assert k >= 1, 'k must be valid'
		self.k = k
		self._x_train = None
		self._y_train = None

	def fit(self, _x_train, _y_train):
		"""根据训练数据集训练KNN分类器"""
		self._x_train = _x_train
		self._y_train = _y_train
		# 返回对象本身(高级操作)
		return self

	def predict(self,x_predict):
		"""给定待测试的数据集x_predict,返回结果向量"""
		assert self._x_train is not None and self._y_train is not None,
			"must fit before predict!"
		assert self._x_train.shape[0] == self._y_train.shape[0],
			"the size of x_train must equal to the size of y_train"
		assert self._x_train.shape[1] == x_predict.shape[1],
			"the feature number of x must be equal to x_train"

		y_predict = [self._predict(x) for x in x_predict]
		return np.array(y_predict)

	def _predict(self, x):
		"""给定单个的待测数据x,返回x的预测结果"""
		assert self._x_train.shape[1] == x.shape[0],
			"the feature number of x must be equal to x_train"
		#求出一个预测的数据 和 每个数据集的距离,是一个无序列表
		distances = [sqrt(np.sum((x_train -x) ** 2)) for x_train in self._x_train]

		#根据索引排序
		nearest = np.argsort(distances)

		#找出距离此新样本最近的k个原始样本的结果
		topK_y = [self._y_train[i] for i in nearest[:self.k]]

		#统计数组中的元素,及它出现的次数
		votes = Counter(topK_y)
		#找到票数最多的n个元素 ,按票数从多到少 排序 [(元素,票数)]
		return votes.most_common()[0][0]

	def __repr__(self):
		return 'KNN(k=%d)'%self.k
定义模型选择库(model_selection.py)
import numpy as np

#训练 测试数据集分离
def train_test_split(x, y, test_ratio=0.2, seed=None):
	assert x.shape[0] == y.shape[0],
		"the size of x must be equal to the size of y"
	assert 0.0 <= test_ratio <= 1.0,
		"test_ratio must be valid"

	if seed:
		np.random.seed(seed)

	shuffle_index = np.random.permutation(len(x))

	test_size = int(len(x) * test_ratio)

	test_index = shuffle_index[:test_size]
	train_index = shuffle_index[test_size:]

	x_train = x[train_index]
	x_test = x[test_index]
	y_train = y[train_index]
	y_test = y[test_index]

	return x_train, x_test, y_train, y_test
使用自己封装的库:
from mylib.model_selection import train_test_split
from mylib.KNN import KNNClassifier

x_train,x_test,y_train,y_test = train_test_split(x, y,test_ratio=0.2)
my_clf = KNNClassifier(k=3)
my_clf.fit(x_train,y_train)

y_predict = my_clf.predict(x_test)
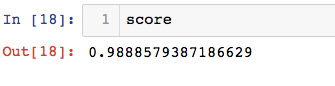
验证算法的准确率:
score = numpy.sum(y_predict==y_test)/len(y_test)
封装,实现解耦:
# metrics.py   (metrics 意为衡量标准)
import numpy
import math

def accuracy_score(y_true, y_predict):
	'''计算准确率'''
	assert y_true.shape[0] == y_predict.shape[0],
		"size of y_true must be equal to the size of y_predict"

	return numpy.sum(y_true == y_predict)/len(y_true)

# KNN.py	 添加求准确率方法
from .metrics import accuracy_score

def score(self,x_test,y_test):
    y_predict = self.predict(x_test)
    return accuracy_score(y_test, y_predict)