1. vue-cli 构建项目
# 全局安装 vue-cli $ npm install --global vue-clif
# 创建一个基于 webpack 模板的新项目 $ vue init webpack your-project-name
# 安装依赖 $ npm install
# 进入项目 $ cd your-project-name
# 开发版本打包并运行 $ npm run dev
# 线上环境整个项目打包 生成 dist 可以直接部署到服务器上的文件夹 npm run build
2. 项目模板中使用 less 方法
首先安装 less 和 less-loader ,在项目目录下运行如下命令
# npm安装
$ npm install less less-loader --save-dev
# 或者使用 yarn
$ yarn add less less-loader --dev
- 安装成功后,打开
build/webpack.base.conf.js,在 module.exports = 的对象的 module.rules 后面添加一段:
module.exports = {
    //  此处省略无数行,已有的的其他的内容
    module: {
        rules: [
          //  此处省略无数行,已有的的其他的规则
          {
            test: /.less$/,
            loader: "style-loader!css-loader!less-loader",
          }
        ]
    }
}
- 最后在代码中的 style 标签中 加上 lang="less" 属性即可
<style scoped lang="less">

</style>
3. 在 router 下的路由文件里设置格式,将页面上路由中默认显示的 #/ 给去掉
const router = new VueRouter({
  mode: 'hash',
  routes
});
// 去掉路由中自带的 #/ 这种东西
  mode: 'history',
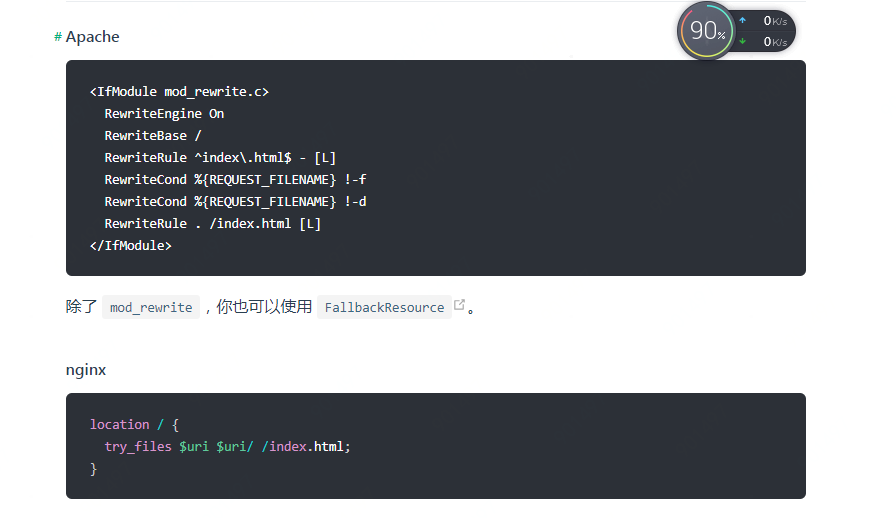
- 需要注意的是使用了
history之后需要在服务器部署时增加一些配置,具体方法插件下面官方写的配置方法
文档链接 https://router.vuejs.org/zh/guide/essentials/history-mode.html#%E5%90%8E%E7%AB%AF%E9%85%8D%E7%BD%AE%E4%BE%8B%E5%AD%90
4. 引入 jquery
- 安装
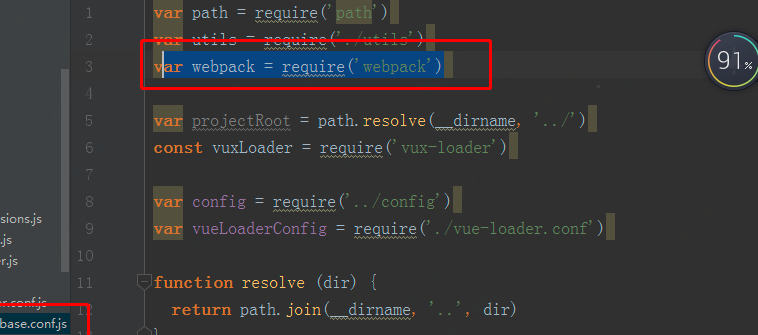
npm install jquery --save // 先在顶部引入 webpack const webpack = require('webpack')
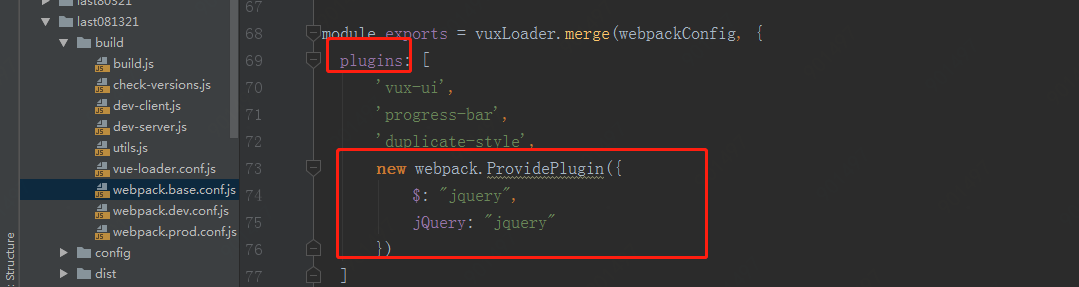
// plugins 中添加
new webpack.ProvidePlugin({ 'window.jQuery': 'jquery', // 为了兼容其他的插件 jQuery: 'jquery', $: 'jquery' })
main.js中
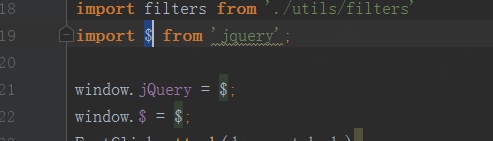
或者
main.js中

5、:class 使用表达式
:class="{'想要改变的类名': 判断条件}/
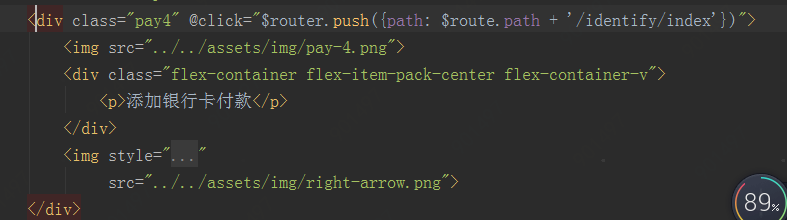
6. vue-router 单页之间如何在 js 中跳转
// 字符串 this.$router.push('/home/first')
// 对象 this.$router.push({ path: '/home/first' })
// 命名的路由 this.$router.push({ name: 'home', params: { userId: wise }})
this.$router.push({
    path: '/setPayPwd',
    query: {
        forgetPassword: 1
    }
})

行内
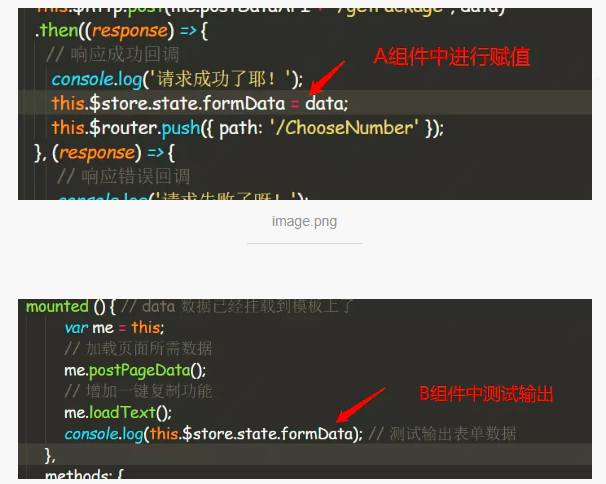
7. vuex 实现组件之间数据的传递
npm install vuex --save
- 在 src 文件夹中新建一个 stroe 文件夹,并在目录下新建一个 index.js 文件(已有的话请忽略),index.js 文件编辑如下
import Vue from 'vue';
import Vuex from 'vuex';

Vue.use(Vuex);

let store = new Vuex.Store({
    state: {
        formData: {} // 企业提交数据表单对象
    }
});

export default store;

在main.js实例化对象时中添加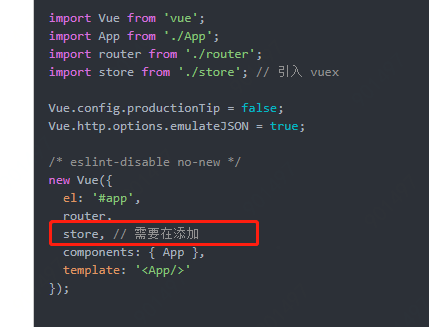
8. 通过 watch 动态的监测路由跳转(跳转时)和 APP.vue 中设置 created 方法实时监测 path (刷新时),来实现 header 文字的改变
- header.vue
watch: {
    '$route' (to, from) {
        // 检测路由改变 header 内容
        if (to.name === 'Index') {
            this.$store.state.PageTitle = '预约领号';
            this.$store.state.isShowBack = false;
        } else if (to.name === 'PreferentialDescription') {
            this.$store.state.PageTitle = '优惠说明';
            this.$store.state.isShowBack = true;
        } else if (to.name === 'RuleIntroduction') {
            this.$store.state.PageTitle = '规则简介';
            this.$store.state.isShowBack = true;
        } else if (to.name === 'ReservationSuccess') {
            this.$store.state.PageTitle = '预约排号';
            this.$store.state.isShowBack = true;
        }
    }
  }
9. 给 vue 挂载全局方法
- 找到
main.js文件进行编辑,这里以axios为例演示
import Vue  from 'vue'
import  axios from 'axios'

Vue.prototype.axios = axios
- 使用方法 某个
.vue文件的sccript中如下编辑
Vue.axios.post('url', { name: '' })
.then(response => {
  console.log(response)
})
.catch(response => {
  console.log(response)
})