一、jpa中添加自定义方法
- http://blog.csdn.net/qq_23660243/article/details/43194465
二、案例
1.3 引入jpa依赖
<dependencies>
        <!-- 除去logback支持 -->
        <dependency>
            <groupId>org.springframework.boot</groupId>
            <artifactId>spring-boot-starter-web</artifactId>
            <exclusions>
                <exclusion>
                    <groupId>org.springframework.boot</groupId>
                    <artifactId>spring-boot-starter-logging</artifactId>
                </exclusion>
            </exclusions>
        </dependency>

        <dependency>
            <groupId>org.springframework.boot</groupId>
            <artifactId>spring-boot-starter-test</artifactId>
            <scope>test</scope>
        </dependency>
        <!-- 使用log4j2,该包paren标签中已经依赖 -->
        <dependency>
            <groupId>org.springframework.boot</groupId>
            <artifactId>spring-boot-starter-log4j2</artifactId>
        </dependency>

        <dependency>
            <groupId>org.springframework.boot</groupId>
            <artifactId>spring-boot-devtools</artifactId>
        </dependency>

        <!-- 引入freemarker包 -->
        <dependency>
            <groupId>org.springframework.boot</groupId>
            <artifactId>spring-boot-starter-freemarker</artifactId>
        </dependency>

        <dependency>
            <groupId>org.apache.tomcat.embed</groupId>
            <artifactId>tomcat-embed-jasper</artifactId>
            <scope>provided</scope>
        </dependency>

        <dependency>
            <groupId>javax.servlet</groupId>
            <artifactId>jstl</artifactId>
        </dependency>

        <!-- 数据库 -->
        <dependency>
            <groupId>org.springframework.boot</groupId>
            <artifactId>spring-boot-starter-data-jpa</artifactId>
        </dependency>
        <dependency>
            <groupId>mysql</groupId>
            <artifactId>mysql-connector-java</artifactId>
            <scope>runtime</scope>
        </dependency>
    </dependencies>
1.2 编写application.properties
#主配置文件,配置了这个会优先读取里面的属性覆盖主配置文件的属性
spring.profiles.active=dev
server.port=8888

logging.config=classpath:log4j2-dev.xml
spring.mvc.view.prefix: /WEB-INF/templates/
spring.mvc.view.suffix: .jsp

#数据库连接配置
spring.datasource.url=jdbc:mysql://localhost/db_boot?useUnicode=true&characterEncoding=utf-8
spring.datasource.username=root
spring.datasource.password=
spring.datasource.driver-class-name=com.mysql.jdbc.Driver

spring.jpa.generate-ddl=true
spring.jpa.show-sql=true
1.3 生成表数据
package com.shyroke.entity;

import java.io.Serializable;

import javax.persistence.Column;
import javax.persistence.Entity;
import javax.persistence.GeneratedValue;
import javax.persistence.Id;
import javax.persistence.Table;

@Entity
@Table(name="user")
public class UserBean implements Serializable {

    @Id
    @GeneratedValue
    private Integer id;
    @Column
    private String userName;
    @Column
    private String passWord;

    public Integer getId() {
        return id;
    }

    public void setId(Integer id) {
        this.id = id;
    }

    public String getUserName() {
        return userName;
    }

    public void setUserName(String userName) {
        this.userName = userName;
    }

    public String getPassWord() {
        return passWord;
    }

    public void setPassWord(String passWord) {
        this.passWord = passWord;
    }

    @Override
    public String toString() {
        return "UserBean [id=" + id + ", userName=" + userName + ", passWord=" + passWord + "]";
    }
}
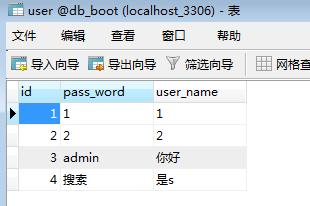
- 执行下面代码,就会在数据库中生成相应的表结构,然后插入一些测试数据。
package com.shyroke;

import org.springframework.boot.SpringApplication;
import org.springframework.boot.autoconfigure.SpringBootApplication;
import org.springframework.boot.web.servlet.FilterRegistrationBean;
import org.springframework.boot.web.servlet.ServletListenerRegistrationBean;
import org.springframework.boot.web.servlet.ServletRegistrationBean;
import org.springframework.context.annotation.Bean;

import util.MyFilter;
import util.MyListener;
import util.MyServlet;

@SpringBootApplication
public class Springboot01Application {

    public static void main(String[] args) {
        SpringApplication.run(Springboot01Application.class, args);
    }
}
1.4 编写控制器
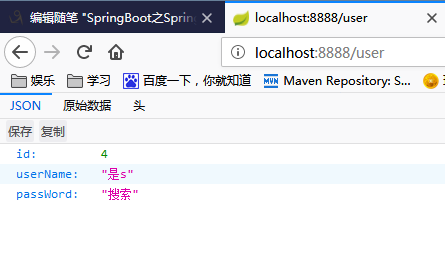
package com.shyroke.controller;

import java.util.List;

import org.springframework.beans.factory.annotation.Autowired;
import org.springframework.stereotype.Controller;
import org.springframework.web.bind.annotation.RequestMapping;
import org.springframework.web.bind.annotation.ResponseBody;

import com.shyroke.dao.UserMapper;
import com.shyroke.entity.UserBean;

@Controller
@RequestMapping(value = "/")
public class IndexController {

    @Autowired
    private UserMapper userMapper;

    @RequestMapping(value="index")
    public String index() {
        return "index";
    }

    @RequestMapping()
    public String index2() {
        return "index";
    }

    @ResponseBody
    @RequestMapping(value="/user")
    public UserBean list() {
        List<UserBean> userList=userMapper.findAll();
        for(UserBean user:userList) {
            System.out.println(user);
        }

        System.out.println("========================");

        UserBean user=userMapper.findOne(4);


        return user;
    }
}
1.5 编写mapper
package com.shyroke.dao;

import org.springframework.data.jpa.repository.JpaRepository;

import com.shyroke.entity.UserBean;

public interface UserMapper extends JpaRepository<UserBean, Integer>{

}
1.6 测试