爬虫 (WebSpider)
所谓爬虫,就是把互联网看成一张网,而爬虫就行蜘蛛一样在网上想收集猎物一样收集互联网中我们想要的信息。
Python 访问互联网
使用Python编写一只爬虫,先解决的问题访问互联网。
urllib模块:URL 简单理解网页的地址;lib是Library(库)的缩写。
URL 详解
URL的格式:protocol://hostname[port]/path/[;parameters][? query]#fragment. 如: http://www.google.com
URL 主要由三部分组成:
(1)协议,如http,https等等
(2)服务器域名(DNS)或者IP地址,[port]端口号,没有指定时使用默认端口号
(3)主机资源的具体地址
urllib包
下面是帮助文档说明:
urllib is a package that collects several modules for working with URLs:
urllib.request :for opening and reading URLs
urllib.error : containing the exceptions raised by urllib.request
urllib.parse : for parsing URLs
urllib.robotparser : for parsing robots.txt files
Python爬虫捉取的内容以utf-8编码的bytes对象。
可以通过解码将其变成Unicode编码格式的内容。
题外话-编码
计算机只懂0,1,确定给我们展示各种各样的语言就是因为有了编码。
ASCII编码,使用一个字节存储了大小写的字母,数字和符号。
当世界上其他非英语国家使用时就遇到了问题,比如中国汉字,不是26个字母组成的,一个字节的编码也无法组成那么多的汉字,于是就出现GB2312编码,用于汉字编码。
日文的编码:shift_JIS
韩文的编码:Euc-kr
…..
为了解决不同的编码方式带来的问题,就出现Unicode编码。它想要创造一个足够大能够包含世界上所有语言的编码标准,这样就不会出现冲突了。然而有利必有弊,Unicode编码方式浪费存储空间。为了解决这个问题,针对不同的需求有不同的实现标准。比如UTF-8, 当文本可以由ASCII编码时,使用一个字节存放。其他格式的编码通过算法换算每个字符使用1-3个字节存放。
看一个小栗子:
>>> import urllib.request
>>> response = urllib.request.urlopen("https://www.baidu.com")
>>> html = response.read()
>>> print(html)
b'<html>

<head>

	<script>

		location.replace(location.href.replace("https://","http://"));

	</script>

</head>

<body>

	<noscript><meta http-equiv="refresh" content="0;url=http://www.baidu.com/"></noscript>

</body>

</html>'上面的代码打印出来的内容中有一个b’表示该内容是由utf-8编码的bytes对象。解码为Unicode编码形式:
>>> html = html.decode("utf-8")
>>> print(html)
<html>

<head>

    <script>

        location.replace(location.href.replace("https://","http://"));

    </script>

</head>

<body>

    <noscript><meta http-equiv="refresh" content="0;url=http://www.baidu.com/"></noscript>

</body>

</html>
这就是我们在浏览器中右键点击审查元素看到了代码。
urllib.request.urlopen 解释
对上面的代码解释:
urllib.request.urlopen(url, data=None, [timeout, ]*, cafile=None, capath=None, cadefault=False, context=None) 用于打开一个URL。
参数:
url,url可以是一个字符串,如”http://www.baidu.com“, 还可以是一个Requst 对象,如下:
>>> req = urllib.request.Request("http://www.baidu.com")
>>> response = urllib.request.urlopen(req)
>>> html = response.read()
>>> html = html.decode("utf-8")
>>> print(html)
<!DOCTYPE html>
<!--STATUS OK-->
...
data,一定得是一个能提供具体说明额外数据的对象,不需要发送这个额外的数据默认为None;
Timeout,可选参数,指定一个连接超时的时间
context, 如果该参数指定了,那么这个参数必须是一个ssl.SSLContext实例。
cafile 和 capath指定一系列HTTPS请求时受信任的CA证书。
cadefault参数可以被忽略。
该函数返回一个可以像context manger一样工作的对象,有一下方法:
- geturl() 返回一个url
- info() return the meta-information of the page, such as headers, in the form of an email.message_from_string() instance
- getcode() 返回HTTP状态码
查看网页请求
打开百度翻译:https://fanyi.baidu.com/
输入translate
等翻译完成后点击右键->查看元素
点击网络
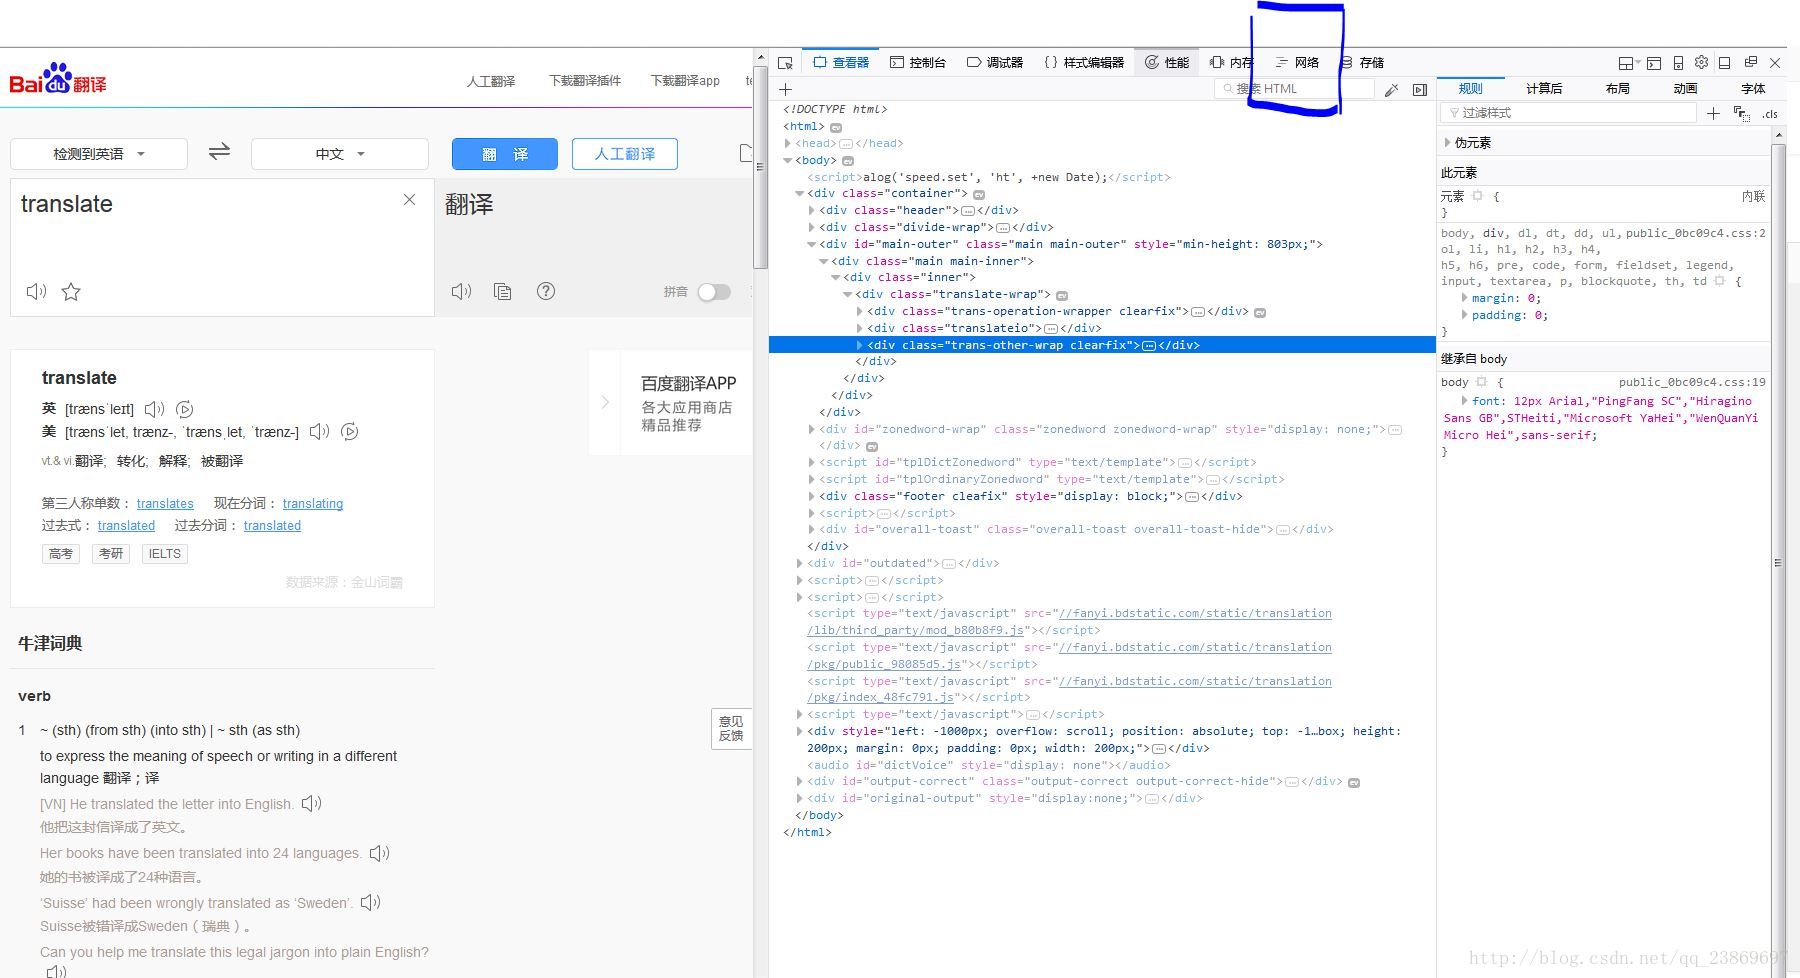
我的firefox语言是中文版的,有点尴尬。
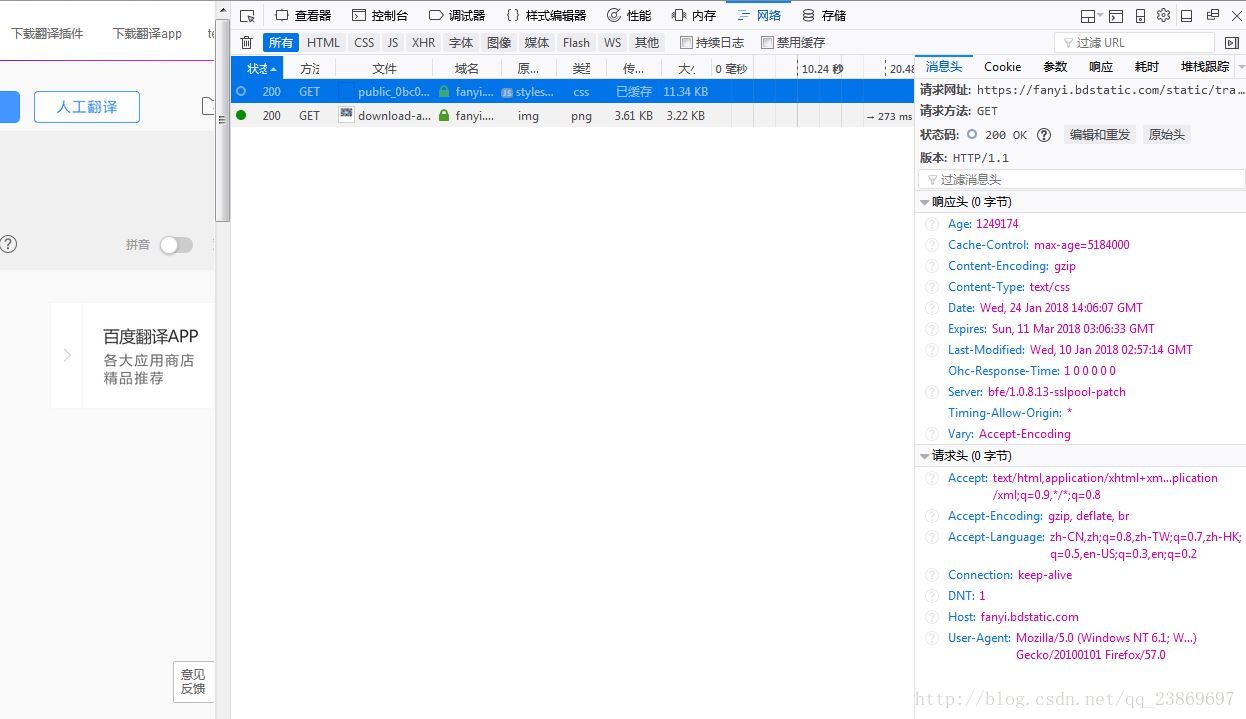
Request URL (请求地址):https://fanyi.bdstatic.com/static/translation/pkg/public_0bc09c4.css
Request Methoe (请求方法):GET
Status Code(状态码):200 OK
Response Headers(请求头)
服务器常常根据请求头判断请求是否是来自“非人类”。一般通过这里的User-Agent识别,但是这个User-Agent能被自定义。
User-Agent的修改
上文提到User-Agent能够被修改,下面看看怎么修改。
官方帮助文档上面的说明:
headers should be a dictionary, and will be treated as if add_header() was called with each key and value as arguments. This is often used to “poof” the User-Agent header value, which is used by a browser to identify itself-some HTTP servers only allow requests coming from common browsers as opposed to scripts. For example, Mozilla Firefox may identify itself as “Mozilla/5.0 (X11; U; Linux i686) Gecko/20071127 Firefox/2.0.0.11”, while urllib’s default user agent string is “Python-urllib/2.6” (on Python 2.6).
import urllib.request
import urllib.parse
import json
url = "https://fanyi.baidu.com/"
data = {}
data['type']='AUTO'
data['i']="translate"
data['doctype']='json'
data['xmlVersion']='1.6'
data['keyfrom']='fanyi.wen'
data['ue']='1.6'
data['typoResult']='true'
data=urllib.parse.urlencode(data).encode('utf-8')
response = urllib.request.urlopen(url,data)
html = response.read().decode('utf-8')
target = json.loads(html)
print(html)
两种添加方法:实例化时将headers参数传递进去;通过add_header()方法向Request对象添加headers.
当通过修改User-Agent使服务器不拒绝访问时第一步,当在短时间内访问的次数过多时,服务器会认为是爬虫。兵来将挡水来土掩,我们减小访问的频率是其中一种解决方法,通常叫延迟提交时间,另外一种方法是使用代理。
有力有弊,使用延迟提交数据的方式带来了另外一个问题,程序工作效率低。
使用代理
访问服务器时,通过别人的IP地址去访问,并把访问的数据转发给你。
使用代理的步骤:
(1)proxy_support)=urllib.request.ProxyHandler({})
参数是字典,键是代理的类型,值是IP和端口,如‘http’:’211.233.234.45:80’
(2)opener = urllib.request.build_opener(proxy_support)
使用build_opener()创建一个私人定制的opener
(3)urllib.request.install_opener(opener)
将定制好opener通过install_opener()安装到系统代替默认的opener
如果不想代替,使用opener.open()
import urllib.request
url = 'https://www.whatismyip.com'
proxy_support = urllib.request.ProxyHandler({'http':'122.245.58.221:80'})
opener = urllib.request.build_opener(proxy_support)
urllib.request.install_opener(opener)
response = urllib.request.urlopen(url)
html = response.read().decode('utf-8')
print(html)
读书笔记 清华出版社《零基础入门学习Python》只用于交流学习