在做一个私人项目的时候需要用到在线富文本编辑器,多方寻觅后选定百度的ueditor,不过,竟然不支持nodeJS后台。
查!
找很多博客,很多教程,最后捋了一个自认为还算清晰的思路来。
以独立小demo将知识点总结如下:
材料:
1.一张用来装编辑器的html页面
2.一个ueditor完整包(官方有php包、ASP包。Java包,随便下载一个),注意,有的包可能目录结构会是ueditor==>utf8==>.....,最好将utf8下面的内容直接复制到ueditor内
3.本地项目安装ueditor模块(此ueditor跟2里面说的不一样,是一个依赖包)
第一步:创建一个项目(略)
第二步:
1.创建服务
2.使用使用body-parser模块解析post请求(主要图片和文件上传)
3.设置入口页面(默认加载ueditor.html)
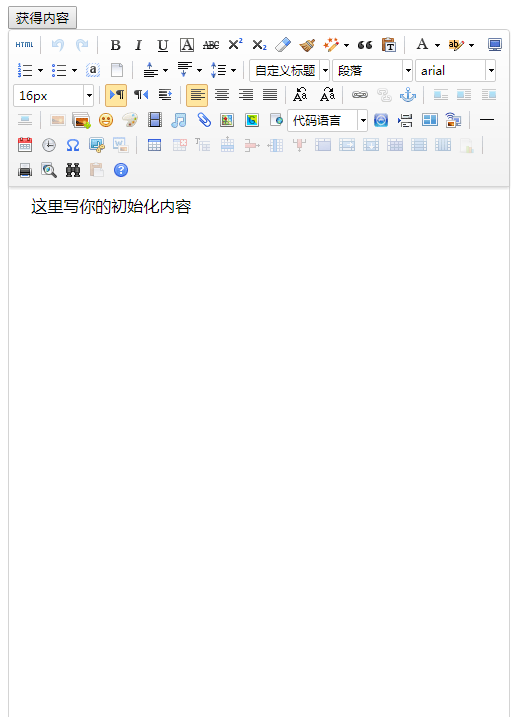
这样,就能看到ueditor界面了:
//引入express
var express=require('express');
//初始化APP
var app=express();
//监听端口
app.listen(3333,function () {
    console.log('服务启动');
});
//引入path模块
var path=require('path');
//引入body-parser处理前台post请求
var bodyParser=require('body-parser');
//设置body-parser中间件
app.use(bodyParser.urlencoded({extended:true}));
//解析body-parser
app.use(bodyParser.json());
//设置静态目录
app.use(express.static(path.join(__dirname,'../lib')));
//设置入口页面
app.get('/',function (req,res) {
    res.sendFile(path.join(__dirname,'../ueditor.html'));
});
界面如下:
但是会出现一个问题:此时因为ueditor包不支持node的原因,所以会报错提示图片上传不可用,事实也如此
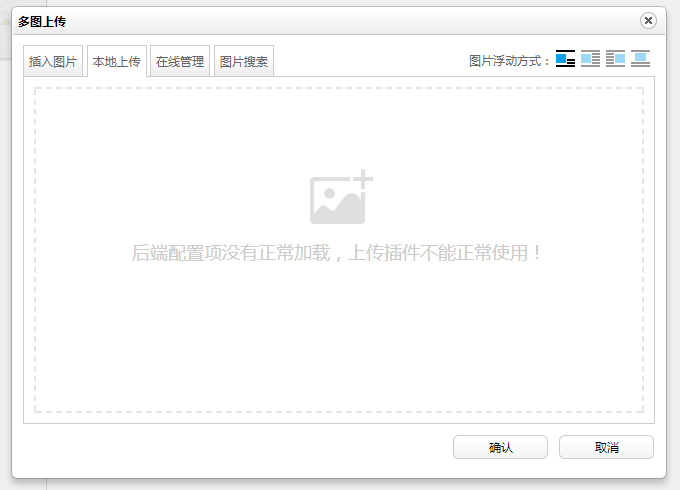
所以还需要更改一些原有的配置。
首先,更改ueditor文件夹中的ueditor.config.js文件,内部有一句设置根目录的代码:

将其更改为:

解释一下:ueditor.config.js文件里这句代码上方有说明,此处是设置编辑器资源文件根目录(比如以localhost:8080/为参照路径,ueditor在整个网站所处的位置),说白了这个地方就是设置ueditor文件包根目录。我设置为“/ueditor/”的理由是,最开始我将http://localhost/lib设置成为了静态文件夹目录,而ueditor存放的位置为lib之下,所以我可以这样设置。
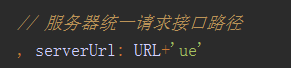
其次,需要更改后台处理图片和文件上传的接口:
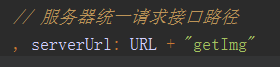
将借口修改为我自己的接口:getImg
到这里,config的配置算是修改完成了,接下来就是处理路由了
1.首先引入ueditor模块
2.在中间件设置ueditor后台的请求处理
其中第2步:在node_modules目录(npm安装模块的目录)下找到ueditor模块,在其中有一个app.js文件,将文件内app.use的中间件设置代码拷贝到controller后台文件中即可,稍后做一些简单的修改和设置。
前两步代码如下:
//引入express
var express=require('express');
//初始化APP
var app=express();
//监听端口
app.listen(3333,function () {
    console.log('服务启动');
});
//引入path模块
var path=require('path');
//引入body-parser处理前台post请求
var bodyParser=require('body-parser');
//设置body-parser中间件
app.use(bodyParser.urlencoded({extended:true}));
//解析body-parser
app.use(bodyParser.json());
//设置静态目录
app.use(express.static(path.join(__dirname,'../lib')));
/*针对ueditor的处理*/
//引入ueditor模块
var ueditor=require('ueditor');
//设置中间件处理ueditor的后台请求
app.use("/ueditor/getImg", ueditor(path.join(__dirname, '../lib'), function (req, res, next) {
    //客户端上传文件设置
    var imgDir = '/images/ueditor/'
    var ActionType = req.query.action;
    if (ActionType === 'uploadimage' || ActionType === 'uploadfile' || ActionType === 'uploadvideo') {
        var file_url = imgDir;//默认图片上传地址
        /*其他上传格式的地址*/
        if (ActionType === 'uploadfile') {
            file_url = '/file/ueditor/'; //附件
        }
        if (ActionType === 'uploadvideo') {
            file_url = '/video/ueditor/'; //视频
        }
        res.ue_up(file_url); //你只要输入要保存的地址 。保存操作交给ueditor来做
        res.setHeader('Content-Type', 'text/html');
    }
    //  客户端发起图片列表请求
    else if (req.query.action === 'listimage') {
        var dir_url = imgDir;
        res.ue_list(dir_url); // 客户端会列出 dir_url 目录下的所有图片
    }
    // 客户端发起其它请求
    else {
        // console.log('config.json')
        res.setHeader('Content-Type', 'application/json');
        res.redirect('/ueditor/nodejs/config.json');
    }
}));


//设置入口页面
app.get('/',function (req,res) {
    res.sendFile(path.join(__dirname,'../ueditor.html'));
});
说明一下:
1. 在设置ueditor中间件的时候,第一个参数【/ueditor/getImg】是指我们的图片上传请求路径,之所以是这个值的原因是ueditor.config.js文件中,我们对接口的设置为:
// 服务器统一请求接口路径
serverUrl: URL + "getImg"
而URL地址又是:
var URL = window.UEDITOR_HOME_URL || "/ueditor/";
那么,可以得知,serverURL完整体应该是:【http://localhost:8080/ueditor/getImg】
所以在当前设置的时候,我们的地址应该是【ueditor/getImg】
2.第二个参数【ueditor(path.join(__dirname, '../lib')】,是设置ueditor模块需要初始化的ueditor所处的位置(将原本的ueditor改变为可以支持nodejs的新版本,个人理解),那么此处的【../lib】即为ueditor相对于当前controller文件的位置,再加上【__dirname】当前目录路径即可获得准确的ueditor包的位置
3.回调中的images路径设置:
var imgDir = '/images/ueditor/'
这个路径定义了一个存放图片的目录,客户端上传的图片会存放在这个目录中,如果没有则自动创建,依然是以静态目录为根目录创建的(即相对lib),下面的文件、视频也一样。
4.最后,如果客户端发送其他的请求,那么就将图片文件上传的config配置信息返回回去,而原本的config信息存放位置可能不是我想要的,最好的办法是,在ueditor目录下创建一个nodejs目录,然后将php(后者ASP、Java)目录中的config.json文件拷贝进去,这样就可以了
做完这些,重启服务,会发现ueditor的图片上传功能就可以使用了。
完整代码如下:
/**
 * Created by admin on 2017/11/14.
 */
/*
var app=require('express')();
var cookieParser=require('cookie-parser');
//引用express-session用来控制session
var session=require('express-session');
//设置session中间件
app.use(session({
    secret:'drhn ued',   //与cookieParser中一致
    resave:true,        //(是否允许)当客户端并行发送多个请求时,其中一个请求在另一个请求结束时对session进行修改覆盖并保存。默认为true。但是(后续版本)有可能默认失效,所以最好手动添加。
    saveUninitialized:true  //初始化session时是否保存到存储。默认为true, 但是(后续版本)有可能默认失效,所以最好手动添加。
}));
app.listen('8181',function(){
    console.log('服务启动');
});
//设置cookie请求中间件
app.use(cookieParser('drhn ued'));
//设置当请求为根目录的时候操作cookie
app.get('/',function(req,res){
    // req.session.user={username:'谢某某'};
    console.log(req.session);
    // 检查session中的isVisit字段是否存在
    //如果存在则自增一次,如果不存在为session设置isVisit字段,并初始化1
    console.log(req.cookies);
    if(req.cookies.isVisit){
        var num=parseInt(req.cookies.isVisit);
        num+=1;
        console.log(typeof num);
        res.cookie('isVisit',num);
        res.send('欢迎您第:'+num+'次访问');
    }else{
        res.cookie('isVisit',1);
        res.send('欢迎第1次访问');
    }
});
app.get('/user',function(req,res){
    if(req.session.user){
        res.send('欢迎你'+req.session.user.username);
    }else{
        req.session.user={username:'谢某某'};
        res.send('欢迎登录');
    }

})*/

//引入express
var express=require('express');
//初始化APP
var app=express();
//监听端口
app.listen(3333,function () {
    console.log('服务启动');
});
//引入path模块
var path=require('path');
//引入body-parser处理前台post请求
var bodyParser=require('body-parser');
//设置body-parser中间件
app.use(bodyParser.urlencoded({extended:true}));
//解析body-parser
app.use(bodyParser.json());
//设置静态目录
app.use(express.static(path.join(__dirname,'../lib')));
/*针对ueditor的处理*/
//引入ueditor模块
var ueditor=require('ueditor');
//设置中间件处理ueditor的后台请求
app.use("/ueditor/getImg", ueditor(path.join(__dirname, '../lib'), function (req, res, next) {
    //客户端上传文件设置
    var imgDir = '/images/ueditor/'
    var ActionType = req.query.action;
    if (ActionType === 'uploadimage' || ActionType === 'uploadfile' || ActionType === 'uploadvideo') {
        var file_url = imgDir;//默认图片上传地址
        /*其他上传格式的地址*/
        if (ActionType === 'uploadfile') {
            file_url = '/file/ueditor/'; //附件
        }
        if (ActionType === 'uploadvideo') {
            file_url = '/video/ueditor/'; //视频
        }
        res.ue_up(file_url); //你只要输入要保存的地址 。保存操作交给ueditor来做
        res.setHeader('Content-Type', 'text/html');
    }
    //  客户端发起图片列表请求
    else if (req.query.action === 'listimage') {
        var dir_url = imgDir;
        res.ue_list(dir_url); // 客户端会列出 dir_url 目录下的所有图片
    }
    // 客户端发起其它请求
    else {
        // console.log('config.json')
        res.setHeader('Content-Type', 'application/json');
        res.redirect('/ueditor/nodejs/config.json');
    }
}));


//设置入口页面
app.get('/',function (req,res) {
    res.sendFile(path.join(__dirname,'../ueditor.html'));
});
效果如下:
