1、全局设置
setttings文件
import os
import sys

# Build paths inside the project like this: os.path.join(BASE_DIR, ...)
# 这里用到了python中一个神奇的变量"__file__", 这个变量可以获取到当前文件的路径(含文件名)
# 再来一个os.path.dirname()就是获得上一级目录
# "BASE_DIR"就是工程根目录
BASE_DIR = os.path.dirname(os.path.dirname(os.path.abspath(__file__)))

# 如果包含外部APP,Mark成Source Root后可能还需要添加如下配置,否则运行manage.py会报错No module named 'xx'
# "extraapps"是外部APP上级目录包(Mark成Source Root)
# sys.path.insert(0, os.path.join(BASE_DIR, 'extraapps'))

# Quick-start development settings - unsuitable for production
# See https://docs.djangoproject.com/en/1.11/howto/deployment/checklist/

# 产品密钥。创建Django项目时自动分配的产品密钥,请使用原自动分配的产品密钥替换此行!!
SECRET_KEY = 'ug4o-53gk-tuxn@@69g_jr8aqq%&e183kr=xw6reg7247&jam='

# 上线时必须将DEBUG设为False
DEBUG = True

# 可指定主机,若元素为'*',表示所有同一局域网内的网络均可访问
ALLOWED_HOSTS = ['localhost', '127.0.0.1']

# App加载
INSTALLED_APPS = [
    'django.contrib.admin',
    'django.contrib.auth',
    'django.contrib.contenttypes',
    'django.contrib.sessions',
    'django.contrib.messages',
    'django.contrib.staticfiles',
    # 'blog',                        # 我的APP

]

# 自定义的auth APP的User模型,继承抽象模型AbstractUser
# AUTH_USER_MODEL = 'appname.UserModelName'

# 自定义的用户登录验证类,继承ModelBackend类,重写authenticate()方法
# AUTHENTICATION_BACKENDS = ['apps.myuser.views.CustomBackend', ]

# 中间件
MIDDLEWARE = [
    'django.middleware.security.SecurityMiddleware',
    'django.contrib.sessions.middleware.SessionMiddleware',
    'django.middleware.common.CommonMiddleware',
    'django.middleware.csrf.CsrfViewMiddleware',
    'django.contrib.auth.middleware.AuthenticationMiddleware',
    'django.contrib.messages.middleware.MessageMiddleware',
    'django.middleware.clickjacking.XFrameOptionsMiddleware',
]

ROOT_URLCONF = 'firstapp.urls'  # 这里系统会自动生成,一般不需要修改。

TEMPLATES = [
    {
        'BACKEND': 'django.template.backends.django.DjangoTemplates',
        'DIRS': [],
        'APP_DIRS': True,
        'OPTIONS': {
            'context_processors': [
                'django.template.context_processors.debug',
                'django.template.context_processors.request',
                'django.contrib.auth.context_processors.auth',
                'django.contrib.messages.context_processors.messages',
            ],
        },
    },
]

WSGI_APPLICATION = 'firstapp.wsgi.application'  # 这里需要据实修改,系统会自动生成。

# 数据库设置,默认为sqlite
# https://docs.djangoproject.com/en/1.11/ref/settings/#databases
DATABASES = {
    'default': {
        'ENGINE': 'django.db.backends.sqlite3',
        'NAME': os.path.join(BASE_DIR, 'db.sqlite3'),
    }
}

# 用户验证
# https://docs.djangoproject.com/en/1.11/ref/settings/#auth-password-validators
AUTH_PASSWORD_VALIDATORS = [
    {
        'NAME': 'django.contrib.auth.password_validation.UserAttributeSimilarityValidator',
    },
    {
        'NAME': 'django.contrib.auth.password_validation.MinimumLengthValidator',
    },
    {
        'NAME': 'django.contrib.auth.password_validation.CommonPasswordValidator',
    },
    {
        'NAME': 'django.contrib.auth.password_validation.NumericPasswordValidator',
    },
]

# 国际化
# https://docs.djangoproject.com/en/1.11/topics/i18n/
LANGUAGE_CODE = 'en-us'  # 中文简体是'zh-hans',Admin后台管理系统的页面语言随之改变

# 本地时间
TIME_ZONE = 'Asia/Shanghai'
USE_I18N = True
USE_L10N = True
USE_TZ = False  # 若使用了本地时间,必须设为False!!(默认值True)

# 邮箱服务配置
EMAIL_HOST = 'xxx.com.cn'  # 发送者邮箱服务器
EMAIL_PORT = 25
EMAIL_HOST_USER = ''  # 发送者用户名(邮箱地址)
EMAIL_HOST_PASSWORD = ''  # 发送者密码
EMAIL_USE_SSL = False

# 静态文件配置 (CSS, JavaScript, Images)
# https://docs.djangoproject.com/en/1.11/howto/static-files/

# 静态文件的访问,用于程序中,如{{static '静态文件目录下的子路径'}}
STATIC_URL = '/static/'

# 静态文件的公用目录,但不能与STATIC_ROOT冲突!
STATICFILES_DIRS = [os.path.join(BASE_DIR, 'static')]

# 静态文件的生产环境根目录,当运行"python manage.py collectstatic"的时候,会将STATICFILES_DIRS以及各app中static的所有的文件复制收集到STATIC_ROOT
# 把这些文件放到一起是为了用Apache等上线部署的时候更方便
# 需要配置URL,如"url(r'^static/(?P<path>.*)$', serve, {'document_root': settings.STATIC_ROOT})"
# STATIC_ROOT = os.path.join(BASE_DIR, 'collectstatic').replace('\', '/')

# 媒体文件(用户上传的文件)配置
# 不能像静态文件那样调用,而是先配置"TEMPLATES"中的"context_processors"添加'django.template.context_processors.media';
# 然后配置URL,如"url(r'^media/(?P<path>.*)$', serve, {'document_root': settings.MEDIA_ROOT})";
# 调用示例:{{ MEDIA_URL }}{{ modelobj.fieldname }}
MEDIA_URL = '/media/'
MEDIA_ROOT = os.path.join(BASE_DIR, 'media').replace('\', '/')

# Django日志配置
# LOGGING = {
#     'version': 1,  # 指明dictConnfig的版本
#     'disable_existing_loggers': False,  # 禁用所有的已经存在的日志配置
#
#     # 格式器
#     'formatters': {
#         'standard': {  # 详细
#             'format': '
时间:[%(asctime)s]	级别:[%(levelname)s]	文件名:[%(filename)s]	方法:[%(funcName)s]	行数:[%(lineno)d]	日志消息:
[%(message)s]

------------------------------------------------------------',
#         },
#         'simple': {  # 简单
#             'format': '时间:%(asctime)s | %(levelname)s | %(message)s',
#         },
#     },
#
#     # 过滤器
#     'filters': {
#         'require_debug_true': {
#             '()': 'django.utils.log.RequireDebugTrue',
#         },
#     },
#
#     # 处理器,在这里定义了三个处理器
#     'handlers': {
#         'file_handler': {  # 文件处理器,所有高于(包括)level的消息会被保存到"filename"
#             'level': 'INFO',
#             'class': 'logging.FileHandler',
#             'formatter': 'standard',
#             'filename': 'E:/PythonProj/mydjsite/log/file.log',
#         },
#         'console': {  # 控制台处理器,所有的高于(包括)level的消息会被传到控制台,使用的是standard格式器
#             'level': 'INFO',
#             'class': 'logging.StreamHandler',
#             'formatter': 'standard',
#             # 'filters':['require_debug_true'],
#         },
#         'mail_admins': {  # AdminEmail处理器,所有高于(包括)而level的消息会被发送给站点管理员,使用的是standard格式器
#             'level': 'ERROR',
#             'class': 'django.utils.log.AdminEmailHandler',
#             'formatter': 'standard',
#             # 'filters': ['require_debug_true'],
#         },
#     },
#
#     # 记录器
#     'loggers': {
#         'django': {  # 使用file_handler处理器,所有高于(包括)level的消息会被发往file_handler和console处理器
#             'handlers': ['file_handler', 'console', 'mail_admins'],
#             'level': 'INFO',
#             'propagate': False,  # 是否继承父类的log信息
#         },
#         'django.request': {  # 记录与处理请求相关的消息。5XX错误被记录为ERROR消息;4XX错误记录为WARNING消息
#             'handlers': ['file_handler', 'console', 'mail_admins'],
#             'level': 'INFO',
#             'propagate': False,
#         },
#         'django.server': {  # 记录开发服务器下处理请求相关的消息。只用于开发阶段
#             'handlers': ['file_handler', 'console', 'mail_admins'],
#             'level': 'INFO',
#             'propagate': False,
#         },
#         'django.db.backends': {  # 与数据库交互的代码相关的消息
#             'handlers': ['file_handler', 'console', 'mail_admins'],
#             'level': 'INFO',
#             'propagate': False,
#         },
#         'myproject.custom': {  # 自定义处理器
#             'handlers': ['file_handler', 'console', 'mail_admins'],
#             'level': 'INFO',
#             'propagate': False,
#         },
#     }
# }

# 缓存配置,下方一般限开发者用
# 可以缓存于内存(locmem.LocMemCache)或文件(filebased.FileBasedCache)
CACHES = {
    'default': {
        'BACKEND': 'django.core.cache.backends.dummy.DummyCache',
    }
}

# 会话生存期设置,浏览器关闭,则会话失效(可能对Chrome浏览器无效)
# 在登录视图get请求中添加语句"request.session.set_expiry(0)",对Chrome会有效
SESSION_EXPIRE_AT_BROWSER_CLOSE = True
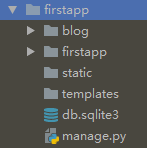
全局设置完成后,对应的db、templates、static路径系统都会认识或生成。
2、路由系统设置
urls文件
在一个project项目有多个app的情况下,我倾向于把urls单独于每个app,即:
urlpatterns = [
    url(r'^admin/', admin.site.urls),
    url(r'^blog/', include('blog.urls')),
]
上面就是把blog开头的url定向到blog.urls下面去解析:
from django.conf.urls import url
from . import views

urlpatterns = [
    url('^hello/', views.hello),
]
3、视图函数
# Create your views here.
from django.http import HttpResponse


def hello(request):
    return HttpResponse("Hello, world. You're at the index.")
4、访问URL
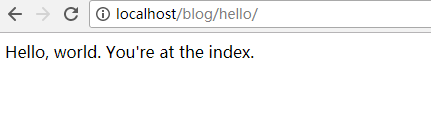
至此,一个基本的Django应用就跑起来了。
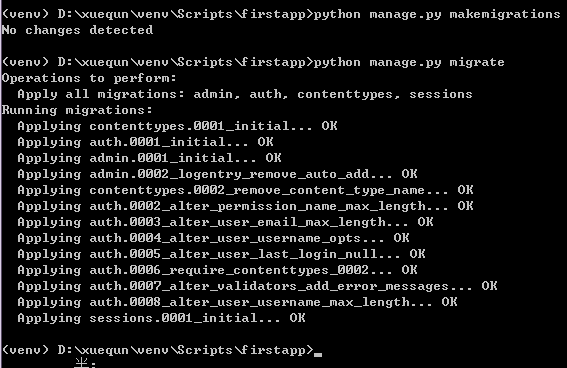
5、后台管理配置
创建管理员账号之前,我们必须先生存admin数据库。
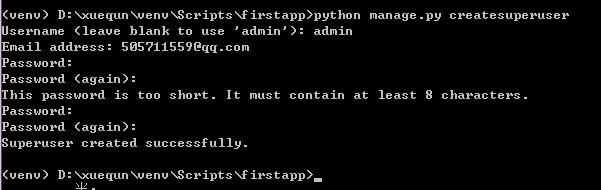
创建账号:
登录后台管理:
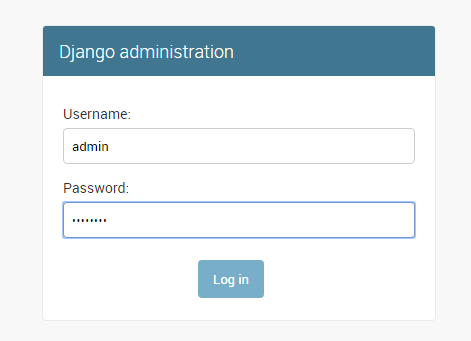

至此,后台管理完成。
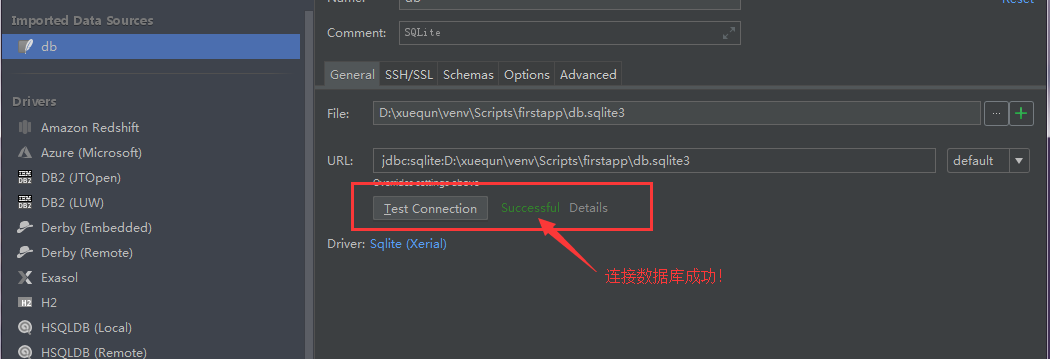
6、连接数据库设置
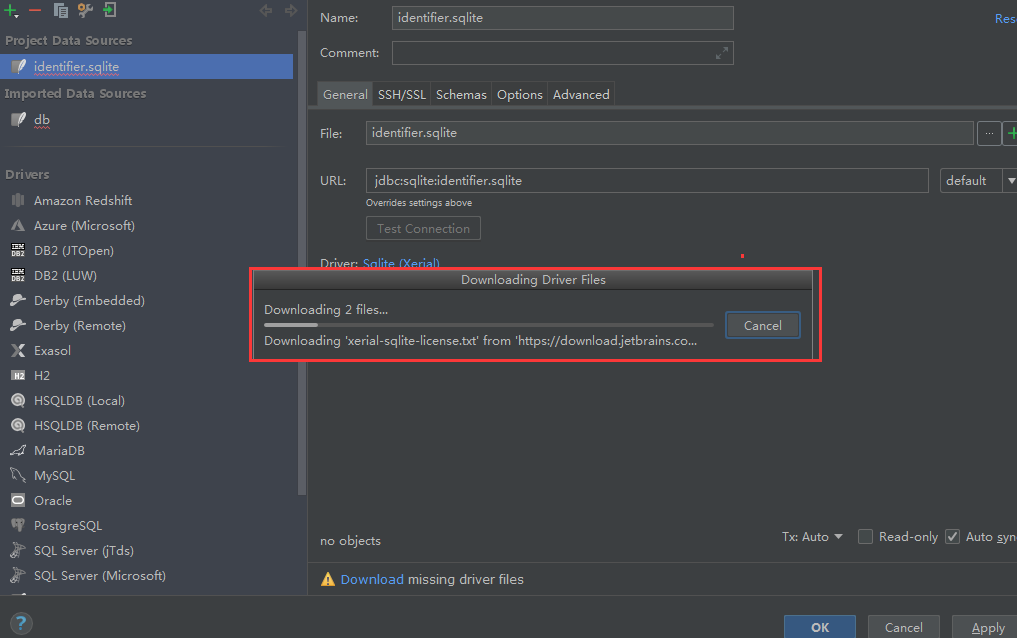
首先连接数据接时,会有错误:

产生这个错误的原因是缺少JDBC驱动文件,需要额外安装。

然后在pycharm页面点击数据库查看对应的表结构:
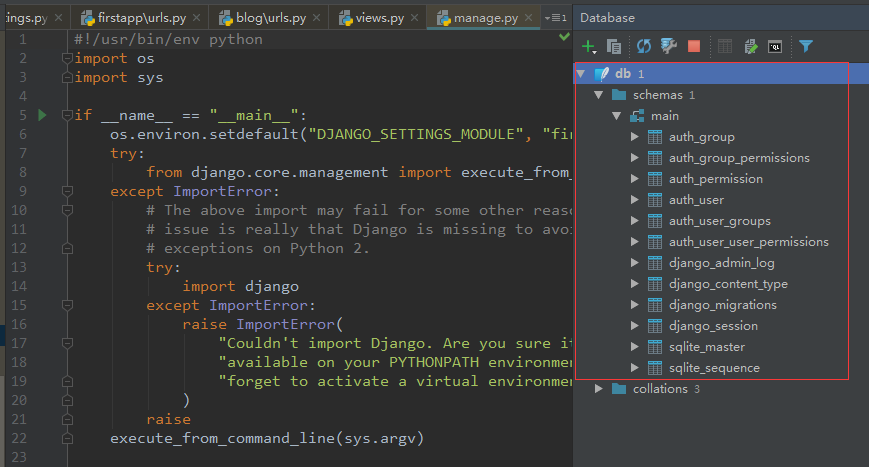
至此,数据库连接设置完成。