一点一点学习CCS,这次学习了如何自定义单选框,复选框以及开关。
一、单选框
1、先写好body里面的样式,先写几个框
 1 <body>
 2     <div class="radio-1">
 3         <input type="radio" name="radio-1" id="radio-1-1">
 4         <label for="radio-1-1"></label>
 5
 6         <input type="radio" name="radio-1" id="radio-1-2">
 7         <label for="radio-1-2"></label>
 8
 9         <input type="radio" name="radio-1" id="radio-1-3">
10         <label for="radio-1-3"></label>
11
12     </div>
13 </body>
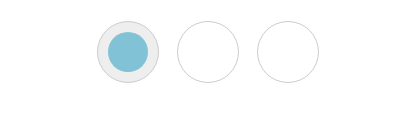
用input写好radio在旁边显示,这个label中的for 属性的值与控件 id 是一样的效果。这里在下面将label的样式如同按钮的样式编写
 1 <style type="text/css">
 2         .radio-1{
 3             width: 980px;
 4             margin: 0 auto;
 5             padding: 3% 0;
 6             text-align: center;
 7             font-size: 28px;
 8         }
 9
10         .radio-1 [type="radio"]{
11             display: none;
12
13         }
14         .radio-1 label{
15             display: inline-block;
16             position: relative;
17             width: 60px;
18             height: 60px;
19             border:1px solid #ccc;
20             background-color: #fff;
21             margin-right: 10px;
22             cursor: pointer;
23             border-radius: 100%
24         }
25         .radio-1 label:after{
26             content: '';
27             position: absolute;;
28             top: 10px;
29             left: 10px;
30             width: 40px;
31             height: 40px;
32             background-color: #81C2D6;
33             border-radius: 50%;
34             transform: scale(0);
35             /*transition: transfrom .2s ease-out;*/
36         }
37         .radio-1 [type="radio"]:checked + label{
38             background-color: #eee;
39             /*transition: background-color .2s  ease-in;*/
40         }
41         .radio-1 [type="radio"]:checked + label:after{
42             transform: scale(1);
43             /*transition: transfrom .2s ease-in;*/
44         }
45     </style>
.radio-1 [type="radio"]{
display: none;} 这个样式是把由该选择器中包含的radio都不让其显示,差不多就是隐藏的意思;
 打开有惊喜
打开有惊喜二、复选框
 1 .checkbox-1{
 2              980px;
 3             margin:0 auto;
 4             text-align:center;
 5             padding: 3% 0;
 6             background-color:#9cc;
 7         }
 8         .checkbox-1 [type="checkbox"]{
 9             display: none;
10
11         }
12         .checkbox-1 label{
13             display: inline-block;
14              10px;
15             height: 10px;
16             padding: 9px;
17             border:1px #ccc solid;
18             background-color: #fff;
19             color: #333;
20             margin-right: 10px;
21             overflow: hidden ;
22             position: relative;
23             cursor: pointer;
24         }
25         .checkbox-1 label:after{
26             content: 'A';
27             font-family: Arial;
28             color: #fff;
29             background-color: #999;
30              26px;
31             height: 26px;
32             line-height: 26px;
33             position: absolute;;
34             left: 1px;
35             top: 1px;
36             border-radius: 4px;
37             text-align: center;
38             transform: translateY(-30px);
39             transition: transform .2s ease-out;
40
41         }
42         .checkbox-1 [type="checkbox"]:checked +label:after{
43             transform: translateY(0);
44             transition: transform .2s ease-in;
45         }
第一个基本样式是设置整体背景,第二样式是将input隐藏掉,只显示出写的label。因为for 属性相当与id属性所以label 所对应的也是input的输入值,在label样式,设置其display为内嵌式,同时设置其长宽,背景颜色以及长宽,当你点击按钮的时候的checked则将after的内容改变位置,本身在label中就设置了超过label设置的长宽的东西都会被隐藏,而一开始after中的东西拜访的位置就往上移动一定距离,当点击后,则修改样式中的translate,即改变其位移,回到原来的位置。
 1 <div class="checkbox-1">
 2         <input type="checkbox" checked="checked" name="checkbox-1" id="checkbox-1-1">
 3         <label for="checkbox-1-1"></label>
 4
 5         <input type="checkbox" name="checkbox-1" id="checkbox-1-2">
 6         <label for="checkbox-1-2"></label>
 7
 8         <input type="checkbox" name="checkbox-1" id="checkbox-1-3">
 9         <label for="checkbox-1-3"></label>
10
11     </div>

三、开关
 1 .checkbox-2 [type="checkbox"]{
 2             display: none;
 3         }
 4         .checkbox-2{
 5              980px;
 6             margin:0 auto;
 7             text-align:center;
 8             padding: 3% 0;
 9             background-color:#fc9;
10         }
11         .checkbox-2 label{
12             display: inline-block;
13              68px;
14             height:34px;
15             border:1px solid #eee;
16             border-radius: 18px;
17             background-color: #fafafa;
18             margin-right: 10px;
19             cursor: pointer;
20             position: relative;
21             transition: background-color .1s ease-in;
22         }
23         .checkbox-2 label:after{
24             content: '';
25             position: absolute;
26             left: 1px;
27             top:1px;
28              30px;
29             height: 30px;
30             border:1px solid #eee;
31             border-radius: 50%;
32             background-color: #fff;
33             transition: left .1s ease-out;
34         }
35         .checkbox-2 [type="checkbox"]:checked +label{
36             background-color: #3c6;
37             transition: background-color .1s ease-in;
38
39         }
40         .checkbox-2 [type="checkbox"]:checked +label:after{
41             left: 35px;
42             transition: left .1s ease-out;
43
44         }
在label 中先把背景设置好,基础的背景,一个椭圆,在after中设置一个小圆圈,设置好背景颜色,在点击该开关后,将该小圆圈向左移动,同时将该背景颜色更改为绿色。
 1 <div class="checkbox-2">
 2         <input type="checkbox" checked="checked" name="checkbox-1" id="checkbox-2-1">
 3         <label for="checkbox-2-1"></label>
 4
 5         <input type="checkbox" name="checkbox-1" id="checkbox-2-2">
 6         <label for="checkbox-2-2"></label>
 7
 8         <input type="checkbox" name="checkbox-2" id="checkbox-2-3">
 9         <label for="checkbox-2-3"></label>
10
11     </div>

打开有惊喜