私有镜像仓库Harbor
1、Harbor概述
Habor是由VMWare公司开源的容器镜像仓库。事实上,Habor是在Docker Registry上进行了相应的企业级扩展,从而获得了更加广泛的应用,这些新的企业级特性包括:管理用户界面,基于角色的访问控制 ,AD/LDAP集成以及审计日志等,足以满足基本企业需求。
官方地址:https://vmware.github.io/harbor/cn/
各组件功能如下:
harbor-adminserver:配置管理中心
harbor-dbMysql:数据库
harbor-jobservice:负责镜像复制
harbor-log:记录操作日志
harbor-ui:Web管理页面和API
nginx:前端代理,负责前端页面和镜像上传/下载转发
redis:会话
registry:镜像存储
2、harbor部署
Harbor安装有3种方式:
- 在线安装:从Docker Hub下载Harbor相关镜像,因此安装软件包非常小
- 离线安装:安装包包含部署的相关镜像,因此安装包比较大
- OVA安装程序:当用户具有vCenter环境时,使用此安装程序,在部署OVA后启动Harbor
本文记录通过离线安装的方式部署。
版本说明:
docker-compose:1.24.0
harbor:1.7.5
2.1、安装docker-compose
$ curl -L "https://github.com/docker/compose/releases/download/1.24.0/docker-compose-$(uname -s)-$(uname -m)" -o /usr/local/bin/docker-compose
$ chmod +x /usr/local/bin/docker-compose
2.2、安装harbor
$ tar zxvf harbor-offline-installer-v1.7.5.tgz -C /usr/local
$ cd /usr/local/harbor
$ vim harbor.cfg
hostname = 192.168.10.10
ui_url_protocol = http
harbor_admin_password = Harbor12345
$ ./prepare
$ ./install.sh
2.3、配置https
上面步骤2.2已经可以满足harbor作为实验安装,但是大多数情况我们需要harbor能够更为安全一些,harbor的一些新的功能特性也在新版本更新说明中有相应说明,例如此1.7.5版本就额外具备着镜像签名,镜像漏洞扫描,存储helm chart、垃圾回收等功能。
https方式分为自签https和向官方机构申请颁发获得https证书,其中后种方式需要的步骤更少,下面内容为自签https步骤。
2.3.1 创建CA密钥对
[root@registry harbor]# pwd
/usr/local/harbor
[root@registry harbor]# openssl genrsa -out ca.key 4096
[root@registry harbor]# openssl req -x509 -new -nodes -sha512 -days 36500 -subj "/C=SC/ST=BeiJing/L=BeiJing/O=example/OU=Personal/CN=yourdomain.com" -key ca.key -out ca.crt
2.3.2 创建web服务器端秘钥对
[root@registry harbor]# openssl genrsa -out yourdomain.com.key 4096
[root@registry harbor]# openssl req -sha512 -new -subj "/C=SC/ST=BeiJing/L=BeiJing/O=example/OU=Personal/CN=yourdomain.com" -key yourdomain.com.key -out yourdomain.com.csr
2.3.3 使web服务器到CA进行签约
无论是使用类似yourdomain.com的 FQDN 还是IP来连接注册表主机,运行此命令以生成符合主题备用名称(SAN)和x509 v3扩展要求的注册表主机证书
cat > v3.ext <<-EOF
authorityKeyIdentifier=keyid,issuer
basicConstraints=CA:FALSE
keyUsage = digitalSignature, nonRepudiation, keyEncipherment, dataEncipherment
extendedKeyUsage = serverAuth
subjectAltName = @alt_names

[alt_names]
DNS.1=yourdomain.com
DNS.2=yourdomain
DNS.3=hostname
EOF
[root@registry harbor]# openssl x509 -req -sha512 -days 3650 -extfile v3.ext -CA ca.crt -CAkey ca.key -CAcreateserial -in yourdomain.com.csr -out yourdomain.com.crt
Signature ok
subject=/C=SC/ST=BeiJing/L=BeiJing/O=example/OU=Personal/CN=yourdomain.com
Getting CA Private Key
2.3.4 配置harbor.cfg
[root@registry harbor]# vim harbor.cfg
ui_url_protocol = https
......
#The path of cert and key files for nginx, they are applied only the protocol is set to https
ssl_cert = /usr/local/harbor/harbor.test.cn.crt
ssl_cert_key = /usr/local/harbor/harbor.test.cn.key

#The path of secretkey storage
secretkey_path = /usr/local/harbor
2.3.5 生成配置和安装
[root@registry harbor]# ./prepare
[root@registry harbor]# ./install.sh
2.4、docker客户端主机配置
Docker守将.crt文件解释为CA证书,将.cert文件解释为客户端证书。
所以需要将服务器转换yourdomain.com.crt为yourdomain.com.cert
[root@registry harbor]# openssl x509 -inform PEM -in yourdomain.com.crt -out yourdomain.com.cert
拷贝yourdomain.com.cert,yourdomain.com.key和ca.crt到需要访问仓库的docker主机
  cp yourdomain.com.cert /etc/docker/certs.d/yourdomain.com/
  cp yourdomain.com.key /etc/docker/certs.d/yourdomain.com/
  cp ca.crt /etc/docker/certs.d/yourdomain.com/
以下说明了使用自定义证书的配置
/etc/docker/certs.d/
    └── yourdomain.com:port
       ├── yourdomain.com.cert  <-- Server certificate signed by CA
       ├── yourdomain.com.key   <-- Server key signed by CA
       └── ca.crt               <-- Certificate authority that signed the registry certificate
配置完成后登录
[root@node02 ~]# docker login yourdomain.com
Username: admin
Password:
WARNING! Your password will be stored unencrypted in /root/.docker/config.json.
Configure a credential helper to remove this warning. See
https://docs.docker.com/engine/reference/commandline/login/#credentials-store

Login Succeeded
2.5、故障排除
1、可以从证书颁发者那里获得中间证书。在这种情况下,应该将中间证书与您自己的证书合并以创建证书包。您可以通过以下命令实现此目的:
cat intermediate-certificate.pem >> yourdomain.com.crt
2、在某些运行docker守护程序的系统上,您可能需要在操作系统级别信任该证书。
在Ubuntu上,可以通过以下命令完成:
cp yourdomain.com.crt /usr/local/share/ca-certificates/yourdomain.com.crt
update-ca-certificates
在Red Hat(CentOS等)上,命令是:
cp yourdomain.com.crt /etc/pki/ca-trust/source/anchors/yourdomain.com.crt
update-ca-trust
3、经实验如果是从证书颁发者获得的证书,则不需要在客户端主机配置证书,因为此证书是可信任的,直接在docker客户端主机执行docker login即可成功登录
2.6、harbor启用镜像签名、漏洞扫描及helm chart功能
镜像签名简单来说就是为了验证镜像的正确性,保证在镜像传输过程中没有中间人篡改;
漏洞扫描功能是利用的开源clair工具,利用网络更新漏洞库,并且对镜像进行扫描;
helm chart是kubernetes的包管理器helm的相关应用文件,相当于Linux的yum。
要启用这些功能,只需要在安装时添加参数"--with-notary --with-clair --with-chartmuseum"即可:
[root@registry harbor]# ./prepare --with-notary --with-clair --with-chartmuseum
Generated and saved secret to file: /usr/local/harbor/secretkey
Generated configuration file: ./common/config/nginx/nginx.conf
Generated configuration file: ./common/config/adminserver/env
Generated configuration file: ./common/config/core/env
Generated configuration file: ./common/config/registry/config.yml
Generated configuration file: ./common/config/db/env
Generated configuration file: ./common/config/jobservice/env
Generated configuration file: ./common/config/jobservice/config.yml
Generated configuration file: ./common/config/log/logrotate.conf
Generated configuration file: ./common/config/registryctl/env
Generated configuration file: ./common/config/core/app.conf
Generated certificate, key file: ./common/config/core/private_key.pem, cert file: ./common/config/registry/root.crt
Copying sql file for notary DB
Generated certificate, key file: ./cert_tmp/notary-signer-ca.key, cert file: ./cert_tmp/notary-signer-ca.crt
Generated certificate, key file: ./cert_tmp/notary-signer.key, cert file: ./cert_tmp/notary-signer.crt
Copying certs for notary signer
Copying notary signer configuration file
Generated configuration file: ./common/config/notary/signer-config.postgres.json
Generated configuration file: ./common/config/notary/server-config.postgres.json
Copying nginx configuration file for notary
Generated configuration file: ./common/config/nginx/conf.d/notary.server.conf
Generated and saved secret to file: /usr/local/harbor/defaultalias
Generated configuration file: ./common/config/notary/signer_env
Generated configuration file: ./common/config/clair/postgres_env
Generated configuration file: ./common/config/clair/config.yaml
Generated configuration file: ./common/config/clair/clair_env
The configuration files are ready, please use docker-compose to start the service.
[root@registry harbor]# ./install.sh --with-notary --with-clair --with-chartmuseum

[Step 0]: checking installation environment ...

Note: docker version: 18.06.1

Note: docker-compose version: 1.24.0

[Step 1]: loading Harbor images ...
Loaded image: goharbor/harbor-adminserver:v1.7.5
Loaded image: goharbor/harbor-portal:v1.7.5
Loaded image: goharbor/harbor-db:v1.7.5
Loaded image: goharbor/registry-photon:v2.6.2-v1.7.5
Loaded image: goharbor/harbor-migrator:v1.7.5
Loaded image: goharbor/harbor-core:v1.7.5
Loaded image: goharbor/harbor-log:v1.7.5
Loaded image: goharbor/redis-photon:v1.7.5
Loaded image: goharbor/nginx-photon:v1.7.5
Loaded image: goharbor/harbor-registryctl:v1.7.5
Loaded image: goharbor/chartmuseum-photon:v0.8.1-v1.7.5
Loaded image: goharbor/harbor-jobservice:v1.7.5
Loaded image: goharbor/notary-server-photon:v0.6.1-v1.7.5
Loaded image: goharbor/notary-signer-photon:v0.6.1-v1.7.5
Loaded image: goharbor/clair-photon:v2.0.8-v1.7.5


[Step 2]: preparing environment ...
Clearing the configuration file: ./common/config/adminserver/env
Clearing the configuration file: ./common/config/core/env
Clearing the configuration file: ./common/config/core/app.conf
Clearing the configuration file: ./common/config/core/private_key.pem
Clearing the configuration file: ./common/config/db/env
Clearing the configuration file: ./common/config/jobservice/env
Clearing the configuration file: ./common/config/jobservice/config.yml
Clearing the configuration file: ./common/config/registry/config.yml
Clearing the configuration file: ./common/config/registry/root.crt
Clearing the configuration file: ./common/config/registryctl/env
Clearing the configuration file: ./common/config/registryctl/config.yml
Clearing the configuration file: ./common/config/nginx/conf.d/notary.upstream.conf
Clearing the configuration file: ./common/config/nginx/conf.d/notary.server.conf
Clearing the configuration file: ./common/config/nginx/cert/harbor.test.cn.crt
Clearing the configuration file: ./common/config/nginx/cert/harbor.test.cn.key
Clearing the configuration file: ./common/config/nginx/nginx.conf
Clearing the configuration file: ./common/config/log/logrotate.conf
Clearing the configuration file: ./common/config/notary/notary-signer.crt
Clearing the configuration file: ./common/config/notary/notary-signer.key
Clearing the configuration file: ./common/config/notary/notary-signer-ca.crt
Clearing the configuration file: ./common/config/notary/root.crt
Clearing the configuration file: ./common/config/notary/signer-config.postgres.json
Clearing the configuration file: ./common/config/notary/server-config.postgres.json
Clearing the configuration file: ./common/config/notary/signer_env
Clearing the configuration file: ./common/config/notary/server_env
Clearing the configuration file: ./common/config/clair/postgresql-init.d/README.md
Clearing the configuration file: ./common/config/clair/postgres_env
Clearing the configuration file: ./common/config/clair/config.yaml
Clearing the configuration file: ./common/config/clair/clair_env
loaded secret from file: /usr/local/harbor/secretkey
Generated configuration file: ./common/config/nginx/nginx.conf
Generated configuration file: ./common/config/adminserver/env
Generated configuration file: ./common/config/core/env
Generated configuration file: ./common/config/registry/config.yml
Generated configuration file: ./common/config/db/env
Generated configuration file: ./common/config/jobservice/env
Generated configuration file: ./common/config/jobservice/config.yml
Generated configuration file: ./common/config/log/logrotate.conf
Generated configuration file: ./common/config/registryctl/env
Generated configuration file: ./common/config/core/app.conf
Generated certificate, key file: ./common/config/core/private_key.pem, cert file: ./common/config/registry/root.crt
Copying sql file for notary DB
Generated certificate, key file: ./cert_tmp/notary-signer-ca.key, cert file: ./cert_tmp/notary-signer-ca.crt
Generated certificate, key file: ./cert_tmp/notary-signer.key, cert file: ./cert_tmp/notary-signer.crt
Copying certs for notary signer
Copying notary signer configuration file
Generated configuration file: ./common/config/notary/signer-config.postgres.json
Generated configuration file: ./common/config/notary/server-config.postgres.json
Copying nginx configuration file for notary
Generated configuration file: ./common/config/nginx/conf.d/notary.server.conf
loaded secret from file: /usr/local/harbor/defaultalias
Generated configuration file: ./common/config/notary/signer_env
Copying offline data file for clair DB
Generated configuration file: ./common/config/clair/postgres_env
Generated configuration file: ./common/config/clair/config.yaml
Generated configuration file: ./common/config/clair/clair_env
The configuration files are ready, please use docker-compose to start the service.


[Step 3]: checking existing instance of Harbor ...


[Step 4]: starting Harbor ...
Creating network "harbor_harbor" with the default driver
Creating harbor-log ... done
Creating redis              ... done
Creating registry           ... done
Creating harbor-db          ... done
Creating registryctl        ... done
Creating harbor-adminserver ... done
Creating clair              ... done
Creating notary-signer      ... done
Creating harbor-core        ... done
Creating notary-server      ... done
Creating harbor-jobservice  ... done
Creating harbor-portal      ... done
Creating nginx              ... done

✔ ----Harbor has been installed and started successfully.----

Now you should be able to visit the admin portal at https://harbor.test.cn.
For more details, please visit https://github.com/goharbor/harbor .
上述功能的具体使用,可参考官方文档
3、harbor高可用
为了使harbor高可用,即harbor内保存的镜像能够高可用,在一个harbor down掉的时候,还有另外一个存储着相同镜像的harbor仓库供使用,harbor后期的版本包括此版本支持了镜像复制的功能。
在使用镜像复制功能之前,当然是需要安装两个harbor服务(一主一备)
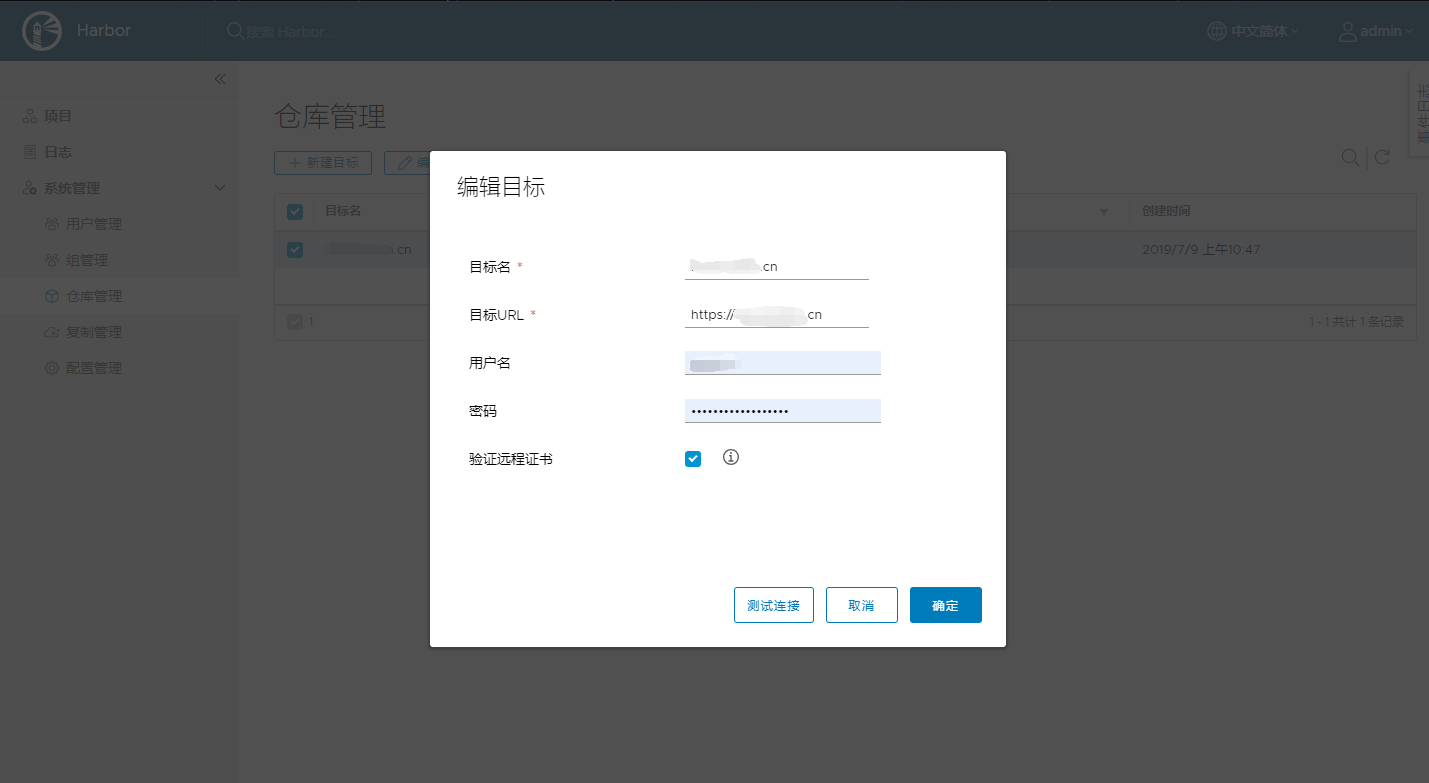
3.1、新增复制目标
“系统管理”—>“仓库管理”—>“新建目标”
填写目标名,目标URL,用户名,密码等
3.2、新增复制规则
“系统管理”—>“复制管理”—>“新建规则”
填写名称、描述、源项目、过滤器、目标、触发模式等

其中过滤器支持以下写法:
*:匹配任何非分隔符字符序列/。
**:匹配任何字符序列,包括路径分隔符/。
?:匹配任何单个非分隔符/。
{alt1,...}:如果其中一个以逗号分隔的替代项匹配,则匹配一系列字符。
3.3、测试
按照设置的规则,观察是否立即复制或者push镜像到主harbor中,观察备harbor中的镜像是否被复制
4、harbor常规操作
暂停harbor docker-compose stop docker容器stop,并不删除容器
恢复harbor docker-compose start 恢复docker容器运行
停止harbor docker-compose down -v 停止并删除docker容器
启动harbor docker-compose up -d 启动所有docker容器
修改harbor的运行配置,需要如下步骤:
停止harbor
docker-compose down -v
修改配置
vim harbor.cfg
执行./prepare已更新配置到docker-compose.yml文件
./prepare
启动 harbor
docker-compose up -d