编译安装Nginx和php搭建KodExplorer网盘
环境说明:
系统版本 CentOS 6.9 x86_64
软件版本 nginx-1.12.2 php-5.5.38 kodexplorer4.25
1、nginx的编译安装可以参照前面的博文,这里不再赘述
2、编译安装php
2.1 下载并安装相关编译器
- mkdir -p /service/tools #创建目录
- cd /service/tools/
- wget http://mirrors.sohu.com/php/php-5.5.38.tar.gz #下载包
- tar xf php-5.5.38.tar.gz #解压
- yum install gcc gcc-c++ glibc -y #安装编译器,如果已经编译安装了nginx则不需要此步骤
- yum install -y libxml2-devel curl curl-devel libjpeg-devel libpng-devel freetype-devel
- #安装编译时所需库
- cd php-5.5.38 #进入php-5.5.38目录
2.2 编译安装
2.2.1 编译生成makefile
- ./configure --prefix=/application/php-5.5.38 --with-jpeg-dir=/usr/lib64 --with-freetype-dir=/usr/lib64/ --with-curl --enable-fpm --enable-mbstring --with-gd --with-fpm-user=nginx --with-fpm-group=nginx
2.2.2 make && make install
3、配置
- [root@Web02 php-5.5.38]# ln -s /application/php-5.5.38 /application/php #创建软链接
- [root@Web02 php-5.5.38]# ln -s /application/php/bin/* /usr/bin/ #创建命令软链接
- [root@Web02 php-5.5.38]# cp php.ini-production /application/php-5.5.38/etc/php.ini
- #拷贝默认配置文件
- [root@Web02 php-5.5.38]#
- cp /application/php-5.5.38/etc/php-fpm.conf.default /application/php-5.5.38/etc/php-fpm.conf
- #拷贝默认php-fpm配置文件,php-fpm 启动进程数
4、启动
- [root@Web02 php-5.5.38]# /application/php/sbin/php-fpm #启动php
- [root@Web02 php-5.5.38]# netstat -lntup|grep 9000 #查看进程9000端口
- tcp 0 0 127.0.0.1:9000 0.0.0.0:* LISTEN 97399/php-fpm
5、配置nginx使其支持php
查看nginx.conf.default有关php的部分(65-71行),将此内容添加到nginx.conf中,并修改fastcgi_param指定script文件名$document_root$fastcgi_script_name
可以在/application/nginx/conf/fastcgi.conf查看
65 #location ~ .php$ {
66 # root html;
67 # fastcgi_pass 127.0.0.1:9000;
68 # fastcgi_index index.php;
69 # fastcgi_param SCRIPT_FILENAME /scripts$fastcgi_script_name;
70 # include fastcgi_params;
71 #}
- [root@Web02 php-5.5.38]# cd /application/nginx/conf/
- [root@Web02 conf]# vim nginx.conf
- server {
- listen 80;
- server_name localhost;
- index index.php index.html index.htm;
- location / {
- root html;
- }
- location ~ .php$ {
- root html;
- fastcgi_pass 127.0.0.1:9000;
- fastcgi_index index.php;
- fastcgi_param SCRIPT_FILENAME $document_root$fastcgi_script_name;
- include fastcgi_params;
- }
- }
- }
这个配置的意思是 在浏览器中访问的.php文件,实际读取的是 $document_root(网站根目录)下的.php文件 -- 也就是说当访问127.0.0.1/index.php的时候,需要读取网站根目录下面的index.php文件,如果没有配置这一配置项时,nginx不回去网站根目录下访问.php文件,所以返回空白
配置项目中:include fastcgi_params; fastcgi_params 文件中含有各个nginx常量的定义,默认情况 SCRIPT_FILENAME = /scripts$fastcgi_script_name
检查语法nginx -t
6、配置网盘
- [root@Web02 conf]# cd ../html/ #进入到站点目录
- [root@Web02 html]# ls
- 50x.html index.html
- [root@Web02 html]# rm -rf * #删除原有的站点文件
- [root@Web02 html]# wget http://static.kodcloud.com/update/download/kodexplorer4.25.zip
- #下载
- [root@Web02 html]# unzip kodexplorer4.25.zip #解压
- [root@Web02 html]# nginx #启动nginx
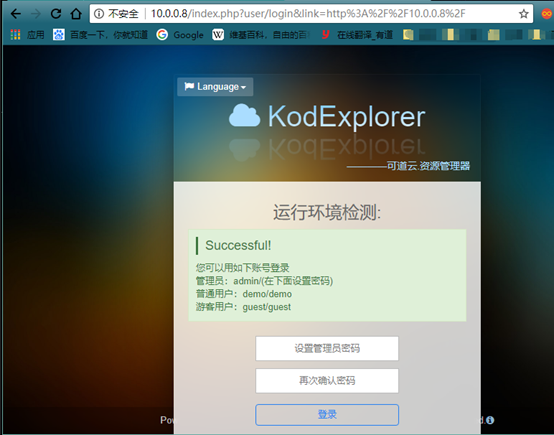
浏览器访问

根据提示操作
su -c 'setenforce 0' #关闭selinux,su -c 指定命令,用root执行
chmod -R 777 /var/www/html/ #按照提示修改权限
刷新页面重新访问,成功,设置管理员用户名和密码,进行登录及后续图形界面操作
博主原创文章,转载请务必注明出处