系统环境:CentOS Linux release 7.4.1708 (Core) 3.10.0-693.el7.x86_64
软件版本:nginx-1.12.2.tar.gz
php 7.1.11
mysql-community-server-5.7.20-1.el7.x86_64
网络环境中配置了DNS服务器,本次nginx服务器的IP是192.168.1.20,域名是wp1.st.local。过程中全部使用域名配置或访问。
一、安装nginx
1、安装依赖及相关支持库
# yum install pcre-devel pcre openssl openssl-devel
2、编译安装nginx
# cd nginx-1.12.2
# ./configure
  --prefix=/opt/nginx
  --sbin-path=/usr/sbin/nginx
  --user=nginx
  --group=nginx
 --pid-path=/var/run/nginx.pid
 --lock-path=/var/run/nginx.lock
  --with-http_ssl_module
  --with-http_stub_status_module
  --with-pcre
  --error-log-path=/var/log/nginx/error.log
  --http-log-path=/var/log/nginx/access.log
  --with-http_gzip_static_module
  --with-file-aio
  --with-http_realip_module
3、编译成功
Configuration summary
  + using system PCRE library
  + using system OpenSSL library
  + using system zlib library

  nginx path prefix: "/opt/nginx"
  nginx binary file: "/usr/sbin/nginx"
  nginx modules path: "/opt/nginx/modules"
  nginx configuration prefix: "/opt/nginx/conf"
  nginx configuration file: "/opt/nginx/conf/nginx.conf"
  nginx pid file: "/var/run/nginx.pid"
  nginx error log file: "/var/log/nginx/error.log"
  nginx http access log file: "/var/log/nginx/access.log"
  nginx http client request body temporary files: "client_body_temp"
  nginx http proxy temporary files: "proxy_temp"
  nginx http fastcgi temporary files: "fastcgi_temp"
  nginx http uwsgi temporary files: "uwsgi_temp"
  nginx http scgi temporary files: "scgi_temp"
4、安装
# make && make install
5、检验安装结果
# nginx -V
nginx version: nginx/1.12.2
built by gcc 4.8.5 20150623 (Red Hat 4.8.5-16) (GCC)
built with OpenSSL 1.0.2k-fips  26 Jan 2017
TLS SNI support enabled
configure arguments: --prefix=/opt/nginx --sbin-path=/usr/sbin/nginx --user=nginx --group=nginx --with-http_ssl_module --with-http_stub_status_module --with-pcre --error-log-path=/var/log/nginx/error.log --http-log-path=/var/log/nginx/access.log --with-http_gzip_static_module --with-file-aio --with-http_realip_module --pid-path=/var/run/nginx.pid --lock-path=/var/run/nginx.lock
6、创建nginx用户
# useradd -M -s /sbin/nologin nginx
7、创建nginx的unit
注意文件路径
# vi /usr/lib/systemd/system/nginx.service

[Unit]
Description=The nginx HTTP and reverse proxy server
After=network.target remote-fs.target nss-lookup.target

[Service]
Type=forking
PIDFile=/run/nginx.pid
# Nginx will fail to start if /run/nginx.pid already exists but has the wrong
# SELinux context. This might happen when running `nginx -t` from the cmdline.
# https://bugzilla.redhat.com/show_bug.cgi?id=1268621
ExecStartPre=/usr/bin/rm -f /run/nginx.pid
ExecStartPre=/usr/sbin/nginx -t
ExecStart=/usr/sbin/nginx
ExecReload=/bin/kill -s HUP $MAINPID
KillSignal=SIGQUIT
TimeoutStopSec=5
KillMode=process
PrivateTmp=true

[Install]
WantedBy=multi-user.target
8、防火墙
# iptables -I INPUT 5 -m state --state NEW -m tcp -p tcp --dport 80 -j ACCEPT
# iptables-save >/etc/sysconfig/iptables
9、配置nginx.conf语法高亮
# wget http://www.vim.org/scripts/download_script.php?src_id=14376 -O /usr/share/vim/vim74/syntax/nginx.vim
# vi /usr/share/vim/vim74/filetype.vim
#追加一行,注意nginx的配置文件路径
au BufRead,BufNewFile /opt/nginx/conf/* set ft=nginx
10、修改配置文件
# vi /opt/nginx/conf/nginx.conf

user  nginx;
worker_processes  auto;

    server {
        listen       80;
        server_name  wp1.st.local;        #配置域名
        location / {
            root   html;
            index  index.php index.html index.htm;        #增加index.php
        }
        error_page   500 502 503 504  /50x.html;
        location = /50x.html {
            root   html;
        }
11、启动服务
# systemctl start nginx.service
# systemctl enable nginx.service
12、访问测试
二、安装PHP
1、添加扩展源
# yum -y install https://mirror.webtatic.com/yum/el7/epel-release.rpm https://mirror.webtatic.com/yum/el7/webtatic-release.rpm
2、安装支持库
# yum install libxml2 libxml2-devel libpng libpng-devel libcurl-devel libcurl libzip-devel libzip gd bzip2-devel bzip2
3、安装PHP7.1及相关支持
# yum -y install mod_php71w php71w-mbstring php71w-pear php71w-fpm php71w-gd php71w-pdo
php71w-mysql放在安装MySQL时一起安装,因为在未添加mysql57源的时候,可能会安装mariadb-libs作为mysql-community-libs的替代。
4、修改配置文件
# vi /etc/php-fpm.d/www.conf

#指定用户为前面创建的nginx
user = nginx
group = nginx
修改nginx.conf,root最好填写绝对路径,document_root就是root选项的指定目录
#添加
location ~ .php$ {
            root           /opt/nginx/html;
            fastcgi_pass   127.0.0.1:9000;
            fastcgi_index  index.php;
            fastcgi_param  SCRIPT_FILENAME  $document_root$fastcgi_script_name;
            include        fastcgi_params;
        }
修改所属用户为nginx
# chown -R nginx. /var/lib/php
# chown -R nginx. /opt/nginx/html
5、启动php-fpm,重载nginx
# systemctl start php-fpm.service
# systemctl enable php-fpm.service
# systemctl reload nginx.service
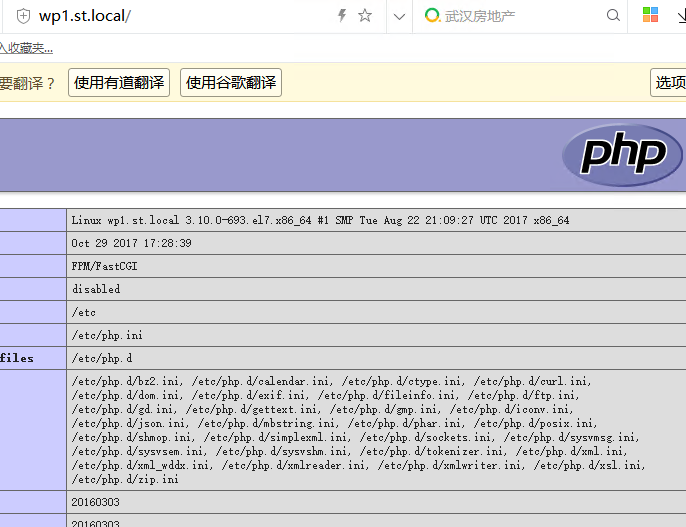
6、访问测试
# /opt/nginx/html/index.php

<?php
    phpinfo();
?>
注意权限
# chown nginx. index.php
三、安装MySQL5.7
1、添加扩展源
# vi /etc/yum.repos.d/mysql-community.repo

[mysql57-community]
name=MySQL 5.7 Community Server
baseurl=http://repo.mysql.com/yum/mysql-5.7-community/el/7/$basearch/
enabled=1
gpgcheck=1
gpgkey=http://repo.mysql.com/RPM-GPG-KEY-mysql
2、安装MySQL
# yum -y install mysql-community-server php71w-mysql
3、启动并配置
# vi /etc/my.cnf
#添加一行
character-set-server=utf8
# systemctl start mysqld
通过mysql_secure_installation命令按提示设置root密码以及基础的MySQL配置
4、创建数据库和新用户
mysql> create database wordpress;
mysql> create user 'wp_user'@'%' identified by 'xxxxxxxx';    #创建用户
mysql> grant all privileges on wordpress.* to 'wp_user'@'%' identified by 'xxxxxxxx';    #授权
mysql> flush privileges;
5、重置MySQL的用户密码
如果忘记MySQL密码,就使用如下办法重置。需要root权限
#vi /etc/my.cnf
[mysqld]
skip-grant-tables
#mysql -uroot
mysql> use mysql;
mysql> update user set authentication_string=password('xxxxxxxx') where user='root';    #5.7版本的密码字段是authentication_string,而不是password
mysql> flush privileges;
修改完后注释掉skip-grant-tables,重启mysqld.service
四、安装WordPress
1、下载并解压
# wget https://cn.wordpress.org/wordpress-4.9.1-zh_CN.zip
# unzip wordpress-4.9.1-zh_CN.zip
# cp -rva wordpress/* /opt/nginx/html/
2、修改用户和组
# chown nginx. /opt/nginx/html
3、SELINUX
# cd /opt/nginx
# chcon -R -t httpd_sys_content_t html/
# cd html/
# chcon -R -t httpd_sys_rw_content_t wp-content/
通过编译安装的nginx与yum安装的的安全上下文有所不同,yum安装会自动配置正确的上下文,编译安装默认可能是admin_home_t,访问时会提示File not found,必须改为httpd_sys_content_t
4、按照提示部署WordPress
五、配置nginx虚拟机
1、添加配置
虚拟server都可以配置为80端口,配置不同的域名
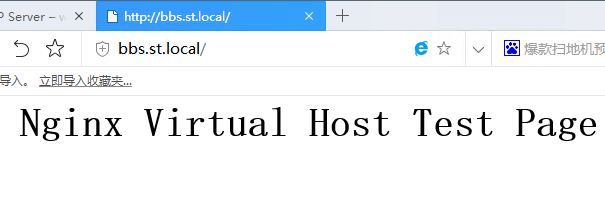
# mkdir /opt/nginx/conf.d
# vi /opt/nginx/conf.d/virtual1.conf
server {
    listen       80;
    server_name  bbs.st.local;

    location / {
        root   /opt/nginx/virtual;
        index  index.html index.htm;
    }
}
#在nginx.conf全局区块中包含配置文件
# vi /opt/nginx/conf/nginx.conf
include /opt/nginx/conf.d/*.conf;
2、创建虚拟主机目录并修改权限
# mkdir /opt/nginx/virtual
# vi /opt/nginx/virtual/index.html
Nginx Virtual Host Test Page
# chown -R nginx. /opt/nginx/virtual/
# chcon -R -t httpd_sys_content_t /opt/nginx/virtual/
3、重载服务
# systemctl reload nginx.service
4、结果检测