一、辅助路由语法
同时控制多个插座内容。
第一步:
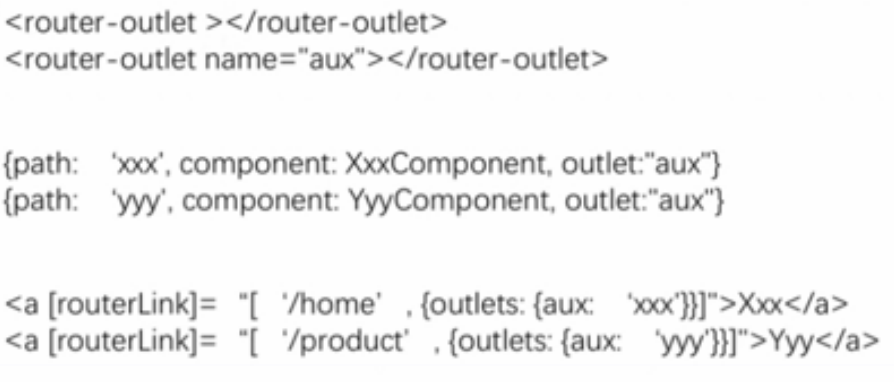
模版上除了主插座,还需要声明一个带name属性的插座
第二步:
路由配置中配置name为aux的插座上可以显示哪些组件,比如显示xxx和yyy组件。
第三步:
在导航时候,路由到某个地址时,辅助的插座上显示哪个组件
二、实例
聊天功能可以在任何页面(商品列表页面,商品详情页面,主页面等)使用。
第一步:在app组件的模版上在定义一个插座来显示聊天面板。
<a [routerLink]="['/home']">主页</a>
<a [routerLink]="['/product',2]">商品详情</a>
<input type="button" value="商品详情" (click)="toProductDetails()">
<router-outlet></router-outlet>
<router-outlet name="aux"></router-outlet>
第二步:单独开发一个聊天室组件,只显示在新定义的插座上。
新建聊天组件并修改模版
ng g c chat
<textarea
placeholder="请输入聊天内容" n
class="chat"
ame="" id="" cols="30" rows="10"></textarea>
.chat{
background: green;
height: 100px;
width: 30%;
float: left;
box-sizing: border-box;
}
修改home组件和product组件模版,包一层div并设置样式
.product{
    background: yellow;
    height: 100px;
    width: 70%;
    float: left;
    box-sizing: border-box;
}

.home{
    background: red;
    height: 100px;
    width: 70%;
    float: left;
    box-sizing: border-box;
}
配置路由决定聊天组件是否显示
const routes: Routes = [
  { path: '', redirectTo : 'home',pathMatch:'full' },
  { path: 'chat', component: ChatComponent, outlet: "aux"},//辅助路由
  { path: 'home', component: HomeComponent },
  { path: 'product/:id', component: ProductComponent, children:[
    { path: '', component : ProductDescComponent },
    { path: 'seller/:id', component : SellerInfoComponent }
  ] },
  { path: '**', component: Code404Component }
];
第三步:通过路由参数控制新插座是否显示聊天面板
增加开始聊天和结束聊天按钮
<!--The content below is only a placeholder and can be replaced.-->
<a [routerLink]="['/home']">主页</a>
<a [routerLink]="['/product',2]">商品详情</a>
<input type="button" value="商品详情" (click)="toProductDetails()">

<a [routerLink]="[{outlets: {aux: 'chat'}}]">开始聊天</a>
<a [routerLink]="[{outlets: {aux: null}}]">结束聊天</a>

<router-outlet></router-outlet>
<router-outlet name="aux"></router-outlet>
效果:
点开始聊天,URL后面多了一个(aux:chat) :辅助路由aux插座路由路径是chat,chat路径对应显示ChatComponent。
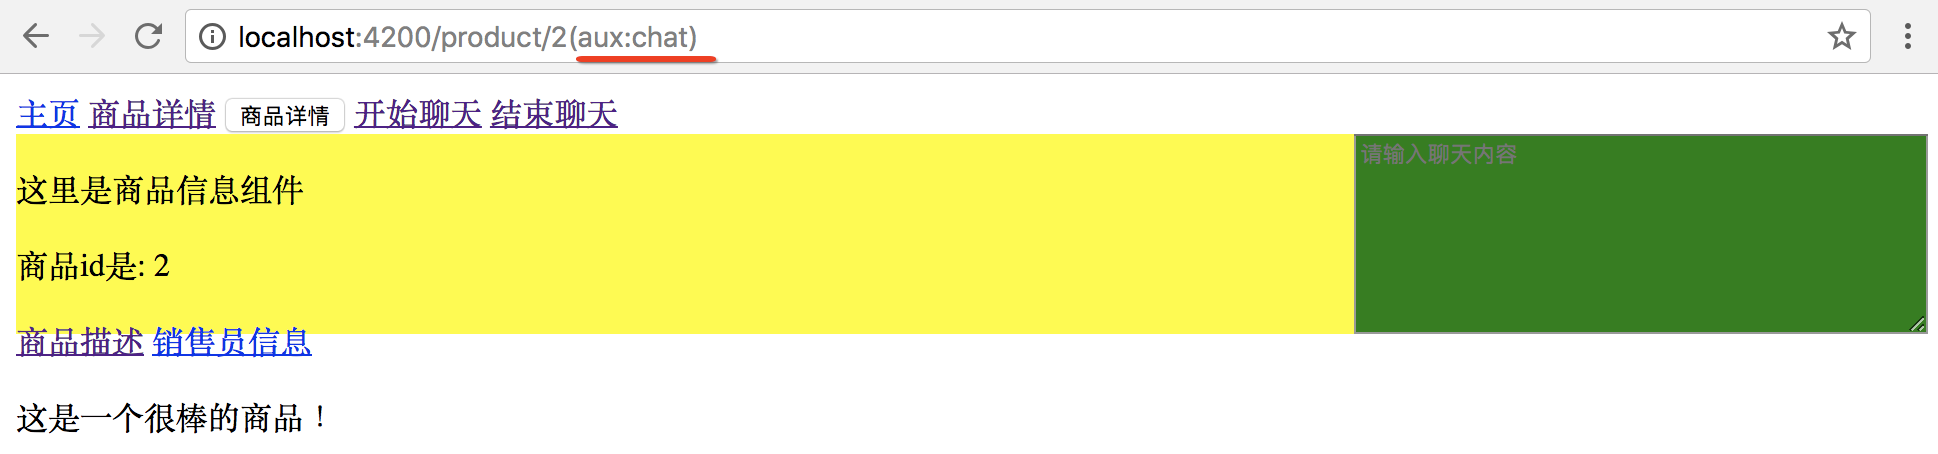
主路由可随意切换,不影响辅助路由
http://localhost:4200/home(aux:chat)
http://localhost:4200/product/2(aux:chat)
扩展:如果想展示chat组件时候,主路由要跳到home组件上。
用priamry指定主路由路径,因为主路由没有名字。
<a [routerLink]="[{outlets: {primary: 'home' , aux: 'chat'}}]">开始聊天</a>
本文作者starof,因知识本身在变化,作者也在不断学习成长,文章内容也不定时更新,为避免误导读者,方便追根溯源,请诸位转载注明出处:http://www.cnblogs.com/starof/p/9006227.html 有问题欢迎与我讨论,共同进步。