一、环境搭建
1. 安装testNG插件到eclipse.
-) 选择菜单 Help /Software updates / Find and Install.
-) 点击add button然后在location中输入http://beust.com/eclipse/
-) 确定后会自动安装testNG插件。
二.包的引入 WebDriver包:selenium-server-standalone.jar
testng 包: testng-6.8.jar
reportng包:reporting.jar,velocity-dep.jar
ant包:ant-contrib.jar
三、新建一个testNG工程:(手动创建lib文件夹,需要把以上三个JAR包放在lib下面)
创建类和方法:
public class test {
@Test(groups="init")
public void f() {
System.out.println("This is test f" );
}
@Test(groups="init")
public void g() {
System.out.println("This is test g" );
}
@Test(dependsOnGroups="init",groups="proccess")
public void h() {
System.out.println("This is test h " );
}
@Test(dependsOnGroups="init",groups="proccess")
public void i() {
System.out.println("This is test i" );
}
}
testng.xml 文件:
<?xml version="1.0" encoding="UTF-8"?>
<suite name="Suite" parallel="tests" thread-count="1">
<test name="test">
<parameter name = "driverType" value = "1"/>
<classes>
<!--测试类-->
<class name="test"/>
<class name="login"/>
</classes>
<groups>
<run>
<!--测试执行用例组合-->
<include name="proccess"/>
<include name="login"/>
</run>
</groups>
</test> <!-- Test -->
</suite> <!-- Suite -->
ant build.xml文件内容:
<project name="TestNGTest" default="test" basedir=".">
<!-- Define <testng> task -->
<taskdef name="testng" classname="org.testng.TestNGAntTask">
<classpath>
<pathelement location="lib/testng-6.8.jar"/>
</classpath>
</taskdef>
<property name="testdir" location="test" />
<property name="srcdir" location="src" />
<property name="libdir" location="lib" />
<property name="full-compile" value="true" />
<path id="classpath.base"/>
<path id="classpath.test">
<fileset dir="${libdir}">
<include name="**/*.jar" />
</fileset>
<pathelement location="${testdir}" />
<pathelement location="${srcdir}" />
<path refid="classpath.base" />
</path>
<target name="clean" >
<delete verbose="${full-compile}">
<fileset dir="${testdir}" includes="**/*.class" />
</delete>
</target>
<target name="compile" depends="clean">
<javac srcdir="${srcdir}" destdir="${testdir}"
verbose="${full-compile}">
<classpath refid="classpath.test"/>
</javac>
</target>
<target name="test" depends="compile">
<testng outputdir="${testdir}" classpathref="classpath.test">
<xmlfileset dir="${srcdir}">
<include name="suite.xml"/>
</xmlfileset>
</testng>
</target>
</project>
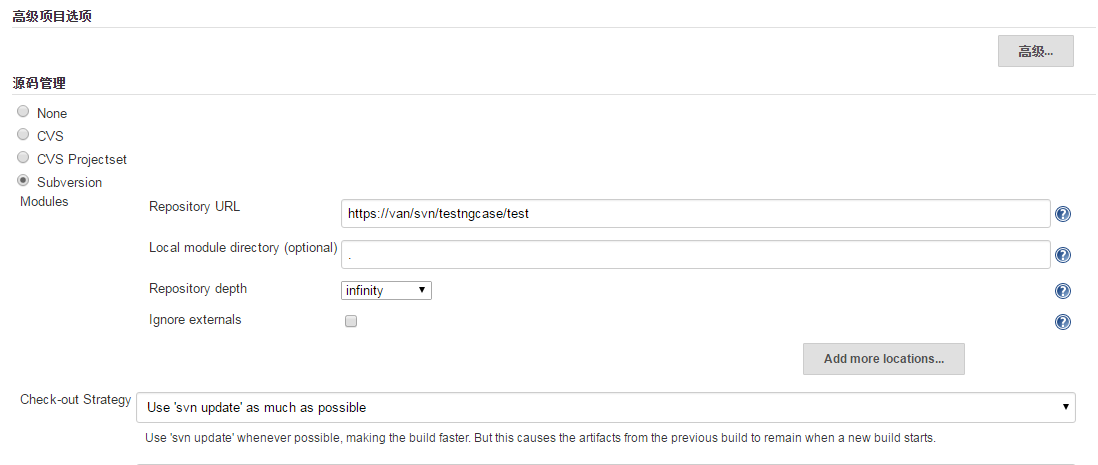
JENKINS引入SVN下载工程包,编译运行:
SVN配置:
ANT配置:

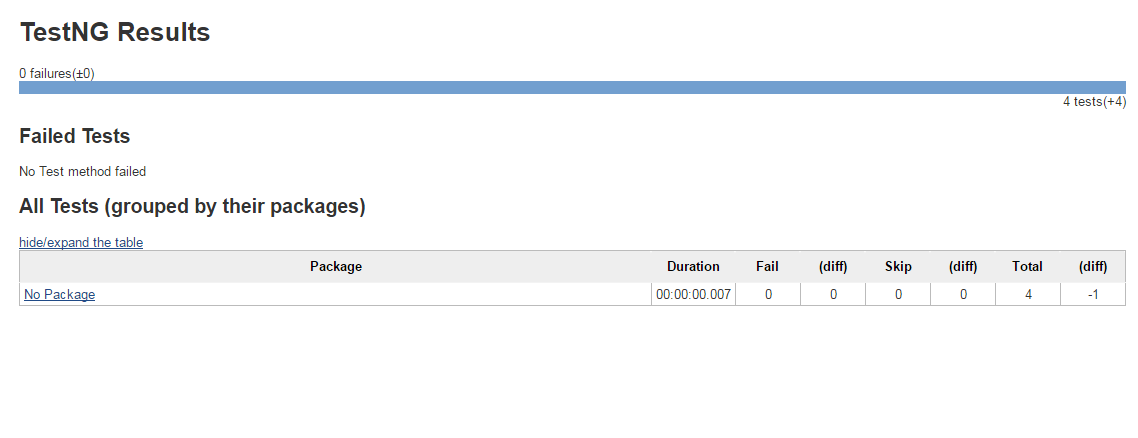
报告输出:
(JENKINS安装TESTNG report 插件) jenkins console执行报告输出,基本上到这一步就成功了。

再看TESTNG插件生成的TESTNG报告: