一、安装MySQL
1): 编译安装MySQL
+-------------------------------------------------------------------------------+
| 操作 | 作用 |
+-------------------------------------------------------------------------------+
|shell> cd /usr/local/src | 进入软件包所在目录(不要照抄) |
|-------------------------------------------------------------------------------|
|shell> groupadd mysql | 增加mysql组(如果有就不用加了) |
|-------------------------------------------------------------------------------|
|shell> useradd mysql -g mysql | 增加mysql用户,并属于mysql组 |
|-------------------------------------------------------------------------------|
|shell> tar -xzvf mysql-5.1.30.tar.gz | 解压mysql源码包 |
|-------------------------------------------------------------------------------|
|shell> cd mysql-5.1.30 | 进入源码包 |
|-------------------------------------------------------------------------------|
|shell> ./configure --prefix=/usr/local/mysql | 配置mysql编译选项, |
| --with-charset=utf8 | 指定安装路径及支持的字符集 |
| --with-extra-charsets=gbk,gb2312,binary | |
|-------------------------------------------------------------------------------|
|shell> make | 编译 |
|-------------------------------------------------------------------------------|
|shell> make install | 安装 |
+-------------------------------------------------------------------------------+
2):配置并初始化MySQL
+---------------------------------------------------------------------------------------+
| 操作 | 作用 |
+---------------------------------------------------------------------------------------+
|shell> cp support-files/my-medium.cnf /etc/my.cnf | 把MySQL配置文件复制到/etc下 |
|---------------------------------------------------------------------------------------|
|shell> vi /etc/my.cnf 在'skip_federated'前加'#'号 | 注释掉这个错误的启动项 |
|---------------------------------------------------------------------------------------|
|shell> cd /usr/local/mysql | 进入mysql的安装目录 |
|---------------------------------------------------------------------------------------|
|shell> chown -R mysql.mysql . | 修改属主属组为mysql,才能完成 |
| | 下一步的初始化数据库工作 |
|---------------------------------------------------------------------------------------|
|shell> bin/mysql_install_db --user=mysql | 初始化数据数据库 |
| --datadir=/usr/local/mysql/var | |
|---------------------------------------------------------------------------------------|
|shell> chown -R root . | 把var目录修改为mysql用户所有 |
|shell> chown -R mysql var | 其他文件修改为root所有,保证安全|
|---------------------------------------------------------------------------------------|
|shell> bin/mysqld_safe --user=mysql & | 启动mysql |
+---------------------------------------------------------------------------------------+
3):测试数据库
+-------------------------------------------------+-------------------------------------+
| 操作 | 作用 |
+-------------------------------------------------+-------------------------------------+
|shell> bin/mysql -uroot | 以root用户连mysql,无密码 |
|---------------------------------------------------------------------------------------|
|mysql> show databases; | 显示数据库 |
|---------------------------------------------------------------------------------------|
| +--------------------+ | |
| | Database | | |
| +--------------------+ | 看到左面的信息,数据库就安装 |
| | information_schema | | 并启动成功了! |
| | mysql | | |
| | test | | |
| +--------------------+ | |
+---------------------------------------------------------------------------------------+
4):接上步,修改mysql密码(可不做此步,默认无密码)
+-------------------------------------------------------------------------------+
| 操作 | 作用 |
+-------------------------------------------------------------------------------+
|mysql>UPDATE user SET | |
| password=PASSWORD('new_password') | 修改root用户的密码 |
| WHERE user='root'; | |
|-------------------------------------------------------------------------------+
|mysql>flush privileges; | 清空权限缓存 |
+-------------------------------------------------------------------------------+
二、安装 apache2
1) 安装zlib压缩库
zlib-1.2.3.tar.gz
shell> cd /usr/local/src
shell> tar -zxvf zlib-1.2.3.tar.gz
shell> cd zlib-1.2.3
shell>./configure //这个配置编译命令不要加目录参数
shell> make && make install
2)安装apache
shell> cd /usr/local/src
shell> tar -zxvf httpd-2.2.4.tar.gz
shell> cd httpd-2.2.4
shell>./configure --prefix=/usr/local/http2
--enable-modules=all
--enable-rewrite
--enable-mods-shared=all
--enable-so
shell> make && make install
#启动Apache
/usr/local/http2/bin/apachectl start
#测试apache
浏览器打开: http://虚拟机IP
看到 "it works!",即为成功
三、安装图形库,为编译PHP做准备
libxml2-2.6.19.tar.gz
jpegsrc.v6b.tar.gz
libpng-1.2.16.tar.gz
freetype-2.3.4.tar.gz
gd-2.0.35.tar.gz
1)libxml2
shell> cd /usr/local/src
shell> tar -zxvf libxml2-2.6.19.tar.gz
shell> cd libxml2-2.6.19
shell>./configure --prefix=/usr/local/libxml2
shell> make && make install
2)jpeg6
#安装出现错误 提示无关键目录无法继续
#手动建立如下目录 ,注意 man1是数字1,不是字母L
shell> mkdir -p /usr/local/jpeg6
shell> mkdir -p /usr/local/jpeg6/bin
shell> mkdir -p /usr/local/jpeg6/lib
shell> mkdir -p /usr/local/jpeg6/include
shell> mkdir -p /usr/local/jpeg6/man
shell> mkdir -p /usr/local/jpeg6/man1
shell> mkdir -p /usr/local/jpeg6/man/man1
shell> cd /usr/local/src
shell> tar -zxvf jpegsrc.v6b.tar.gz
shell> cd jpeg-6b
shell>./configure --prefix=/usr/local/jpeg6/ --enable-shared --enable-static
shell> make && make install
3)libpng
shell> cd /usr/local/src
shell> tar -zvxf libpng-1.2.12.tar.gz
shell> cd libpng-1.2.12
shell>./configure #和zlib一样不要带参数,让它默认安装到相应目录
shell> make && make install
4)freetype
shell> cd /usr/local/src
shell> tar -zvxf freetype-2.3.4.tar.gz
shell> cd freetype-2.3.4
shell> mkdir -p /usr/local/freetype
shell>./configure --prefix=/usr/local/freetype
shell> make && make install
5)GD库
shell> cd /usr/local/src
shell> tar -zvxf gd-2.0.35.tar.gz
shell> mkdir -p /usr/local/gd
shell> cd gd-2.0.35
shell>./configure --prefix=/usr/local/gd
--with-jpeg=/usr/local/jpeg6/
--with-png --with-zlib
--with-freetype=/usr/local/freetype
shell> make && make install
四、安装 php5
shell> cd /usr/local/src
shell> tar -zxvf php-5.3.16.tar.gz
shell> cd php-5.3.16
shell>./configure --prefix=/usr/local/php
--with-apxs2=/usr/local/http2/bin/apxs
--with-mysql=mysqlnd
--with-pdo-mysql=mysqlnd
--with-mysqli=mysqlnd
--with-freetype-dir=/usr/local/freetype
--with-gd=/usr/local/gd2
--with-zlib --with-libxml-dir=/usr/local/libxml2
--with-jpeg-dir=/usr/local/jpeg6
--with-png-dir
--enable-mbstring=all
--enable-mbregex
--enable-shared
shell> make && make install
shell> cp php.ini-dist /usr/local/php/lib/php.ini
五、配置Apache使其支持php
vi /usr/local/http2/conf/httpd.conf
1):在httpd.conf(Apache主配置文件)中增加:
AddType application/x-httpd-php .php
2):找到下面这段话:
<IfModule dir_module>
DirectoryIndex index.html
</IfModule>
在index.html 前面添加index.php
3):建立php测试网页
vi /usr/local/apache2/htdocs/index.php
输入如下内容:
<?php
phpinfo();
?>
4): 重启apache
shell> /usr/local/http2/bin/apachectl restart
5):再次浏览器查看http://虚拟机IP
如果看到php信息,工作就完成了!
六)配置虚拟主机
1)配置host文件
打开C:/windows/system32/drivers/etc/hosts 文件
增加域名记录
如:
192.168.1.246 www.ec1.com
192.168.1.246 www.ec2.com
2) 增加虚拟主机
vi /usr/local/http2/conf/httpd.conf
取消#Include conf/extra/httpd-vhosts.conf
这一行前面的#号
保存退出
vi /usr/local/http2/conf/extra/httpd-vhosts.conf
增加虚拟主机记录
<VirtualHost *:80>
ServerAdmin webmaster@dummy-host.example.com
DocumentRoot "/usr/local/http2/htdocs/ec1"
ServerName www.ec1.com
ServerAlias www.dummy-host.example.com
ErrorLog "logs/dummy-host.example.com-error_log"
CustomLog "logs/dummy-host.example.com-access_log" common
</VirtualHost>
<VirtualHost *:80>
ServerAdmin webmaster@dummy-host2.example.com
DocumentRoot "/usr/local/http2/htdocs/ec2"
ServerName www.ec2.com
ErrorLog "logs/dummy-host2.example.com-error_log"
CustomLog "logs/dummy-host2.example.com-access_log" common
</VirtualHost>
3)
shell> cd /usr/local/http2/htdocs
shell> mkdir ec1 ec2
shell> echo this is ec1.com > ec1/index.html
shell> echo this is ec2.com > ec2/index.html
4)重启apache
/usr/local/http2/bin/apachectl restart
5)浏览器打开www.ec1.com,和www.ec2.com
看到不同的网站内容,虚拟主机创建完毕!
编译软件
软件运行->二进制文件
软件编写->.c,.php等源文件.
源文件 ---编译(编译器)--->二进制
安装: 可以安装编译好的二进制文件.如win的exe,redhat的rpm,debian/ubuntu下的.deb
也可以拿别人的源码,自己编译.
======linux下编译软件的3个通用步骤===
0:获取源码包,解压
1:配置,比如装在哪,比如读取帮助.
configure
1.1:用gcc编译的软件都会有一个configure文件
1.2:configure有2个最通用选项,configure --prefix=/path , 指定文件的安装路径.
configure -h , 查看所有的配置选项.
将会根据你输的参数,生成一个makefie文件(配置单),及大量的临时文件
注意:在你configure后,源码目录下的文件已经发生了改变.
因此,如果你本次configure,某个配置错了,删掉源码目录,重新解压.
或者 执行 make clean,都能够消除configure的影响.
1.3: make 编译,这一步耗时最长
1.4: make install ,安装(就是把编译出的二进制复制到适当目录去)
====如何解压====
.gz, tar -zxvf /path/xx.gz
.bz, tar -jxvf /patch/xx.bz
===例http-2.2.9.tar.gz====
tar zxvf http-2.2.9.tar.gz
cd http-2.2.9
./configure --prefix=/usr/local/http2
--enable-rewirte
--enable-modules=most
编译
make
安装
make install
启动apache
/usr/local/http2/bin/apachectl start
常犯的错误
1:gcc库没装或者没装全
表现:没有可用的C编译器
同类错误:提示g++ not found,
解决:出现以上错误,则是因为gcc编译器没装,或者是没装全.
挂载光盘,到Pakeges里目录下去,
搜索gcc, 把相关的软件都装上.
在安装gcc的过程中,因为依赖性问题,在安装gcc之前
需要B->C->D软件

没有libppl*相关的软件,怎么办?
答:在光盘的packges里目录下,ls|grep ppl,找相关的软件装上.
2:

这类提示,缺少curses/tempcap库,
同上,在packges目录下,找到相关的软件,安装.
3:因为系统存在相同的软件带来的错误.
比如,看到以下界面
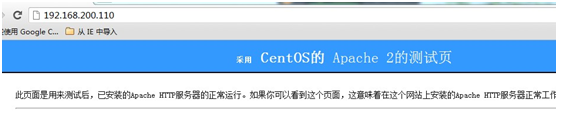
原因:这是因为系统中已经安装了apache,并且apache还启动了.
解决:卸载(如果因为依赖性关系不能卸载,可不必卸),
关闭该进程.
两个好用的系统命令
1:ps -A 查看系统进程
可以配合管道,更方便的查看进程.
例:怀疑系统有http进程再运行.
可以:ps -A|grep http
则会把http相关的进程筛选出来.
2: 杀死进程
pkill -9 http
会把http相关的进程全部杀掉.
网站移植到linux上后,问题一般集中在以下两种可能.
1:权限的问题.
2:大小写敏感问题.
Linux下的文件是区分大小写的.