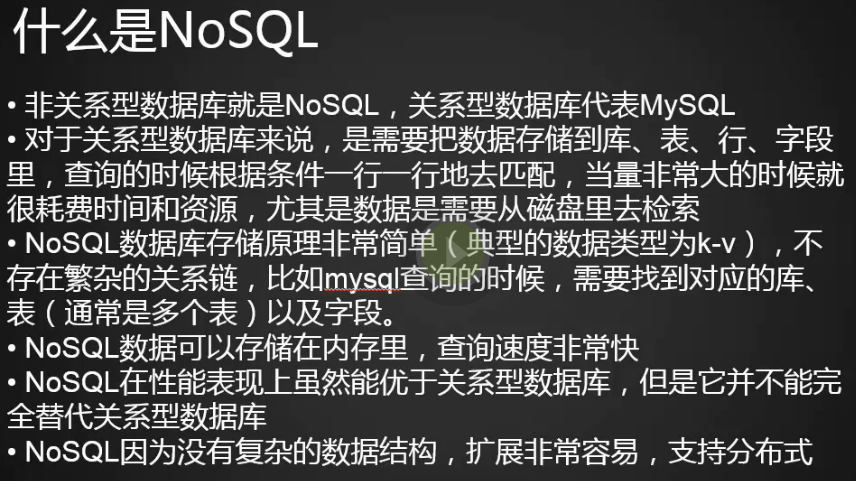
NoSQL介绍

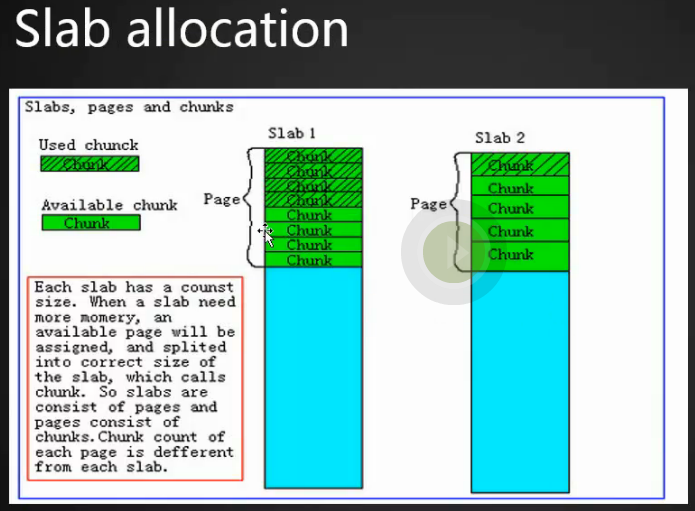
memcached介绍


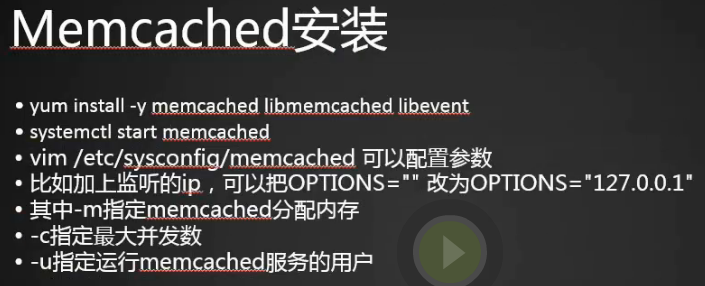
安装memcached
1.首先查看memcached包信息
[root@centos-02 ~]# yum list|grep memcache
collectd-memcachec.x86_64                 5.8.0-1.el7                  epel
dmlite-plugins-memcache.x86_64            0.8.8-1.el7                  epel
libmemcached.i686                         1.0.16-5.el7                 base
libmemcached.x86_64                       1.0.16-5.el7                 base
libmemcached-devel.i686                   1.0.16-5.el7                 base
libmemcached-devel.x86_64                 1.0.16-5.el7                 base
memcached.x86_64                          1.4.15-10.el7_3.1            base
memcached-devel.i686                      1.4.15-10.el7_3.1            base
memcached-devel.x86_64                    1.4.15-10.el7_3.1            base
opensips-memcached.x86_64                 1.10.5-3.el7                 epel
pcp-pmda-memcache.x86_64                  3.11.8-7.el7                 base
php-ZendFramework-Cache-Backend-Libmemcached.noarch
php-pecl-memcache.x86_64                  3.0.8-4.el7                  base
php-pecl-memcached.x86_64                 2.2.0-1.el7                  epel
python-memcached.noarch                   1.48-4.el7                   base
rubygem-memcache-client.noarch            1.8.5-13.el7                 epel
uwsgi-router-memcached.x86_64             2.0.15-1.el7                 epel
[root@centos-02 ~]#
2.直接yum安装memcached,libevent包作为依赖也被安装了
[root@centos-02 ~]# yum install -y memcached
已加载插件:fastestmirror
base                                                              | 3.6 kB  00:00:00
epel/x86_64/metalink                                              | 6.0 kB  00:00:00
epel                                                              | 4.7 kB  00:00:00
extras                                                            | 3.4 kB  00:00:00
mysql-connectors-community                                        | 2.5 kB  00:00:00
mysql-tools-community                                             | 2.5 kB  00:00:00
mysql56-community                                                 | 2.5 kB  00:00:00
updates                                                           | 3.4 kB  00:00:00
zabbix                                                            | 2.9 kB  00:00:00
zabbix-non-supported                                              |  951 B  00:00:00
(1/3): epel/x86_64/updateinfo                                     | 905 kB  00:00:07
(2/3): updates/7/x86_64/primary_db                                | 6.9 MB  00:00:15
(3/3): epel/x86_64/primary_db                                     | 6.3 MB  00:00:50
Loading mirror speeds from cached hostfile
 * base: mirrors.tuna.tsinghua.edu.cn
 * epel: mirrors.tuna.tsinghua.edu.cn
 * extras: mirrors.tuna.tsinghua.edu.cn
 * updates: mirrors.tuna.tsinghua.edu.cn
正在解决依赖关系
--> 正在检查事务
---> 软件包 memcached.x86_64.0.1.4.15-10.el7_3.1 将被 安装
--> 正在处理依赖关系 libevent-2.0.so.5()(64bit),它被软件包 memcached-1.4.15-10.el7_3.1.x86_64 需要
--> 正在检查事务
---> 软件包 libevent.x86_64.0.2.0.21-4.el7 将被 安装
--> 解决依赖关系完成

依赖关系解决

=========================================================================================
 Package             架构             版本                          源              大小
=========================================================================================
正在安装:
 memcached           x86_64           1.4.15-10.el7_3.1             base            85 k
为依赖而安装:
 libevent            x86_64           2.0.21-4.el7                  base           214 k

事务概要
=========================================================================================
安装  1 软件包 (+1 依赖软件包)

总下载量:299 k
安装大小:901 k
Downloading packages:
(1/2): memcached-1.4.15-10.el7_3.1.x86_64.rpm                     |  85 kB  00:00:00
(2/2): libevent-2.0.21-4.el7.x86_64.rpm                           | 214 kB  00:00:01
-----------------------------------------------------------------------------------------
总计                                                        260 kB/s | 299 kB  00:01
Running transaction check
Running transaction test
Transaction test succeeded
Running transaction
  正在安装    : libevent-2.0.21-4.el7.x86_64                                         1/2
  正在安装    : memcached-1.4.15-10.el7_3.1.x86_64                                   2/2
  验证中      : memcached-1.4.15-10.el7_3.1.x86_64                                   1/2
  验证中      : libevent-2.0.21-4.el7.x86_64                                         2/2

已安装:
  memcached.x86_64 0:1.4.15-10.el7_3.1

作为依赖被安装:
  libevent.x86_64 0:2.0.21-4.el7

完毕!
[root@centos-02 ~]#
[root@centos-02 ~]# rpm -qa libevent
libevent-2.0.21-4.el7.x86_64
[root@centos-02 ~]#
3.启动memcached,-u指定以memcached用户运行,-p监听端口,-m分配内存大小单位兆,-c最大并发数,这些参数可以在memcached启动的时候更改/usr/bin/memcached,也可以在配置文件中修改/etc/sysconfig/memcached
[root@centos-02 ~]# systemctl start memcached
[root@centos-02 ~]# ps aux|grep memcache
memcach+   4271  0.0  0.1 325556  1156 ?        Ssl  23:20   0:00 /usr/bin/memcached -u memcached -p 11211 -m 64 -c 1024
root       4278  0.0  0.0 112664   928 pts/0    R+   23:21   0:00 grep --color=auto memcache
[root@centos-02 ~]# netstat -lntp
Active Internet connections (only servers)
Proto Recv-Q Send-Q Local Address           Foreign Address         State       PID/Program name
tcp        0      0 0.0.0.0:11211           0.0.0.0:*               LISTEN      4271/memcached
tcp        0      0 0.0.0.0:22              0.0.0.0:*               LISTEN      960/sshd
tcp        0      0 127.0.0.1:25            0.0.0.0:*               LISTEN      1586/master
tcp        0      0 0.0.0.0:10051           0.0.0.0:*               LISTEN      1048/zabbix_server
tcp6       0      0 :::3306                 :::*                    LISTEN      1362/mysqld
tcp6       0      0 :::11211                :::*                    LISTEN      4271/memcached
tcp6       0      0 :::80                   :::*                    LISTEN      809/httpd
tcp6       0      0 :::22                   :::*                    LISTEN      960/sshd
tcp6       0      0 ::1:25                  :::*                    LISTEN      1586/master
tcp6       0      0 :::10051                :::*                    LISTEN      1048/zabbix_server
[root@centos-02 ~]#
[root@centos-02 ~]# cat /etc/sysconfig/memcached
PORT="11211"
USER="memcached"
MAXCONN="1024"
CACHESIZE="64"
OPTIONS=""
[root@centos-02 ~]#
4.查看memcached支持的选项
[root@centos-02 ~]# memcached -h
memcached 1.4.15
-p <num>      TCP port number to listen on (default: 11211)
-U <num>      UDP port number to listen on (default: 11211, 0 is off)
-s <file>     UNIX socket path to listen on (disables network support)
-a <mask>     access mask for UNIX socket, in octal (default: 0700)
-l <addr>     interface to listen on (default: INADDR_ANY, all addresses)
              <addr> may be specified as host:port. If you don't specify
              a port number, the value you specified with -p or -U is
              used. You may specify multiple addresses separated by comma
              or by using -l multiple times
-d            run as a daemon
-r            maximize core file limit
-u <username> assume identity of <username> (only when run as root)
-m <num>      max memory to use for items in megabytes (default: 64 MB)
-M            return error on memory exhausted (rather than removing items)
-c <num>      max simultaneous connections (default: 1024)
-k            lock down all paged memory.  Note that there is a
              limit on how much memory you may lock.  Trying to
              allocate more than that would fail, so be sure you
              set the limit correctly for the user you started
              the daemon with (not for -u <username> user;
              under sh this is done with 'ulimit -S -l NUM_KB').
-v            verbose (print errors/warnings while in event loop)
-vv           very verbose (also print client commands/reponses)
-vvv          extremely verbose (also print internal state transitions)
-h            print this help and exit
-i            print memcached and libevent license
-P <file>     save PID in <file>, only used with -d option
-f <factor>   chunk size growth factor (default: 1.25)
-n <bytes>    minimum space allocated for key+value+flags (default: 48)
-L            Try to use large memory pages (if available). Increasing
              the memory page size could reduce the number of TLB misses
              and improve the performance. In order to get large pages
              from the OS, memcached will allocate the total item-cache
              in one large chunk.
-D <char>     Use <char> as the delimiter between key prefixes and IDs.
              This is used for per-prefix stats reporting. The default is
              ":" (colon). If this option is specified, stats collection
              is turned on automatically; if not, then it may be turned on
              by sending the "stats detail on" command to the server.
-t <num>      number of threads to use (default: 4)
-R            Maximum number of requests per event, limits the number of
              requests process for a given connection to prevent
              starvation (default: 20)
-C            Disable use of CAS
-b <num>      Set the backlog queue limit (default: 1024)
-B            Binding protocol - one of ascii, binary, or auto (default)
-I            Override the size of each slab page. Adjusts max item size
              (default: 1mb, min: 1k, max: 128m)
-S            Turn on Sasl authentication
-o            Comma separated list of extended or experimental options
              - (EXPERIMENTAL) maxconns_fast: immediately close new
                connections if over maxconns limit
              - hashpower: An integer multiplier for how large the hash
                table should be. Can be grown at runtime if not big enough.
                Set this based on "STAT hash_power_level" before a
                restart.
[root@centos-02 ~]#
查看memcached状态
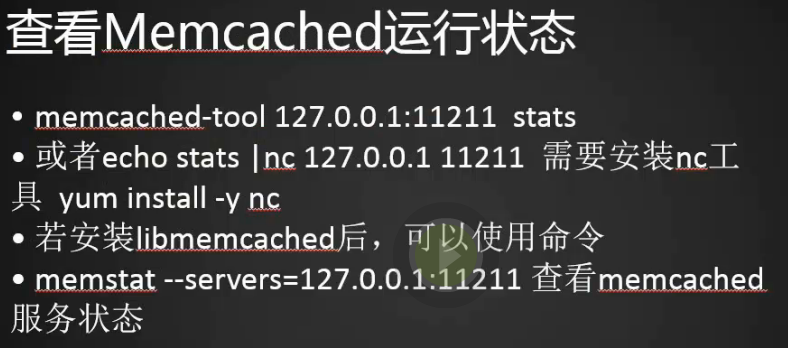
1.查看memcached状态
[root@centos-02 ~]# memcached-tool 127.0.0.1:11211 stats
#127.0.0.1:11211   Field       Value
         accepting_conns           1
               auth_cmds           0
             auth_errors           0
                   bytes           0
              bytes_read          33
           bytes_written          54
              cas_badval           0
                cas_hits           0
              cas_misses           0
               cmd_flush           0
                 cmd_get           0
                 cmd_set           0
               cmd_touch           0
             conn_yields           0
   connection_structures          11
        curr_connections          10
              curr_items           0  (目前memcached中有多少个项目)
               decr_hits           0
             decr_misses           0
             delete_hits           0
           delete_misses           0
       evicted_unfetched           0
               evictions           0
       expired_unfetched           0
                get_hits           0  (命中了多少,命中率等于get_hits/curr_items,也就是保存的有多少被访问过了)
              get_misses           0
              hash_bytes      524288
       hash_is_expanding           0
        hash_power_level          16
               incr_hits           0
             incr_misses           0
                libevent 2.0.21-stable
          limit_maxbytes    67108864
     listen_disabled_num           0
                     pid        4271
            pointer_size          64
               reclaimed           0
            reserved_fds          20
           rusage_system    0.332541
             rusage_user    0.468638
                 threads           4
                    time  1521646884
       total_connections          12
             total_items           0
              touch_hits           0
            touch_misses           0
                  uptime        1246
                 version      1.4.15
[root@centos-02 ~]#
2.安装nc包
[root@centos-02 ~]# yum install -y nc
3.查看nc包是由哪个包安装来的
[root@centos-02 ~]# rpm -qf `which nc`
nmap-ncat-6.40-7.el7.x86_64
[root@centos-02 ~]#
4.用nc命令查看memcached状态
[root@centos-02 ~]# echo stats |nc 127.0.0.1 11211
STAT pid 4271
STAT uptime 1941
STAT time 1521647579
STAT version 1.4.15
STAT libevent 2.0.21-stable
STAT pointer_size 64
STAT rusage_user 0.751807
STAT rusage_system 0.422651
STAT curr_connections 10
STAT total_connections 13
STAT connection_structures 11
STAT reserved_fds 20
STAT cmd_get 0
STAT cmd_set 0
STAT cmd_flush 0
STAT cmd_touch 0
STAT get_hits 0
STAT get_misses 0
STAT delete_misses 0
STAT delete_hits 0
STAT incr_misses 0
STAT incr_hits 0
STAT decr_misses 0
STAT decr_hits 0
STAT cas_misses 0
STAT cas_hits 0
STAT cas_badval 0
STAT touch_hits 0
STAT touch_misses 0
STAT auth_cmds 0
STAT auth_errors 0
STAT bytes_read 39
STAT bytes_written 1081
STAT limit_maxbytes 67108864
STAT accepting_conns 1
STAT listen_disabled_num 0
STAT threads 4
STAT conn_yields 0
STAT hash_power_level 16
STAT hash_bytes 524288
STAT hash_is_expanding 0
STAT bytes 0
STAT curr_items 0
STAT total_items 0
STAT expired_unfetched 0
STAT evicted_unfetched 0
STAT evictions 0
STAT reclaimed 0
END
[root@centos-02 ~]#
5.还可以用memstat --servers=127.0.0.1:11211查看memcached状态
[root@centos-02 ~]# rpm -qa libmemcached
[root@centos-02 ~]# yum install -y libmemcached
[root@centos-02 ~]# memstat --servers=127.0.0.1:11211
Server: 127.0.0.1 (11211)
	 pid: 4271
	 uptime: 2206
	 time: 1521647844
	 version: 1.4.15
	 libevent: 2.0.21-stable
	 pointer_size: 64
	 rusage_user: 0.840607
	 rusage_system: 0.477239
	 curr_connections: 10
	 total_connections: 14
	 connection_structures: 11
	 reserved_fds: 20
	 cmd_get: 0
	 cmd_set: 0
	 cmd_flush: 0
	 cmd_touch: 0
	 get_hits: 0
	 get_misses: 0
	 delete_misses: 0
	 delete_hits: 0
	 incr_misses: 0
	 incr_hits: 0
	 decr_misses: 0
	 decr_hits: 0
	 cas_misses: 0
	 cas_hits: 0
	 cas_badval: 0
	 touch_hits: 0
	 touch_misses: 0
	 auth_cmds: 0
	 auth_errors: 0
	 bytes_read: 56
	 bytes_written: 2126
	 limit_maxbytes: 67108864
	 accepting_conns: 1
	 listen_disabled_num: 0
	 threads: 4
	 conn_yields: 0
	 hash_power_level: 16
	 hash_bytes: 524288
	 hash_is_expanding: 0
	 bytes: 0
	 curr_items: 0
	 total_items: 0
	 expired_unfetched: 0
	 evicted_unfetched: 0
	 evictions: 0
	 reclaimed: 0
[root@centos-02 ~]#
memcached命令行

1.进入到memcached
[root@centos-02 ~]# telnet 127.0.0.1 11211 (也可以用[root@centos-02 ~]# nc 127.0.0.1 11211)
Trying 127.0.0.1...
Connected to 127.0.0.1.
Escape character is '^]'.
2.set用来存储数据,key2键名,0可以包括键值对的整型参数,客户机使用它存储关于键值对的额外信息 ,30过期时间,2在缓存中存储的字节数
set key2 0 30 2
12
STORED
123
ERROR
3.get用来获取值
get key2
VALUE key2 0 2
12
END

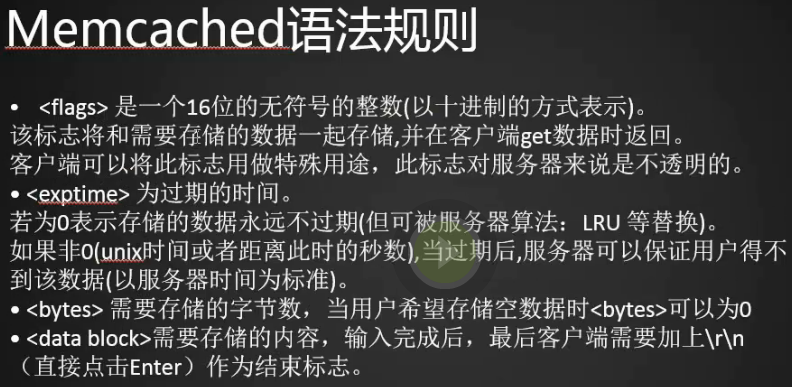

3.replace替换也需要加上后面的几个参数
set key3 1 100 4
1234
STORED
replace key3 1 0 5
abcde
STORED
get key3
VALUE key3 1 5
abcde
END
4.delete删除
get key3
VALUE key3 1 5
abcde
END
delete key3
DELETED
get key3
END
memcached数据导出和导入
1.在服务器需要重启的时候需要将memcached中的数据先导出,重启成功后再导入telnet退出用ctr+]右方括号
set key1 1 0 1
1
STORED
set key2 1 0 2
12
STORED
set key3 1 0 3
123
STORED
^]
telnet>
telnet> quit
Connection closed.
[root@centos-02 ~]#
2.查看当前memcached状态
[root@centos-02 ~]# memstat --servers=127.0.0.1:11211
Server: 127.0.0.1 (11211)
	 pid: 4271
	 uptime: 5106
	 time: 1521650744
	 version: 1.4.15
	 libevent: 2.0.21-stable
	 pointer_size: 64
	 rusage_user: 1.932015
	 rusage_system: 1.058518
	 curr_connections: 10
	 total_connections: 16
	 connection_structures: 11
	 reserved_fds: 20
	 cmd_get: 10
	 cmd_set: 9
	 cmd_flush: 0
	 cmd_touch: 0
	 get_hits: 6
	 get_misses: 4
	 delete_misses: 0
	 delete_hits: 1
	 incr_misses: 0
	 incr_hits: 0
	 decr_misses: 0
	 decr_hits: 0
	 cas_misses: 0
	 cas_hits: 0
	 cas_badval: 0
	 touch_hits: 0
	 touch_misses: 0
	 auth_cmds: 0
	 auth_errors: 0
	 bytes_read: 392
	 bytes_written: 3435
	 limit_maxbytes: 67108864
	 accepting_conns: 1
	 listen_disabled_num: 0
	 threads: 4
	 conn_yields: 0
	 hash_power_level: 16
	 hash_bytes: 524288
	 hash_is_expanding: 0
	 bytes: 213
	 curr_items: 3
	 total_items: 9
	 expired_unfetched: 0
	 evicted_unfetched: 0
	 evictions: 0
	 reclaimed: 2
[root@centos-02 ~]#
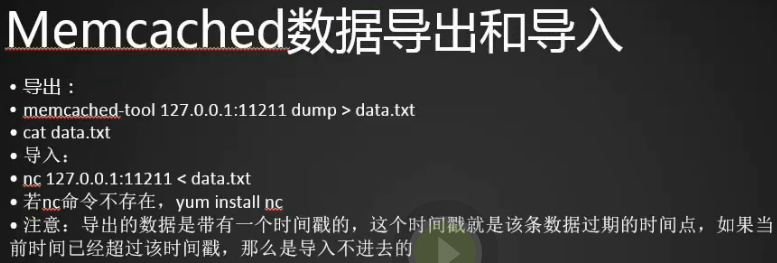
3.导出数据
[root@centos-02 ~]# memcached-tool 127.0.0.1:11211 dump > data.txt
Dumping memcache contents
  Number of buckets: 1
  Number of items  : 3
Dumping bucket 1 - 3 total items
[root@centos-02 ~]# cat data.txt
add key2 1 1521645638 2
12
add key1 1 1521645638 1
1
add key3 1 1521645638 3
123
[root@centos-02 ~]#
4.导入数据(导入数据之前先重启下memcached服务清除数据,因为导入的数据用的add命令,不重启的话内存中已经有数据了,add直接导入会报失败)
[root@centos-02 ~]# nc 127.0.0.1 11211 < data.txt
STORED
STORED
STORED
[root@centos-02 ~]#
5.上一步虽然导入成功了,但是get不到数据,这是为什么呢,发现是因为我们导出的数据带一个时间戳(这个时间戳其实是系统直接设置的),相当于我们导入数据后数据立刻过期了,那为什么我们直接设置30秒后过期可以能,这是因为系统会加30秒转换成时间戳,相当于当前时间戳加上30秒,也就是30秒后过期了,当直接写时间戳的时候,会已时间戳时间比较过期时间。
[root@centos-02 ~]# date -d @1521645638
2018年 03月 21日 星期三 23:20:38 CST
[root@centos-02 ~]#
[root@centos-02 ~]# date -d "+1 hour" +%s (当前时间加一个小时的时间戳,将导出的数据时间戳修改为这个时间戳就可以成功导入数据并可以查看到数据了)
1521732304
[root@centos-02 ~]#
[root@centos-02 ~]# nc 127.0.0.1 11211
get k1
END
[root@centos-02 ~]# cat data.txt
add key2 1 1521645638 2
12
add key1 1 1521645638 1
1
add key3 1 1521645638 3
123
[root@centos-02 ~]#

1.说明:虽然可以使用telnet连接,但是在网站里面(LNMP架构),如何PHP去连接memcached呢? Memcached它总得要有自己的客户端吧. 在前面编译PHP,PHP是支持连接MySQL的,如何PHP不支持连接MySQL的话,是不可能做到搭建Discuz论坛(查看帖子或发帖子),可以做到安装Discuz论坛(查看帖子或发帖子),是因为PHP和MySQL是可以连接的. 同理PHP也需要连接Memcached,所以在PHP的模块里面需要Memcache这样的一个模块,它作为PHP连接Memcached的一个中间件,如果没有这个模块的话,PHP也是无法连接Memcached的.
2.查看php安装的模块
[root@centos-02 bin]# /usr/local/php-fpm/sbin/php-fpm -m (或php -m)
3.下载memcache
[root@centos-02 src]# wget http://www.apelearn.com/bbs/data/attachment/forum/memcache-2.2.3.tgz
[root@centos-02 src]# tar zxvf memcache-2.2.3.tgz
package.xml
memcache-2.2.3/config.m4
memcache-2.2.3/config9.m4
memcache-2.2.3/config.w32
memcache-2.2.3/CREDITS
memcache-2.2.3/example.php
memcache-2.2.3/memcache.c
memcache-2.2.3/memcache_queue.c
memcache-2.2.3/memcache_session.c
memcache-2.2.3/memcache_standard_hash.c
memcache-2.2.3/memcache_consistent_hash.c
memcache-2.2.3/memcache.dsp
memcache-2.2.3/php_memcache.h
memcache-2.2.3/memcache_queue.h
memcache-2.2.3/README
[root@centos-02 src]# cd memcache-2.2.3
[root@centos-02 memcache-2.2.3]# ls
config9.m4  example.php                 memcache_queue.c          php_memcache.h
config.m4   memcache.c                  memcache_queue.h          README
config.w32  memcache_consistent_hash.c  memcache_session.c
CREDITS     memcache.dsp                memcache_standard_hash.c
[root@centos-02 memcache-2.2.3]#
4.执行phpize生成.configure文件
[root@centos-02 memcache-2.2.3]# /usr/bin/phpize
Configuring for:
PHP Api Version:         20100412
Zend Module Api No:      20100525
Zend Extension Api No:   220100525
[root@centos-02 memcache-2.2.3]#
5.configure配置文件
[root@centos-02 memcache-2.2.3]# ./configure --with-php-config=/usr/bin/php-config
6.make
7.make install
[root@centos-02 memcache-2.2.3]# make install
Installing shared extensions:     /usr/lib64/php/modules/
[root@centos-02 memcache-2.2.3]#
[root@centos-02 memcache-2.2.3]# ls /usr/lib64/php/modules/
bcmath.so      fileinfo.so    ldap.so        mysqli.so      pdo.so         sqlite3.so     xmlwriter.so
curl.so        gd.so          mbstring.so    mysql.so       pdo_sqlite.so  wddx.so        xsl.so
dom.so         json.so        memcache.so    pdo_mysql.so   phar.so        xmlreader.so   zip.so
[root@centos-02 memcache-2.2.3]# ls /usr/lib64/php/modules/
8.编辑php.ini添加extension=memcache.so
9.查看当前模块是否加载了memcache模块,成功了
[root@centos-02 /]# /usr/bin/php -m
[PHP Modules]
bcmath
bz2
calendar
Core
ctype
curl
date
dom
ereg
exif
fileinfo
filter
ftp
gd
gettext
gmp
hash
iconv
json
ldap
libxml
mbstring
memcache
mhash
mysql
mysqli
openssl
pcntl
pcre
PDO
pdo_mysql
pdo_sqlite
Phar
readline
Reflection
session
shmop
SimpleXML
sockets
SPL
sqlite3
standard
tokenizer
wddx
xml
xmlreader
xmlwriter
xsl
zip
zlib

[Zend Modules]

[root@centos-02 /]#
1.下载php文件做测试
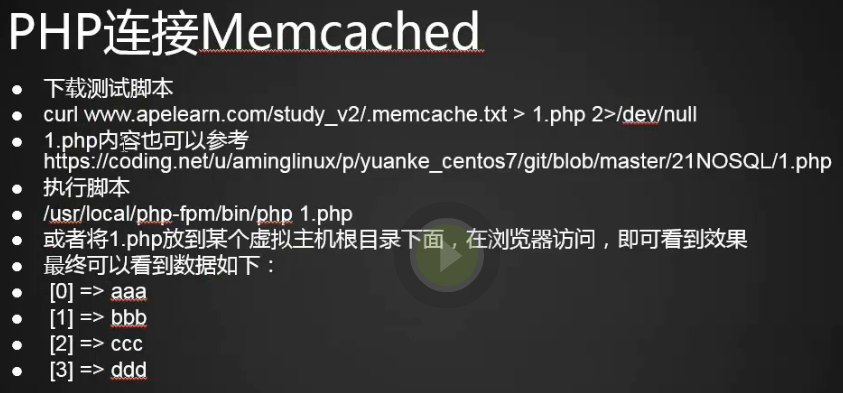
[root@centos-02 /]# curl www.apelearn.com/study_v2/.memcache.txt > 1.php
  % Total    % Received % Xferd  Average Speed   Time    Time     Time  Current
                                 Dload  Upload   Total   Spent    Left  Speed
100   785  100   785    0     0   2377      0 --:--:-- --:--:-- --:--:--  2582
[root@centos-02 /]# vim 1.php

<?php
//连接Memcache Memcache
$mem = new Memcache;
$mem->connect("localhost", 11211);
//保存数据
$mem->set('key1', 'This is first value', 0, 60);
$val = $mem->get('key1');
echo "Get key1 value: " . $val ."<br>";
//替换数据
$mem->replace('key1', 'This is replace value', 0, 60);
$val = $mem->get('key1');
echo "Get key1 value: " . $val . "<br>";
//保存数组数据
$arr = array('aaa', 'bbb', 'ccc', 'ddd');
$mem->set('key2', $arr, 0, 60);
$val2 = $mem->get('key2');
echo "Get key2 value: ";
print_r($val2);
echo "<br>";
//删除数据
$mem->delete('key1');
$val = $mem->get('key1');
echo "Get key1 value: " . $val . "<br>";
//清除所有数据
$mem->flush();
$val2 = $mem->get('key2');
echo "Get key2 value: ";
print_r($val2);
echo "<br>";
//关闭连接
$mem->close();
?>
2.测试结果成功
[root@centos-02 /]# systemctl start memcached
[root@centos-02 /]# php 1.php
Get key1 value: This is first value<br>Get key1 value: This is replace value<br>Get key2 value: Array
(
    [0] => aaa
    [1] => bbb
    [2] => ccc
    [3] => ddd
)
<br>Get key1 value: <br>Get key2 value: <br>[root@centos-02 /]#
memcached中存储session

1.场景:做负载均衡、lnmp架构比较多的web服务器,当用户登录的时候会遇到一个问题,比如第一次登录在A服务器上,第二次登录在B服务器上这样就没办法让用户的登录状态在某一个服务器上(当然假如我们用的是nginx代理的话,nginx负载均衡upstream可以使用ip hase,但是如果使用的lvs可能就会遇到这种问题)我们可以将session不在存在服务器的磁盘上,而是保存在memcached中,将memcached作为一个公共的服务器,当访问的时候用内网ip,而不是127.0.0.1。
2.下载一个存session的php脚本
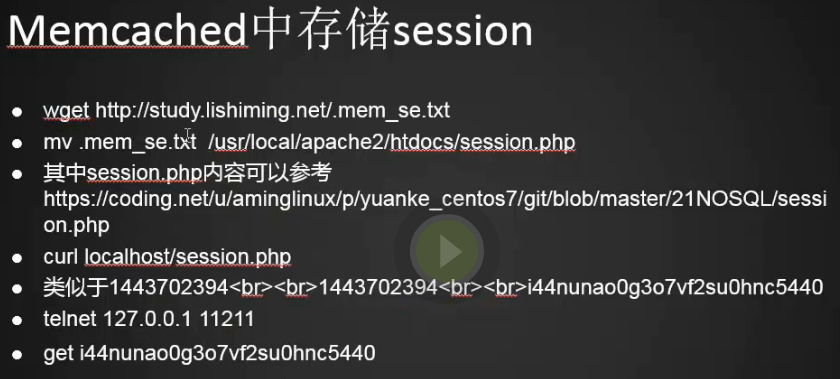
[root@centos-02 /]# wget http://study.lishiming.net/.mem_se.txt
--2018-03-25 23:15:04--  http://study.lishiming.net/.mem_se.txt
正在解析主机 study.lishiming.net (study.lishiming.net)... 182.254.152.182
正在连接 study.lishiming.net (study.lishiming.net)|182.254.152.182|:80... 已连接。
已发出 HTTP 请求,正在等待回应... 301 Moved Permanently
位置:http://www.apelearn.com/study_v2/.mem_se.txt [跟随至新的 URL]
--2018-03-25 23:15:04--  http://www.apelearn.com/study_v2/.mem_se.txt
正在解析主机 www.apelearn.com (www.apelearn.com)... 115.159.51.96
正在连接 www.apelearn.com (www.apelearn.com)|115.159.51.96|:80... 已连接。
已发出 HTTP 请求,正在等待回应... 200 OK
长度:237 [text/plain]
正在保存至: “.mem_se.txt”

100%[===============================================>] 237         --.-K/s 用时 0.001s

2018-03-25 23:15:05 (243 KB/s) - 已保存 “.mem_se.txt” [237/237])

[root@centos-02 /]#
[root@centos-02 /]# cat .mem_se.txt
<?php
session_start();
if (!isset($_SESSION['TEST'])) {
$_SESSION['TEST'] = time();
}
$_SESSION['TEST3'] = time();
print $_SESSION['TEST'];
print "<br><br>";
print $_SESSION['TEST3'];
print "<br><br>";
print session_id();
?>
[root@centos-02 /]#
3.将php脚本放到Apache或nginx www目录
[root@centos-02 /]# mv .mem_se.txt /var/www/html/1.php
[root@centos-02 /]#
4.访问1.php (我用的是yum安装PHP session默认安装到了/var/lib/php/session),查看session
[root@centos-02 /]# curl localhost/1.php
1521991528<br><br>1521991528<br><br>h2apffndaa6vtr65lvg06ho7q5
[root@centos-02 /]# cd /var/lib/php/session/
[root@centos-02 session]# ls
sess_6gpj231uum9ular29vbt02s6e0  sess_h2apffndaa6vtr65lvg06ho7q5  sess_lpssm1efemlfpjh0maen3ji5a3
5.默认session是保存在服务器的tmp目录下,怎么指定将session保存到memcached中呢?编辑php.ini文件注释掉session.save_handler=files,添加session.save_hander = memcache 和 session.save_path = "……"
;session.save_handler = files
session.save_handler = memcache
session.save_path = "tcp://192.168.133.88:11211"
6.如果用的是php-fpm需要重启php-fpm,我这里直接重启Apache
[root@centos-02 ~]# /usr/sbin/apachectl restart
7.删掉/var/lib/php/session/下的session文件,再测访问1.php试试
[root@centos-02 ~]# rm -fr /var/lib/php/session/sess_*
[root@centos-02 ~]#
[root@centos-02 ~]# curl localhost/1.php
8.查看php的phpinfo信息发现session被保存了两个位置,再看memcached里面发现没有,我们配置失败了。
session.save_path /var/lib/php/session tcp://192.168.133.88:11211
[root@centos-02 ~]# curl localhost/1.php
1521994490<br><br>1521994490<br><br>8jihhfdcuao3fd0srghgabus66
[root@centos-02 ~]# ls /var/lib/php/session/sess_
sess_29njv027tf24k77dp0r79foe22  sess_8jihhfdcuao3fd0srghgabus66
[root@centos-02 ~]# telnet 127.0.0.1 11211
Trying 127.0.0.1...
Connected to 127.0.0.1.
Escape character is '^]'.
get 8jihhfdcuao3fd0srghgabus66
END
9.我们用第二种方法配置到虚拟主机里面添加两行配置
[root@centos-02 /]# vim etc/httpd/conf/httpd.conf
php_value session.save_handler "memcache"
php_value session.save_path "tcp://192.168.133.88:11211"
[root@centos-02 /]# /usr/sbin/apachectl restart
[root@centos-02 /]# curl localhost/1.php
1521997077<br><br>1521997077<br><br>tjfm2cfk7lp1fbnce2ijovt650
[root@centos-02 /]# telnet 127.0.0.1 11211
Trying 127.0.0.1...
Connected to 127.0.0.1.
Escape character is '^]'.
get tjfm2cfk7lp1fbnce2ijovt650
VALUE tjfm2cfk7lp1fbnce2ijovt650 0 37
TEST|i:1521997077;TEST3|i:1521997077;
END