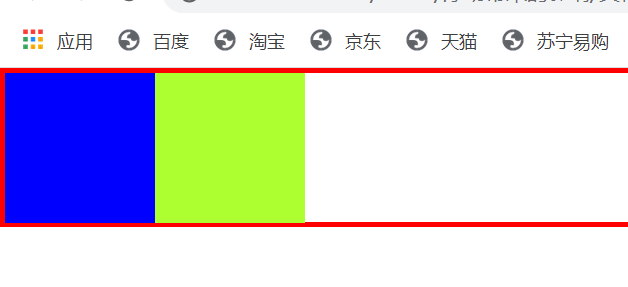
清除浮动(float)带来的影响
float会带来父标签的塌陷问题。
<!DOCTYPE html>
<html lang="en">
<head>
    <meta http-equiv="content-type" charset="UTF-8">
    <title>父标签塌陷</title>
    <style>
        body {
            margin: 0;
        }

        .c1 {
            border: 3px solid red;
        }

        #d1 {
            background-color: blue;
             100px;
            height: 100px;
            float: left;
        }

        #d2 {
            background-color: greenyellow;
             100px;
            height: 100px;
            float: left;
        }
    </style>
</head>
<body>

    <div class="c1">
        <div id="d1"></div>
        <div id="d2"></div>
    </div>

</body>
</html>

如何解决上述问题,这里就要用到clear。
clear
# clear属性 规定元素的哪一侧不允许拥有其他浮动的元素
| 属性值 | 描述 |
|---|---|
| left | 在左侧不允许有浮动的元素 |
| right | 在右侧不允许有浮动的元素 |
| both | 在左右两侧均不允许有浮动的元素 |
| none | 默认值,允许浮动元素出现在两侧 |
| inherit | 规定应该从父元素继承 clear 属性的值。 |
action:clear只会对自身起作用,并不会影响到其他元素。
清除浮动副作用的三种方式
# 固定的高度
# 伪元素清除法
# overflow: hidden;
这里推荐使用第二种方式来解决浮动的副作用。
.clearfix:after{
    content:"";
    display:blook;
    clear:both;
}
<!DOCTYPE html>
<html lang="en">
<head>
    <meta http-equiv="content-type" charset="UTF-8">
    <title>父标签塌陷</title>
    <style>
        body {
            margin: 0;
        }

        .clearfix:after {
            content: '';
            display: block;
            clear: both;  /*清除左右两侧的浮动元素*/
        }

        #d1 {
            background-color: blue;
             100px;
            height: 100px;
            float: left;
        }

        #d2 {
            background-color: greenyellow;
             100px;
            height: 100px;
            float: left;
        }

        #d3 {
            border: 3px solid red;
        }
    </style>
</head>
<body>

    <div class="clearfix" id="d3">
        <div id="d1"></div>
        <div id="d2"></div>
    </div>

</body>
</html>
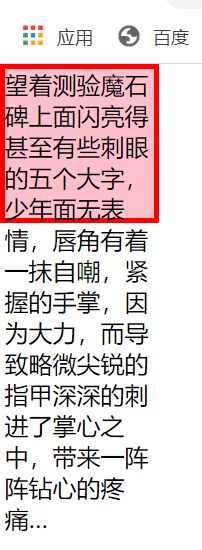
overflow溢出属性
"""
overflow:   水平方向和垂直方向均设置
overflow-x: 水平方向设置
overflow-y: 垂直方向设置
"""
| 属性值 | 描述 |
|---|---|
| visible | 默认值。内容不会被修剪,会呈现在元素框之外。 |
| hidden | 内容会被修剪,元素框之外的其余内容是不可见的。 |
| scroll | 内容会被修剪,但是浏览器会显示滚动条以便查看其余的内容。 |
| auto | 如果内容被修剪,则浏览器会显示滚动条以便查看其余的内容。 |
| inherit | 规定应该从父元素继承 overflow 属性的值。 |
exp:
<!DOCTYPE html>
<html lang="en">
<head>
    <meta http-equiv="content-type" charset="UTF-8">
    <title>溢出属性</title>
    <style>
        body {
            margin: 0;
        }

        .c1 {
            background-color: pink;
             100px;
            height: 100px;
            border: 3px solid red;
        }
    </style>
</head>
<body>
<div class="c1">望着测验魔石碑上面闪亮得甚至有些刺眼的五个大字,少年面无表情,唇角有着一抹自嘲,紧握的手掌,因为大力,而导致略微尖锐的指甲深深的刺进了掌心之中,带来一阵阵钻心的疼痛…</div>
</body>
</html>
        .c1 {
            background-color: pink;
             100px;
            height: 100px;
            border: 3px solid red;
            overflow: hidden; /*溢出部分隐藏*/
        }
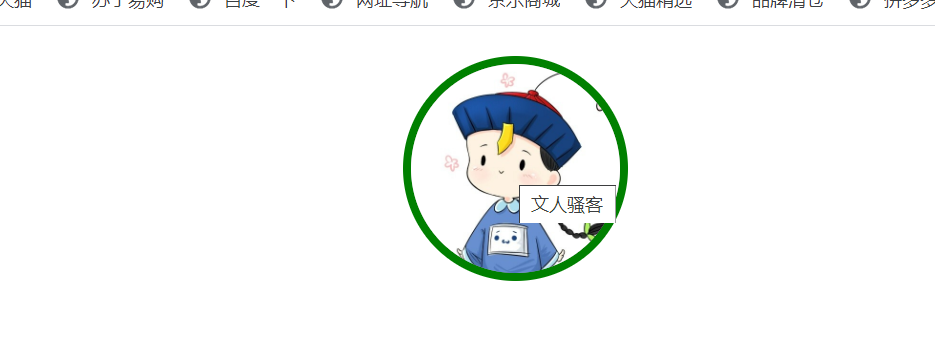
一个圆形头像的小例子
<!DOCTYPE html>
<html lang="en">
<head>
    <meta http-equiv="content-type" charset="UTF-8">
    <title>圆形头像</title>
    <link rel="stylesheet" href="mycss.css">
</head>
<body>
<div class="blog-head">
    <img src="222.jpg" alt="博客头像" title="文人骚客"/>
</div>
</body>
</html>
css样式表
body {
    margin: 0;
}

.blog-head {
    background-color: darkgray;
     140px;
    height: 140px;
    border: 5px solid green;
    border-radius: 50%;
    margin: 20px auto;
    overflow: hidden;
}

.blog-head > img {
     100%;
}
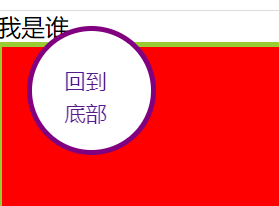
定位属性position
"""
定位属性分为:static、relative、absoulte、fixed
"""
static
# 所有的标签默认都是静态的static,无法改变位置
relative(相对定位)
# 相对于标签原来的位置做移动
absoulte(绝对定位)
# 相对于已经定位过的父标签做移动(如果没有父标签那么就以body为参照
fixed定位
# 相对于浏览器窗口固定在某个位置
<!DOCTYPE html>
<html lang="en">
<head>
    <meta http-equiv="content-type" charset="UTF-8">
    <title>定位属性</title>
    <style>
        body {
            margin: 0;
        }

        #d1 {
            position: fixed; /*位置固定*/
            top: 10px;
            left: 20px;
            height: 80px;
             80px;
            background-color: white;
            border: 3px solid purple;
            border-radius: 50%;
            overflow: hidden;
        }

        #d1 a {
            text-decoration: none;
            font-family: "Arial Black";
            font-size: 14px;
             100%;
        }

        #d1 > div {
            padding: 22px;
        }

        #d2 {
            position: fixed; /*位置固定*/
            bottom: 10px;
            right: 20px;
            height: 80px;
             80px;
            background-color: white;
            border: 3px solid purple;
            border-radius: 50%;
            overflow: hidden;
        }

        #d2 a {
            text-decoration: none;
            font-family: "Arial Black";
            font-size: 14px;
             100%;
        }

        #d2 > div {
            padding: 22px;
        }

        .c1 {
            height: 500px;
             100%;
            background-color: red;
            border: 3px solid yellowgreen;
        }

        .c2 {
            height: 500px;
             100%;
            background-color: lightskyblue;
            border: 3px solid grey;
        }

        .c3 {
            height: 500px;
             100%;
            background-color: green;
            border: 3px solid pink;
        }


    </style>
</head>
<body>
<span id="d4">我是谁<span>
<div id="d1">
    <div><a href="#d5">回到底部</a></div>
</div>
<div class="c1"></div>
<div class="c2"></div>
<div class="c3"></div>
<div id="d2">
    <div><a href="#d4">回到顶部</a></div>
</div>
    <span id="d5">我在哪里</span>
</body>
</html>
是否脱离文档流
# 不脱离文档流
相对定位relative
# 脱离文档流
浮动float
绝对定位absolute
固定定位fixed
z-index模态框
设置对象的层叠顺序
"""
(1)、z-index 值表示谁压着谁,数值大的压盖住数值小的;
(2)、只有定位了的元素,才能有z-index,也就是说,不管相对定位,绝对定位,固定定位,都可以使用z-index,而浮动元素不能使用z-index;
(3)、z-index值没有单位,就是一个正整数,默认的z-index值为0如果大家都没有z-index值,或者z-index值一样,那么谁写在HTML后面,谁在上面压着别人,定位了元素,永远压住没有定位的元素;
(4)、从父现象:父亲怂了,儿子再牛逼也没用。
"""
eg:百度登录页面其实是三层登录结构
1.最底部是正常内容(z=0)  最远的
2.黑色的透明区(z=99)     中间层
3.白色的注册区域(z=100)  离用户最近
百度登录页面示例
<!DOCTYPE html>
<html lang="en">
<head>
    <meta http-equiv="content-type" charset="UTF-8">
    <title>百度登录页面</title>
    <style>
        body {
            margin: 0;
        }

        .cover {
            position: fixed;
            top: 0;
            right: 0;
            bottom: 0;
            left: 0;
            background-color: rgba(0, 0, 0, 0.4);
            z-index: 99;

        }
        .modal{
            background-color: white;
            height: 300px;
             300px;
            position: fixed;
            left: 50%;
            top:50%;
            z-index: 100;
            margin-left: -150px;
            margin-top: -150px;

        }
    </style>
</head>
<body>

<div>萨瓦迪卡萨瓦迪卡萨瓦迪卡</div>
<div class="cover"></div>
<div class="modal">
    <h1>登录页面</h1>
    <p>username:<input type="text" name="username" placeholder="请输入用户名~"/></p>
    <p>password:<input type="password" name="password" placeholder="请输入密码~"/></p>
    <p><input type="submit" value="提交"/></p>
</div>

</body>
</html>

透明度opacity
# 用来定义透明效果。取值范围是0~1,0是完全透明,1是完全不透明。
# 它不单单可以修改颜色的透明度还同时修改字体的透明度
rgba只能影响颜色
而opacity可以修改颜色和字体

opacity: 0.5;