最近做了一个项目,使用不干胶标签贴在RFID抗金属标签上,那么就会出现标签打印的问题,该如何打印呢?后来经过网上冲浪发现,其实打印标签和打印A4纸的方法一样,只不过就是布局、设置纸张大小的问题。
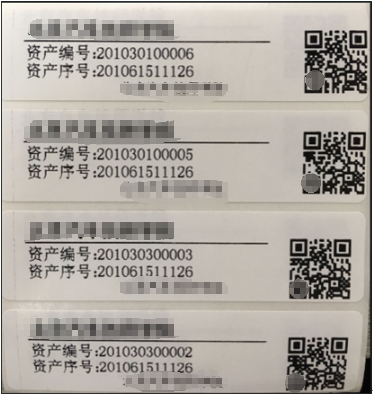
本文介绍打印机初步配置,以及实现方法。标签主要展示资产基本信息以及二维码。
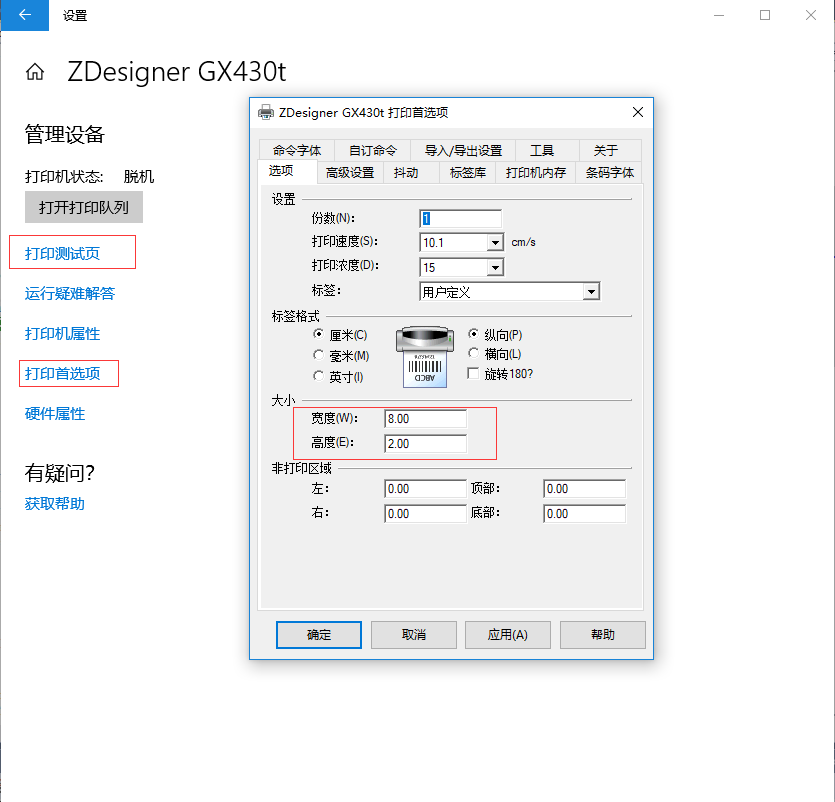
首先设置打印机纸张大小,纸张高宽度以实际标签为准,设置好后可打印测试页测试一下,以ZDesigner GX430t打印机为例。
创建PrintDocument实例,以及配置打印机名称:
/// <summary>
/// 打印
/// </summary>
private void Myprinter()
{
    PrintDocument pd = new PrintDocument();
    pd.PrintPage += new PrintPageEventHandler(printDocument_PrintA4Page);

    pd.DefaultPageSettings.PrinterSettings.PrinterName = "ZDesigner GX430t";       //打印机名称
    //pd.DefaultPageSettings.Landscape = true;  //设置横向打印,不设置默认是纵向的
    pd.PrintController = new System.Drawing.Printing.StandardPrintController();
    pd.Print();
}
设置页面布局,根据实际需求进行排版
private void printDocument_PrintA4Page(object sender, PrintPageEventArgs e)
{
    Font titleFont = new Font("黑体", 11, System.Drawing.FontStyle.Bold);//标题字体
    Font fntTxt = new Font("宋体", 10, System.Drawing.FontStyle.Regular);//正文文字
    Font fntTxt1 = new Font("宋体", 8, System.Drawing.FontStyle.Regular);//正文文字
    System.Drawing.Brush brush = new SolidBrush(System.Drawing.Color.Black);//画刷
    System.Drawing.Pen pen = new System.Drawing.Pen(System.Drawing.Color.Black);           //线条颜色

    try
    {
        e.Graphics.DrawString("标题name", titleFont, brush, new System.Drawing.Point(20, 10));

        Point[] points111 = { new Point(20, 28), new Point(230,28) };
        e.Graphics.DrawLines(pen, points111);

        e.Graphics.DrawString("资产编号:", fntTxt, brush, new System.Drawing.Point(20, 31));
        e.Graphics.DrawString("123456789123465", fntTxt, brush, new System.Drawing.Point(80, 31));
        e.Graphics.DrawString("资产序号:", fntTxt, brush, new System.Drawing.Point(20, 46));
        e.Graphics.DrawString("123456789131321", fntTxt, brush, new System.Drawing.Point(80, 46));

        e.Graphics.DrawString("底部name", fntTxt1, brush, new System.Drawing.Point(100, 62));

        Bitmap bitmap = CreateQRCode("此处为二维码数据");
        e.Graphics.DrawImage(bitmap, new System.Drawing.Point(240, 10));

    }
    catch (Exception ee)
    {
        MessageBox.Show(ee.Message);
    }
}
二维码生成方法,我这里使用zxing
/// <summary>
/// 二维码方法
/// </summary>
/// <param name="asset"></param>
/// <returns></returns>
public static Bitmap CreateQRCode(string asset)
{
    EncodingOptions options = new QrCodeEncodingOptions
    {
        DisableECI = true,
        CharacterSet = "UTF-8", //编码
        Width = 80,             //宽度
        Height = 80             //高度
    };
    BarcodeWriter writer = new BarcodeWriter();
    writer.Format = BarcodeFormat.QR_CODE;
    writer.Options = options;
    return writer.Write(asset);
}
效果图:
最后附上源码,里面有zxing.dll
链接: https://pan.baidu.com/s/1F2joXgj0gmPrwf4yALC-vQ
提取码: yg4x
2019.09.04 补充:
增加一维码打印
/// <summary>
/// 创建条码方法
/// </summary>
/// <param name="asset"></param>
/// <returns></returns>
public static Bitmap CreateCode(string asset)
{
    // 1.设置条形码规格
    EncodingOptions options = new EncodingOptions();
    options.Height = 40; // 必须制定高度、宽度
    options.Width = 120;


    // 2.生成条形码图片并保存
    BarcodeWriter writer = new BarcodeWriter();
    writer.Options = options;
    writer.Format = BarcodeFormat.CODE_128;     //二维码编码
    return writer.Write(asset);     // 生成图片
}