一、微服务架构
简单的说,微服务是系统架构的一种设计风格,它的主旨是将一个原本独立的系统拆分为多个小型服务,这些小型服务都在各自独立的进程中运行,服务之间通过基于HTTP的RESTful API进行通信协作。被拆分的每一个小型服务都围绕着系统中的某一项或耦合度较高的业务功能进行构建,并且每个服务都维护着自身的数据存储、业务开发、自动化测试案例以及独立部署机制。由于有了轻量级的通信协作基础,所以这些微服务可以使用不同的语言来编写。
二、Spring Cloud简介
Spring Cloud是一个基于Spring Boot实现的微服务架构开发工具。它为微服务架构中设计的配置管理、服务治理、断路器、智能路由(路由网关)、微代理、控制总线、全局锁、决策竞选、分布式会话、和集群状态管理等操作提供了一种简单的开发方式。
介绍一下Spring Cloud Netflix(核心组件):
- Eureka:服务治理组件,包含服务注册中心、服务注册与发现机制的实现。
- Hystrix:容错管理组件,实现断路器模式,帮助服务依赖中出现的延迟和为故障提供强大的容错能力。
- Ribbon:客户端负载均衡的服务调用组件
- Feign:基于Ribbon和Hystrix的声明式调用组件
- Zuul:网关组件,提供智能路由、访问过滤等功能
- Archaius:外部化配置组件
当然还有其他组件,比如说Spring Cloud Config(配置管理工具)、Spring Cloud Bus(事件、消息总线) ……
三、Spring Cloud Eureka(微服务架构中最为核心和基础的模块)
Spring Cloud Eureka 是Spring Cloud Netflix微服务套件中的一部分,主要负责完成微服务架构中的服务治理功能。Spring Cloud通过为Eureka增加了Spring Boot风格的自动化配置,我们只需要通过简单引入依赖和注解配置就能让Spring Boot构建的微服务应用轻松地与Eureka服务治理进行整合。
Eureka服务端,服务注册中心
Eureka客户端,处理服务的注册于发现
四、项目结构
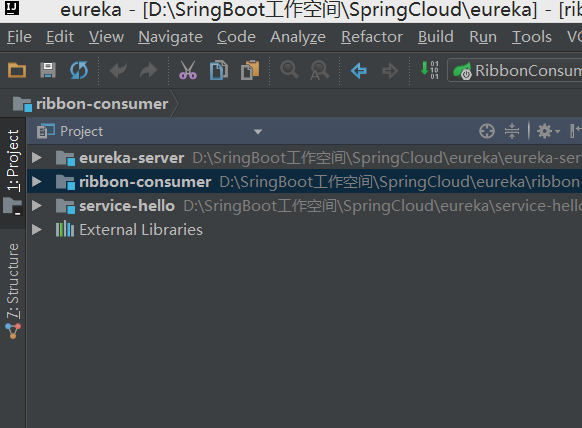
eureka-server:服务注册中心模块
serice-hello:spring boot应用 也为客户端服务模块
ribbon-consumer:负载均衡实现模块
版本说明:Spring Cloud版本采用的是Brixton.SR5版本,基于Spring Boot 1.3.7版本
注意:使用Spring Cloud版本的时候要注意Sring Boot的版本(之前下载好依赖之后,项目运行就会报错,这是版本不兼容的问题)
五、Eureka实现
创建一个空项目,添加一个spring boot模块,命名为eureka-server,在pom.xml中加入必要的依赖:
    <parent>
        <groupId>org.springframework.boot</groupId>
        <artifactId>spring-boot-starter-parent</artifactId>
        <version>1.3.7.RELEASE</version>
        <relativePath/> <!-- lookup parent from repository -->
    </parent>
        <dependency>
            <groupId>org.springframework.cloud</groupId>
            <artifactId>spring-cloud-starter-eureka-server</artifactId>
        </dependency>
    <dependencyManagement>
        <dependencies>
            <dependency>
                <groupId>org.springframework.cloud</groupId>
                <artifactId>spring-cloud-dependencies</artifactId>
                <version>Brixton.SR5</version>
                <type>pom</type>
                <scope>import</scope>
            </dependency>
        </dependencies>
    </dependencyManagement>
通过@EnableEurekaServer注解启动一个服务注册中心提供给其他应用进行对话:
package com.stonegeek;

import org.springframework.boot.SpringApplication;
import org.springframework.boot.autoconfigure.SpringBootApplication;
import org.springframework.cloud.netflix.eureka.server.EnableEurekaServer;

/**
 * Created by StoneGeek on 2018/5/28.
 * 博客地址:http://www.cnblogs.com/sxkgeek
 */

@EnableEurekaServer
@SpringBootApplication
public class EurekaServerApplication {

    public static void main(String[] args) {
        SpringApplication.run(EurekaServerApplication.class, args);
    }
}
配置application.properties(eureka.client.register-with-eureka:由于该应用是注册中心,所以设置为false,代表不向注册中心注册自己,eureka.client.fetch-registry:由于注册中心的职责就是维护服务实例,它并不需要去检索服务,所以也设置为false)
server.port=1111

eureka.instance.hostname=localhost

eureka.client.register-with-eureka=false
eureka.client.fetch-registry=false
eureka.client.service-url.defaultZone=http://${eureka.instance.hostname}:${server.port}/eureka/
#spring.application.name=eureka-server
#
#server.port=1111
#
#eureka.instance.hostname=peer1
#
#eureka.client.service-url.defaultZone=http://peer2:1112/eureka
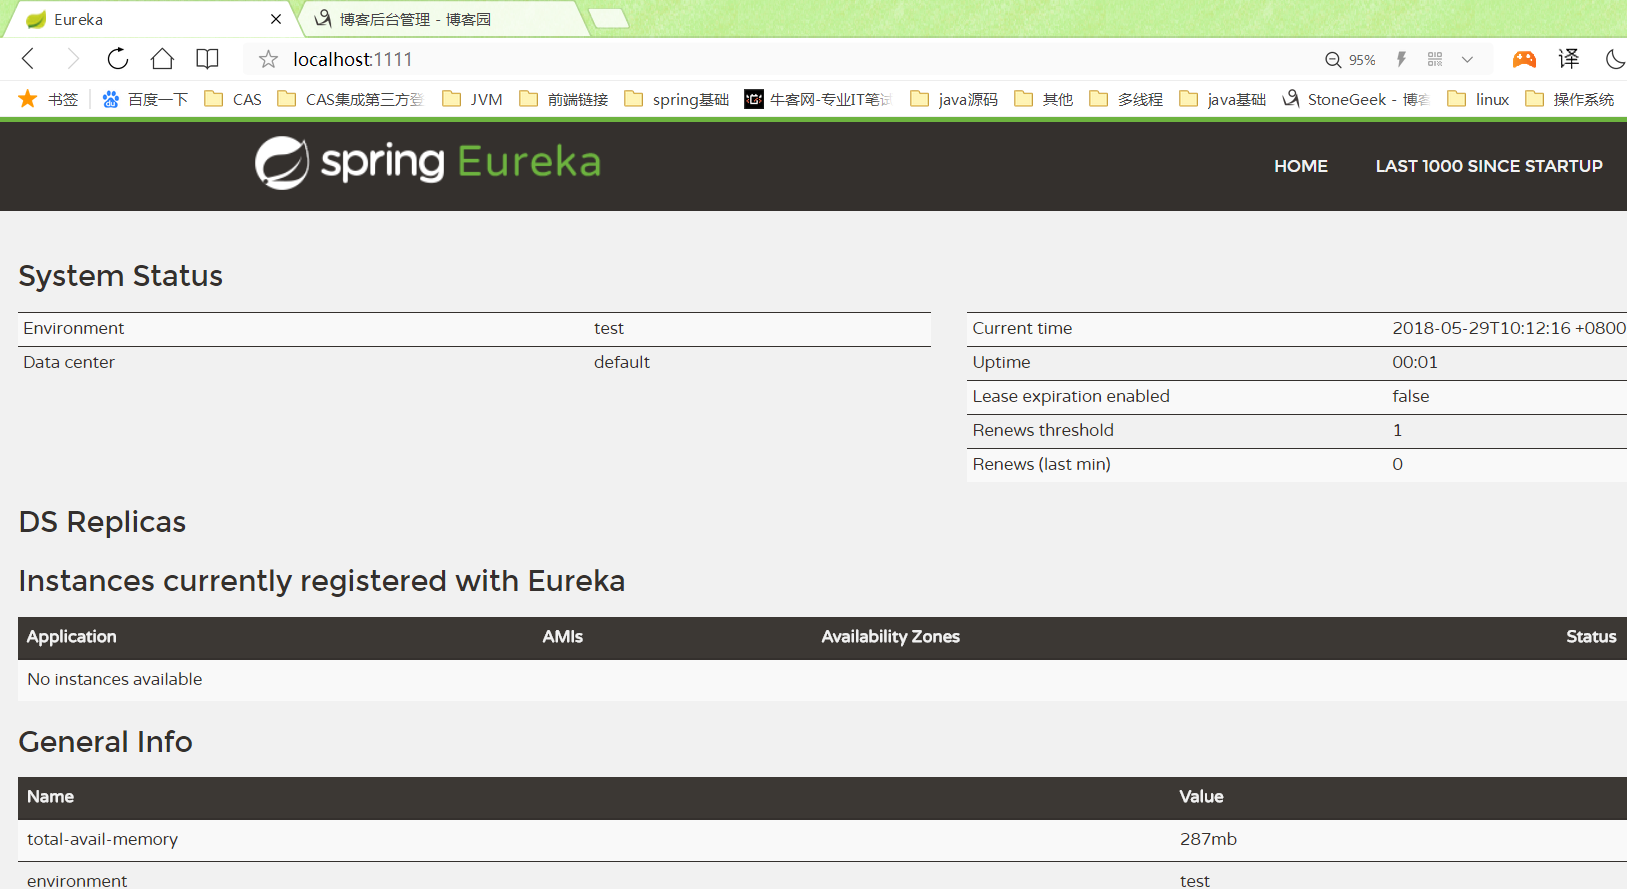
完成上述配置之后,启动应用并访问http://localhost:1111/。可以看到Eureka信息面板,其中Instances currently registered with Eureka栏是空的,说明该注册中心还没有注册任何服务
创建注册服务提供者
在新建一个spring boot 模块,在pom文件中添加模块依赖:
        <dependency>
            <groupId>org.springframework.boot</groupId>
            <artifactId>spring-boot-starter-web</artifactId>
        </dependency>
        <dependency>
            <groupId>org.springframework.cloud</groupId>
            <artifactId>spring-cloud-starter-eureka</artifactId>
        </dependency>
    <dependencyManagement>
        <dependencies>
            <dependency>
                <groupId>org.springframework.cloud</groupId>
                <artifactId>spring-cloud-dependencies</artifactId>
                <version>Brixton.SR5</version>
                <type>pom</type>
                <scope>import</scope>
            </dependency>
        </dependencies>
    </dependencyManagement>
新建hellocontroller.class,通过注入DiscoveryClient对象,在日志中打印出服务的相关内容
package com.stonegeek.controller;

import org.springframework.beans.factory.annotation.Autowired;
import org.springframework.cloud.client.ServiceInstance;
import org.springframework.cloud.client.discovery.DiscoveryClient;
import org.springframework.web.bind.annotation.RequestMapping;
import org.springframework.web.bind.annotation.RequestMethod;
import org.springframework.web.bind.annotation.RestController;

import java.util.logging.Logger;

/**
 * Created by StoneGeek on 2018/5/27.
 * 博客地址:http://www.cnblogs.com/sxkgeek
 */
@RestController
public class HelloController {
    private final Logger logger =Logger.getLogger(String.valueOf(getClass()));
    @Autowired
    private DiscoveryClient client;

    @RequestMapping(value = "hello",method = RequestMethod.GET)
    public String  index(){
        ServiceInstance instance=client.getLocalServiceInstance();
        logger.info("/hello, host:"+instance.getHost()+", service_id:"+instance.getServiceId()+"service_port:"+instance.getPort());
        return "hello world ";
    }
}
在主类中通过加上@EnableDiscoveryClient注解,激活Eureka中的DiscoveryClient实现(自动化配置,创建DiscoveryClient接口针对Eureka客户端的EurekaDiscoveryClient实例),才能实现上述controller中对服务信息的输出
package com.stonegeek;

import org.springframework.boot.SpringApplication;
import org.springframework.boot.autoconfigure.SpringBootApplication;
import org.springframework.cloud.client.discovery.EnableDiscoveryClient;

@EnableDiscoveryClient
@SpringBootApplication
public class ServiceHelloApplication {

    public static void main(String[] args) {
        SpringApplication.run(ServiceHelloApplication.class, args);
    }
}
最后,我们需要在application.properties配置文件中,通过spring.application.name属性来为服务命名,此处命名为service-hello,再通过eureka.client.serviceUrl.defaultZone属性来指定服务注册中心地址,这里使用之前构建的服务注册中心地址,
spring.application.name=service-hello
eureka.client.service-url.defaultZone=http://localhost:1111/eureka
之后,我们分别启动上述两个模块、服务注册中心模块(eureka-server),客户端服务模块(service-hello),
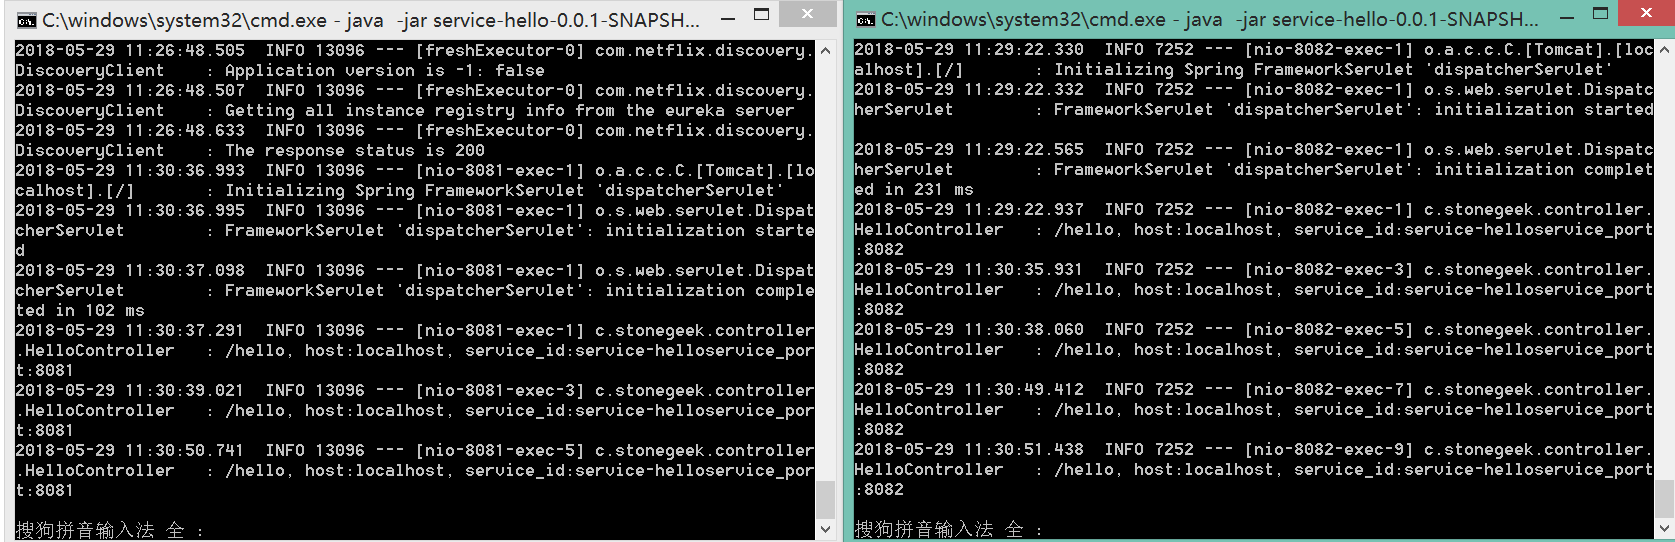
service-hello控制台打印:
![]()
eureka-server打印:
![]()
eureka信息面板:

访问localhost:8080/hello ,service-hello控制台打印:

以上输出内容就是之前我们在helloController中注入的DiscoveryClient接口对象,从服务注册中心获取的服务相关信息
六、Ribbon负载均衡实现
上述我们已经有了服务注册中心和服务提供者,现在就来构建一个服务消费者,而且Ribbon是一个基于HTTP和TCP的客户端负载均衡器
创建一个springboot的基础工程来实现服务消费者,命名为ribbon-consumer,并在pom.xml中添加相关依赖
        <dependency>
            <groupId>org.springframework.boot</groupId>
            <artifactId>spring-boot-starter-web</artifactId>
        </dependency>
        <dependency>
            <groupId>org.springframework.cloud</groupId>
            <artifactId>spring-cloud-starter-eureka</artifactId>
        </dependency>
        <dependency>
            <groupId>org.springframework.cloud</groupId>
            <artifactId>spring-cloud-starter-ribbon</artifactId>
        </dependency>
    <dependencyManagement>
        <dependencies>
            <dependency>
                <groupId>org.springframework.cloud</groupId>
                <artifactId>spring-cloud-dependencies</artifactId>
                <version>Brixton.SR5</version>
                <type>pom</type>
                <scope>import</scope>
            </dependency>
        </dependencies>
    </dependencyManagement>
在应用主类RibbonConsumerApplication中通过@EnableDiscoveryClient注解让该应用注册为Eureka客户端应用,以获得服务发现能力,同时在主类中创建RestTemplate的spring bean 实例,并通过@LoadBanlanced注解开启客户端负载均衡。
package com.stonegeek;

import org.springframework.boot.SpringApplication;
import org.springframework.boot.autoconfigure.SpringBootApplication;
import org.springframework.cloud.client.discovery.EnableDiscoveryClient;
import org.springframework.cloud.client.loadbalancer.LoadBalanced;
import org.springframework.context.annotation.Bean;
import org.springframework.web.client.RestTemplate;

/**
 * Created by StoneGeek on 2018/5/28.
 * 博客地址:http://www.cnblogs.com/sxkgeek
 */

@EnableDiscoveryClient
@SpringBootApplication
public class RibbonConsumerApplication {

    @Bean
    @LoadBalanced
    RestTemplate restTemplate(){
        return new RestTemplate();
    }
    public static void main(String[] args) {
        SpringApplication.run(RibbonConsumerApplication.class, args);
    }
}
创建ConsumerController类并实现/ribbon-consumer接口。在该接口中,通过在上面创建的RestTemplate来实现对SERIVCE-HELLO服务提供的/hello接口进行调用。可以看到这里访问的地址是服务名SEVICE-HELLO,而不是一个地址,这在服务治理框架中是一个很重要的特性
package com.stonegeek.controller;

import org.springframework.beans.factory.annotation.Autowired;
import org.springframework.web.bind.annotation.RequestMapping;
import org.springframework.web.bind.annotation.RequestMethod;
import org.springframework.web.bind.annotation.RestController;
import org.springframework.web.client.RestTemplate;

/**
 * Created by StoneGeek on 2018/5/28.
 * 博客地址:http://www.cnblogs.com/sxkgeek
 */
@RestController
public class ConsumerController {
    @Autowired
    RestTemplate restTemplate;

    @RequestMapping(value = "/ribbon-consumer",method = RequestMethod.GET)
    public String helloConsumer(){
        return restTemplate.getForEntity("http://SERVICE-HELLO/hello",String.class).getBody();
    }
}
配置application.properties ,配置Eureka服务注册中心的位置,需要与之前SERVICE-HELLO一样,否则发现不了该服务,同时设置该消费者端口我9000,不能与之前的应用端口冲突。
spring.application.name=ribbon-consumer

server.port=9000
eureka.client.service-url.defaultZone=http://localhost:1111/eureka/
现在开始启动三个模块,首先启动服务注册中心,然后在IDEA中打包SERVICE-HELLO生成JAR文件,然后在命令行中输入java -jar 生成的JAR包 --server.port=8081,然后将8081修改为8082


再启动ribbon-comsumer模块后,可以看到eureka信息面板,除了SERVICE-HELLO(两个实例单元,分别是8081,8082)、还多了一个RIBBON-COMSUMER服务:

通过访问http://localhost:9000/ribbon-consumer发出GET请求,成功返回“ Hello,World”。此时在ribbon-consumer控制台看到:当前客户端维护的SERCVICE-HELLO的服务列表情况。其中包含了各个实例的位置,Ribbon就是按照此信息进行轮询访问的,以实现基于客户端的负载均衡:

再发送几次请求,观察两个SERVICE-HELLO的控制台,可以发现Ribbon轮询访问这两个SERVICE实例:
自此Eureka的 服务注册中心与发现、Ribbon的客户端负载均衡也就搭建完成了!!!后续还会补充其他核心组件的搭建!!!