1.AIDL是什么:Android Interface Definition Language,即Android接口定义语言。
2.为什么要使用AIDL:Android系统中的进程之间不能共享内存,因此,需要提供一些机制在不同进程之间进行数据通信。
3.AIDL的使用步骤:
(1)建立aidl的服务方:
a.建立一个含有activity的service,其实也可以直接建立一个service,此处只是简单介绍.
b.建立aidl文件,声明接口以及方法,建立完成后ADT会自动生成一个aild接口的实现java文件,在gen下面.
c.建立service继承类,内部实现aidl的stub.且在onbind中进行返回.
b.AndroidManifest.xml文件中配置AIDL服务,需要注意的是<action>标签中android:name的属性值就是客户端要引用该服务的ID,也就是Intent类的参数值。
(2)建立客户断完成跨进程的调用.
a.建立android project内部会自动创建一个activity,在activity中bind服务.bind服务成功后,onServiceConnected将会回调返回给service给定的ibind.
b.onServiceConnected根据返回的内容,实现跨进程的调用.
4.经典Hello World的例子
本例子建立两个不同的android project来模拟两个不同的进程,一个service(包含aidl以及实现aidl),一个client实现跨进程接口的调用.具体步骤如下:
(1)Service
a.建立一个android project,在内部建立一个ServiceInterface.aidl以及ServiceAidl.ServiceInterface.aidl申明需要用到的方法.ServiceAidl是一个service,主要实现aidl的方法以及返回给client端调用的接口.在申明完aidl后对应的gen下面会自动生成对应的
ServiceInterface.aidl的java类.结构图以及实现如下图:

对应的代码如下:
package com.example.serviceaidl;

import android.os.Bundle;
import android.app.Activity;
import android.util.Log;
import android.view.Menu;

public class ServiceMainActivity extends Activity {

    @Override
    protected void onCreate(Bundle savedInstanceState) {
        super.onCreate(savedInstanceState);
        setContentView(R.layout.activity_main);
        Log.d(this.getClass().getName(),"ServiceAidl MainActivity onCreate");
    }

    @Override
    public boolean onCreateOptionsMenu(Menu menu) {
        // Inflate the menu; this adds items to the action bar if it is present.
        getMenuInflater().inflate(R.menu.activity_main, menu);
        return true;
    }
    @Override
    protected void onDestroy() {
        super.onDestroy();
        Log.d(this.getClass().getName(),"ServiceAidl MainActivity onDestroy");
    }
}
package com.example.serviceaidl;

interface ServiceInterface{
 String getHelloWord();
}
package com.example.serviceaidl;

import android.app.Service;
import android.content.Intent;
import android.os.Bundle;
import android.os.IBinder;
import android.os.RemoteException;
import android.util.Log;

public class ServiceAidl extends Service {
   @Override
   public void onCreate() {
        super.onCreate();
        Log.d(this.getClass().getName(),"ServiceMainActivity ServiceAidl onCreate");
   }

    public class ServiceInterfaceInstance extends ServiceInterface.Stub{
        @Override
        public String getHelloWord() throws RemoteException{
            Log.d(this.getClass().getName(),"ServiceMainActivity ServiceInterfaceInstance getHelloWord impl");
            return "Hello world!!!";
        }
    }
    @Override
    public IBinder onBind(Intent arg0) {
        // TODO Auto-generated method stub
        ServiceInterfaceInstance  serviceInterfaceInstance = new ServiceInterfaceInstance();
        Log.d(this.getClass().getName(),"ServiceMainActivity ServiceInterfaceInstance onBind return serviceInterfaceInstance");
        return serviceInterfaceInstance;
    }
    @Override
     public void onDestroy() {
         super.onDestroy();
         Log.d(this.getClass().getName(),"ServiceMainActivity ServiceAidl onDestory");
     }
}
b.由于此处用到的MainActivity类只是作为一个起动Service工程的一个入口,以及可以从起动的时候看到servie对应的进程号,作为一个简单的界面无需多做介绍.另外AndroidManifest.xml需要声明service的action(android:name="start_service_withaidl_action" ),作为client绑定的标志.对应的AndroidManifest.xml配置如下:
<?xml version="1.0" encoding="utf-8"?>
<manifest xmlns:android="http://schemas.android.com/apk/res/android"
    package="com.example.serviceaidl"
    android:versionCode="1"
    android:versionName="1.0" >

    <uses-sdk
        android:minSdkVersion="8"
        android:targetSdkVersion="17" />

    <application
        android:allowBackup="true"
        android:icon="@drawable/ic_launcher"
        android:label="@string/app_name"
        android:theme="@style/AppTheme" >
        <activity
            android:name="com.example.serviceaidl.ServiceMainActivity"
            android:label="@string/app_name" >
            <intent-filter>
                <action android:name="android.intent.action.MAIN" />

                <category android:name="android.intent.category.LAUNCHER" />
            </intent-filter>
        </activity>
        <service
            android:name="com.example.serviceaidl.ServiceAidl" >
            <intent-filter>
                <!-- action android:name的具体值可以任意给定,但必须保证起动service的intent和此处一致。
                    通常使用形如ACTION_AIDL_SERVICE或者com.xxx.xxx等等这种样式。-->
                <action android:name="start_service_withaidl_action" />
            </intent-filter>
        </service>
    </application>

</manifest>
以上的服务端设计完成,以下将实现客户端的调用.
(2)Client
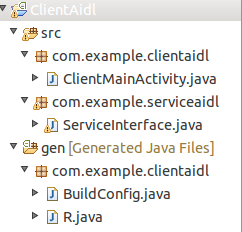
a.Eclipse再建立一个android project, 把上面服务端Service项目工程中gen目录下自动生成的ServiceInterface.java源文件带目录复制到客户端src下.
b.在app的界面MainActivity上,bind Service,同时bind成功后onServiceConnected将会回调,那么回调传回来对象将调用到service里的实现,到此完成跨进程调用.
具体的结构以及代码布局如下所示.
package com.example.clientaidl;

import com.example.serviceaidl.ServiceInterface;

import android.os.Bundle;
import android.os.IBinder;
import android.app.Activity;
import android.content.ComponentName;
import android.content.Context;
import android.content.Intent;
import android.content.ServiceConnection;
import android.util.Log;
import android.view.Menu;
import android.widget.Toast;

public class ClientMainActivity extends Activity {

    @Override
    protected void onCreate(Bundle savedInstanceState) {
        super.onCreate(savedInstanceState);
        setContentView(R.layout.activity_main);
        Log.d(this.getClass().getName(),"Client MainActivity onCreate bindservice");
        bindService(new Intent("start_service_withaidl_action"), serviceConnection, Context.BIND_AUTO_CREATE);
    }

    @Override
    public boolean onCreateOptionsMenu(Menu menu) {
        // Inflate the menu; this adds items to the action bar if it is present.
        getMenuInflater().inflate(R.menu.activity_main, menu);
        return true;
    }
    private ServiceInterface mServerInterface;

    private ServiceConnection serviceConnection = new ServiceConnection() {
        @Override
        public void onServiceConnected(ComponentName name, IBinder service) {
            mServerInterface = ServiceInterface.Stub.asInterface(service);

            try {
                Log.d(this.getClass().getName(),"Client MainActivity ServiceConnectioned..mServerInterface : "+mServerInterface);
                String hello=mServerInterface.getHelloWord();
                //Toast.makeText(this, hi, Toast.LENGTH_SHORT).show();
                Toast.makeText(getApplication(), hello, Toast.LENGTH_SHORT).show();
                //Log.d(this.getClass().getName(),hi);
                Log.d(this.getClass().getName(), "Client bindService...connected");
            } catch (Exception e) {
                e.printStackTrace();
            }
        }

        @Override
        public void onServiceDisconnected(ComponentName name) {
        }
    };
}
以上已经基本完成aidl服务端的建立,客户端的建立,以及客户端执行的跨进程调用.
(3)那么操作是先运行service app,然后运行client app,当界面显示跨进程成功后的toast弹出来后,点击返回,退出各个应用.对应的整个log输出如下,可以很好的说明整个流程.

其中进程:11103即工程Service,此是含service的app起动显示.在这里只是更明显的显示出来servce的进程号.10985显示的是client app的进程.client app起动在create里bind service,此时去起动ServiceAidl(即oncreate),然后成功返回后ServiceAidl的onBind返回bind给client.那么client成功bind
service后,client的onServiceConnected将得到回调,后续从log中也可以看出来.
简单经典的hello world通过aidl完成了.
asdf
(2)Client(2)Client(3)对应的整个log输出如下,可以很好的说明整个流程.
a.Eclipse再建立一个android project, 把上面服务端Service项目工程中gen目录下自动生成的ServiceInterface.java源文件带目录复制到客户端src下.
b.在app的界面MainActivity上,bind Service,同时bind成功后onServiceConnected将会回调,那么回调传回来对象将调用到service里的实现,到此完成跨进程调用.
具体的结构以及代码布局如下所示.
a.Eclipse再建立一个android project, 把上面服务端Service项目工程中gen目录下自动生成的ServiceInterface.java源文件带目录复制到客户端src下.
b.在app的界面MainActivity上,bind Service,同时bind成功后onServiceConnected将会回调,那么回调传回来对象将调用到service里的实现,到此完成跨进程调用.
具体的结构以及代码布局如下