引言: Ionic2开始采用TypeScript进行编码。本文讲述如何在Ionic2 项目中调用原生的 js 代码。Ionic2和Ionic3的区别不大,方法是通用的。
本文代码:
http://git.oschina.net/mingyueyixi/ionic-js
归纳为两种方法:
- 直接编写声明文件就可以使用的方式
- 在html中使用script标签引入的方式
调用过程可以归纳为:
- 引入 js 文件到项目中
- 编写 TypeScript 声明文件
- 在 index.html 中配置 js 文件(可以没有)
这一个过程和方法和Angular2+中调用 js 原理一致。可以参考我的上一篇文章:
http://blog.csdn.net/mingyueyixi/article/details/73695321
同样的,书写.d.ts声明文件是最重要的。不会写这个,写的不好,或者一些js代码写了也引不进来,那么得考虑在网页文件index.html中使用<script> 标签引入。而由于 js 代码会被编译到main.js中,从而导致www目录中不存在要引入的 js 文件,于是,我们需要进行一些配置,使 js 文件像 assets 目录一样不被编译,原样拷贝到www中。
这里,不管是不是在index.html中引入js文件,声明文件都是要写的(至少需要书写声明语句)。因为TypeScript 就靠声明文件或声明语句,来感知 js 代码定义了哪些东西(接口,类,方法)。
接下来,从无到有创建项目,并演示如何调用 js 代码。
创建Ionic-Js 项目
执行命令创建ionic-js项目:
ionic start Ionic-Js blank --v2如果是网络正常,node-module会成功安装。
如果网络不好,手动安装依赖库:
npm install解决依赖安装时的网络问题,参考我的上一篇文章。
浏览器查看:
ionic serve直接编写声明文件就可以使用的方式
涉及模块加载
创建库目录
按此路径:src/lib/wocao 依次创建lib目录和wocao目录。
创建 js 文件
es模块、js 类。
wocao.js中的代码:
"use strict";
exports.__esModule = true;
var Wocao = (function () {
    function Wocao() {
    }
    Wocao.prototype.mean = function () {
        return "老马卧于槽上,忽大惊曰:尼玛!";
    };
    return Wocao;
}());
exports.Wocao = Wocao;
依据js代码结构编写声明文件
wocao.js 代码结构其实很简单,就一个类,附带mean()方法。于是编写的声明文件wocao.d.ts 。
wocao.d.ts 代码:
export declare class Wocao {
    mean(): string;
}
在 ts 中调用
声明文件编写完成后,就可以调用了。在HomePage(src/pages/home/home.ts)中使用:
import {Component, OnInit} from '@angular/core';
import { NavController } from 'ionic-angular';
import {Wocao} from "../../lib/wocao";
@Component({
selector: 'page-home',
templateUrl: 'home.html'
})
export class HomePage{
constructor(public navCtrl: NavController) {
let wocao = new Wocao();
alert(wocao.mean());
}
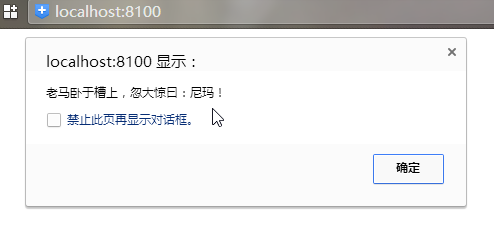
}
效果:
在html中使用script标签引入的方式
当 js 代码写的比较坑,不太明白怎么整这些模块加载的时候。可以直接在html中引入。
创建专门装载 js 代码的库目录
在src下创建 js 目录。
其实这一步可以不需要,可以直接在assets中放置js代码。创建的 js 目录要保证不被编译,需要配置。
配置 js 库和其它目录的复制方式
这个配置方法可以改变Ionic的构建方式。具体可以在Ionic的官方github上找到一个专门描述项目配置的项目。
在项目根目录的package.json中添加配置:
 "config": {
        "ionic_src_dir": "src",
        "ionic_www_dir": "www",
        "ionic_build_dir": "www/build",
        "ionic_copy": "config/copy.config.js"
    }
整个package.json 的内容为:
http://git.oschina.net/mingyueyixi/ionic-js/blob/master/package.json
依据上述配置的 "ionic_copy" 在根目录创建 config/copy.config.js 目录和文件,
copy.config.js 的内容:
// this is a custom dictionary to make it easy to extend/override
// provide a name for an entry, it can be anything such as 'copyAssets' or 'copyFonts'
// then provide an object with a `src` array of globs and a `dest` string

module.exports = {
  copyAssets: {
    src: ['{{SRC}}/assets/**/*'],
    dest: '{{WWW}}/assets'
  },
  // src/js目录被配置为js仓库,只递归拷贝js文件
  copyLibs:{
    src: ['{{SRC}}/js/**/*.js'],
    dest: '{{WWW}}/js'
  },
  copyIndexContent: {
    src: ['{{SRC}}/index.html', '{{SRC}}/manifest.json', '{{SRC}}/service-worker.js'],
    dest: '{{WWW}}'
  },
  copyFonts: {
    src: ['{{ROOT}}/node_modules/ionicons/dist/fonts/**/*', '{{ROOT}}/node_modules/ionic-angular/fonts/**/*'],
    dest: '{{WWW}}/assets/fonts'
  },
  copyPolyfills: {
    src: ['{{ROOT}}/node_modules/ionic-angular/polyfills/polyfills.js'],
    dest: '{{BUILD}}'
  },
  copySwToolbox: {
    src: ['{{ROOT}}/node_modules/sw-toolbox/sw-toolbox.js'],
    dest: '{{BUILD}}'
  }
}
将 js 代码放到 js 库目录中
这里使用一个第三方 js 库——Base64_utillity 来进行说明。
Base64_utillity 库的GitHub地址:https://github.com/ShashiBadhuk/base64_utility
在src/js 目录中创建base64_utillity 目录。下载这个js 库:
https://github.com/ShashiBadhuk/base64_utility/blob/master/index.js
将其放到src/js 中,并改名为 base64_uitllity.js ,以下是这个库的内容:
/*
 * Base64 Utility v0.0.1
 * Copyright 2016 Javascriptt.com
 * Authors: Shashi Badhuk.
 * All Rights Reserved.
 * Use, reproduction, distribution, and modification of this code is subject to the terms and
 * conditions of the MIT license
 *
 */
var Base64 = {

  // private property
  _keyStr: "ABCDEFGHIJKLMNOPQRSTUVWXYZabcdefghijklmnopqrstuvwxyz0123456789+/=",

  // public method for encoding
  encode: function(input) {
    var output = "";
    var chr1, chr2, chr3, enc1, enc2, enc3, enc4;
    var i = 0;

    input = Base64._utf8_encode(input);

    while (i < input.length) {

      chr1 = input.charCodeAt(i++);
      chr2 = input.charCodeAt(i++);
      chr3 = input.charCodeAt(i++);

      enc1 = chr1 >> 2;
      enc2 = ((chr1 & 3) << 4) | (chr2 >> 4);
      enc3 = ((chr2 & 15) << 2) | (chr3 >> 6);
      enc4 = chr3 & 63;

      if (isNaN(chr2)) {
        enc3 = enc4 = 64;
      } else if (isNaN(chr3)) {
        enc4 = 64;
      }

      output = output +
        this._keyStr.charAt(enc1) + this._keyStr.charAt(enc2) +
        this._keyStr.charAt(enc3) + this._keyStr.charAt(enc4);

    }

    return output;
  },

  // public method for decoding
  decode: function(input) {
    var output = "";
    var chr1, chr2, chr3;
    var enc1, enc2, enc3, enc4;
    var i = 0;

    input = input.replace(/[^A-Za-z0-9+/=]/g, "");

    while (i < input.length) {

      enc1 = this._keyStr.indexOf(input.charAt(i++));
      enc2 = this._keyStr.indexOf(input.charAt(i++));
      enc3 = this._keyStr.indexOf(input.charAt(i++));
      enc4 = this._keyStr.indexOf(input.charAt(i++));

      chr1 = (enc1 << 2) | (enc2 >> 4);
      chr2 = ((enc2 & 15) << 4) | (enc3 >> 2);
      chr3 = ((enc3 & 3) << 6) | enc4;

      output = output + String.fromCharCode(chr1);

      if (enc3 != 64) {
        output = output + String.fromCharCode(chr2);
      }
      if (enc4 != 64) {
        output = output + String.fromCharCode(chr3);
      }

    }

    output = Base64._utf8_decode(output);

    return output;

  },

  // private method for UTF-8 encoding
  _utf8_encode: function(string) {
    string = string.replace(/
/g, "
");
    var utftext = "";

    for (var n = 0; n < string.length; n++) {

      var c = string.charCodeAt(n);

      if (c < 128) {
        utftext += String.fromCharCode(c);
      } else if ((c > 127) && (c < 2048)) {
        utftext += String.fromCharCode((c >> 6) | 192);
        utftext += String.fromCharCode((c & 63) | 128);
      } else {
        utftext += String.fromCharCode((c >> 12) | 224);
        utftext += String.fromCharCode(((c >> 6) & 63) | 128);
        utftext += String.fromCharCode((c & 63) | 128);
      }

    }

    return utftext;
  },

  // private method for UTF-8 decoding
  _utf8_decode: function(utftext) {
    var string = "";
    var i = 0;
    var c = c1 = c2 = 0;

    while (i < utftext.length) {

      c = utftext.charCodeAt(i);

      if (c < 128) {
        string += String.fromCharCode(c);
        i++;
      } else if ((c > 191) && (c < 224)) {
        c2 = utftext.charCodeAt(i + 1);
        string += String.fromCharCode(((c & 31) << 6) | (c2 & 63));
        i += 2;
      } else {
        c2 = utftext.charCodeAt(i + 1);
        c3 = utftext.charCodeAt(i + 2);
        string += String.fromCharCode(((c & 15) << 12) | ((c2 & 63) << 6) | (c3 & 63));
        i += 3;
      }

    }

    return string;
  }

}
module.exports = Base64;
为这个 js 库编写声明文件
依据Base64_utillity.js 代码结构,在src/js/base64_utillity 中创建声明文件。
base64_utillity.d.ts :
declare var Base64:{
    encode: (input: string) => string;
    decode: (input: string) => string;
    _utf8_encode: (string: any) => string;
    _utf8_decode: (utftext: any) => string;
  }
其实这一段代码也可以直接写在其他任何需要使用的 ts 中。比如写在HomePage 的 import 语句下。这种方式声明的Base64不是全局的,其他地方使用不方便。
在html中引入js文件
依照传统的方式,在 src/index.html 中引入js文件:
<html>
    <head>
        <!-- 省略 -->
        <script src="js/base64-utillity/Base64_utillity.js"></script>
    </head>
    <body>
        <!-- 省略 -->
    </body>
</html>
index.html完整内容:
在 ts 中调用
依旧是HomePage(src/pages/home/home.ts)中使用:
import {Component} from '@angular/core';
import { NavController } from 'ionic-angular';
import {Wocao} from "../../lib/wocao";
// 也可以写在这里
// declare var Base64:{
// encode: (input: string) => string;
// decode: (input: string) => string;
// _utf8_encode: (string: any) => string;
// _utf8_decode: (utftext: any) => string;
// }
@Component({
selector: 'page-home',
templateUrl: 'home.html'
})
export class HomePage{
constructor(public navCtrl: NavController) {
// let wocao = new Wocao();
// alert(wocao.mean());
let encodeText = Base64.encode("中国");
let deCodeText = Base64.decode(encodeText);
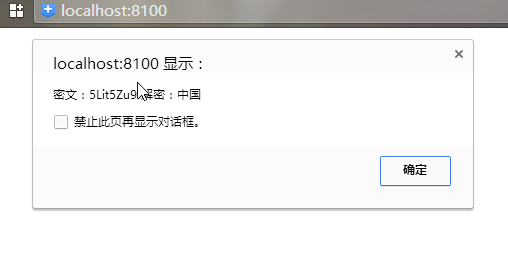
alert("密文:"+encodeText+" 解密:"+deCodeText);
}
}预览:
ionic-js 文件结构一览
如图,这个示例的文件结构:
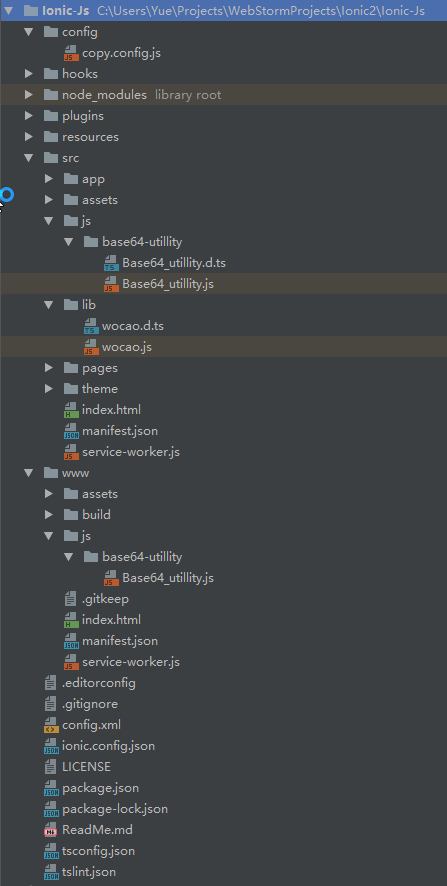
可以看到,编译后,src/js 目录下的东西,只有 js 文件被复制到 www/js 中。