1.把项目打成war包放到linux服务器上
2.linux相应项目对应的启动命令:

#!/bin/bash

export BUILD_ID=dontKillMe
pid=`ps -ef | grep /home/rivamed/fw-fhvc/flvcat-hvc-exec-v2.0.0.11.war | grep -v grep | awk '{print $2}'`
if [ -n "$pid" ]
then
kill -9 $pid
fi
#指定最后编译好的jar存放的位置
www_path=/home/rivamed/fw-fhvc

#Jenkins中编译好的jar名称
jar_name=flvcat-hvc-exec-v2.0.0.11.war
source /etc/profile
#进入最后指定存放jar的位置
cd  ${www_path}
war_path=${www_path}/${jar_name}
config_path=${www_path}/config

echo "开始启动"

nohup java -jar -Xdebug -Xrunjdwp:transport=dt_socket,server=y,suspend=n,address=8401 -Dfile.encoding=UTF-8 -Dcas.standalone.config="$config_path" "$war_path" > nohup.out 2>&1 &
> nohup.out
tail -f nohup.out
注意:启动命令上需要加上下面指令 才能使用远程调试
-Xdebug -Xrunjdwp:transport=dt_socket,server=y,suspend=n,address=8401
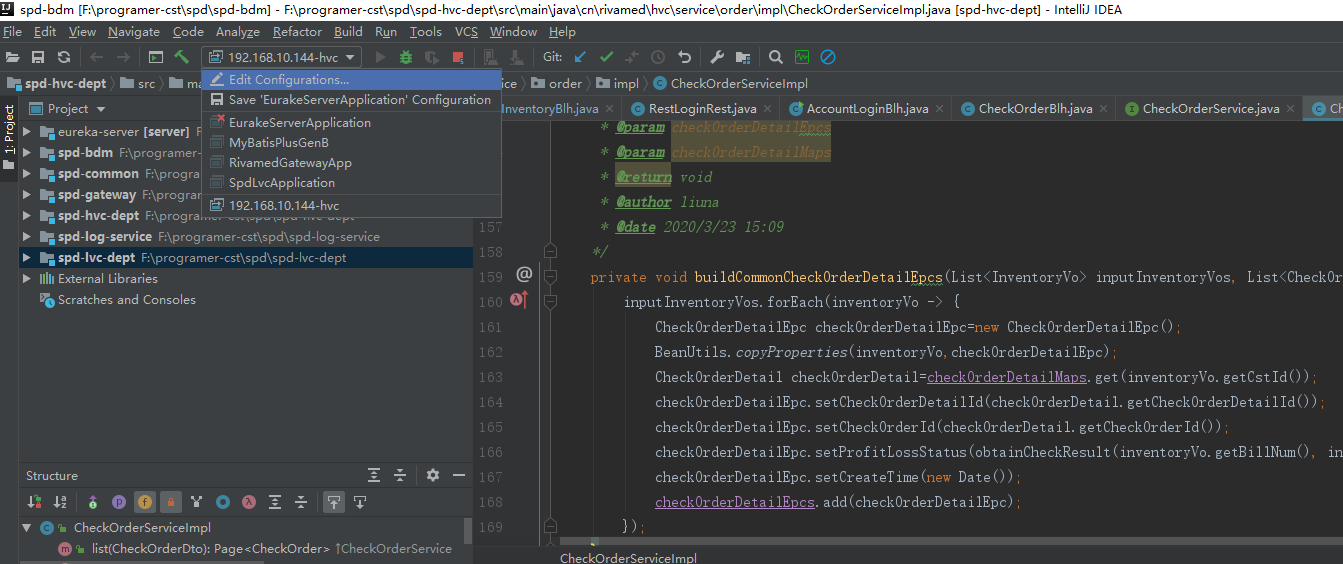
3.idea中配置远程调试
首先选择选择Edit Configurations
然后添加一个remote
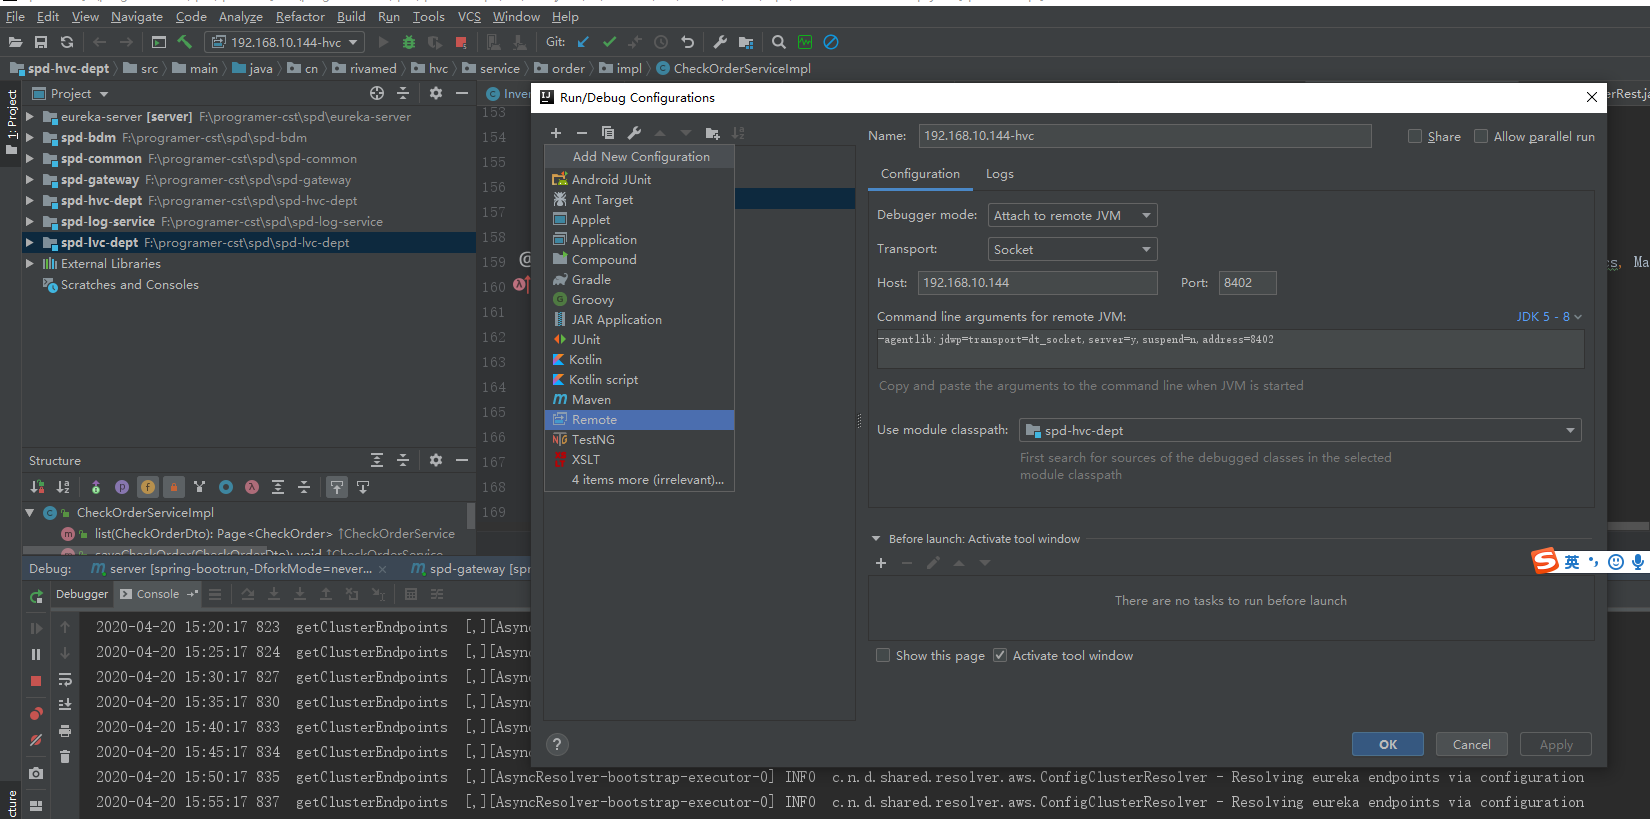
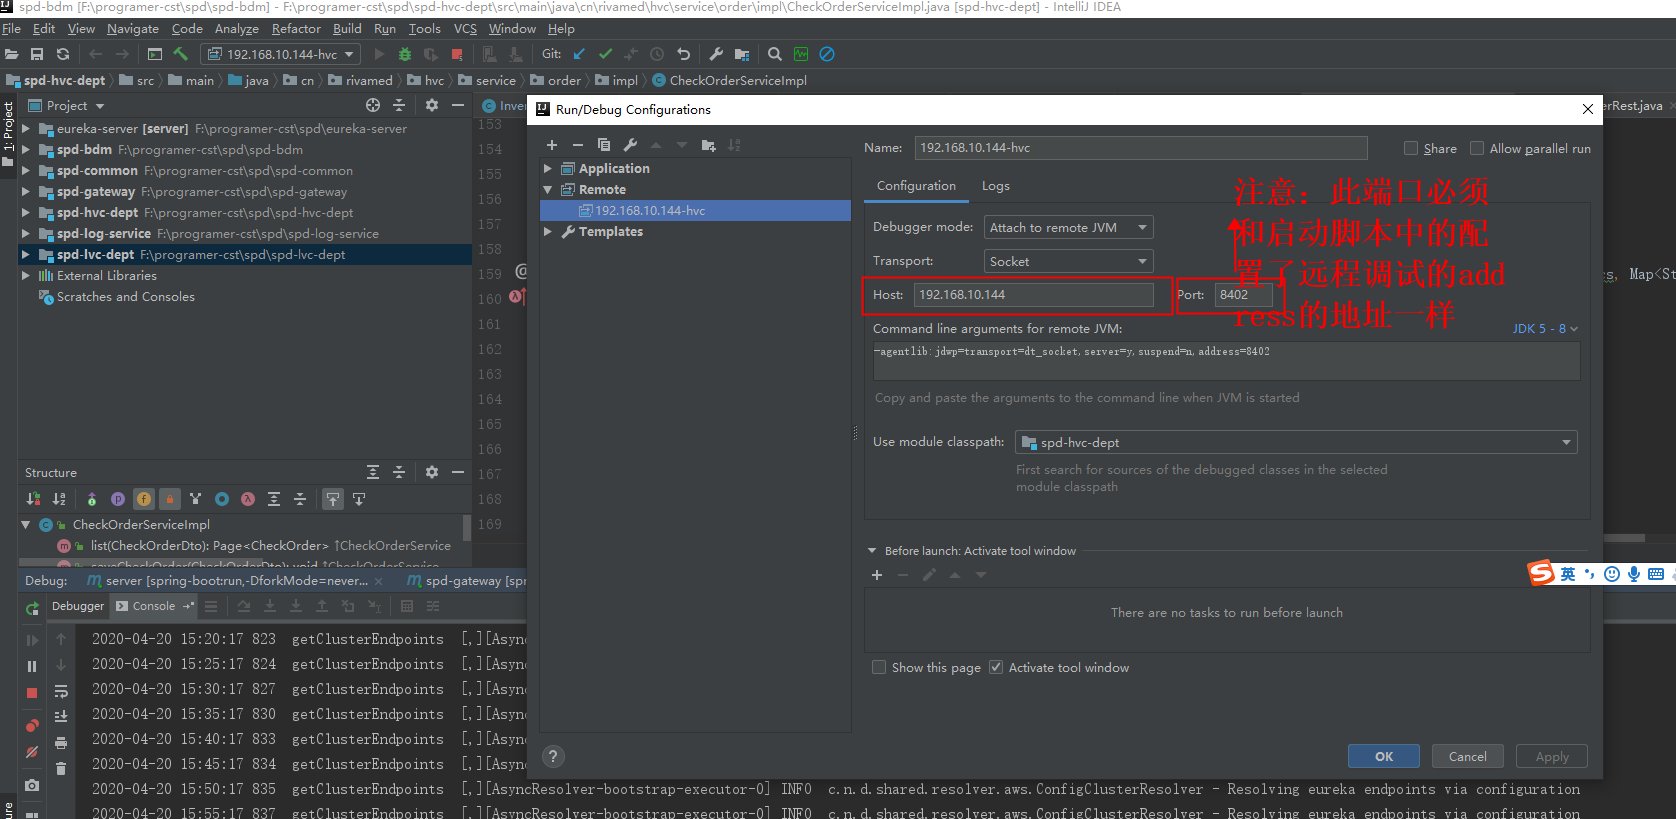
最后添加要调试的远程的ip地址和端口
4、debug模式启动上面添加的remote,即可进行远程断点调试