上一篇博文简述了脚手架的使用,以及在ws中的简单配置,详细的配置方法就不讲了,可能有很多细节,在日常使用中发掘就好。然后是脚手架的项目结构以及之间的联系,这个完全可以自己找出来,再不济就百度一下就好。
今天记录一下组件之间的传值问题,特别是兄弟组件的传值,真的是为难了我好久的一个问题:
要做啥呢?:
方便兄弟组件中传值,我知道的实现方式有两种,一种是使用React Context,一种是 如图所示的传球:
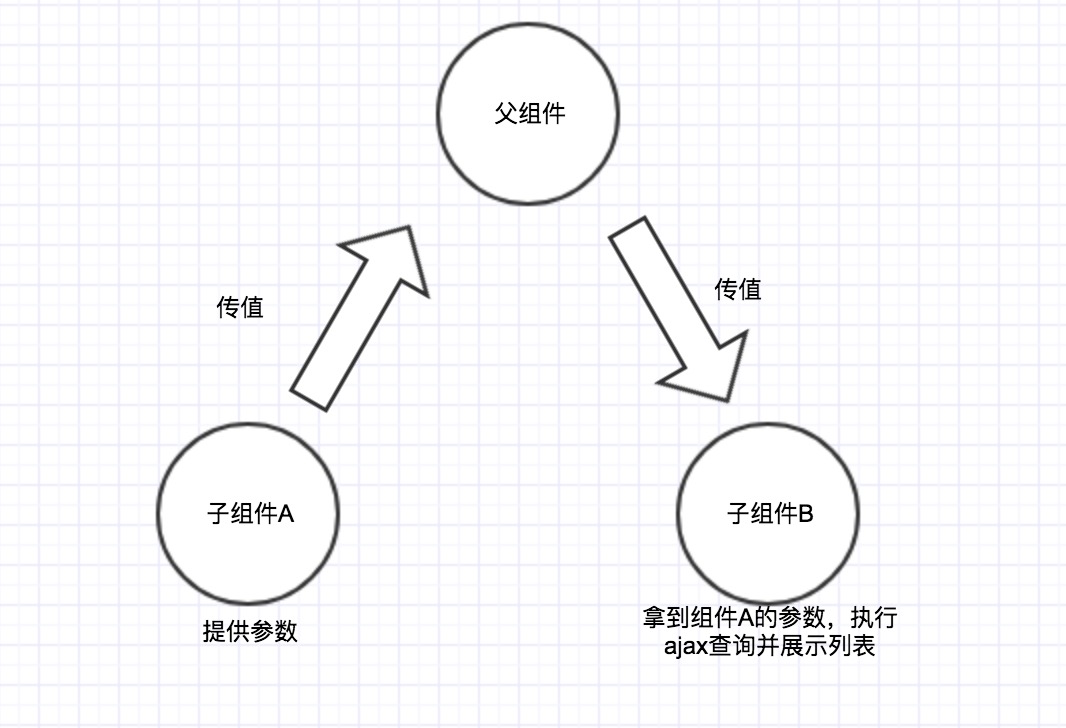
组件结构图:
输入参数,点击查询,查询的input值传递给兄弟组件查询数据:
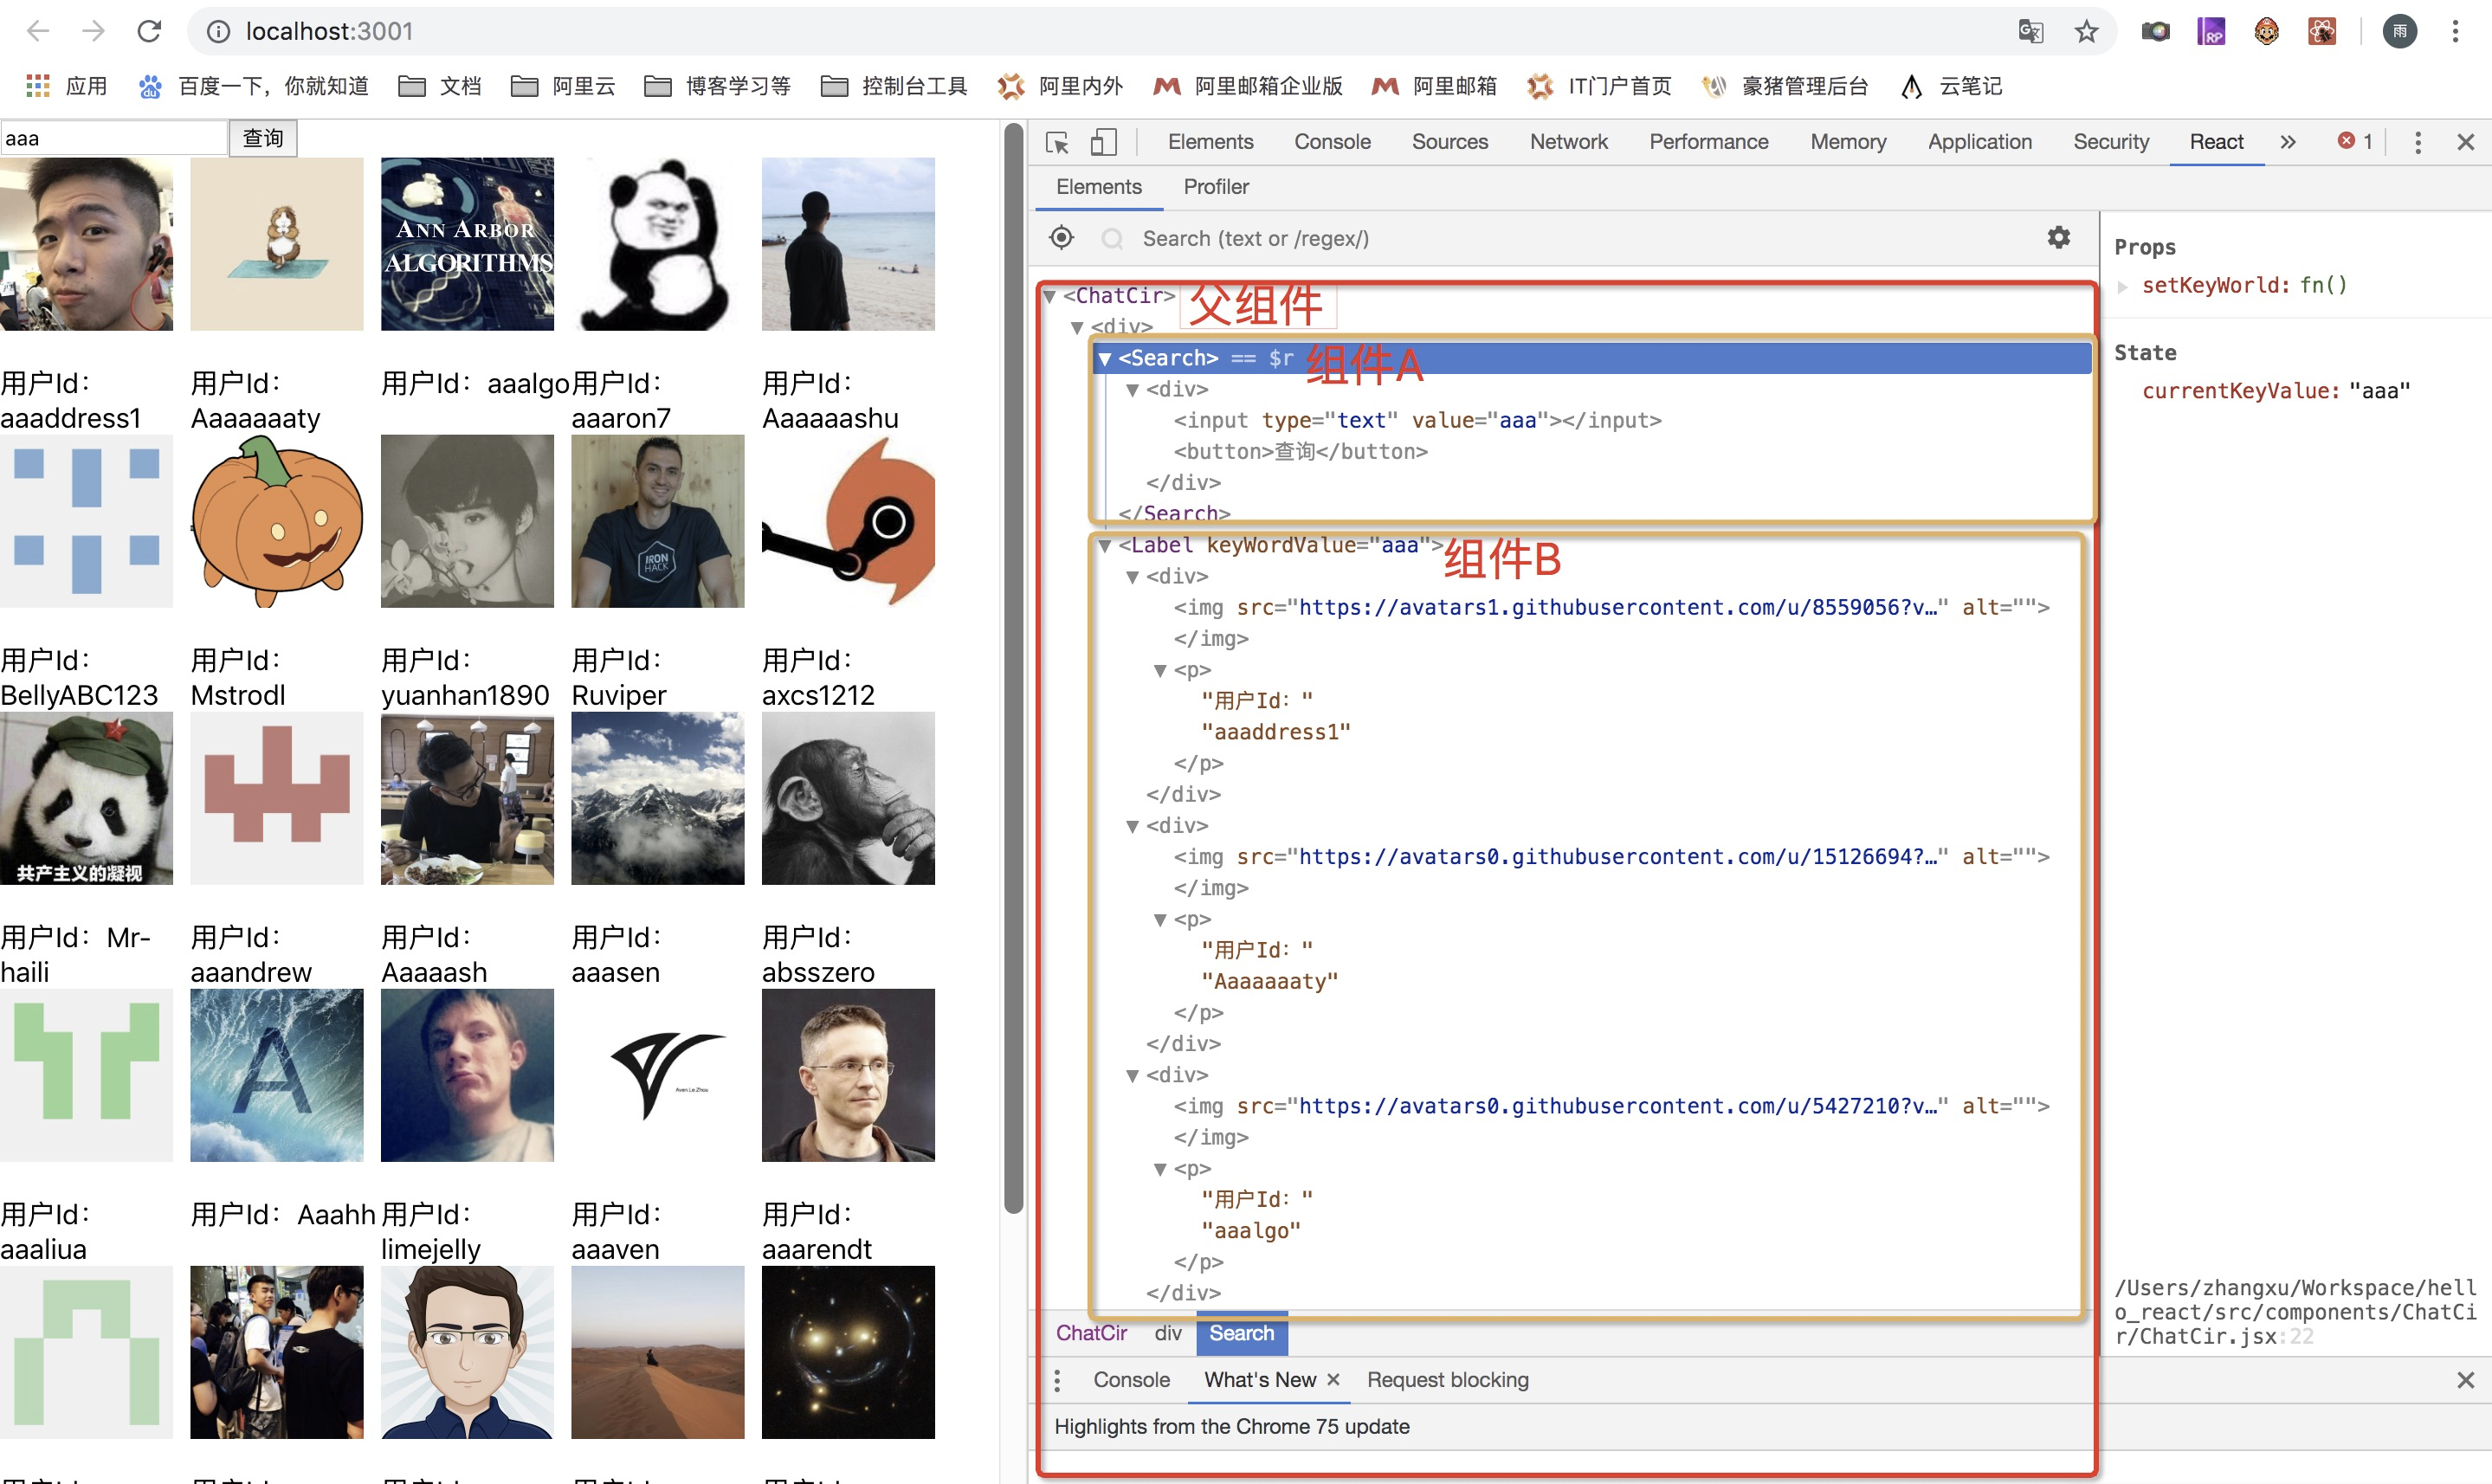
组件代码:
父组件:
import React,{Component} from 'react';
import Label from './Label';
import Search from './Search';
//组件传值可以使用 Context
export default class ChatCir extends Component{
    constructor(props){
        super(props);
        this.state={
            keyWord: ''
        }
    }
    //设置组件A input的查询参数
    setKeyWorld = (keyWord) => {
        this.setState({
            keyWord
        })
    }

    render() {
        return (
            <div>
                {/*组件A*/}
                <Search setKeyWorld={this.setKeyWorld} />
                {/*组件B*/}
                <Label keyWordValue={this.state.keyWord}/>
            </div>

        );
    }

}
组件A:
import React,{Component} from 'react';

export default class Search extends Component{
    constructor(props){
        super(props);
        this.state={
            currentKeyValue: ''
        }
    }
    setCurrentKeyValue= (e) => {
        const currentKeyValue = e.target.value
        this.setState({
            currentKeyValue
        })

    }
    //点击查询按钮,将值传给父组件
    search = () =>{
        this.props.setKeyWorld(this.state.currentKeyValue);
    }
    render() {
        return (
            <div>
                <input type="text" value={this.state.currentKeyValue} onChange={this.setCurrentKeyValue}/>
                <button onClick={this.search}>查询</button>
            </div>
        );
    }

}
组件B:
import React,{Component} from 'react';
import axios from 'axios';
//项目目录执行
//npm isntall axios --save
//npm i -S axios

export default class Label extends Component{
    constructor(props){
        super(props);
        this.state={
            key: '',
            UserList: []
        }
    }


    //props将要被改变前执行
    componentWillReceiveProps(props){

        const key=props.keyWordValue;
        console.log('key',key)
        this.setState({key});
        //ajax请求接口
        axios.get('https://api.github.com/search/users?q='+key)
            .then(response=>{
                const {items} =  response.data;
                console.log(items)
                this.setState({UserList: items})

            })
            .catch( error=> {
                console.log(error);
            })
    }

    render() {
        const UserList=this.state.UserList;
        // 遍历列表数据
        return UserList.map((value,index)=> (
            <div style={{ 110, height:160,float:'left'}}>
                <img style={{ 100, height:100}} src={value.avatar_url} alt=""/>
                <p>用户Id:{value.login}</p>
            </div>
        ));
    }

}