在Linux服务器上运行Jupyter notebook server教程
很多deep learning教程都推荐在jupyter notebook运行python代码,方便及时交互。但只在本地运行没有GPU环境,虽然google colab是个好办法,但发现保存模型后在云端找不到模型文件,且需要合理上网才能访问。于是想给实验室的服务器配置jupyter notebook,供本机远程访问。踩了不少坑,码一下教程以供参考。
服务器环境是Ubuntu 16.04.5 LTS 。本机windows10。分配给我的账号没有root权限,自用的python环境是用conda建了一个虚拟环境。
服务器已经装了Anaconda并且自带Jupyter notebook。唯一需要配置的就是如何安全运行notebook server以便能够远程访问它。主要参考官方文档Running a notebook server。
配置Jupyter Notebook Server
生成notebook配置文件
先查看服务器是否已有notebook配置文件,linux下的路径一般是“/home/USERNAME/.jupyter/jupyter_notebook_config.py”。如果没有进行过配置,默认是没有这个文件的,需要自己生成:
$ jupyter notebook --generate-config
这行代码会在当前路径下生成一个.jupyter文件夹,并且文件夹中含有配置文件jupyter_notebook_config.py。
配置密码
如果是notebook5.3以上的版本,此时可以直接运行jupyter notebook命令,会以一个带有token的地址访问notebook,打开后会让你填写token和设置新的password,之后就都以设置的密码登录。
notebook5.0以上的版本,需要运行一行命令 jupyter notebook password ,会让你填写密码和确认密码,并且生成含有密码的hash的jupyter_notebook_config.json在配置文件夹下。
$ jupyter notebook password
Enter password:  ****
Verify password: ****
[NotebookPasswordApp] Wrote hashed password to /Users/you/.jupyter/jupyter_notebook_config.json
配置ssh
为了安全起见,使用密码的同时最好也使用SSL,这样就不会直接发送未加密的密码hash。
用openssl生成自签名证书(365天有效期):
$ openssl req -x509 -nodes -days 365 -newkey rsa:2048 -keyout mykey.key -out mycert.pem
给notebook配置·certfile:
$ jupyter notebook --certfile=mycert.pem --keyfile mykey.key
写入配置文件
编辑 .jupyter 文件夹下的 jupyter_notebook_config.py,按照注释说明加入以下这几行代码,填入之前生成的mycert.pem和mykey.key的路径,以及jupyter_notebook_config.json文件中的密码hash串。
# Set options for certfile, ip, password, and toggle off
# browser auto-opening
c.NotebookApp.certfile = u'/absolute/path/to/your/certificate/mycert.pem'
c.NotebookApp.keyfile = u'/absolute/path/to/your/certificate/mykey.key'
# Set ip to '*' to bind on all interfaces (ips) for the public server
c.NotebookApp.ip = '*'
c.NotebookApp.password = u'sha1:bcd259ccf...<your hashed password here>'
c.NotebookApp.open_browser = False

# It is a good idea to set a known, fixed port for server access
c.NotebookApp.port = 9999
这时候在本机浏览器键入https://xx.xx.xx.xx:9999(服务器ip)就可以访问了。
给notebook指定新的kernel
由于notebook的默认python环境是服务器的base,但我需要用自己的虚拟环境下的python解释器。于是需要给notebook设置新的kernel。
查看当前的python解释器路径
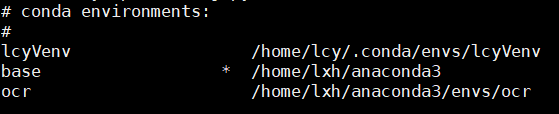
进入我的虚拟环境下运行python,查看Python解释器所在位置:
>>>import sys
>>>sys.executable
同时在Jupyter notebook运行这两行代码,看到的果然是base的路径。
新建notebook kernel
回到base环境运行如下代码,找到Jupyter的内核所在位置。
$jupyter kernelspec list
Jupyter是通过kernels文件夹下的子文件夹来管理kernel的,这时候能看到只有一个python3文件夹。所以如果要建新的kernel,需要新建一个自命名的文件夹,然后把python3文件夹下的kernel.json复制过来,修改参数值(需要root权限)。
编辑新的kernel.json文件,将python路径改为自己虚拟环境中的python,display_name取一个不是python3的以作区分。
{
"argv": [
"/home/lcy/.conda/envs/lcyVenv/bin/python",
"-m",
"ipykernel_launcher",
"-f",
"{connection_file}"
],
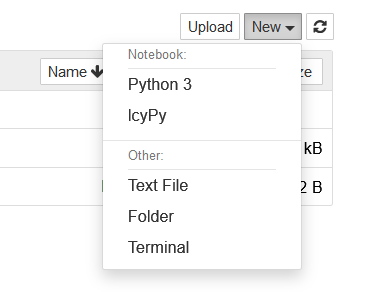
"display_name": "lcyPy",
"language": "python"
}
此时打开Jupyter notebook看到了刚刚自定义的新kernel,但新建一个lcyPy文件却发现提示无法连接到kernel。
查到的解决方案是在虚拟环境下安装ipython kernel,代码如下:
$source activate lcyVenv
$conda install notebook ipykernel
$ipython kernel install --user
然后回到base下开启jupyter notebook就能用了。