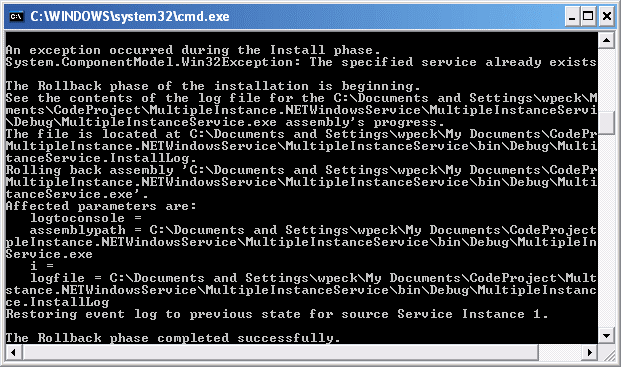
It's not readily apparent how to install a Windows Service multiple times on a single machine. At first glance, it seems like it's not supported by the operating system. When attempting to install a second instance of a service using InstallUtil on the same machine, you'll likely be presented with the following message:

Fortunately, there is a way around this. If you have a need to install multiple instances of the same service, then please read on.
The Problem
When reviewing the ServiceInstaller class using Reflector, you'll see it does a Win32 call to CreateServicein the ServiceInstaller.Install method. CreateService will return the ERROR_DUPLICATE_SERVICE_NAME return code whenever the method is called with a serviceName or displayName parameter that matches that of an already installed service. This is what causes the Win32Exception to be thrown in the above window and ultimately causes the second install to fail. You can view the complete documentation on the CreateService function here.
To get around this, all that needs to be done is to dynamically set the service name during installation and service startup to a known value and to make sure that value is different for each instance of the service you install.
The Solution
All that needs to be done is to make sure that the name of each service installation instance is unique. Then you need to have copies of installation directories for each service instance you'd like to have. Finally, you need to be able to set the service name dynamically during installation and startup. This will be facilitated using the app.config file.
Storing the Service Name
The cleanest and most readily available way of providing the service name is to use an app.config file for your service and create an appSettings key that can be read from to set the service name. An app.config file needs to be added to your solution if one doesn't already exist to store the unique service name in order to dynamically set the ServiceInstaller.ServiceName and the ServiceBase.ServiceName to the same service name value you added to your configuration.
Alternately, we could have provided a custom command line switch to the InstallUtil during installation like InstallUtil /i /servicename="Service Instance 1" MultipleInstanceService.exe. Then that would allow us to pull the servicename property off the Context.Parameters collection during installation. The reason I chose not to recommend this option is that it does not allow us to reliably set the ServiceBase.ServiceName to the exact value that was provided during installation. Someone installing the service could mistype the servicename they provide during install which wouldn't match the value set in configuration.
Hide Copy Code
<configuration>
<appSettings>
<add key="ServiceName" value="Service Instance 1"/>
</appSettings>
</configuration>
Reading the Service Name from Configuration
The app.config file needs to be accessible during the installation of the service as well as when the service starts up. This is cake while the service is running because the configuration file loaded into the configuration system will be the configuration file for your service. It is a little trickier during installation. The reason why it's more difficult during installation is the fact that InstallUtil which is used to install the service does not run in the same execution path your service does, instead it runs at <system drive>:windowsMicrosoft.NETFrameworkv2.0.50727. So, we need to find another way to access the configuration file for our service.
The easiest and most reliable way I found to do this is to use the Assembly class in the System.Reflection namespace. Using the Location property of the Assembly, we can identify the installation path of the Windows Service and open that services configuration file as shown below.
Hide Copy Code
private string GetConfigurationValue(string key)
{
Assembly service = Assembly.GetAssembly(typeof(MultipleInstanceInstaller));
Configuration config = ConfigurationManager.OpenExeConfiguration(service.Location);
if (config.AppSettings.Settings[key] != null)
{
return config.AppSettings.Settings[key].Value;
}
else
{
throw new IndexOutOfRangeException
("Settings collection does not contain the requested key: " + key);
}
}
Now that the app.config file can be read during installation, all we need to do is create an instance of a ServiceInstaller class and set the ServiceName property to the value we have stored in configuration. Using the method in the code snippet above, this is an easy task.
Hide Copy Code
ServiceInstaller installer = new ServiceInstaller();
installer.ServiceName = GetConfigurationValue("ServiceName");
return installer;
Now that we've created our ServiceInstaller class instance as described above and added it to the Installers collection of our root System.Configuration.Install.Installer class marked with the RunInstaller(true) attribute of our Windows Service project, there's only one last thing to do. We need to set the ServiceBase.ServiceName of our service class instance when the service starts up. This time we'll use the ConfigurationManager class directly to read our services configuration file in the constructor of our service instance.
Hide Copy Code
public MultipleInstanceService()
{
InitializeComponent();
this.ServiceName = ConfigurationManager.AppSettings.Get("ServiceName");
}
Now all that is left to do is install this service at a few different locations on the same machine. Adding a new instance of the service becomes as simple as a copy/paste of the service installation directory and change of some configuration values.

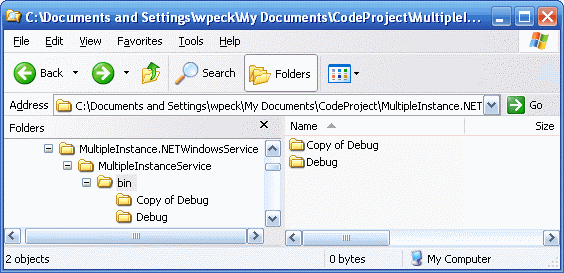
I just made a copy of the debug directory in order to have another service installation directory. It'd be better to use a different convention for directory names than I've done here, but this is just for illustration. Now that there are two copies of the same service on your machine all that is left to do is install them.

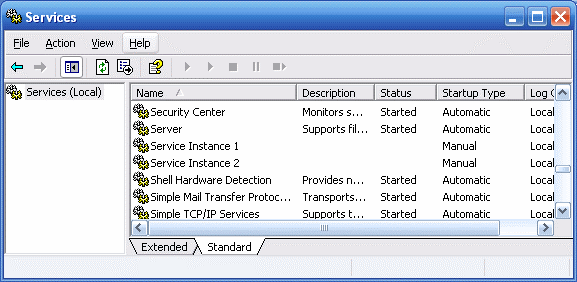
From a command prompt, you'll need to use InstallUtil to install both instances of your service. For instructions on how to use InstallUtil, see Installer Tool (InstallUtil.exe). Once you're done installing the service instances, you'll have something like the services console above where Service Instance 1 and Service Instance 2 are created from the same executable, only installed from different directory locations with a different service name.
Conclusion
Being able to use the services application model to manage your application's runtime is an invaluable asset. Using the pattern I've presented, you can now leverage multiple instances of the same service on a single machine with little effort. Hopefully you'll find this method as useful as I did.
From: https://www.codeproject.com/Articles/21320/Multiple-Instance-NET-Windows-Service