ElementUI官方地址:https://element.eleme.cn/2.11/#/zh-CN
1.初期准备
首先我们准备几个基本的样式文件:normalize.css 和 base.css
normalize.css:一个CSS RESET(样式重置)的文件,下载地址:https://necolas.github.io/normalize.css/,具体可以搜索 "reset.css和normalize.css"
base.css:根据项目或个人需求定义的一些基本样式,这里我们只简单定义一下
(一般我们将静态资源文件放在 /src/assets目录中)


*{
    outline: none;
}

html,
body {
  margin: 0;
  padding: 0;
  width: 100%;
  height: 100%;
}

textarea {
    resize: none !important;
}

input[type="text"]:disabled {
    background: 0 0!important;
    color: #c2c2c2;
    cursor: not-allowed;
    user-select: none;
}

.hidden {
    display: none;
}

.unselect {
    -moz-user-select: none;
    -webkit-user-select: none;
    -ms-user-select: none;
    -khtml-user-select: none;
    user-select: none;
}

#app {
  padding: 0px;
  margin: 0px;
  height: 100%;
}

#el-aside{
    width: 220px !important;
}


.el-menu.el-menu-vertical-demo{
    border-bottom: none;
    height: 100%;
}

.el-menu.el-menu-vertical-demo > li{
    text-align: left;
}
2.快速搭建
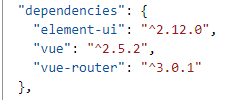
引入依赖命令:cnpm i element-ui -S
再package.json文件中可以看到引入依赖的信息,表示引入依赖成功
接下来要在 main.js 中全局引入 Element,代码如下
import Vue from 'vue';
import App from './App';
import router from './router';
import ElementUI from 'element-ui';
import 'element-ui/lib/theme-chalk/index.css';
import './assets/css/normalize.css';
import './assets/css/base.css';

Vue.config.productionTip = false;
Vue.use(ElementUI);

new Vue({
  el: '#app',
  router,
  components: { App },
  template: '<App/>'
});
2.使用Container容器布局
根据官方提供案例,修改 App.vue 文件
<template>
  <el-container id="app">
    <el-header>Header</el-header>
    <el-container>
      <el-aside width="200px">Aside</el-aside>
      <el-main>Main</el-main>
    </el-container>
    <el-footer>Footer</el-footer>
  </el-container>
</template>

<script>
export default {
  name: 'App'
};
</script>

<style>
.el-header,
.el-footer {
  background-color: #b3c0d1;
  color: #333;
  text-align: center;
  line-height: 60px;
}

.el-aside {
  background-color: #d3dce6;
  color: #333;
  text-align: center;
  line-height: 200px;
}

.el-main {
  background-color: #e9eef3;
  color: #333;
  text-align: center;
  line-height: 160px;
}

body > .el-container {
  margin-bottom: 40px;
}

.el-container:nth-child(5) .el-aside,
.el-container:nth-child(6) .el-aside {
  line-height: 260px;
}

.el-container:nth-child(7) .el-aside {
  line-height: 320px;
}
</style>
3.实现导航栏
修改 App.vue 文件
<template>
  <el-container id="app">
    <el-header>Header</el-header>
    <el-container>
      <el-aside id="el-aside">
        <el-menu default-active="1" class="el-menu-vertical-demo" background-color="#545c64" text-color="#fff" active-text-color="#ffd04b">
          <el-menu-item index="1">
            <i class="el-icon-menu"></i>
            <span>处理中心</span>
          </el-menu-item>
          <el-submenu index="2">
            <template slot="title">
              <i class="el-icon-s-unfold"></i>
              <span>我的工作台</span>
            </template>
            <el-menu-item index="2-1">
              <i class="el-icon-arrow-right"></i>
              <span>选项1</span>
            </el-menu-item>
            <el-menu-item index="2-2">
              <i class="el-icon-arrow-right"></i>
              <span>选项2</span></el-menu-item>
            <el-menu-item index="2-3">
              <i class="el-icon-arrow-right"></i>
              <span>选项3</span>
            </el-menu-item>
          </el-submenu>
          <el-menu-item index="3">
            <i class="el-icon-message-solid"></i>
            <span>消息中心</span>
          </el-menu-item>
        </el-menu>
      </el-aside>
      <el-main>Main</el-main>
    </el-container>
    <el-footer>Footer</el-footer>
  </el-container>
</template>

<script>
export default {
  name: 'App'
};
</script>

<style>
.el-header,
.el-footer {
  background-color: #b3c0d1;
  color: #333;
  text-align: center;
  line-height: 60px;
}

.el-aside {
  background-color: #d3dce6;
  color: #333;
  text-align: center;
  line-height: 200px;
}

.el-main {
  background-color: #e9eef3;
  color: #333;
  text-align: center;
  line-height: 160px;
}

body > .el-container {
  margin-bottom: 40px;
}

.el-container:nth-child(5) .el-aside,
.el-container:nth-child(6) .el-aside {
  line-height: 260px;
}

.el-container:nth-child(7) .el-aside {
  line-height: 320px;
}
</style>
实现效果图
