Redis系列
redis相关介绍
redis是一个key-value存储系统。和Memcached类似,它支持存储的value类型相对更多,包括string(字符串)、list(链表)、set(集合)、zset(sorted set --有序集合)和hash(哈希类型)。这些数据类型都支持push/pop、add/remove及取交集并集和差集及更丰富的操作,而且这些操作都是原子性的。在此基础上,redis支持各种不同方式的排序。与memcached一样,为了保证效率,数据都是缓存在内存中。区别的是redis会周期性的把更新的数据写入磁盘或者把修改操作写入追加的记录文件,并且在此基础上实现了master-slave(主从)同步。Redis 是一个高性能的key-value数据库。 redis的出现,很大程度补偿了memcached这类key/value存储的不足,在部 分场合可以对关系数据库起到很好的补充作用。它提供了Java,C/C++,C#,PHP,JavaScript,Perl,Object-C,Python,Ruby,Erlang等客户端,使用很方便.
今天我们来利用Redis来实现一个大家在工作中都可能遇到的需求,热卖排行榜
话不多说开干!!!!!
-
需求说明
1、本次我们实现一个每日热卖商品排行榜的需求
2、简单的设计俩张表:goods(商品表)、sell(销售记录表)
3、主要是将当日热卖的商品查询出来,利用Redis的有序集合进行大到小排序显示在前端页面
-
技术列表
Springboot 2.1.2.RELEASERedisfreemarkermybatis-plus 3.2.0hutool-all
搭建项目基础环境
-
首先我们来创建一个
springboot项目,并且引入需要的依赖,后续需要的依赖后面用到在引入 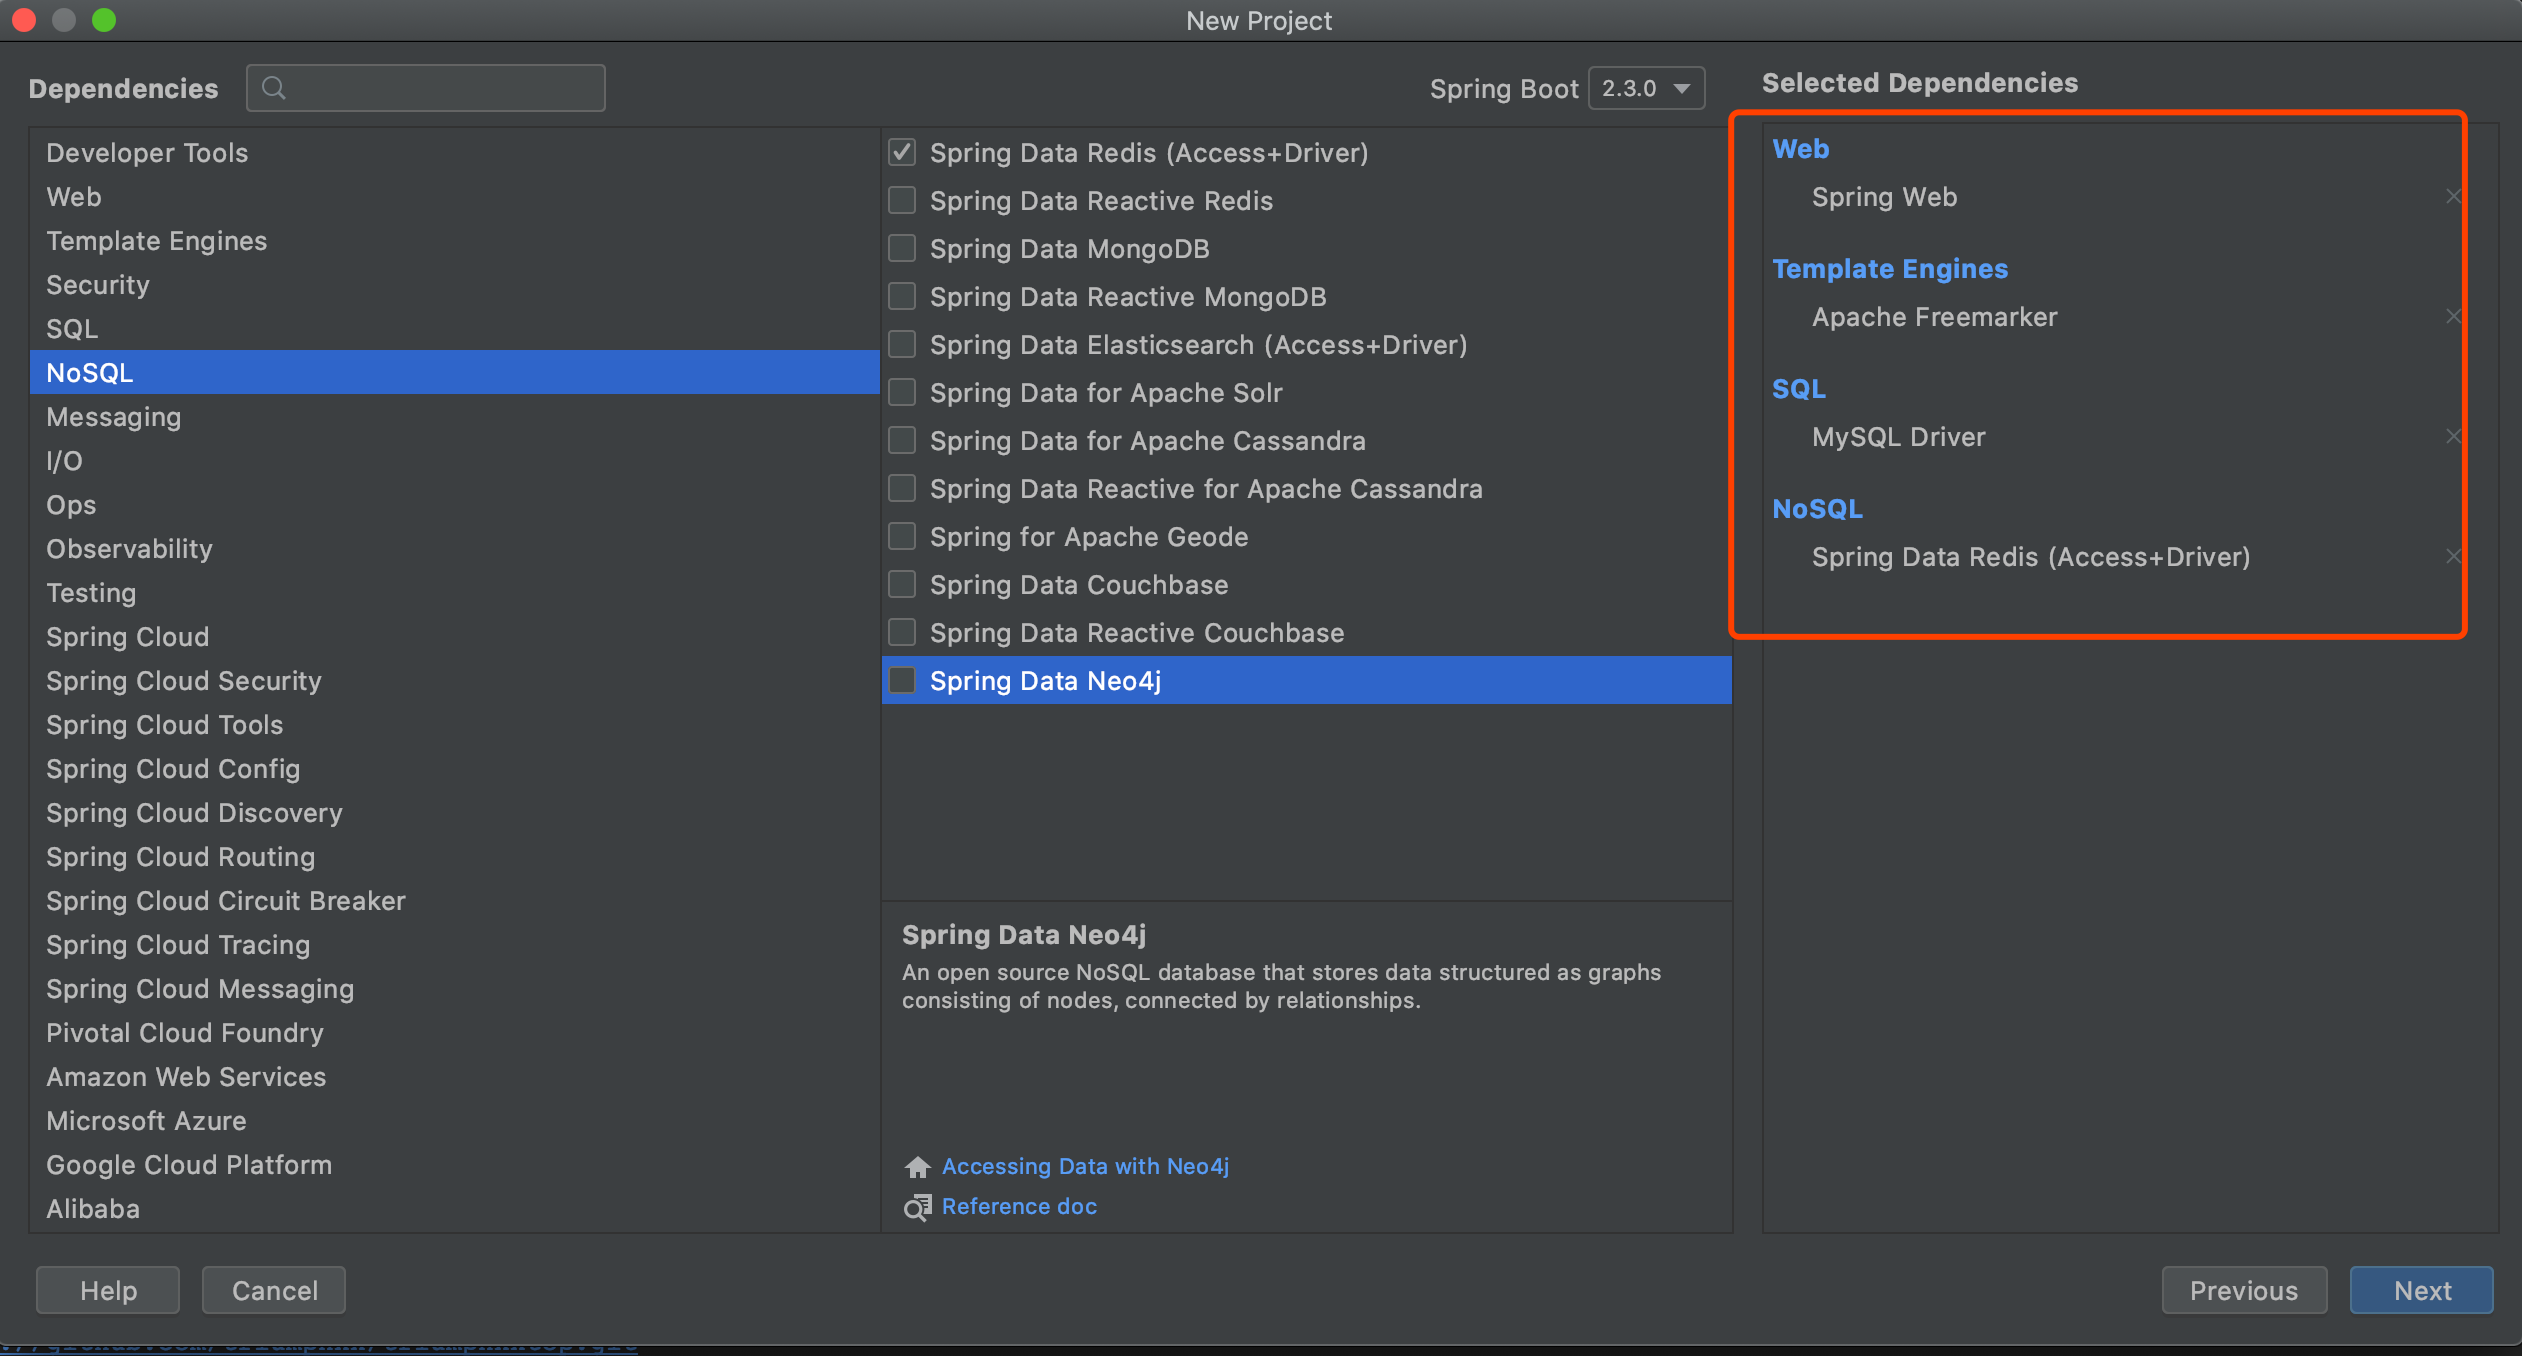
-
所有的依赖如下:
<dependency>
            <groupId>org.springframework.boot</groupId>
            <artifactId>spring-boot-starter-data-redis</artifactId>
        </dependency>
        <dependency>
            <groupId>org.springframework.boot</groupId>
            <artifactId>spring-boot-starter-freemarker</artifactId>
        </dependency>
        <dependency>
            <groupId>org.springframework.boot</groupId>
            <artifactId>spring-boot-starter-web</artifactId>
        </dependency>

        <dependency>
            <groupId>mysql</groupId>
            <artifactId>mysql-connector-java</artifactId>
            <scope>runtime</scope>
        </dependency>
        <dependency>
            <groupId>org.projectlombok</groupId>
            <artifactId>lombok</artifactId>
            <optional>true</optional>
        </dependency>
        <!--mp-->
        <dependency>
            <groupId>com.baomidou</groupId>
            <artifactId>mybatis-plus-boot-starter</artifactId>
            <version>3.2.0</version>
        </dependency>

        <!--代码生成器-->
        <dependency>
            <groupId>com.baomidou</groupId>
            <artifactId>mybatis-plus-generator</artifactId>
            <version>3.2.0</version>
        </dependency>

        <!-- sql分析器 -->
        <dependency>
            <groupId>p6spy</groupId>
            <artifactId>p6spy</artifactId>
            <version>3.8.6</version>
        </dependency>

        <!-- commons-lang3 -->
        <dependency>
            <groupId>org.apache.commons</groupId>
            <artifactId>commons-lang3</artifactId>
            <version>3.9</version>
        </dependency>
        <!--工具类-->
        <dependency>
            <groupId>cn.hutool</groupId>
            <artifactId>hutool-all</artifactId>
            <version>4.1.17</version>
        </dependency>
-
由于我们项目用到的模本引擎是
freemarker下面简单的介绍一下这个模版引擎
FreeMarker是一款模板引擎:即一种基于模板和要改变的数据, 并用来生成输出文本(HTML网页、配置文件、源代码等)的通用工具。它不是面向最终用户的,而是一个Java类库,是一款程序员可以嵌入他们所开发产品的组件.
能够很方便的对后端的数据进行渲染
敲黑板重点!!FreeMarker的宏:宏是在模板中使用macro指令定义
宏是和某个变量关联的模板片断,以便在模板中通过用户定义指令使用该变量。
大白话:就是提高前端的代码的重用
-
如下是本项目中用到的
FreeMarker的宏
<#macro layout title>
    <!DOCTYPE html>
    <html>
    <head>
        <meta charset="utf-8">
        <title>${title}</title>
        <meta name="viewport" content="width=device-width, initial-scale=1, maximum-scale=1">
        <meta name="keywords" content="公众号:北漂码农有话说">
        <meta name="description" content="公众号:北漂码农有话说致力于输出优质技术文章">
        <link rel="stylesheet" href="/res/layui/css/layui.css">
        <link rel="stylesheet" href="/res/css/global.css">
    </head>
    <body>

    <#include "/include/header.ftl" />

    <#nested >

    <#include "/include/footer.ftl" />

    <script src="/res/layui/layui.js"></script>
    <script>
        layui.cache.page = '';
        layui.cache.user = {
            username: '游客'
            ,uid: -1
            ,avatar: '../res/images/avatar/00.jpg'
            ,experience: 83
            ,sex: '男'
        };
        layui.config({
            version: "3.0.0"
            ,base: '../res/mods/' //这里实际使用时,建议改成绝对路径
        }).extend({
            fly: 'index'
        }).use('fly');
    </script>

    <script type="text/javascript">var cnzz_protocol = (("https:" == document.location.protocol) ? " https://" : " http://");document.write(unescape("%3Cspan id='cnzz_stat_icon_30088308'%3E%3C/span%3E%3Cscript src='" + cnzz_protocol + "w.cnzz.com/c.php%3Fid%3D30088308' type='text/javascript'%3E%3C/script%3E"));</script>

    </body>
    </html>
</#macro>
-
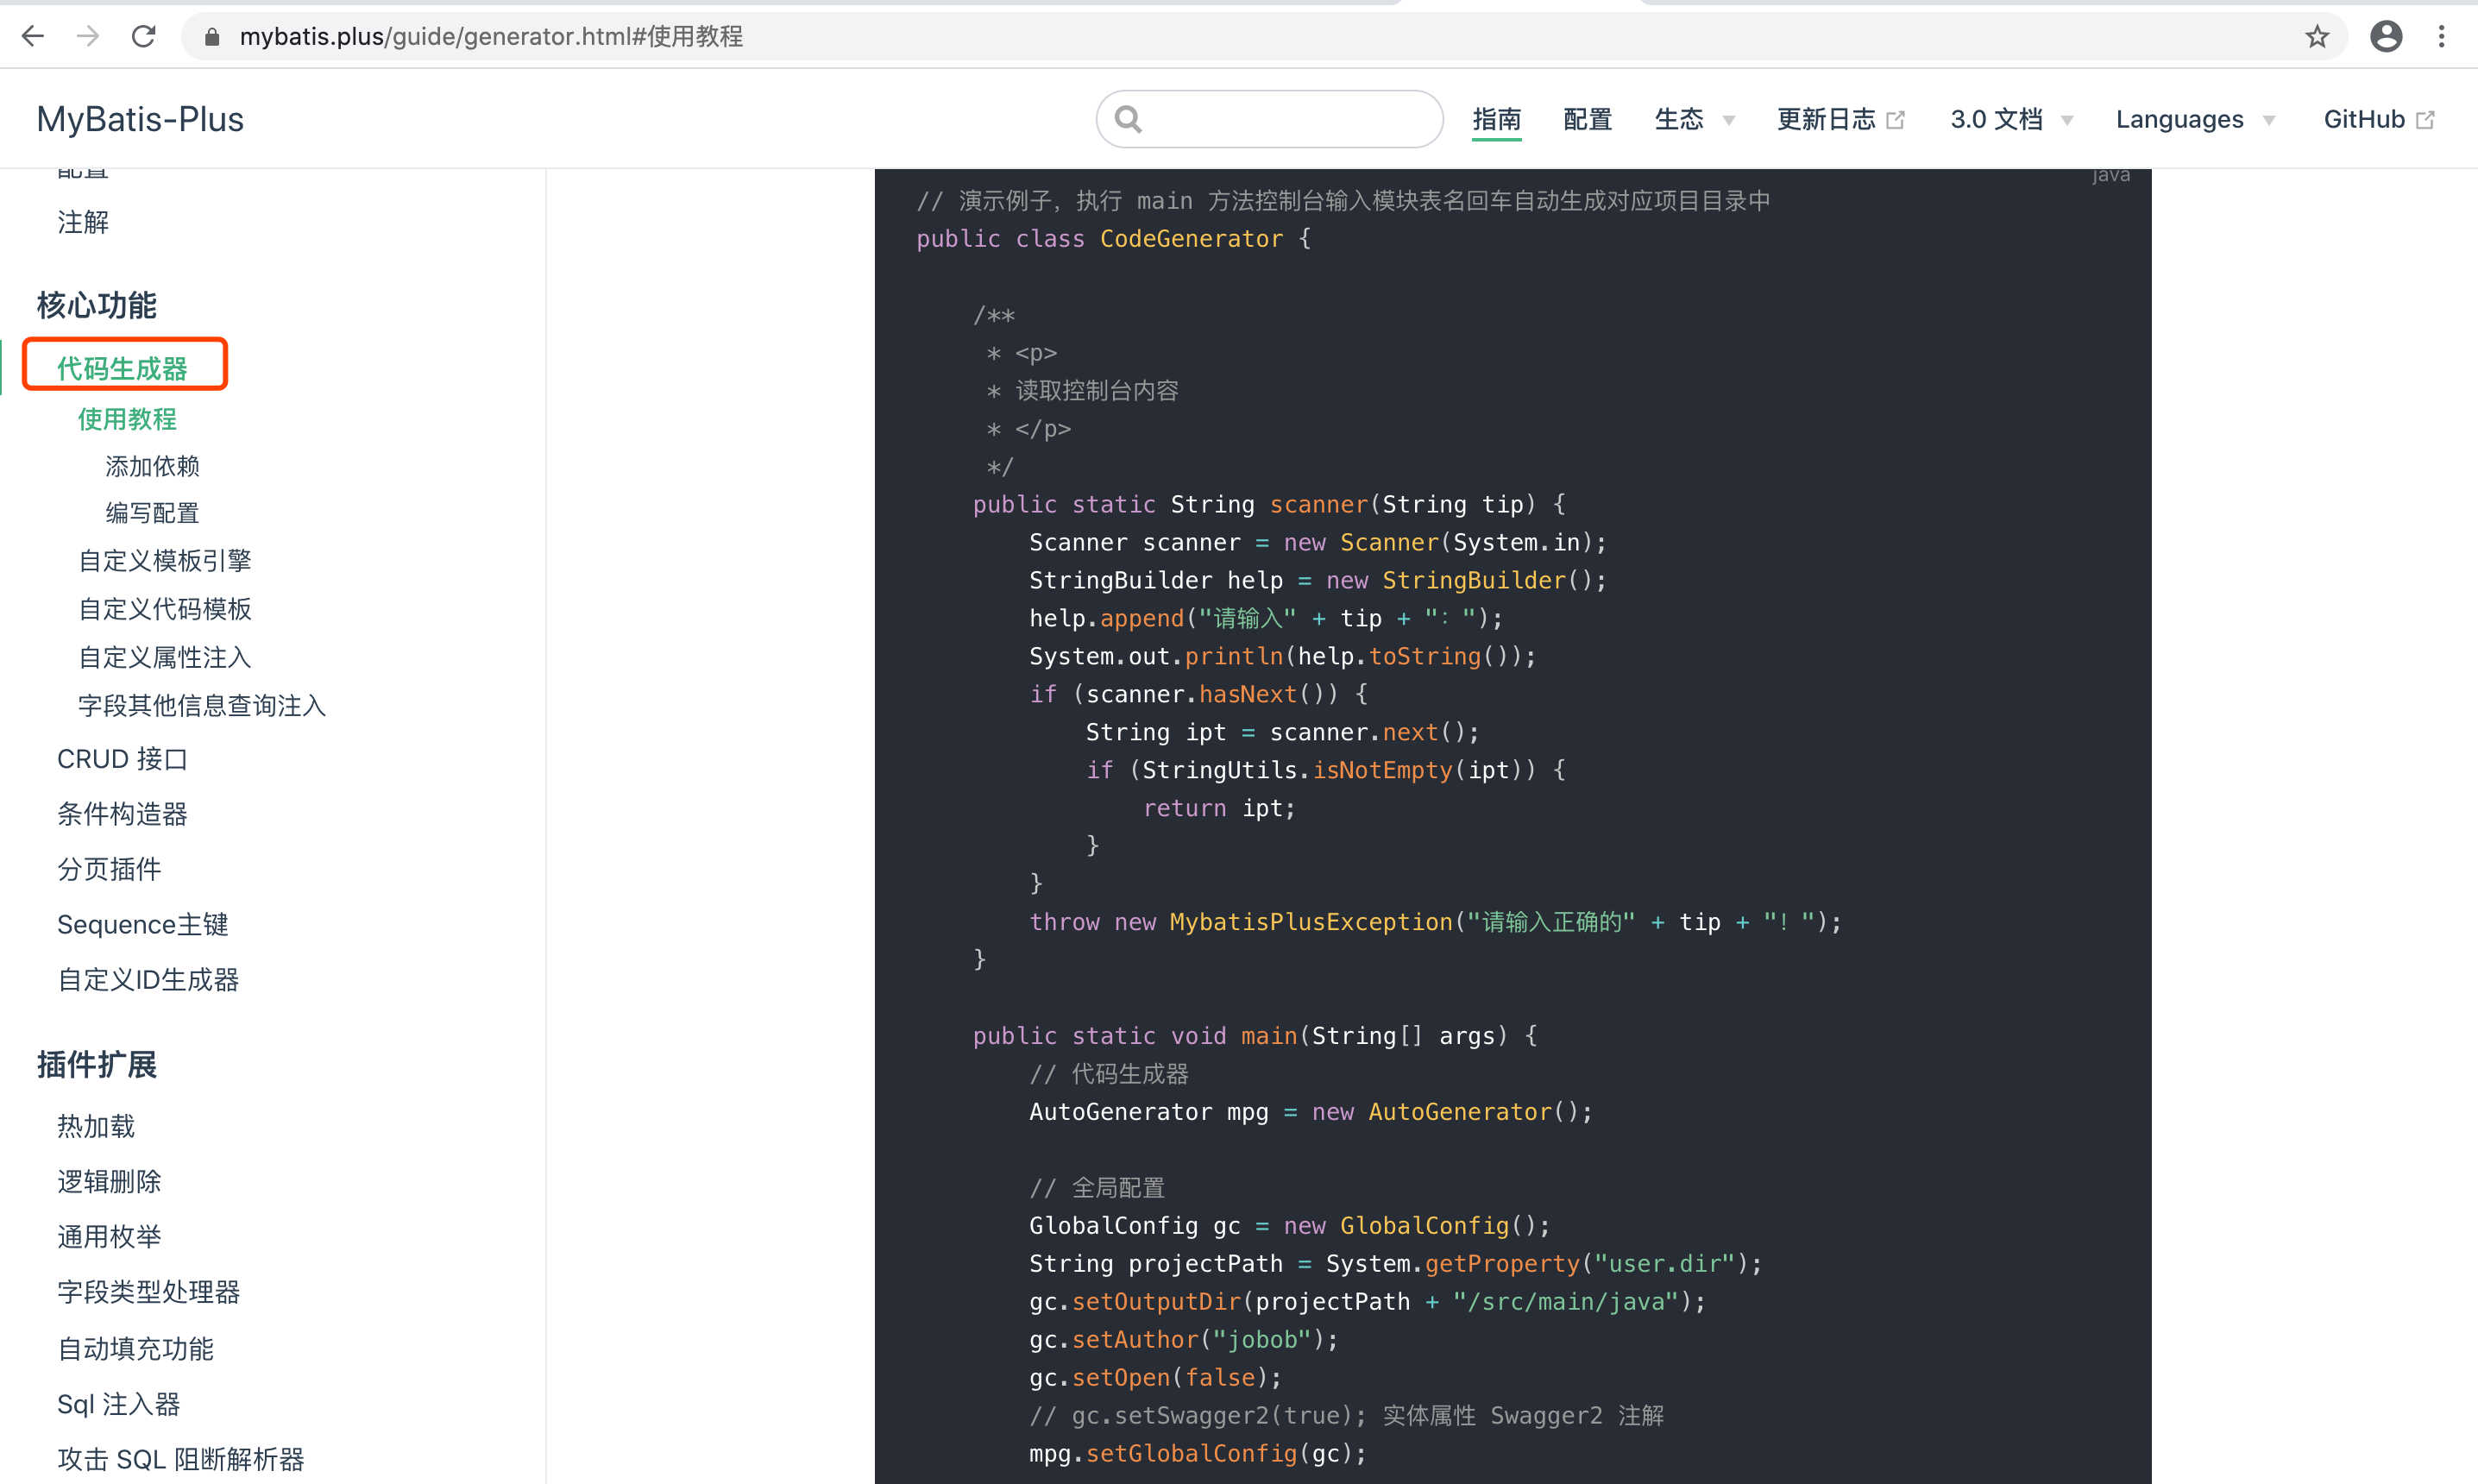
由于选择的是mybatis-plus开发所以我们将代码进行生成
参考官网:mybatis-plus官网
找到代码生成器将代码拷贝到你的项目下进行必要的配置执行main方法,生成代码。如下:
代码如下:
public class CodeGenerator {

    /**
     * <p>
     * 读取控制台内容
     * </p>
     */
    public static String scanner(String tip) {
        Scanner scanner = new Scanner(System.in);
        StringBuilder help = new StringBuilder();
        help.append("请输入" + tip + ":");
        System.out.println(help.toString());
        if (scanner.hasNext()) {
            String ipt = scanner.next();
            if (StringUtils.isNotEmpty(ipt)) {
                return ipt;
            }
        }
        throw new MybatisPlusException("请输入正确的" + tip + "!");
    }

    public static void main(String[] args) {
        // 代码生成器
        AutoGenerator mpg = new AutoGenerator();

        // 全局配置
        GlobalConfig gc = new GlobalConfig();
        String projectPath = System.getProperty("user.dir");
        gc.setOutputDir(projectPath + "/src/main/java");
//        gc.setOutputDir("D:\test");
        gc.setAuthor("公众号:北漂码农有话说");
        gc.setOpen(false);
        // gc.setSwagger2(true); 实体属性 Swagger2 注解
        gc.setServiceName("%sService");
        mpg.setGlobalConfig(gc);

        // 数据源配置
        DataSourceConfig dsc = new DataSourceConfig();
        dsc.setUrl("jdbc:mysql://localhost:3306/triumphxxtop?useUnicode=true&useSSL=false&characterEncoding=utf8&serverTimezone=UTC");
        // dsc.setSchemaName("public");
        dsc.setDriverName("com.mysql.cj.jdbc.Driver");
        dsc.setUsername("root");
        dsc.setPassword("root");
        mpg.setDataSource(dsc);

        // 包配置
        PackageConfig pc = new PackageConfig();
        pc.setModuleName(null);
        pc.setParent("com.triumphxx");
        mpg.setPackageInfo(pc);

        // 自定义配置
        InjectionConfig cfg = new InjectionConfig() {
            @Override
            public void initMap() {
                // to do nothing
            }
        };

        // 如果模板引擎是 freemarker
        String templatePath = "/templates/mapper.xml.ftl";
        // 如果模板引擎是 velocity
        // String templatePath = "/templates/mapper.xml.vm";

        // 自定义输出配置
        List<FileOutConfig> focList = new ArrayList<>();
        // 自定义配置会被优先输出
        focList.add(new FileOutConfig(templatePath) {
            @Override
            public String outputFile(TableInfo tableInfo) {
                // 自定义输出文件名 , 如果你 Entity 设置了前后缀、此处注意 xml 的名称会跟着发生变化!!
                return projectPath + "/src/main/resources/mapper/"
                        + "/" + tableInfo.getEntityName() + "Mapper" + StringPool.DOT_XML;
            }
        });

        cfg.setFileOutConfigList(focList);
        mpg.setCfg(cfg);

        // 配置模板
        TemplateConfig templateConfig = new TemplateConfig();

        // 配置自定义输出模板
        //指定自定义模板路径,注意不要带上.ftl/.vm, 会根据使用的模板引擎自动识别
        // templateConfig.setEntity("templates/entity2.java");
        // templateConfig.setService();
        // templateConfig.setController();

        templateConfig.setXml(null);
        mpg.setTemplate(templateConfig);

        // 策略配置
        StrategyConfig strategy = new StrategyConfig();
        strategy.setNaming(NamingStrategy.underline_to_camel);
        strategy.setColumnNaming(NamingStrategy.underline_to_camel);
        strategy.setSuperEntityClass("com.triumphxx.entity.BaseEntity");
        strategy.setEntityLombokModel(true);
        strategy.setRestControllerStyle(true);
        strategy.setSuperControllerClass("com.triumphxx.controller.BaseController");
        strategy.setInclude(scanner("表名,多个英文逗号分割").split(","));
        strategy.setSuperEntityColumns("id", "created", "modified", "status");
        strategy.setControllerMappingHyphenStyle(true);
        strategy.setTablePrefix(pc.getModuleName() + "_");
        mpg.setStrategy(strategy);
        mpg.setTemplateEngine(new FreemarkerTemplateEngine());
        mpg.execute();
    }
}
-
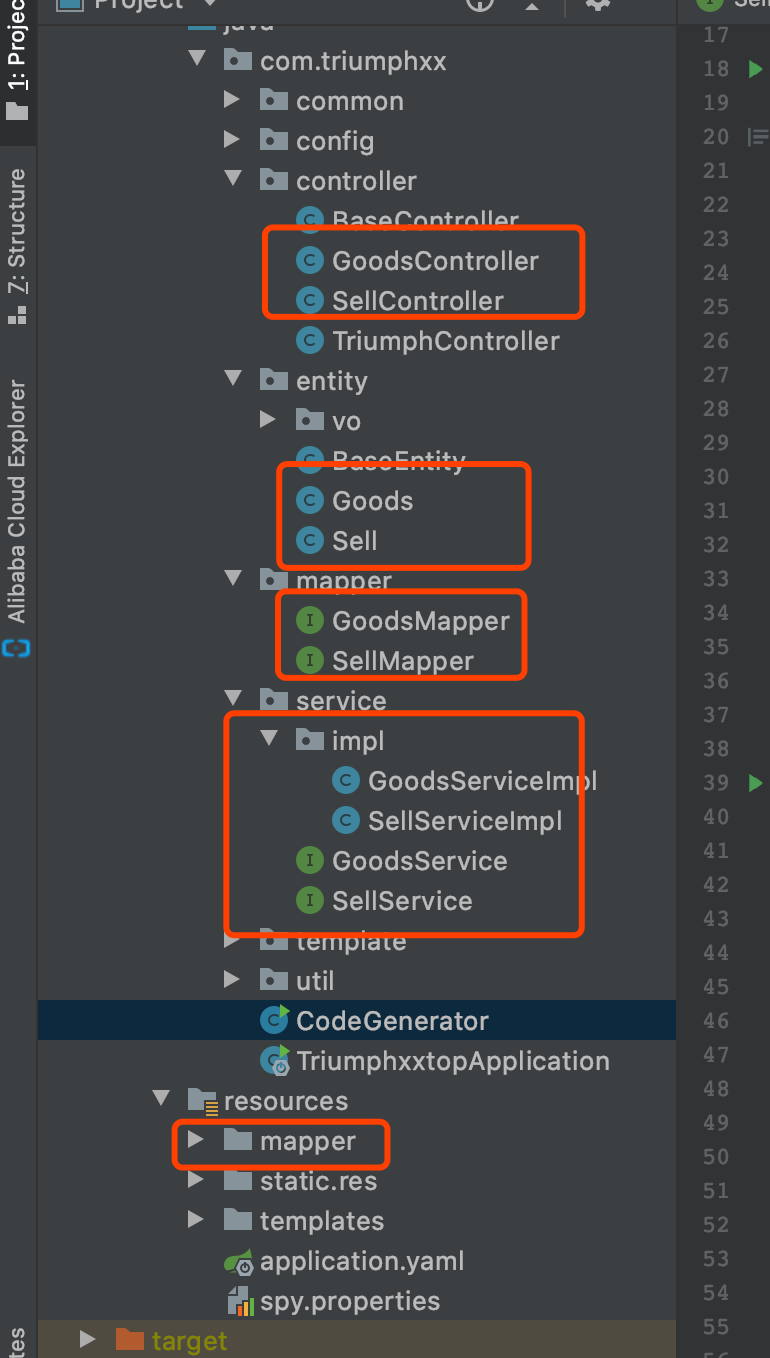
执行
main方法,如下,输入你的表名,生成你的代码 
-
生成代码
-
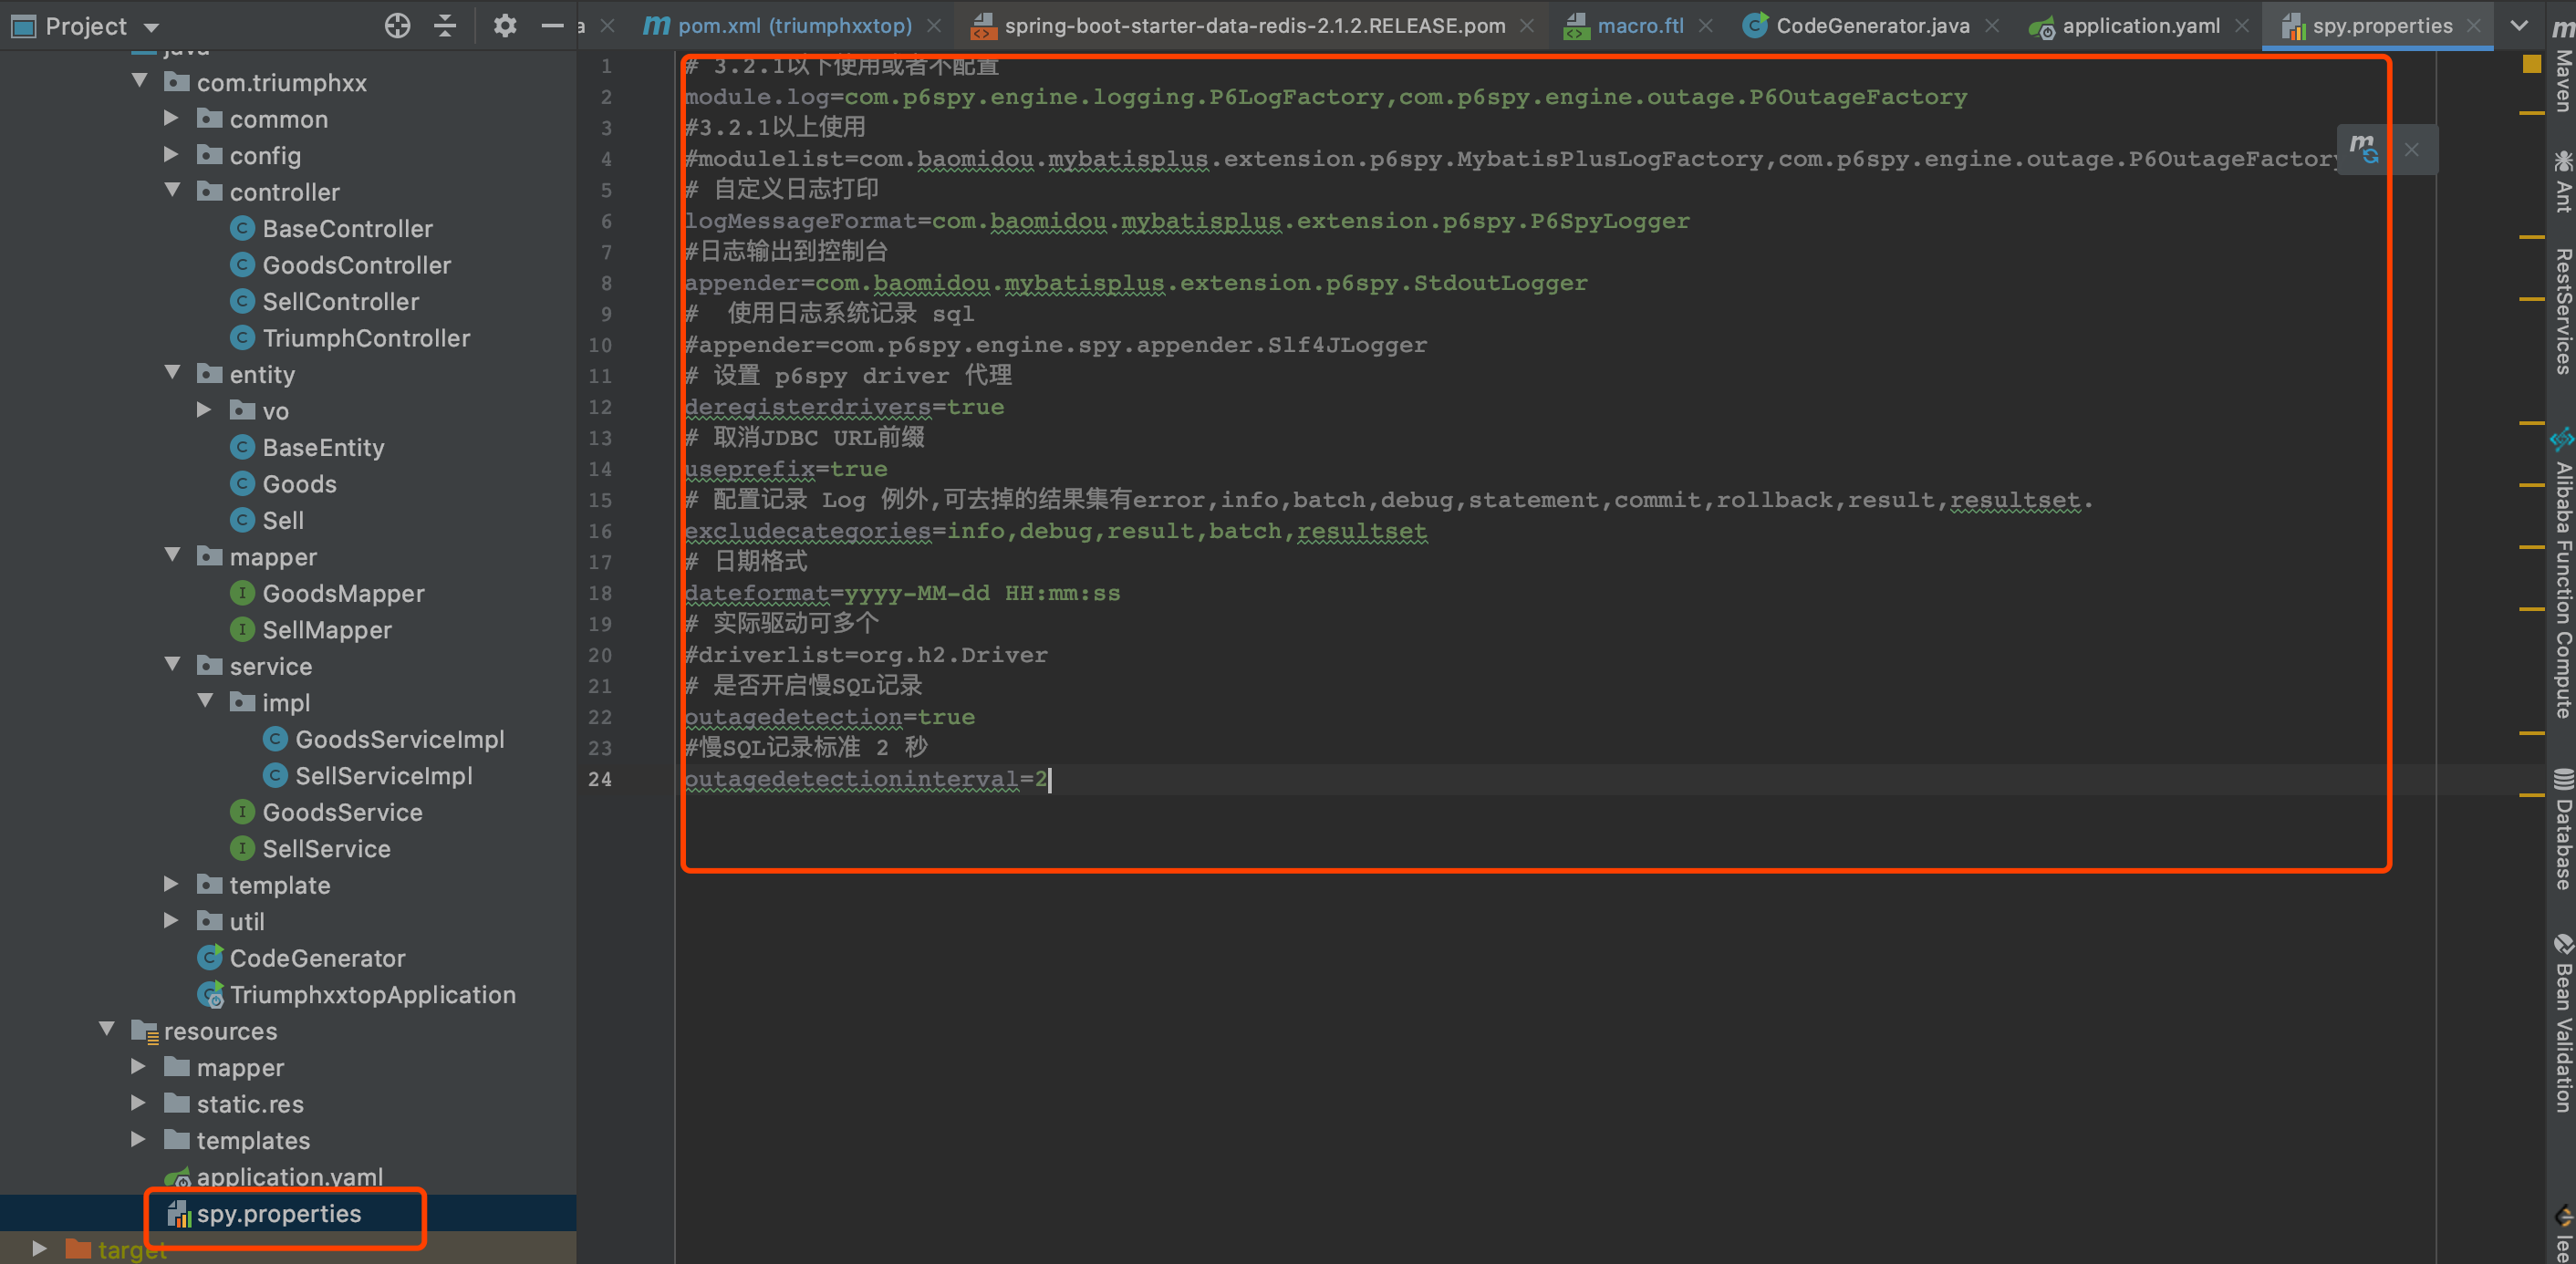
由于我们使用的是mp所以需要配置sql分析器,将sql打印出来,便于分析,当然配置sql分析器是有一定的性能损耗,所以不建议在产线上配置,配置如下:
首先添加依赖
<!-- sql分析器 -->
  <dependency>
     <groupId>p6spy</groupId>
     <artifactId>p6spy</artifactId>
     <version>3.8.6</version>
 </dependency>
修改数据库配置信息,driver-class-name:com.p6spy.engine.spy.P6SpyDriver,
jdbc后边加上p6spy
spring:
  datasource:
    driver-class-name: com.p6spy.engine.spy.P6SpyDriver
    url: jdbc:p6spy:mysql://localhost:3306/triumphxxtop?useUnicode=true&useSSL=false&characterEncoding=utf8&serverTimezone=UTC
    username: root
    password: root
引入配置文件
-
项目设计思路,在项目启动的时候,将今日的热卖商品数据缓存到redis中,代码如下:
/**
 * @author:triumphxx
 * @Date:2020/5/16
 * @Time:7:40 上午
 * @微信公众号:北漂码农有话说
 * @desc:系统启动加载类
 **/
@Component
public class ContextStartUp implements ApplicationRunner {

    @Autowired
    SellService sellService;

    /**
     * 服务启动是加载执行的的方法
     * 将每天热卖的商品进行展示
     * @param args
     * @throws Exception
     */
    @Override
    public void run(ApplicationArguments args) throws Exception {
        sellService.initGoodsSellTop();
    }

}
-
核心代码如下,每一步都有详细的说明。
 @Autowired
    GoodsService goodsService;
    @Autowired
    RedisUtil redisUtil;
    @Autowired
    com.triumphxx.util.DateUtil dateUtil;
    @Override
    public void initGoodsSellTop() {
        //获取当天内销售量大于80的商品id和销售记录id
        List<Sell> sells =  this.list(new QueryWrapper<Sell>()
                .ge("sell_num",80)
                .ge("sell_date", DateUtil.format(new Date(),"yyyy-MM-dd"))
                .select("goods_id","sell_num")
        );
        List<GoodsVo> goodsVos = new ArrayList<>();
        for (Sell sell : sells) {
            //1、根据销售量大于80的销售记录查询出货物的信息
            GoodsVo goods = goodsService.selectSellTop(new QueryWrapper<Goods>().eq("g.goods_id",sell.getGoodsId())
                    .eq("s.sell_date",DateUtil.format(new Date(),"yyyy-MM-dd")));
            //2、将销售货物一天的销售的数量进行数据缓存
            redisUtil.zSet(Constants.REDIS_KEY.GOODS_TOP_KEY+goods.getGoodsId(),goods.getGoodsId(),goods.getSellNum());
            //设置过期时间 当天有效
            //0点的时间减去现在的时间换算层毫秒数
            Long expireTime =   dateUtil.initDateByDay()-DateUtil.currentSeconds();
            redisUtil.expire(Constants.REDIS_KEY.GOODS_TOP_KEY+goods.getGoodsId(),expireTime);
            //同时缓存一下货物的基本信息 货物id 货物名称 销售货物数量
            this.hasCacheGoods(goods,expireTime);
            goodsVos.add(goods);
        }
        //做并集
        this.zuionOneDayTop(goodsVos);
    }

    /**
     *合并当天热卖榜
     */
    private void zuionOneDayTop(List<GoodsVo> goodsVos) {
        List<String> otherKeys = new ArrayList<>();
        for (GoodsVo goodsVo : goodsVos) {
            String temp = Constants.REDIS_KEY.GOODS_TOP_KEY +goodsVo.getGoodsId();
            otherKeys.add(temp);
        }
        redisUtil.zUnionAndStore(Constants.REDIS_KEY.GOODS_TOP_KEY,
                otherKeys,Constants.REDIS_KEY.GOODS_ONE_DAY_RANK);
    }

    /**
     * 缓存货物的基本信息
     * @param goods
     * @param expireTime
     */
    private void hasCacheGoods(GoodsVo goods, Long expireTime) {
        //构造货物基本信息key
        String goodsKey =Constants.REDIS_KEY.GOODS_KEY+goods.getGoodsId();
        boolean isKey = redisUtil.hasKey(goodsKey);
        if (!isKey){
            redisUtil.hset(goodsKey,Constants.REDIS_KEY.GOODS_KEY_ID,goods.getGoodsId(),expireTime);
            redisUtil.hset(goodsKey,Constants.REDIS_KEY.GOODS_KEY_NAME,goods.getGoodsName(),expireTime);
            redisUtil.hset(goodsKey,Constants.REDIS_KEY.GOODS_KEY_SELL_NUM,goods.getSellNum(),expireTime);

        }
    }
-
代码中设计的常量类如下
/**
 * @author:triumphxx
 * @Date:2020/5/16
 * @Time:9:43 上午
 * @微信公众号:北漂码农有话说
 * @desc:常量类
 **/
public class Constants {

    public static class REDIS_KEY {
        /**
         * 货物销量key 每天某一个货物的销售量
         */
        public static final String GOODS_TOP_KEY= "goods:rank:";
        /**
         * 货物的基本信息key
         */
        public static final String GOODS_KEY= "goods:";
        /**
         * 货物id
         */
        public static final String GOODS_KEY_ID= "goods:id:";
        /**
         * 货物名称
         */
        public static final String GOODS_KEY_NAME= "goods:name:";
        /**
         * 货物销售数量
         */
        public static final String GOODS_KEY_SELL_NUM= "goods:sellnum:";
        /**
         * 每日销售并集后的key
         */
        public static final String GOODS_ONE_DAY_RANK= "oneday:rank";
    }
}
项目中涉及的其他技术点比如:自定义标签等有机会专题讨论
项目中的具体细节请移步GitHub分析相关源码
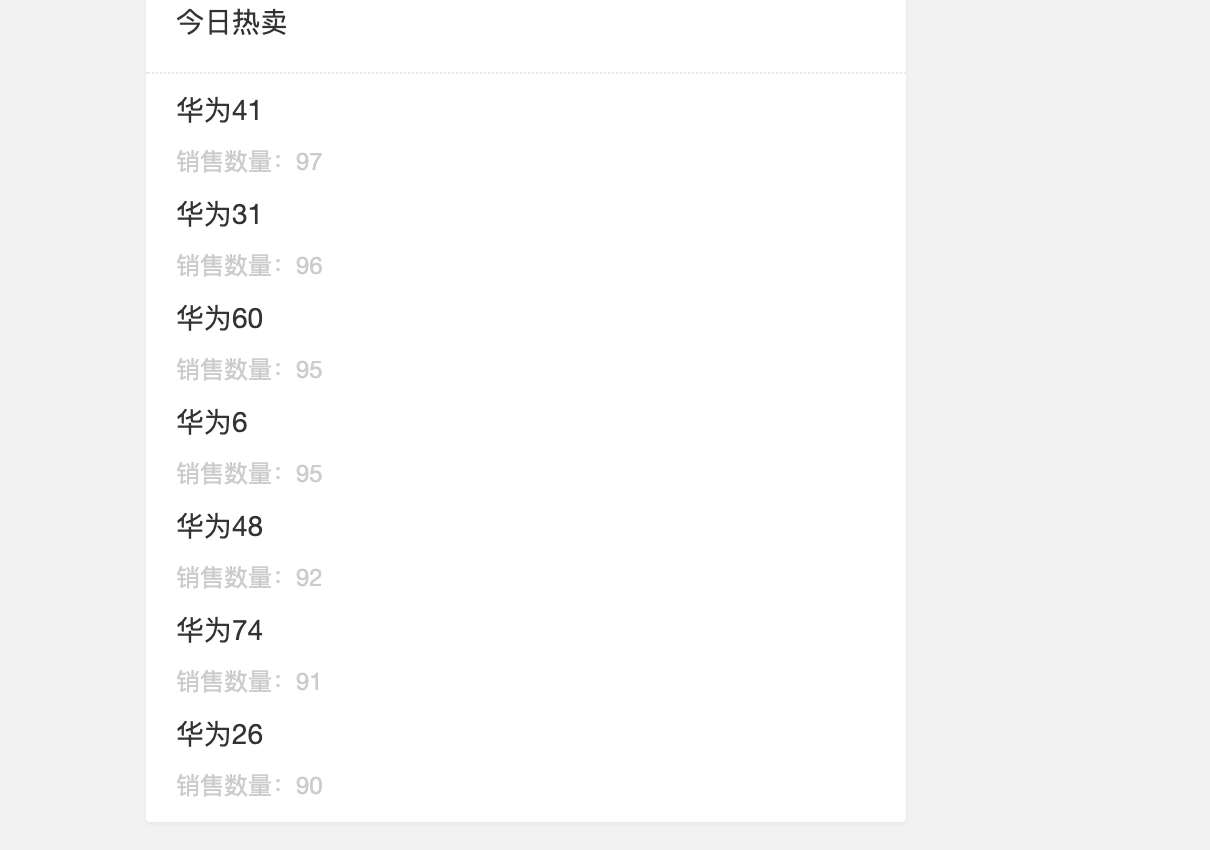
项目最终效果如图
本文的案例,本被人已经上传到 GitHub上了,地址:https://github.com/triumphxx/triumphxxtop
如果觉得笔者的内容对你有用,请关注微信公众号,欢迎点赞评论。