环境:Windows 10
STEP 1: 下载 JFlex 文件,我选择的是 jflex-1.7.0.zip。下载完成后解压到想安装的位置。
文件结构如下(假设解压目录为 C:):
C:jflex-1.7.0
        +--bin                        (start scripts)
        +--doc                        (FAQ and manual)
        +--examples
            +--byaccj                 (calculator example for BYacc/J)
            +--cup-maven              (calculator example for cup and maven)
            +--interpreter            (interpreter example for cup)
            +--java                   (Java lexer specification)
            +--simple-maven           (example scanner built with maven)
            +--standalone-maven       (a simple standalone scanner,
                                        built with maven)
            +--zero-reader            (Readers that return 0 characters)
        +--lib                        (precompiled classes)
        +--src
            +--main
                +--config             (PMD source analyzer configuration)
                +--cup                (JFlex parser spec)
                +--java
                    +--jflex          (source code of JFlex)
                        +--anttask    (source code of JFlex Ant Task)
                        +--gui        (source code of JFlex UI classes)
                        +--unicode    (source code for Unicode properties)
                +--jflex              (JFlex scanner spec)
                +--resources          (messages and default skeleton file)
            +--test                   (unit tests)
STEP 2:修改 jflex.bat
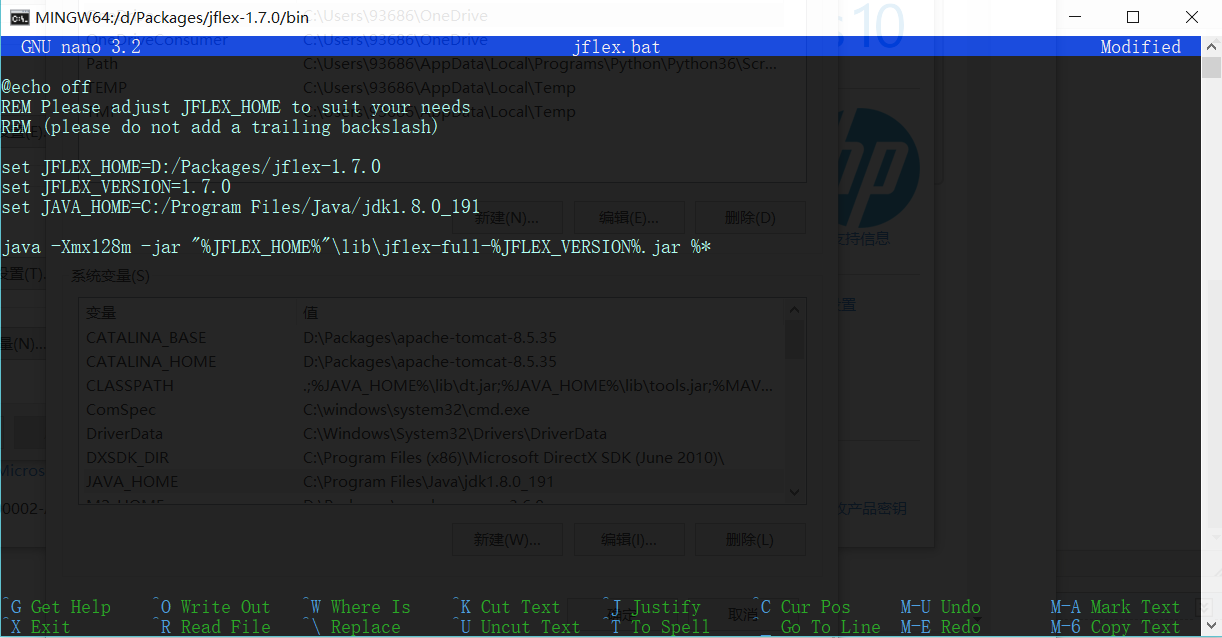
1)进入 jflex解压目录/jflex-1.7.0/bin,打开jflex.bat
2)修改两个环境变量:
JAVA_HOME :Java JDK 的安装路径
JFLEX_HOME :JFlex 的安装路径
**由于直接打开 jflex.bat 会闪退,我是在 gitbash 中用 nano 编辑的。

STEP 3:将 jflex解压目录/jflex-1.7.0/bin 加入系统环境变量 Path
STEP 4:运行 jflex 检查是否配置成功(依旧用的是 gitbash)
文档说,命令格式为jflex <options> <inputfiles> (如果不在命令行输入文件名,jflex会有一个弹出一个输入文件名的窗口)
这里是所有选项的说明:
-d <directory> 在指定目录<directory>生成文件
--encoding <name> 使用<name>格式的编码读入此法规范并书写 java 文件
--skel <file> 使用外部骨架<file>
--nomin 在扫描生成时跳过 DFA 最小化的步骤
--jflex 执行 JLex 解释规范
--dot 为 NFA, DFA, minimised DFA 生成 Graphviz dot 文件
--dump 显示 NFA, initial DFA, minimised DFA 的转换表
--legacydot 元字符 dot (.) 匹配 [^
] 而非 [^
u000Bu000Cu0085u2028u2029]
--verbose or -v 显示生成进度消息(默认开启)
--quiet or -q 只显示错误信息
--warn-unused 警告未使用的宏(在 verbose 模式中默认开启,quiet 模式中默认关闭)
--no-warn-unused 不警告未使用的宏
--time 显示代码生成进度的时间信息
--version 打印版本信息
--info 打印系统与 jdk 信息
--unicodever <ver> 打印所有 Unicode 版本<ver>支持的属性
--help or -h 打印帮助信息
按照习俗,跑跑看 jflex --version:
![]()
GOOD JOB!
接下来运行一个手册提供的简单例子
这段 lexical specitication 描述了 Java 语言的部分规则,从手册复制下来的时候每行会多出四个空格,要手动去掉。保存在 test.flex 文件中。
%%

%class Lexer
%unicode
%cup
%line
%column

%{
  StringBuffer string = new StringBuffer();

  private Symbol symbol(int type) {
    return new Symbol(type, yyline, yycolumn);
  }
  private Symbol symbol(int type, Object value) {
    return new Symbol(type, yyline, yycolumn, value);
  }
%}

LineTerminator =
|
|

InputCharacter = [^
]
WhiteSpace     = {LineTerminator} | [ 	f]

/* comments */
Comment = {TraditionalComment} | {EndOfLineComment} | {DocumentationComment}

TraditionalComment   = "/*" [^*] ~"*/" | "/*" "*"+ "/"
// Comment can be the last line of the file, without line terminator.
EndOfLineComment     = "//" {InputCharacter}* {LineTerminator}?
DocumentationComment = "/**" {CommentContent} "*"+ "/"
CommentContent       = ( [^*] | *+ [^/*] )*

Identifier = [:jletter:] [:jletterdigit:]*

DecIntegerLiteral = 0 | [1-9][0-9]*

%state STRING

%%

/* keywords */
<YYINITIAL> "abstract"           { return symbol(sym.ABSTRACT); }
<YYINITIAL> "boolean"            { return symbol(sym.BOOLEAN); }
<YYINITIAL> "break"              { return symbol(sym.BREAK); }

<YYINITIAL> {
  /* identifiers */
  {Identifier}                   { return symbol(sym.IDENTIFIER); }

  /* literals */
  {DecIntegerLiteral}            { return symbol(sym.INTEGER_LITERAL); }
  "                             { string.setLength(0); yybegin(STRING); }

  /* operators */
  "="                            { return symbol(sym.EQ); }
  "=="                           { return symbol(sym.EQEQ); }
  "+"                            { return symbol(sym.PLUS); }

  /* comments */
  {Comment}                      { /* ignore */ }

  /* whitespace */
  {WhiteSpace}                   { /* ignore */ }
}

<STRING> {
  "                             { yybegin(YYINITIAL);
                                   return symbol(sym.STRING_LITERAL,
                                   string.toString()); }
  [^

"\]+                   { string.append( yytext() ); }
  \t                            { string.append('	'); }
  \n                            { string.append('
'); }

  \r                            { string.append('
'); }
  \"                           { string.append('"'); }
  \                             { string.append('\'); }
}

/* error fallback */
[^]                              { throw new Error("Illegal character <"+
                                                    yytext()+">"); }
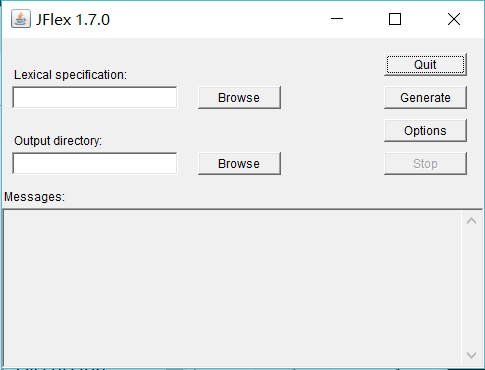
执行命令 jflex ,会弹出如下窗口,选择文件和目录,点击 Generate 即可生成 scanner,是一个叫 Lexer.java 的文件。

参考:http://www.jflex.de/manual.html#content(官方文档)