部署离线切片,我们部署到SQLite数据库或者mysql,在这里我们部署到本地切片,切片下载是用的太乐下载器,如果没有买可以参考Gmap.NET 详请及下载器的使用见webgis离线部署
效果:
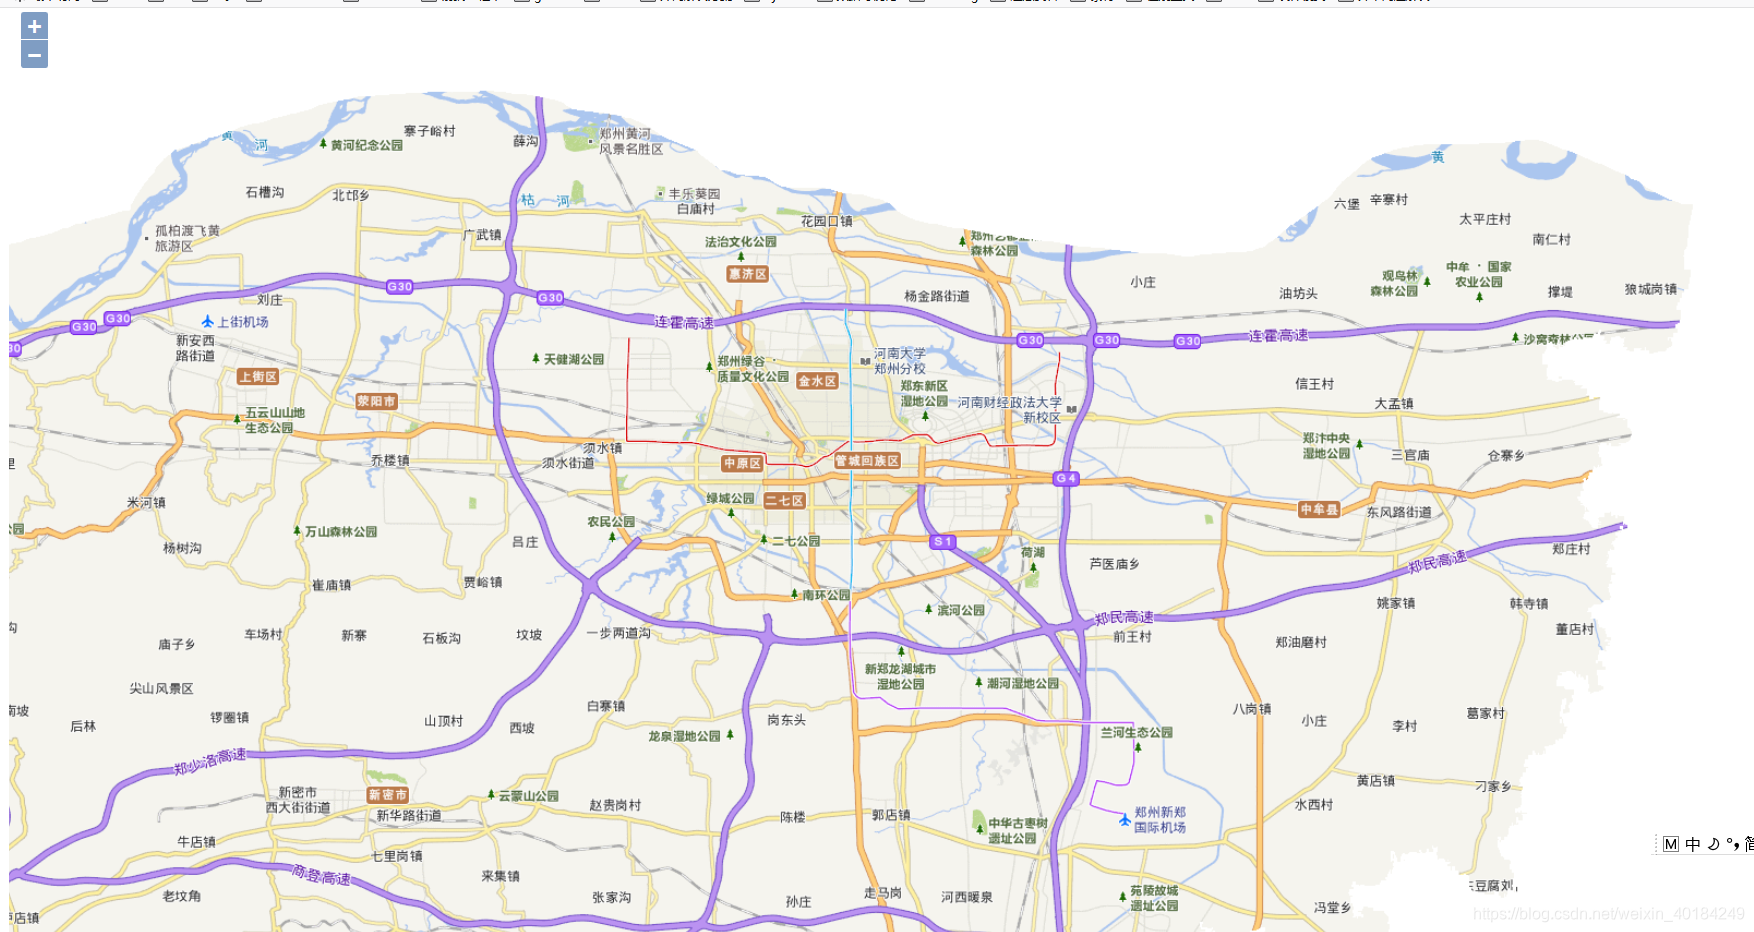
部署过程:
1、新建一个空文件夹(arcgis 名字随便起),并配置到geowebcache中的web.xml中
添加如下标签
  <context-param>
        <param-name>GEOWEBCACHE_CACHE_DIR</param-name>
        <param-value>E:/tile/arcgis</param-value>
    </context-param>
param-value是你所建的文件夹
2、启动tomcat,
在启动tomcat 之后我们在arcgis文件夹中可以看到

上面四个文件,Layers文件是我存储arcgistile图层信息创建,不是tomcat启动后生成的。
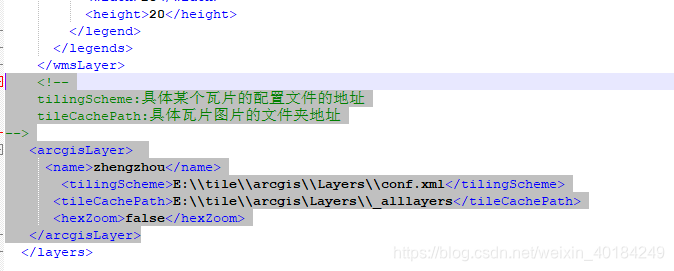
3、修改arcgis文件夹中,geowebcache.xml
添加如下代码
代码:
	<!--
    tilingScheme:具体某个瓦片的配置文件的地址
    tileCachePath:具体瓦片图片的文件夹地址
-->
   <arcgisLayer>
     <name>zhengzhou</name>
       <tilingScheme>E:\tile\arcgis\Layers\conf.xml</tilingScheme>
      <tileCachePath>E:\tile\arcgisLayers\_alllayers</tileCachePath>
      <hexZoom>false</hexZoom>
   </arcgisLayer>
4、geowebcache-core-context需要加
<bean id="gwcArcGIGridsetConfigutation" class="org.geowebcache.arcgis.layer.ArcGISCacheGridsetConfiguration"/>
5、启动tomcat就可以,注由于版本问题不一定能预览,但是不妨碍加载数据
<!DOCTYPE html>
<html>
<head>
    <meta charset="utf-8" />
    <title>加载离线切片</title>
    <link href="../script/ol4/ol.css" rel="stylesheet" />
    <script src="../script/ol4/ol.js"></script>
    <style >
        #map {
            height: 100vh;
        }
    </style>
</head>
<body>
    <div id="map"></div>
   <script>
       var format = 'image/png';
       var tiled = new ol.layer.Tile({
           //visible: false,
           source: new ol.source.TileWMS({
               url: 'http://localhost:8888/geowebcache/service/wms',
               params: {
                   'FORMAT': format,
                   'VERSION': '1.1.1',
                   tiled: true,
                   "LAYERS": 'zhengzhou',
                   "exceptions": 'application/vnd.ogc.se_inimage',

               }
           })
       });
       var view = new ol.View({
           projection:"EPSG:4326",
           zoom: 13,
           center: [113.33, 34.01]
       });
       var map = new ol.Map({
           target: 'map',
           layers: [tiled],
           view:view
       });
   </script>
</body>
</html>
注意:
1、首先这个切片肯定偏移,这里加载的高德切片,关于切片纠偏,一些收费的切片下载器,会自动处理,这里只能自己处理,博主还没有解决方案,有了补上。
2、按照原博主部署切片,要用geowebcache1.8版本,如果高版本,无法预览,但是不影响OL或者leaflet加载
3、使用范围有限
4、geowebcache-core-context需要加
<bean id="gwcArcGIGridsetConfigutation" class="org.geowebcache.arcgis.layer.ArcGISCacheGridsetConfiguration"/>
如果不加,tomcat启动会出现一下类似错误
10 四月 18:12:15 (main) WARN [support.XmlWebApplicationContext] - Exception encountered during context initialization - cancelling refresh attempt: org.springframework.beans.factory.BeanCreationException: Error creating bean with name 'gwcXmlConfig' defined in ServletContext resource [/WEB-INF/geowebcache-core-context.xml]: Invocation of init method failed; nested exception is java.lang.IllegalStateException: No ArcGISCacheGridsetConfiguration could be found
10 四月 18:12:15 (main) ERROR [context.ContextLoader] - Context initialization failed
org.springframework.beans.factory.BeanCreationException: Error creating bean with name 'gwcXmlConfig' defined in ServletContext resource [/WEB-INF/geowebcache-core-context.xml]: Invocation of init method failed; nested exception is java.lang.IllegalStateException: No ArcGISCacheGridsetConfiguration could be found
        at org.springframework.beans.factory.support.AbstractAutowireCapableBeanFactory.initializeBean(AbstractAutowireCapableBeanFactory.java:1745)
        at org.springframework.beans.factory.support.AbstractAutowireCapableBeanFactory.doCreateBean(AbstractAutowireCapableBeanFactory.java:576)
        at org.springframework.beans.factory.support.AbstractAutowireCapableBeanFactory.createBean(AbstractAutowireCapableBeanFactory.java:498)