应用系统分布式构建运维
部署主从数据库
基础环境安装
准备两台主机
修改主机名
# hostnamectl set-hostname mysql1
# hostnamectl set-hostname mysql2
关闭防火墙及SELinux服务(两个节点)
# setenforce 0
# systemctl stop firewalld
配置hosts文件(两个节点)
# vi /etc/hosts
加入以下内容
192.168.37.16 mysql1
192.168.37.17 mysql2
安装数据库服务(两个节点)
# yum install -y mariadb mariadb-server
启动数据库服务并设置开机自启
# systemctl start mariadb
# systemctl enable mariadb
Created symlink from /etc/systemd/system/multi-user.target.wants/mariadb.service to /usr/lib/systemd/system/mariadb.service.
初始化数据库并配置主从服务
初始化数据库(两个节点)
SERVERS IN PRODUCTION USE! PLEASE READ EACH STEP CAREFULLY!
password for the root user. If you've just installed MariaDB, and
you haven't set the root password yet, the password will be blank,
so you should just press enter here.
OK, successfully used password, moving on...
root user without the proper authorisation.
New password: ##输入数据库root密码
Password updated successfully!
Reloading privilege tables..
... Success!
By default, a MariaDB installation has an anonymous user, allowing anyone
to log into MariaDB without having to have a user account created for
them. This is intended only for testing, and to make the installation
go a bit smoother. You should remove them before moving into a
production environment.
... Success!
ensures that someone cannot guess at the root password from the network.
... skipping.
access. This is also intended only for testing, and should be removed
before moving into a production environment.
- Dropping test database...
... Success!
- Removing privileges on test database...
... Success!
will take effect immediately.
... Success!
installation should now be secure.
配置mysql1主节点
修改mysql1节点的数据库配置文件
# vi /etc/my.cnf
[mysqld]
log_bin=mysql-bin ##记录操作日志
binlog_ignore_db=mysql ##不同步mysql系统数据库
server_id=16 ##数据库集群中的每个节点id都要不同
datadir=/var/lib/mysql
socket=/var/lib/mysql/mysql.sock
重启数据库服务
# systemctl restart mariadb
进入数据库
# mysql -uroot -p123456
授权在任何客户端机器上可以以root用户登录到数据库
> grant all privileges on *.* to root@'%' identified by "123456";
在主节点上创建一个用户连接节点mysql2,并赋予从节点同步主节点数据库的权限
> grant replication slave on *.* to 'user'@'mysql2' identified by '123456';
配置mysql2从节点
修改mysql2节点的数据库配置文件
# vi /etc/my.cnf
[mysqld]
log_bin=mysql-bin ##记录操作日志
binlog_ignore_db=mysql ##不同步mysql系统数据库
server_id=17 ##数据库集群中的每个节点id都要不同
datadir=/var/lib/mysql
socket=/var/lib/mysql/mysql.sock
重启数据库服务
# systemctl restart mariadb
进入数据库
# mysql -uroot -p123456
配置从节点连接主节点的连接信息
> change master to master_host='mysql1',master_user='user',master_password='123456';
开启从节点服务
> start slave;
查看从节点服务状态
> show slave statusG

配置数据库主从集群成功
验证数据库主从服务
主节点创建数据库
在主节点中创建库
> create database test;
> use test;
在库中创建表
> create table company(id int not null primary key,name varchar(50),addr varchar(255));
插入表数据
> insert into company values(1,"alibaba","china");
查看表数据
> select * from company;

从节点验证复制功能
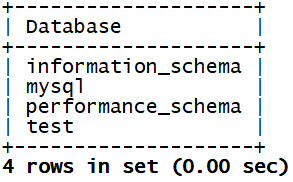
查看数据库列表
> show databases;
> use test;
查询表
> show tables;

查询内容,验证复制功能
> select * from company;

验证从数据库的复制功能成功
部署Nginx服务
基础环境安装
修改主机名
# hostnamectl set-hostname nginx
关闭防火墙及SELinux服务
# setenforce 0
# systemctl stop firewalld
安装配置基础服务
编译安装基础环境
# yum install -y gcc gcc-c++ openssl-devel zlib-devel zlib pcre-devel
创建指定用户
# groupadd -g 1001 nginx
# useradd -u 900 nginx -g nginx -s /sbin/nologin
# tail -1 /etc/passwd
nginx:x:900:1001::/home/nginx:/sbin/nologin
安装配置nginx服务
将提供的nginx-1.12.2.tar.gz压缩包上传至/usr/local/src/目录下,并解压到当前目录
# cd /usr/local/src
# tar -zxvf nginx-1.12.2.tar.gz
编译并安装
# cd nginx-1.12.2
# ./configure --prefix=/usr/local/nginx --with-http_dav_module
> --with-http_stub_status_module --with-http_addition_module
> --with-http_sub_module --with-http_flv_module --with-http_mp4_module
> --with-http_ssl_module --with-http_gzip_static_module --user=nginx --group=nginx
没有报错,进行安装
# make && make install
创建软链接
# ln -s /usr/local/nginx/sbin/nginx /usr/local/sbin/
启动测试
# nginx -t
nginx: the configuration file /usr/local/nginx/conf/nginx.conf syntax is ok
nginx: configuration file /usr/local/nginx/conf/nginx.conf test is successful
# nginx
# netstat -ntpl
80端口启动,表示nginx服务启动成功
安装PHP环境
基础环境安装
修改主机名
# hostnamectl set-hostname php
关闭防火墙及SELinux服务
# setenforce 0
# systemctl stop firewalld
安装配置基础服务
编译安装基础环境
# yum install -y gcc gcc-c++ libxml2-devel libcurl-devel openssl-devel bzip2-devel
将提供的libmcrypt-2.5.8.tar.gz压缩包上传至/usr/local/src目录下,并解压到当前目录
# cd /usr/local/src
# tar -zxvf libmcrypt-2.5.8.tar.gz
编译安装服务
# cd libmcrypt-2.5.8
# ./configure --prefix=/usr/local/libmcrypt && make && make install
安装PHP环境
将提供的php-5.6.27.tar.gz压缩包上传至/usr/local/src目录下,并解压到当前目录
# cd /usr/local/src/
# tar -zxvf php-5.6.27.tar.gz
编译安装服务
# cd php-5.6.27
# ./configure --prefix=/usr/local/php5.6 --with-mysql=mysqlnd
--with-pdo-mysql=mysqlnd --with-mysqli=mysqlnd --with-openssl --enable-fpm
--enable-sockets --enable-sysvshm --enable-mbstring --with-freetype-dir
--with-jpeg-dir --with-png-dir --with-zlib --with-libxml-dir=/usr --enable-xml --with-mhash
--with-mcrypt=/usr/local/libmcrypt --with-config-file-path=/etc
--with-config-file-scan-dir=/etc/php.d --with-bz2 --enable-maintainer-zts
没有报错,进行安装
# make && make install
创建用户ID
这个nginx的id号要和nginx主机上的保持一致
# groupadd -g 1001 nginx
# useradd -u 900 nginx -g nginx -s /sbin/nologin
# tail -1 /etc/passwd
nginx:x:900:1001::/home/nginx:/sbin/nologin
配置PHP环境
PHP压缩包中提供了PHP环境需要用到的模板文件,需要对文件进行改名后才能使用
复制文件并改名
# cp php.ini-production /etc/php.ini
# cp sapi/fpm/init.d.php-fpm /etc/init.d/php-fpm
赋予文件执行权限
# chmod +x /etc/init.d/php-fpm
添加PHP服务到启动列表,并设置开机自启
# chkconfig --add php-fpm
# chkconfig php-fpm on
修改PHP的主配置文件
# cp /usr/local/php5.6/etc/php-fpm.conf.default /usr/local/php5.6/etc/php-fpm.conf
# grep -n '^'[a-Z] /usr/local/php5.6/etc/php-fpm.conf
149:user = nginx
150:group = nginx
164:listen = 192.168.37.13:9000
224:pm = dynamic
235:pm.max_children = 50
240:pm.start_servers = 5
245:pm.min_spare_servers = 5
250:pm.max_spare_servers = 35
启动PHP服务
启动PHP服务
# service php-fpm start
Starting php-fpm done
查看启动状态
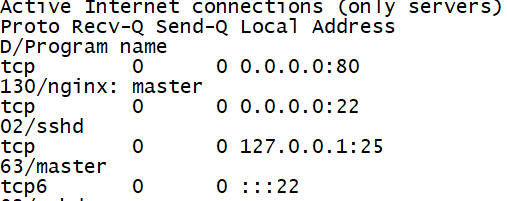
# netstat -ntpl

9000端口启动,表示PHP环境安装完毕
分布式部署LNMP+WordPress
已经完成了主从数据库的安装配置、Nginx服务的安装、PHP环境的安装的四台机器进行部署
分布式LNMP环境的调试
配置Nginx服务支持PHP环境(nginx节点)
修改配置文件
# vi /usr/local/nginx/conf/nginx.conf
location / {
root /www; ##更改网页目录
index index.php index.html index.htm;
}
location ~ .php$ { ##去掉这部分前面的注释符
root /www; ##更改目录
fastcgi_pass 192.168.37.13:9000; ##添加PHP主机IP地址
fastcgi_index index.php;
fastcgi_param SCRIPT_FILENAME /scripts$fastcgi_script_name;
include fastcgi_params;
}
添加配置
# vi /usr/local/nginx/conf/fastcgi_params
fastcgi_param SCRIPT_NAME $fastcgi_script_name;
fastcgi_param SCRIPT_FILENAME $document_root$fastcgi_script_name; ##添加这行
fastcgi_param REQUEST_URI $request_uri;
创建目录(nginx和php节点)
在nginx和php节点,创建/www目录,并修改用户和用户组
# mkdir /www
# chown nginx:nginx /www/
部署WordPress(nginx和php节点)
将提供的wordpress-4.7.3-zh_CN.zip压缩包上传至nginx节点和php节点的/root目录下并解压
# yum install -y unzip
# unzip wordpress-4.7.3-zh_CN.zip
将解压后的文件复制到/www目录下
# mv wordpress/* /www/
修改wordpress的配置文件(nginx节点)
将模板文件复制并修改
# cp /www/wp-config-sample.php /www/wp-config.php
# vi /www/wp-config.php
/** WordPress数据库的名称 */
define('DB_NAME', 'wordpress');
define('DB_USER', 'root');
define('DB_PASSWORD', '123456');
define('DB_HOST', '192.168.37.16'); ##此处IP为mysql1的地址
define('DB_CHARSET', 'utf8');
define('DB_COLLATE', '');
The authenticity of host '192.168.37.13 (192.168.37.13)' can't be established.
ECDSA key fingerprint is SHA256:C2d2Z+sCPaySJhwUjJ6I9fcmVW/rCBNL/7qI4lm8fd8.
ECDSA key fingerprint is MD5:84:3a:fb:c4:c1:15:b6:99:6f:62:f9:4b:46:a4:60:8c.
Are you sure you want to continue connecting (yes/no)? yes
Warning: Permanently added '192.168.37.13' (ECDSA) to the list of known hosts.
root@192.168.37.13's password: ##输入PHP节点密码
wp-config.php 100% 2909 1.9MB/s 00:00
创建WordPress数据库(mysql1节点)
登录数据库
# mysql -uroot -p123456
创建数据库
> create database wordpress;
验证WordPress应用(nginx节点)
重启nginx服务
# nginx -s reload
使用网页访问192.168.37.12(nginx节点ip)
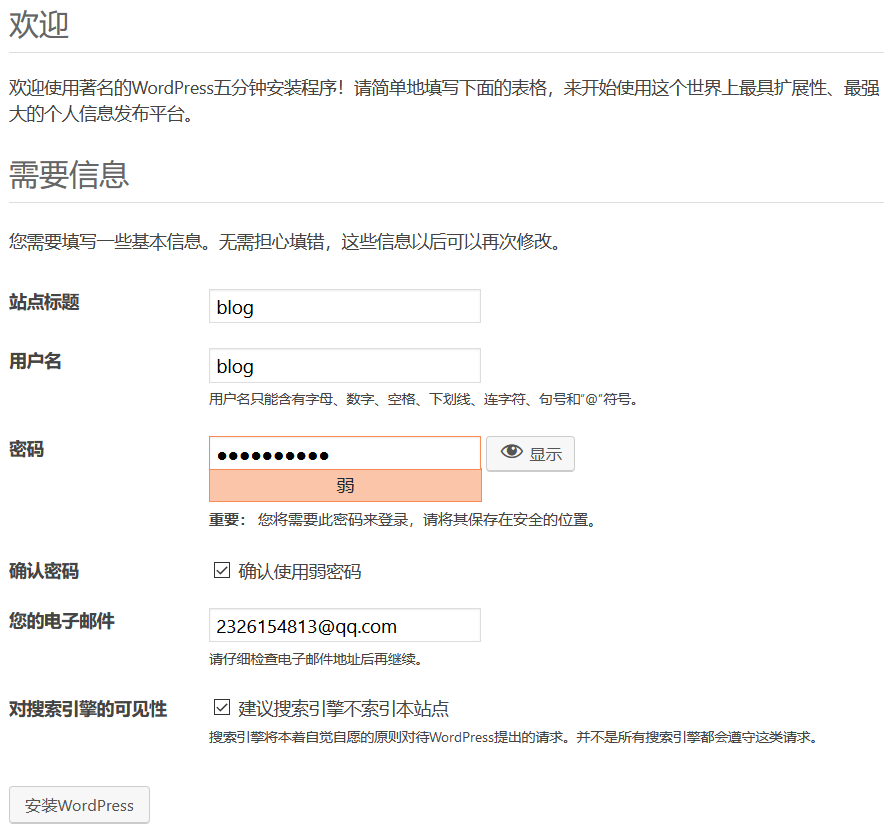
填写信息之后点击左下角安装
进入后台界面
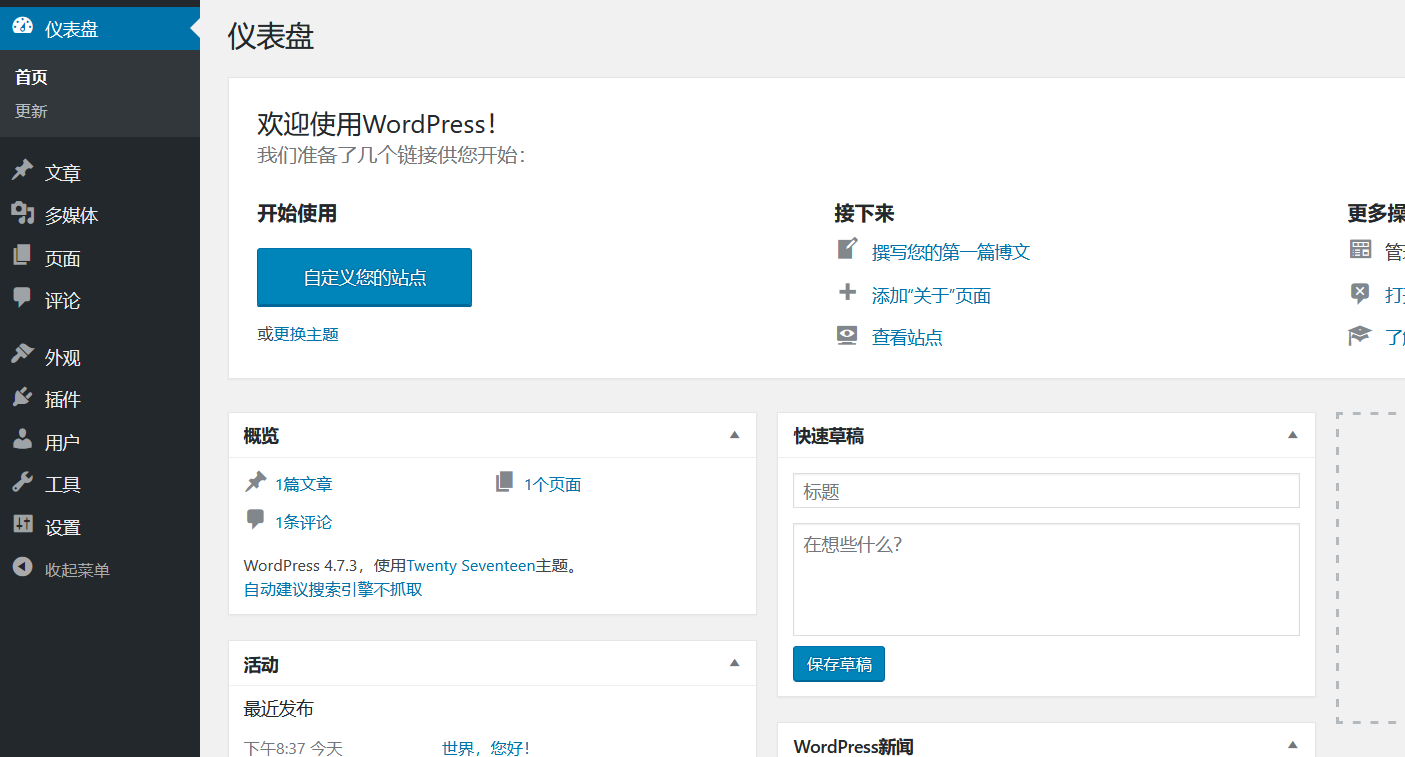
点击左上角图标

分布式部署完成