---恢复内容开始---
课程地址:
http://study.163.com/course/courseMain.htm?courseId=1003285002
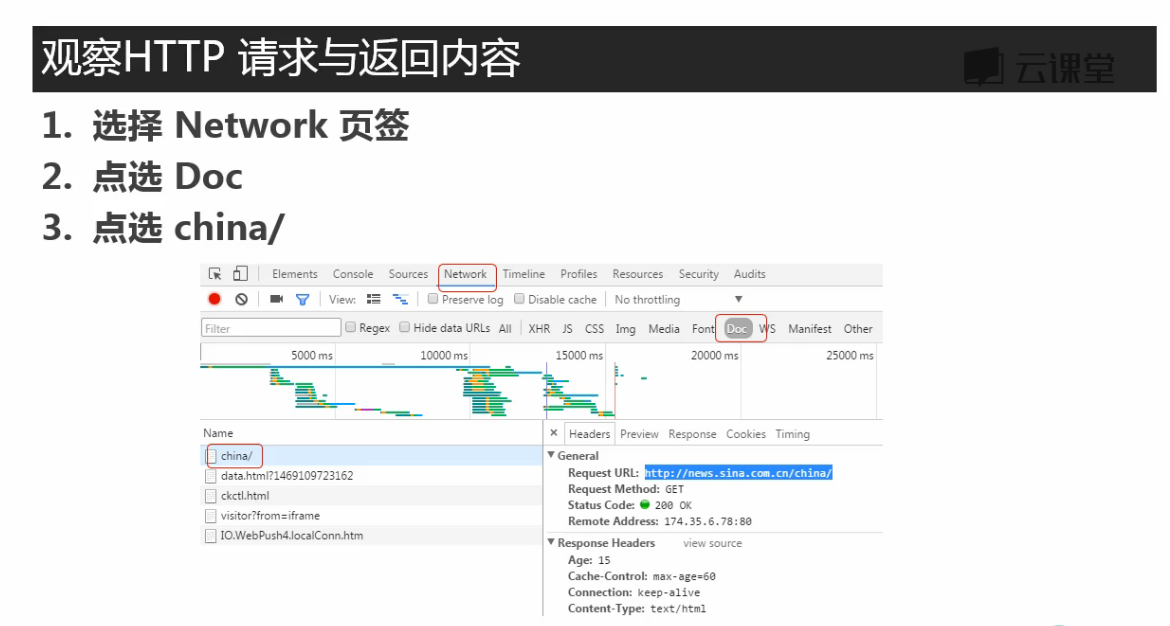
这里有不同的包,接下来确定哪个包是要爬取页面的内容
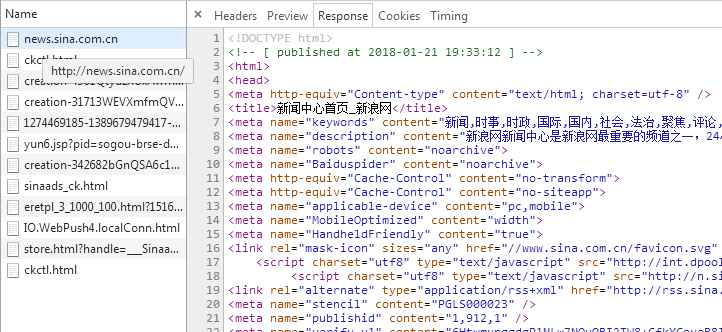
将上图中response标签下的内容与网页中的内容比对,如下:
将爬取内容在记事本中ctrl+f查找与页面中文本比对,确认爬取的页面正确
然后再在这个包的header标签中取得爬取要用的url(感觉一般要爬的都和浏览器上方窗口的url一样)

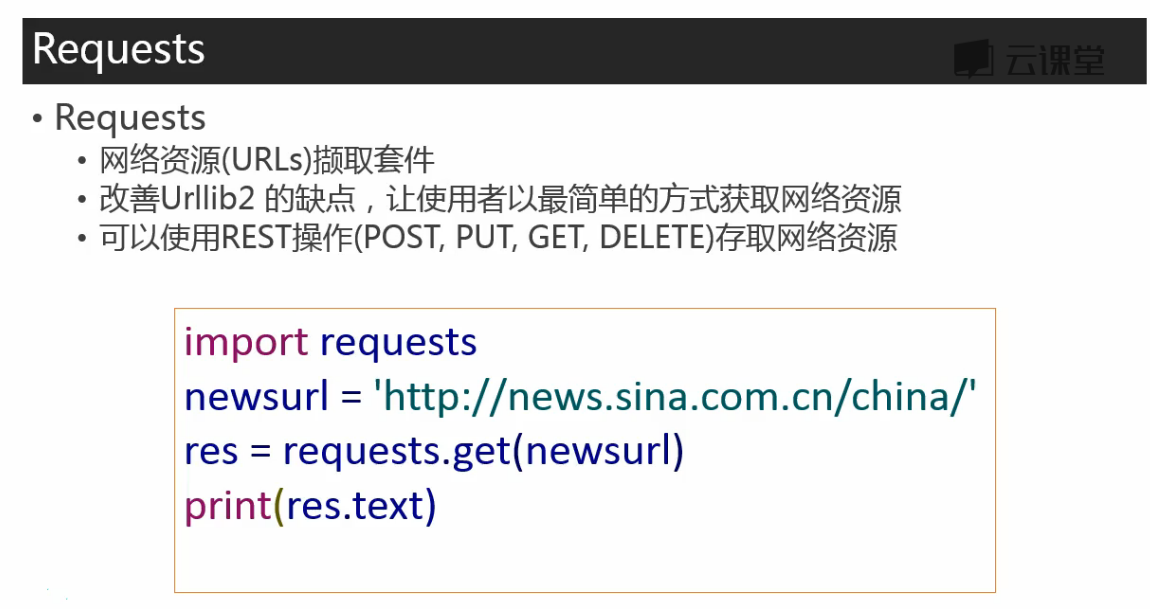
test_requests.py
import requests
res = requests.get('http://news.sina.com.cn/china/')
res.encoding = 'utf-8'
print(res.text)
test_beautifulsoup.py:
from bs4 import BeautifulSoup
import re

# 文档字符串
html_doc = """
<html><head><title>The Dormouse's story</title></head>
<body>
<p class="title"><b>The Dormouse's story</b></p>
<p class="story">Once upon a time there were three little sisters; and their names were
<a href="http://example.com/elsie" class="sister" id="link1">Elsie</a>,
<a href="http://example.com/lacie" class="sister" id="link2">Lacie</a> and
<a href="http://example.com/tillie" class="sister" id="link3">Tillie</a>;
and they lived at the bottom of a well.</p>

<p class="story">...</p>
"""

soup = BeautifulSoup(html_doc, 'html.parser')

print('去除标签内容,打印文本字段')
print(soup.text)

print('获取所有超链接')
links =soup.find_all('a')
for link in links:
    print(link.name, link['href'], link.get_text())

print('获取lacie的链接')
link_node = soup.find(name='a', href='http://example.com/lacie')
print(link_node.name, link_node['href'], link_node.get_text())

print('正则匹配')
link_node = soup.find(name='a', href=re.compile(r'ill'))
print(link_node.name, link_node['href'], link_node.get_text())

print('获取p段落文字')
link_node = soup.find(name='p', class_='title')
print(link_node.name, link_node.get_text())
输出结果:
D:PycharmProjects163news_spidervenvScriptspython.exe D:/PycharmProjects/test/test/test_bs4.py
去除标签内容,打印文本字段
The Dormouse's story
The Dormouse's story
Once upon a time there were three little sisters; and their names were
Elsie,
Lacie and
Tillie;
and they lived at the bottom of a well.
...
获取所有超链接
a http://example.com/elsie Elsie
a http://example.com/lacie Lacie
a http://example.com/tillie Tillie
获取lacie的链接
a http://example.com/lacie Lacie
正则匹配
a http://example.com/tillie Tillie
获取p段落文字
p The Dormouse's story
Process finished with exit code 0
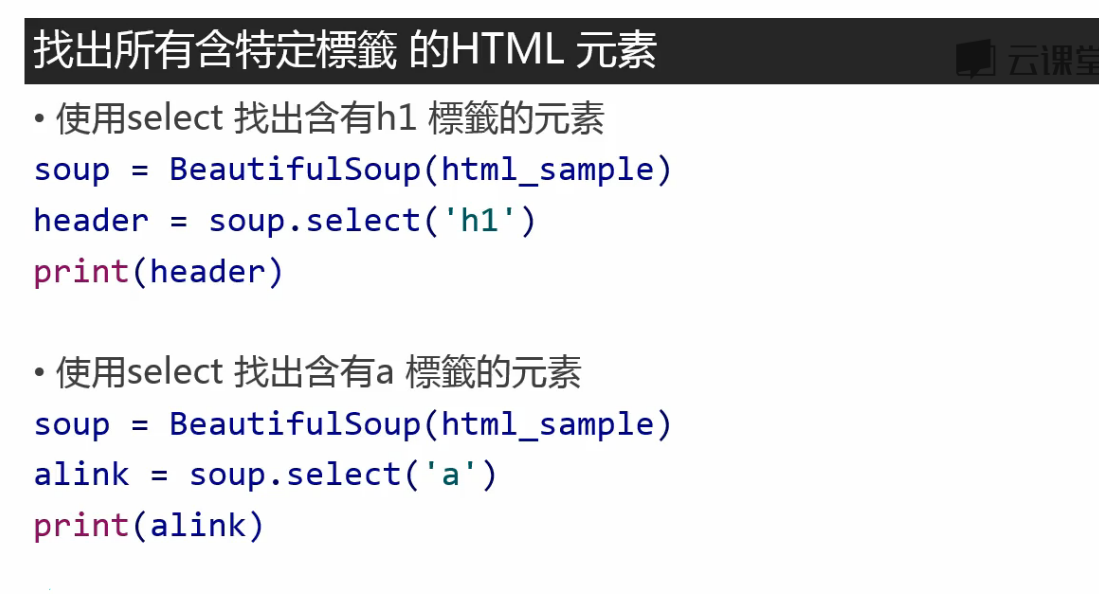
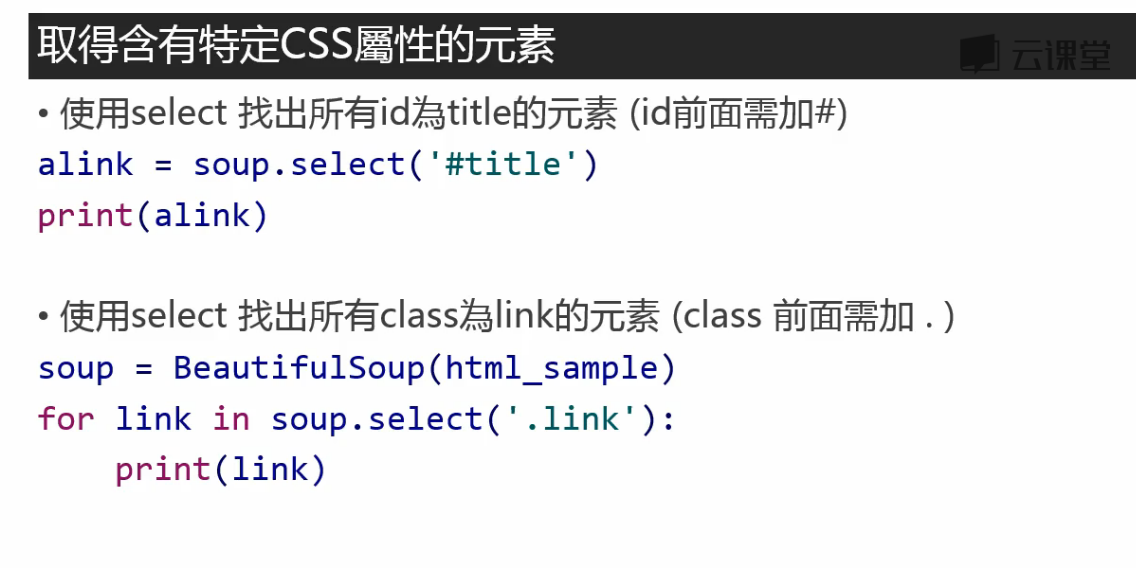
筛分数据
左边的箭头选取想要爬取的部分,自动定位到网页代码

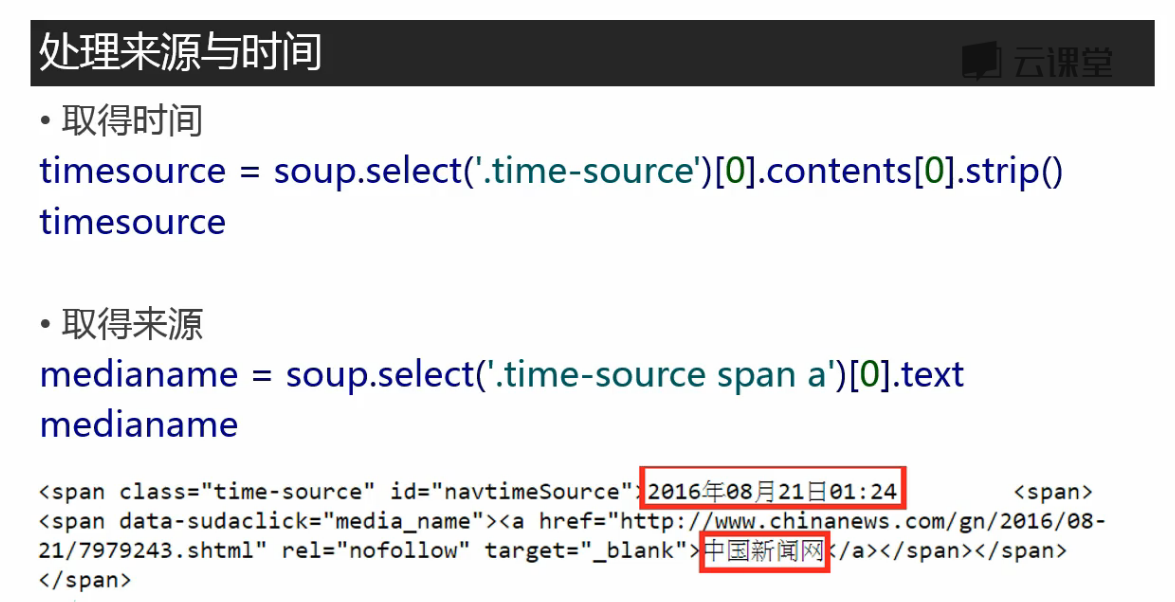
一个class=“time-source”下嵌套了两个文本内容,用content取出
strip()去掉文本后面的空格
‘.time-source span a’ 表示time-source后面的span标签后面的a标签
取得的time是字符串类型,储存的话可能需要转换为时间格式
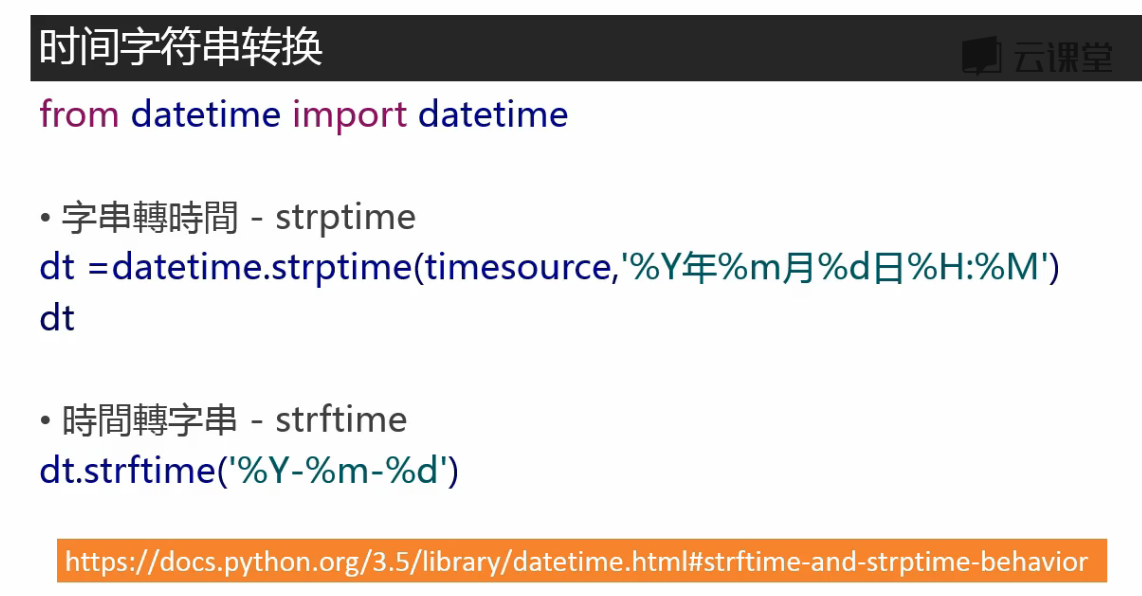
from datetime import datetime

import requests
from bs4 import BeautifulSoup
# 抓取新闻内容
res = requests.get('http://news.sina.com.cn/o/2018-01-02/doc-ifyqcsft9091054'
                   '.shtml?cre=tianyi&mod=pcpager_china&loc=35&r=9&doct=0&rfunc=22&tj=none&tr=9')
res.encoding = 'utf-8'
soup = BeautifulSoup(res.text, 'html.parser')
title = soup.select('.main-title')[0].text
time = soup.select('.date-source span')[0].text    # '.date-source span'空格隔开表嵌套的标签
medianame = soup.select('.date-source a')[0].text   # 取得来源
date = datetime.strptime(time, '%Y年%m月%d日 %H:%M')   # 注意:要转换的时间2018年01月21日 19:43中有个空格,格式'%Y年%m月%d日 %H:%M'中也要加入相应的空格,否则报错
article = []     # 文章内容在多个p标签中,合并为一个list
for p in soup.select('.article p')[:-1]:      # [:-1]把最后一个标签p中关于编辑的内容去掉
      article.append(p.text.strip())    # 不加strip()输出会有空白码u3000

article = ' '.join(article)      # list中的元素以','分隔,不符合阅读习惯,现在改为以空白分隔
author = soup.select('.show_author')[0].text.lstrip('责任编辑:')    # 取得编辑名称,lstrip('责任编辑:')将文本左边的'责任编辑:'移除,l表示左边

print(title, date, medianame)
print(article)
print(author)

想要获取评论数,用刚才的方法获取不到
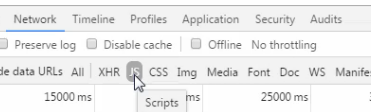
评论数是通过js发送的,不在Doc标签下,在js标签下找到

这个包中
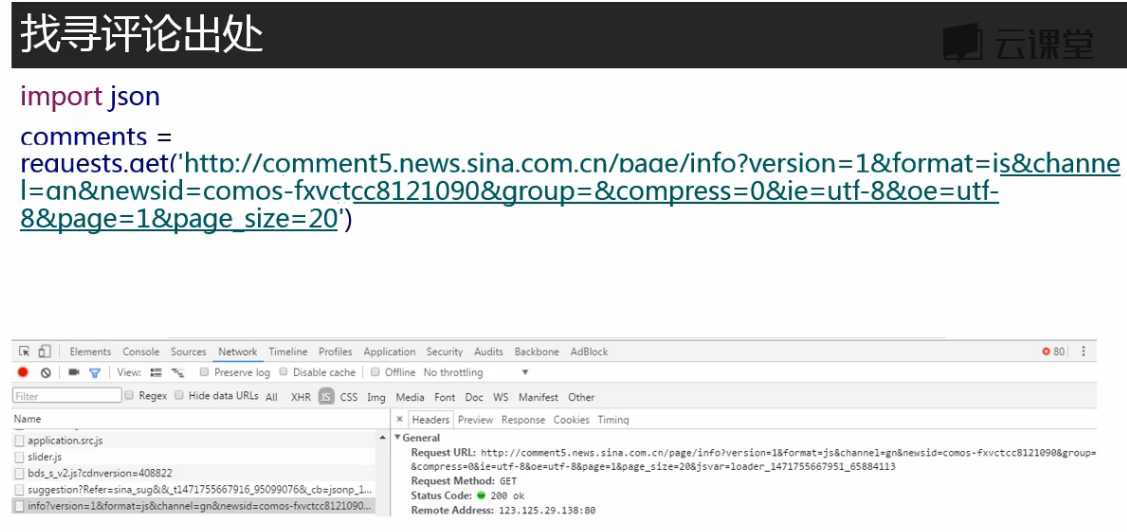
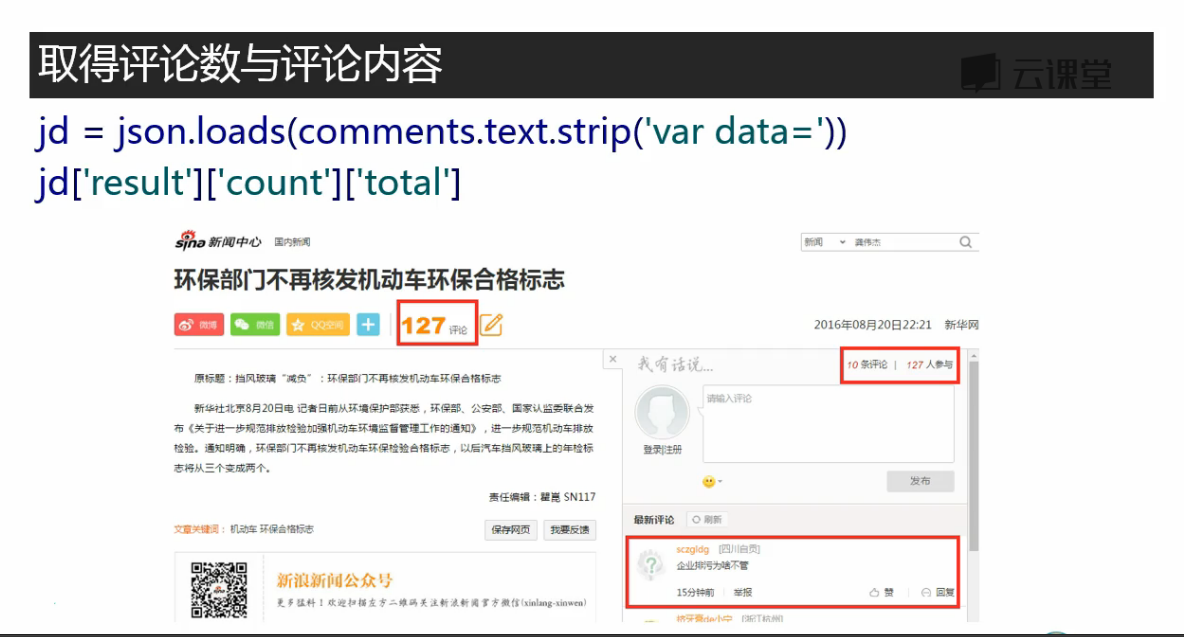
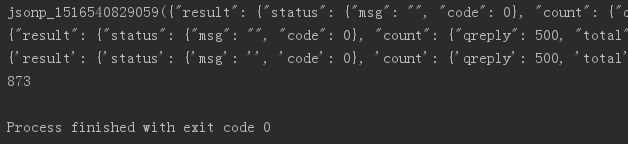
# 获取评论,解析json
comments = requests.get('http://comment5.news.sina.com.cn/page/info?version=1&format='
                        'json&channel=sh&newsid=comos-fyqcsft9091054&group=undefined&compress'
                        '=0&ie=utf-8&oe=utf-8&page=1&page_size=3&t_size=3&h_size=3&thread=1&ca'
                        'llback=jsonp_1516540829059&_=1516540829059')
import json
print(comments.text)
print(comments.text.strip('jsonp_1516540829059()'))
jd = json.loads(comments.text.strip('jsonp_1516540829059()'))    # 返回的数据被jsonp包上了,将其去掉,将内容从json转换为python的字典
print(jd)
print(jd['result']['count']['total'])     # 评论数嵌套在result count total 标签下

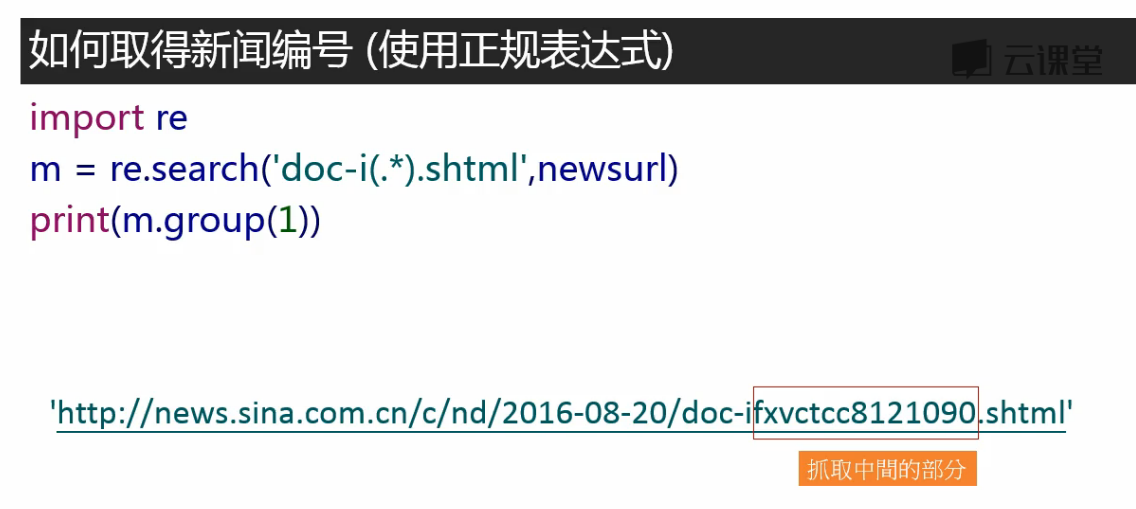
# 取得新闻编号
# 由于新闻内容和评论数不在同一个url中,这样不用麻烦地每个页面专门去找评论数所在的url,直接通过id拼接出评论数所在的url
newsurl = 'http://news.sina.com.cn/o/2018-01-02/doc-ifyqcsft9091054.shtml'
m = re.search('doc-i(.*).shtml', newsurl)
newsid = m.group(1)     # group(1)取得上式小括号的部分,group(0)取得所有比对到的部分
print(newsid)
输出正确:fyqcsft9091054
# 将取评论url的新闻编号部分换成一个大括号{}
# 通过commentUrl.format(newsid)可以将newsid放入大括号中,生成当前编号的新闻取评论数的url
commentUrl = 'http://comment5.news.sina.com.cn/page/info?version=1&'
             'format=json&channel=sh&newsid=comos-{}&group=undefined&'
             'compress=0&ie=utf-8&oe=utf-8&page=1&page_size=3&t_size=3&h_size=3&thread=1'
             '&callback=jsonp_1516540829059&_=1516540829059'


# 写一个函数,通过原url获取评论数

def getCommentCounts(newsurl):
    m = re.search('doc-i(.*).shtml', newsurl)
    newsid = m.group(1)
    comments = requests.get(commentUrl.format(newsid))
    jd = json.loads(comments.text.strip('jsonp_1516540829059()'))
    return jd['result']['count']['total']


print(getCommentCounts(newsurl))
输出正确:873
关于format()可参看https://www.cnblogs.com/benric/p/4965224.html
---恢复内容结束---
课程地址:
http://study.163.com/course/courseMain.htm?courseId=1003285002
这里有不同的包,接下来确定哪个包是要爬取页面的内容
将上图中response标签下的内容与网页中的内容比对,如下:
将爬取内容在记事本中ctrl+f查找与页面中文本比对,确认爬取的页面正确
然后再在这个包的header标签中取得爬取要用的url(感觉一般要爬的都和浏览器上方窗口的url一样)
test_requests.py
import requests
res = requests.get('http://news.sina.com.cn/china/')
res.encoding = 'utf-8'
print(res.text)
test_beautifulsoup.py:
from bs4 import BeautifulSoup
import re

# 文档字符串
html_doc = """
<html><head><title>The Dormouse's story</title></head>
<body>
<p class="title"><b>The Dormouse's story</b></p>
<p class="story">Once upon a time there were three little sisters; and their names were
<a href="http://example.com/elsie" class="sister" id="link1">Elsie</a>,
<a href="http://example.com/lacie" class="sister" id="link2">Lacie</a> and
<a href="http://example.com/tillie" class="sister" id="link3">Tillie</a>;
and they lived at the bottom of a well.</p>

<p class="story">...</p>
"""

soup = BeautifulSoup(html_doc, 'html.parser')

print('去除标签内容,打印文本字段')
print(soup.text)

print('获取所有超链接')
links =soup.find_all('a')
for link in links:
    print(link.name, link['href'], link.get_text())

print('获取lacie的链接')
link_node = soup.find(name='a', href='http://example.com/lacie')
print(link_node.name, link_node['href'], link_node.get_text())

print('正则匹配')
link_node = soup.find(name='a', href=re.compile(r'ill'))
print(link_node.name, link_node['href'], link_node.get_text())

print('获取p段落文字')
link_node = soup.find(name='p', class_='title')
print(link_node.name, link_node.get_text())
输出结果:
D:PycharmProjects163news_spidervenvScriptspython.exe D:/PycharmProjects/test/test/test_bs4.py
去除标签内容,打印文本字段
The Dormouse's story
The Dormouse's story
Once upon a time there were three little sisters; and their names were
Elsie,
Lacie and
Tillie;
and they lived at the bottom of a well.
...
获取所有超链接
a http://example.com/elsie Elsie
a http://example.com/lacie Lacie
a http://example.com/tillie Tillie
获取lacie的链接
a http://example.com/lacie Lacie
正则匹配
a http://example.com/tillie Tillie
获取p段落文字
p The Dormouse's story
Process finished with exit code 0
筛分数据
左边的箭头选取想要爬取的部分,自动定位到网页代码
一个class=“time-source”下嵌套了两个文本内容,用content取出
strip()去掉文本后面的空格
‘.time-source span a’ 表示time-source后面的span标签后面的a标签
取得的time是字符串类型,储存的话可能需要转换为时间格式
from datetime import datetime

import requests
from bs4 import BeautifulSoup
# 抓取新闻内容
res = requests.get('http://news.sina.com.cn/o/2018-01-02/doc-ifyqcsft9091054'
                   '.shtml?cre=tianyi&mod=pcpager_china&loc=35&r=9&doct=0&rfunc=22&tj=none&tr=9')
res.encoding = 'utf-8'
soup = BeautifulSoup(res.text, 'html.parser')
title = soup.select('.main-title')[0].text
time = soup.select('.date-source span')[0].text    # '.date-source span'空格隔开表嵌套的标签
medianame = soup.select('.date-source a')[0].text   # 取得来源
date = datetime.strptime(time, '%Y年%m月%d日 %H:%M')   # 注意:要转换的时间2018年01月21日 19:43中有个空格,格式'%Y年%m月%d日 %H:%M'中也要加入相应的空格,否则报错
article = []     # 文章内容在多个p标签中,合并为一个list
for p in soup.select('.article p')[:-1]:      # [:-1]把最后一个标签p中关于编辑的内容去掉
      article.append(p.text.strip())    # 不加strip()输出会有空白码u3000

article = ' '.join(article)      # list中的元素以','分隔,不符合阅读习惯,现在改为以空白分隔
author = soup.select('.show_author')[0].text.lstrip('责任编辑:')    # 取得编辑名称,lstrip('责任编辑:')将文本左边的'责任编辑:'移除,l表示左边

print(title, date, medianame)
print(article)
print(author)
想要获取评论数,用刚才的方法获取不到
评论数是通过js发送的,不在Doc标签下,在js标签下找到
这个包中
# 获取评论,解析json
comments = requests.get('http://comment5.news.sina.com.cn/page/info?version=1&format='
                        'json&channel=sh&newsid=comos-fyqcsft9091054&group=undefined&compress'
                        '=0&ie=utf-8&oe=utf-8&page=1&page_size=3&t_size=3&h_size=3&thread=1&ca'
                        'llback=jsonp_1516540829059&_=1516540829059')
import json
print(comments.text)
print(comments.text.strip('jsonp_1516540829059()'))
jd = json.loads(comments.text.strip('jsonp_1516540829059()'))    # 返回的数据被jsonp包上了,将其去掉,将内容从json转换为python的字典
print(jd)
print(jd['result']['count']['total'])     # 评论数嵌套在result count total 标签下
# 取得新闻编号
# 由于新闻内容和评论数不在同一个url中,这样不用麻烦地每个页面专门去找评论数所在的url,直接通过id拼接出评论数所在的url
newsurl = 'http://news.sina.com.cn/o/2018-01-02/doc-ifyqcsft9091054.shtml'
m = re.search('doc-i(.*).shtml', newsurl)
newsid = m.group(1)     # group(1)取得上式小括号的部分,group(0)取得所有比对到的部分
print(newsid)
输出正确:fyqcsft9091054
# 将取评论url的新闻编号部分换成一个大括号{}
# 通过commentUrl.format(newsid)可以将newsid放入大括号中,生成当前编号的新闻取评论数的url
commentUrl = 'http://comment5.news.sina.com.cn/page/info?version=1&'
             'format=json&channel=sh&newsid=comos-{}&group=undefined&'
             'compress=0&ie=utf-8&oe=utf-8&page=1&page_size=3&t_size=3&h_size=3&thread=1'
             '&callback=jsonp_1516540829059&_=1516540829059'


# 写一个函数,通过原url获取评论数

def getCommentCounts(newsurl):
    m = re.search('doc-i(.*).shtml', newsurl)
    newsid = m.group(1)
    comments = requests.get(commentUrl.format(newsid))
    jd = json.loads(comments.text.strip('jsonp_1516540829059()'))
    return jd['result']['count']['total']


print(getCommentCounts(newsurl))
输出正确:873
关于format()可参看https://www.cnblogs.com/benric/p/4965224.html
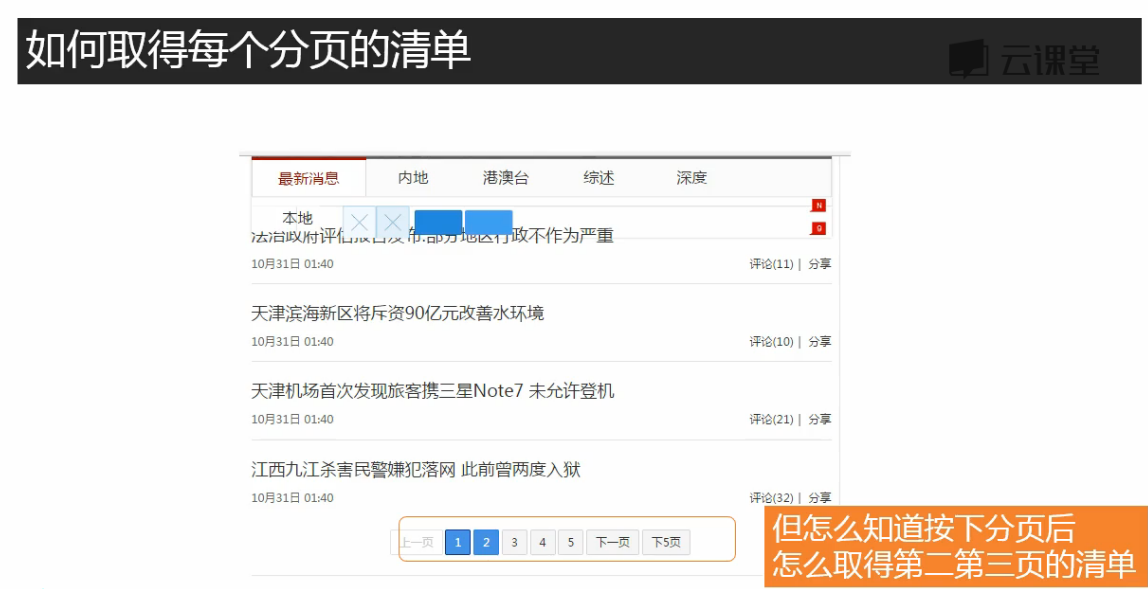
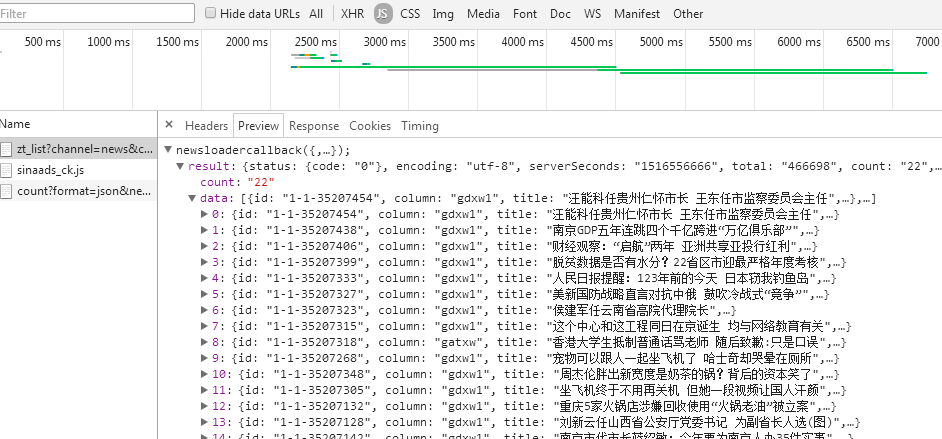
页面下滑,有新的新闻标题加载出来,说明使用了非同步加载,在Js中
点击第二页,在JS中找到新加载的数据。JS是JavaScript,实际上是JSON数据外面包裹上了JavaScript函式