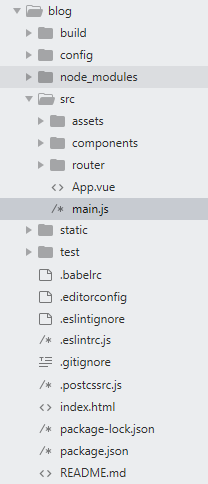
项目结构:
首先,编写博客的导航栏组件BlogHeader.vue:


 1 <template>
 2     <nav>
 3         <ul>
 4             <li>
 5                 <router-link to="/" exact>博客</router-link>
 6                 <router-link to="/add" exact>写博客</router-link>
 7             </li>
 8         </ul>
 9     </nav>
10
11 </template>
12
13 <script>
14     export default{
15         name:"blog-header"
16     }
17
18 </script>
19
20 <style scoped>
21     ul{
22         list-style-type: none;
23         text-align: center;
24         margin: 0px;
25     }
26
27     li{
28         display: inline-block;
29         margin: 0 10px;
30     }
31
32     a{
33         color: #fff;
34         text-decoration: none;
35         padding: 12px;
36         border-radius: 5px;
37     }
38
39     nav{
40         background: crimson;
41         padding: 30px 0;
42         margin:10px;
43     }
44
45     .router-link-active{
46         background: rgba(255,255,255,0.8);
47         color: #444;
48     }
49
50 </style>
如图所示:

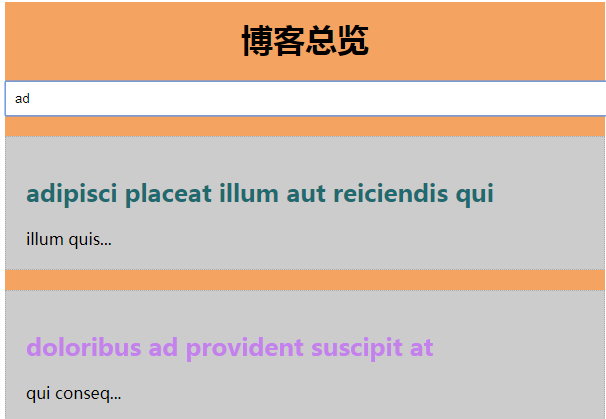
然后,编写展示博客的组件showBlog.vue:
用到的知识点有axios访问api:更多axios知识点请访问:https://www.npmjs.com/package/axios
 1 new Vue({
 2   el: '#app',
 3   data () {
 4     return {
 5       info: null
 6     }
 7   },
 8   created () {
 9     axios
10       .get('https://api.coindesk.com/v1/bpi/currentprice.json')
11       .then(response => (this.info = response))
12   }
13 })
14 <div id="app">
15   {{ info }}
16 </div>
错误处理:
 1 <!--
 2 很多时候我们可能并没有从 API 获取想要的数据。这可能是由于很多种因素引起的,比如 axios 调用可能由于多种原因而失败,包括但不限于:
 3 API 不工作了;
 4 请求发错了;
 5 API 没有按我们预期的格式返回信息。
 6 -->
 7 axios
 8   .get('https://api.coindesk.com/v1/bpi/currentprice.json')
 9   .then(response => (this.info = response.data.bpi))
10   .catch(error => console.log(error))
自定义指令,详见:https://cn.vuejs.org/v2/guide/custom-directive.html
 1 // 注册一个全局自定义指令 `v-focus`
 2 Vue.directive('focus', {
 3   // 当被绑定的元素插入到 DOM 中时……
 4   inserted: function (el) {
 5     // 聚焦元素
 6     el.focus()
 7   }
 8 })
 9
10 //如果想注册局部指令,组件中也接受一个 directives 的选项:
11 directives: {
12   focus: {
13     // 指令的定义
14     inserted: function (el) {
15       el.focus()
16     }
17   }
18 }
19
20 //然后你可以在模板中任何元素上使用新的 v-focus 属性,如下:
21 <input v-focus>
过滤器:https://cn.vuejs.org/v2/guide/filters.html
showBlog.vue代码:
 1 <template>
 2   <div id="show-blog" v-theme:column="'narrow'">
 3     <h1 style="text-align: center;padding: 15px 0px 0px 0px">博客总览</h1>
 4     <input type="text" v-model="serach" placeholder="搜索" />
 5     <div v-for="blog in blogs" class="single-blog">
 6         <!-- | pipe管道过滤器的标识 -->
 7         <router-link v-bind:to="'/blog/' + blog.id"><h2 v-rainbow>{{blog.name}} </h2></router-link>
 8         <article>
 9             <!-- {{blog.price | snippet}} -->
10              {{blog.detail | snippet}}
11         </article>
12     </div>
13   </div>
14 </template>
15
16 <script>
17 export default {
18   name: 'show-blog',
19   data(){
20       return{
21           blogs:[
22
23           ],
24           serach:''
25       }
26   },
27   created(){
28       /*this.$http.get('http://jsonplaceholder.typicode.com/posts').then(function(data){
29               this.blogs = data.body.slice(0,30);
30       })*/
31       this.$axios.get('/api/items').then((data)=>{
32   //        console.log(data.body);
33          this.blogs = data.data;
34
35       })
36   },
37 /*  computed:{
38       filteredBlogs:function(){
39           return this.blogs.filter((blog)=>{
40               return blog.title.match(this.serach);
41           })
42       }*/
43  // },
44   //过滤器局部实现方法
45   filters:{
46       "to-uppercase":function(data){
47           return data.toUpperCase();
48       }
49   },
50   //自定义指令的局部实现方式
51   directive:{
52
53   }
54 }
55 </script>
56
57 <style>
58
59 #show-blog{
60     max-width: 800px;
61     margin:0 auto;
62 }
63
64 .single-blog{
65     padding: 20px;
66     margin: 20px auto;
67     box-sizing: border-box;
68     background: #ccc;
69     border:1px dotted #aaa;
70 }
71
72 #show-blog a{
73     color: #444;
74     text-decoration: none;
75 }
76
77 input[type="text"]{
78     padding: 8px;
79     width:100%;
80     box-shadow: border-box;
81 }
82 </style>
界面如图所示:
博客详情页代码:
 1 <template>
 2     <div id="single-blog">
 3         <h1>{{blog.title}}</h1>
 4         <article>{{blog.body}}</article>
 5     </div>
 6 </template>
 7
 8 <script>
 9     export default{
10         name:"singleblog",
11         data(){
12             return{
13                 id:this.$route.params.id,
14                 blog:{}
15             }
16         },
17         created(){
18             this.$http.get('http://jsonplaceholder.typicode.com/posts/'+this.id).then(function(data){
19                   this.blog = data.body;
20               })
21         }
22     }
23
24 </script>
25
26 <style>
27     #single-blog{
28         max-width: 800px;
29         margin: 0 auto;
30         padding: 20px;
31         background: #eee;
32         border:1px dotted #aaa;
33     }
34 </style>

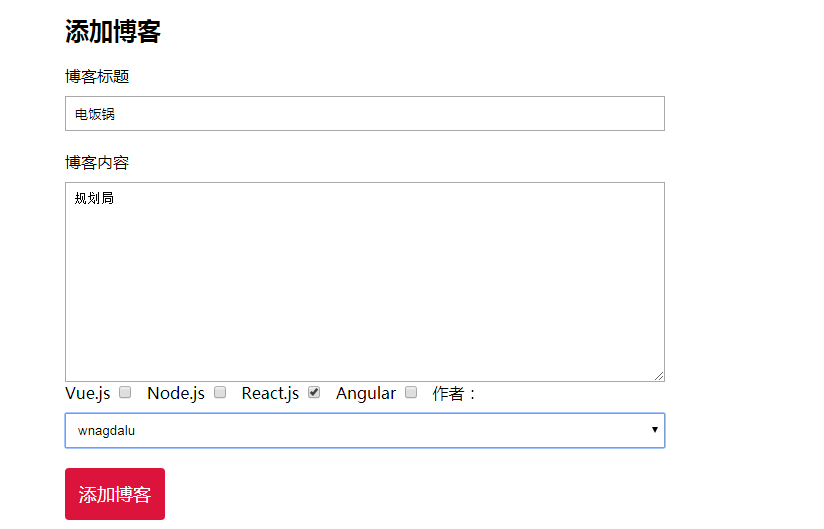
最后编写添加博客页代码:
  1 <template>
  2   <div id="add-blog" >
  3   <h2>添加博客</h2>
  4   <form action="" v-if="!submmited">
  5       <label>博客标题</label>
  6       <input type="text" v-model="blog.title" required="" />
  7       <label for="">博客内容</label>
  8       <textarea name="" id="" cols="30" rows="10" v-model="blog.content"></textarea>
  9     <div id="checkboxes">
 10       <label for="">Vue.js</label>
 11       <input type="checkbox" value="Vue.js" v-model="blog.categories" />
 12       <label for="">Node.js</label>
 13       <input type="checkbox" value="Node.js"  v-model="blog.categories"/>
 14       <label for="">React.js</label>
 15       <input type="checkbox" value="React.js"  v-model="blog.categories"/>
 16       <label for="">Angular</label>
 17       <input type="checkbox" value="Angular"  v-model="blog.categories"/>
 18       <label for="">作者:</label>
 19       <select v-model="blog.author">
 20         <option v-for="author in authors">
 21           {{author}}
 22         </option>
 23       </select>
 24       <button v-on:click.prevent="post">添加博客</button>
 25     </div>
 26   </form>
 27
 28   <div>
 29     <h3 v-if="submmited">您的博客发布成功!</h3>
 30   </div>
 31   <hr>
 32   <div id="preview">
 33       <h3>博客总览</h3>
 34       <p>博客标题:{{blog.title}}</p>
 35       <p>博客内容:{{blog.content}}</p>
 36     <p>博客分类:</p>
 37     <ul>
 38       <li v-for="category in blog.categories">
 39         {{category}}
 40       </li>
 41     </ul>
 42     <p>作者:{{blog.author}}</p>
 43   </div>
 44   </div>
 45 </template>
 46
 47 <script>
 48   import axios from 'axios'
 49 export default {
 50   name: 'addBlog',
 51   data () {
 52     return {
 53         blog:{
 54             title:"",
 55             content:"",
 56         categories:[],
 57         author:""
 58         },
 59       authors:["lianmin","wnagdalu","zhoujielun"],
 60       submmited:false
 61     }
 62   },
 63   methods:{
 64     post:function(){
 65       /*this.$http.post("http://jsonplaceholder.typicode.com/posts",{
 66         title:this.blog.title,
 67         body:this.blog.content,
 68         userId:1
 69       }).then(function(data){
 70         console.log(data.body);
 71         this.submmited=true;
 72       });*/
 73       var _this = this;
 74      axios.post("http://jsonplaceholder.typicode.com/posts",{
 75         title:this.blog.title,
 76         body:this.blog.content,
 77         userId:1
 78       }).then((data)=>{
 79         console.log(data.body);
 80         _this.submmited=true;
 81       });
 82     }
 83   }
 84 }
 85 </script>
 86
 87 <!-- Add "scoped" attribute to limit CSS to this component only -->
 88 <style scoped>
 89 #add-blog *{
 90   box-sizing:border-box ;
 91 }
 92 #add-blog{
 93   margin: 20px auto;
 94   max-width: 600px;
 95   padding: 20px;
 96 }
 97
 98 label{
 99   display: block;
100   margin:20px 0 10px;
101 }
102
103 input[type="text"],textarea,select{
104   display: block;
105   width: 100%;
106   padding: 8px;
107 }
108
109 textarea{
110   height: 200px;
111 }
112
113 #checkboxes label{
114   display: inline-block;
115   margin-top: 0;
116 }
117
118 #checkboxes input{
119   display: inline-block;
120   margin-right: 10px;
121 }
122
123 button{
124   display: block;
125   margin:20px 0;
126   background: crimson;
127   color: #fff;
128   border: 0;
129   padding: 14px;
130   border-radius: 4px;
131   font-size: 18px;
132   cursor: pointer;
133 }
134
135 #preview{
136   padding: 10px 20px;
137   border:1px dotted #ccc;
138   margin:30px 0;
139 }
140
141 h3{
142   margin-top: 10px;
143 }
144 </style>
最后进行路由表的相关配置:
 1 import Vue from 'vue'
 2 import Router from 'vue-router'
 3 import HelloWorld from '@/components/HelloWorld'
 4 import showblog from '@/components/showblog'
 5 import addblog from '@/components/AddBlog'
 6 import singleBlog from '@/components/SingleBlog'
 7
 8 Vue.use(Router)
 9
10 export default new Router({
11   routes: [
12     {
13       path: '/',
14       name: 'showblog',
15       component: showblog
16     },
17     {
18       path: '/add',
19       name: 'addblog',
20       component: addblog
21     },
22     {
23       path: '/blog/:id', /*路由参数*/
24       component: singleBlog
25     },
26   ],
27    mode:"history"  //不用显示#号
28 })
还要在App.vue中进行一些编写,主要是使用写好的路由:
 1 <template>
 2   <div id="app">
 3       <blog-header></blog-header>
 4    <!--  <add-blog></add-blog> -->
 5     <!-- <show-blog></show-blog> -->
 6     <router-view/>
 7   </div>
 8 </template>
 9
10 <script>
11 import AddBlog from './components/AddBlog'
12 import showblog from './components/showblog'
13 import blogHeader from './components/BlogHeader'
14 export default {
15   name: 'App',
16   components: {
17     'add-blog': AddBlog,
18     'show-blog':showblog,
19     "blog-header":blogHeader
20   }
21 }
22 </script>
23
24 <style>
25
26 </style>
另外,还可以在main.js中进行一些全局属性的配置:
 1 // The Vue build version to load with the `import` command
 2 // (runtime-only or standalone) has been set in webpack.base.conf with an alias.
 3 import Vue from 'vue'
 4 import App from './App'
 5 import router from './router'
 6 import VueResource from 'vue-resource'
 7 import axios from 'axios'
 8
 9
10 Vue.prototype.$axios = axios
11 //全局配置axios
12 //axios.defaults.baseURL='http://localhost:8080'
13 //请求头配置
14 /*
15 axios.defaults.headers.common['Authorization'] = 'Token'
16 axios.defaults.headers.post['Content-type'] = ''
17 axios.defaults.headers.get['Accepts']='application/json'
18 */
19 Vue.config.productionTip = false
20 Vue.use(VueResource)
21
22 //自定义指令
23 Vue.directive('rainbow',{
24     bind(el,binding,vnode){
25         el.style.color = "#" + Math.random().toString(16).slice(2,8)
26     }
27 })
28
29 Vue.directive('theme',{
30     bind(el,binding,vnode){
31         if(binding.value=='wide'){
32             el.style.maxWidth = "1260px"
33         }else if(binding.value='narrow'){
34             el.style.maxWidth="600px"
35         }
36
37         if(binding.arg=='column'){
38             el.style.background = "#F4A460";
39             el.style.margin = "10px auto"
40         }
41     }
42 })
43
44 //自定义过滤器  全局的实现方式
45 /*Vue.filter("to-uppercase",function(value){
46     return value.toUpperCase();
47 })*/
48
49 Vue.filter("snippet",function(value){
50     return value.slice(0,10) + "...";
51 })
52 /* eslint-disable no-new */
53 new Vue({
54   el: '#app',
55   router,
56   components: { App },
57   template: '<App/>'
58 })