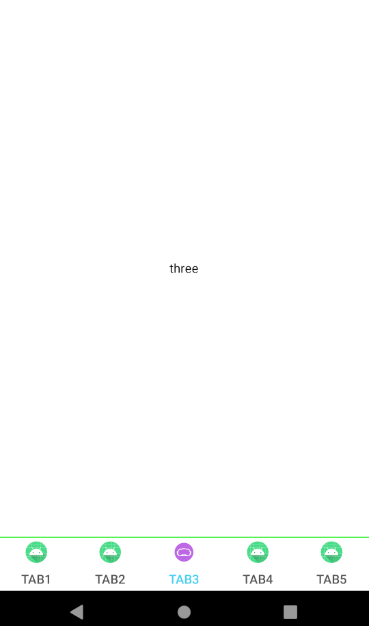
使用TabLayout+Viewpager写的一个底部导航栏 可以直接拿来塞填数据 导航栏可以根据自己的需求移动
先上图:
如果你的tab数量太多,超出的屏幕,就像今日头条的分类一样,那就会挤在一起,这个时候需要让tab可以横向滚动 只需要加入
app:tabMode="scrollable"
就可以让你的tab变的可以滚动,可以超出屏幕
直接上代码:
class MainActivity : AppCompatActivity(), TabLayout.OnTabSelectedListener {
    //tab文字
    private val titles = arrayOf("TAB1", "TAB2", "TAB3", "TAB4", "TAB5")
    //tab展示图片
    private val tabs = intArrayOf(R.mipmap.ic_launcher,R.mipmap.ic_launcher,R.mipmap.ic_launcher,R.mipmap.ic_launcher,R.mipmap.ic_launcher)
    //tab被选中后展示图片
    private val tabsSelect = intArrayOf(R.mipmap.vr,R.mipmap.vr,R.mipmap.vr,R.mipmap.vr,R.mipmap.vr)
    //tab关联的fragment列表
    private val fragments: ArrayList<Fragment> = ArrayList()
    private var pagerAdapter: FmPagerAdapter? = null

    override fun onCreate(savedInstanceState: Bundle?) {
        super.onCreate(savedInstanceState)
        setContentView(R.layout.activity_main)
        initData()
    }
    //初始化
    fun initData(){
        //关联tab和fragment
        for (i in 0 until tabs.size) {
            getFragment(i)?.let { fragments.add(it) }
            home_bottom_tab_tl.addTab(home_bottom_tab_tl.newTab())
        }
        // viewpager关联adapter
        home_bottom_tab_tl.setupWithViewPager(home_viewPager_vp,false);
        pagerAdapter = FmPagerAdapter(fragments,getSupportFragmentManager())
        home_viewPager_vp.setAdapter(pagerAdapter);
        // 给tab设置文字或者图片
        for (i in 0 until tabs.size) {
//            home_bottom_tab_tl.getTabAt(i)?.setText(titles[i])
            home_bottom_tab_tl.getTabAt(i)?.setIcon(tabs[i])
        }
        //添加tab选中监听
        home_bottom_tab_tl.addOnTabSelectedListener(this)
        //设置默认选中第三个 从0开始
        home_bottom_tab_tl.getTabAt(2)?.select()
    }

    fun getFragment(num:Int): Fragment? {
        when(num){
            0 ->return OneFragment()
            1 ->return TwoFragment()
            2 ->return ThreeFragment()
            3 ->return FourFragment()
            4 ->return FiveFragment()
        }
        return null
    }

    internal class FmPagerAdapter(private val fragmentList: List<Fragment>?, fm: FragmentManager?) :
        FragmentPagerAdapter(fm!!) {

        override fun getCount(): Int {
            return if (fragmentList != null && !fragmentList.isEmpty()) fragmentList.size else 0
        }

        override fun getItem(position: Int): Fragment {
            return fragmentList!![position]
        }

    }

    override fun onTabReselected(p0: TabLayout.Tab?) {

    }
    //失去选中 改回原来的图片  文字的选中是在style里面设置的
    override fun onTabUnselected(p0: TabLayout.Tab?) {
        p0?.position?.let { home_bottom_tab_tl.getTabAt(it)?.setIcon(tabs[it]) }
    }
    //选中的的 图片设置
    override fun onTabSelected(p0: TabLayout.Tab?) {
        p0?.position?.let { home_bottom_tab_tl.getTabAt(it)?.setIcon(tabsSelect[it]) }
    }
}
activity_main.xml
<?xml version="1.0" encoding="utf-8"?>
<RelativeLayout xmlns:android="http://schemas.android.com/apk/res/android"
    android:layout_width="match_parent"
    android:layout_height="match_parent"
    xmlns:app="http://schemas.android.com/apk/res-auto"
    android:orientation="vertical">
    <LinearLayout
        android:layout_width="match_parent"
        android:layout_height="60dp"
        android:orientation="vertical"
        android:layout_alignParentBottom="true">
        <View
            android:layout_width="match_parent"
            android:layout_height="1dp"
            android:background="#0AF10A"/>

        <com.google.android.material.tabs.TabLayout
            android:id="@+id/home_bottom_tab_tl"
            style="@style/MyTablayoutStyle"
            android:layout_width="match_parent"
            android:layout_height="60dp"
            />
    </LinearLayout>
    <androidx.viewpager.widget.ViewPager
        android:id="@+id/home_viewPager_vp"
        android:layout_width="match_parent"
        android:layout_height="match_parent"
        android:layout_marginBottom="60dp"/>
</RelativeLayout>
tab的style设置
<style name="MyTablayoutStyle" parent="Widget.Design.TabLayout">
        <item name="tabBackground">@color/color_FFFFFF</item>
        <item name="tabIndicatorColor">@color/color_00FFFFFF</item>
        <item name="tabSelectedTextColor">@color/color_3BCEF3</item>
        <item name="android:textSize">@dimen/middle_text_size</item>
        <item name="tabTextColor">@color/color_535353</item>
    </style>
完工 非常简单
demo地址:
https://github.com/hch1991/TabLayout-ViewPager