WCF的rest服务已经不是什么新概念了,不过,最近做了一个rest服务(Host在windows服务上),缺发现没有人调用,于是自己做了一个简单web界面,调用rest服务的一些方法,同时又不想因为这个简单的界面再部署一个IIS之类的重量级服务,于是就产生了这么一个非常绕口的想法:
在wcf rest服务上部署一个(套)页面,用来测试wcf rest服务自身的一个(或几个)方法
本文这个非常绕口的题目,也就是起源于这个非常绕口的想法。
关于rest服务的优势
在开始说正文之前,先说说在我理解中的rest服务与一般的Soap服务相比的优势。
首先,如果rest服务的某个方法是get方式的,在url中可以将全部参数放全,那么很幸运,只要有浏览器,就可以看服务是不是正常工作了。
其次,如果需要post部分复杂数据,或者使用其他动词,那么,调适起来就麻烦一些,需要各种客户端去访问(退化到和Soap一样的,不过Soap有很多现成的工具可以调适)。
最后,rest服务拥有极好的web兼容性,并且一个设计良好的rest服务本身具有很强的描述性,而Soap服务则依赖于wsdl这个相对较复杂的约定。
rest服务的客户端选型
根据前面的分析,可以看出,需要post部分复杂数据或者使用其他动词的时候,rest服务还是需要一个特定的客户端的。
当然这个客户端还是有很多类型可以选择的,例如:c#等语言自己写一个客户端,直接写个asp.net程序使用Ajax调用服务等方法。
不过,我这里选了这样的方式:
静态页面+js+ajax调用
选择这种方式有这样几个约束,首先,需要一个能够被访问的地址,来获得静态页面和js等文件,其次,如果希望使用方能有一个比较给力的操作界面,那么可能需要不少的js,和一定的js水平(ps:我是js菜鸟)。
撇开第二个问题不谈,一个能够被访问的地址,想想什么样的服务能给我们这个,IIS当然可以,不过有必要么?其实rest服务自身也是一个可以被访问的地址,为什么不用rest服务自己哪?
既然想到了,那么就动手吧。
原始的rest服务
首先,准备一个原始的rest服务,作为我们的例子:
1: [ServiceContract]
2: public interface IHelloWorld
3: {
4: [OperationContract]
5: [WebInvoke(UriTemplate = "/findperson/",
6: BodyStyle = WebMessageBodyStyle.WrappedRequest, RequestFormat = WebMessageFormat.Json, ResponseFormat = WebMessageFormat.Json)]
7: Person FindPerson(string firstname, string lastname);
8: }
9:
10: [DataContract]
11: public class Person
12: {
13: [DataMember]
14: public string FirstName { get; set; }
15: [DataMember]
16: public string LastName { get; set; }
17: }
这个例子比较简单,因此完全可以不用post也能完成,不过,这里为了这里的演示目的,还是规定使用post方式。
然后准备实现:
1: public class HelloWorld
2: : IHelloWorld
3: {
4: public Person FindPerson(string firstname, string lastname)
5: {
6: // biz logic ...
7: return new Person { FirstName = firstname, LastName = lastname };
8: }
9: }
最后,准备上配置,和启动ServiceHost部分,服务就能跑起来了(略,这些不是本文的重点)。
让rest服务可以提供界面
服务跑起来了仅仅是准备动作,如何让这个rest服务能够给出界面哪?
这里先准备一个非业务性的接口:
1: [ServiceContract]
2: public interface IRestWithUI
3: {
4: [OperationContract]
5: [WebGet(UriTemplate = "/ui/",
6: BodyStyle = WebMessageBodyStyle.Bare, RequestFormat = WebMessageFormat.Json, ResponseFormat = WebMessageFormat.Json)]
7: Stream GetIndexPage();
8: [OperationContract]
9: [WebGet(UriTemplate = "/ui/{file}",
10: BodyStyle = WebMessageBodyStyle.Bare, RequestFormat = WebMessageFormat.Json, ResponseFormat = WebMessageFormat.Json)]
11: Stream GetFile(string file);
12: }
然后,简单实现一下这个接口:
1: public class RestWithUI
2: : IRestWithUI
3: {
4: private static readonly string BaseDir =
5: Path.Combine(Path.GetDirectoryName(typeof(RestWithUI).Assembly.Location), "UI");
6:
7: public Stream GetIndexPage()
8: {
9: return GetFile("index.htm");
10: }
11:
12: public Stream GetFile(string file)
13: {
14: if (Path.IsPathRooted(file) || file.Contains("..")) // For security.
15: return Stream.Null;
16: if (WebOperationContext.Current == null)
17: return Stream.Null;
18: var fullPath = Path.Combine(BaseDir, file);
19: if (!File.Exists(fullPath))
20: return Stream.Null;
21: var fileExt = Path.GetExtension(file);
22: if (fileExt != null)
23: fileExt = fileExt.ToLower();
24: switch (fileExt)
25: {
26: case ".js":
27: WebOperationContext.Current.OutgoingResponse.ContentType = "text/javascript";
28: break;
29: case ".css":
30: WebOperationContext.Current.OutgoingResponse.ContentType = "text/css";
31: break;
32: case ".htm":
33: case ".html":
34: default:
35: WebOperationContext.Current.OutgoingResponse.ContentType = "text/html";
36: break;
37: }
38: return File.Open(fullPath, FileMode.Open, FileAccess.Read, FileShare.ReadWrite);
39: }
40: }
这里将UI文件都约定为放在当前dll文件所在目录的UI子目录下,并且出于安全原因,拒绝所有对上级目录的访问。同时,将默认文件设置为UI目录下index.htm文件。
到此为止,我们拥有了两个服务接口,一个是业务的,一个是非业务的,为了让原来业务实现支持非业务的接口,需要做小小的更改:
1: [ServiceContract]
2: public interface IHelloWorldWithUI
3: : IHelloWorld, IRestWithUI { }
4:
5: public class HelloWorld
6: : RestWithUI, IHelloWorldWithUI
7: {
8: // ...
9: }
然后,别忘了准备UI目录,和目录下面的index.htm文件,先准备个简单的“界面”:
<html><body>Hello world!</body></html>
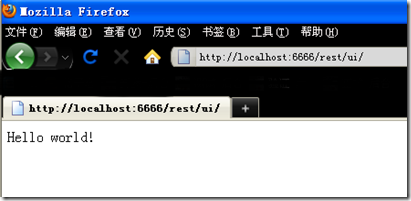
好吧,来看看这个简单得不能再简单的“界面”,假设服务的地址是:http://localhost:6666/rest
那么UI的地址就是:http://localhost:6666/rest/ui/
来看一下界面:
在这个UI下,我们什么事情都不能干,因为这个“界面”不能产生任何的动作,下一步就是让我们的“界面”变成真正的界面。
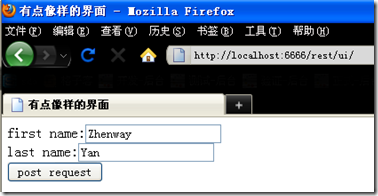
省去了花哨的界面,做一个真正能用的最简单的界面:
1: <html>
2: <head>
3: <title>有点像样的界面</title>
4: <script type="text/javascript" src="http://ajax.googleapis.com/ajax/libs/jquery/1.4.4/jquery.min.js"></script>
5: <script type="text/javascript" src="http://jquery-json.googlecode.com/files/jquery.json-2.2.min.js"></script>
6: <script type="text/javascript" src="http://jtemplates.tpython.com/jTemplates/jquery-jtemplates.js"></script>
7: <script type="text/javascript">
8: function postRequest() {
9: var url = '../findperson/';
10: var req = { firstname: firstname.value, lastname: lastname.value };
11: var json = $.toJSON(req);
12: $.ajax({
13: url: url,
14: data: json,
15: type: "POST",
16: processData: false,
17: contentType: "application/json",
18: timeout: 10000,
19: dataType: "text",
20: success: function(res) { renderTemplate('showresponse', $.evalJSON(res)); },
21: error: function(xhr) {
22: if (!error) return;
23: if (xhr.responseText) {
24: alert(xhr.responseText);
25: }
26: return;
27: }
28: });
29: }
30: function renderTemplate(containerId, data) {
31: $.jTemplatesDebugMode = true;
32: $('#' + containerId).setTemplateElement(containerId + '-template');
33: $('#' + containerId).processTemplate(data);
34: }
35: </script>
36: </head>
37: <body>
38: first name:<input id="firstname" type="text" value="Zhenway" /><br />
39: last name:<input id="lastname" type="text" value="Yan" /><br />
40: <button type="button" onclick="postRequest();">post request</button><br />
41: <div id="showresponse"></div>
42: <textarea id="showresponse-template" style="display:none">
43: Person information:<br />
44: <strong>First Name:</strong>{$T.FirstName}<br />
45: <strong>Last Name:</strong>{$T.LastName}<br />
46: <strong>Full Name:</strong>{$T.FirstName + " " + $T.LastName}
47: </textarea>
48: </body>
49: </html>
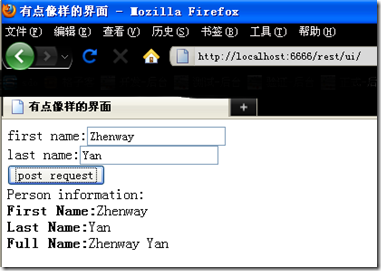
发送一下请求,可以看到:
到这里,已经简单的界面就完成了,当然如果要做更复杂的界面,和更复杂的互动,就要有良好的html+js基础了,这已经超出了我的能力范围,不过,再复杂的静态html文件始终还是静态资源,UI目录下的文件修改一下就可以了,对rest服务自身而言,并不关心这些。


