Migrations迁移
Just like you use Git / SVN to manage changes in your source code, you can use migrations to keep track of changes to the database. With migrations you can transfer your existing database into another state and vice versa: Those state transitions are saved in migration files, which describe how to get to the new state and how to revert the changes in order to get back to the old state.
You will need Sequelize CLI. The CLI ships support for migrations and project bootstrapping.
就像你使用Git / SVN去管理你的资源码的变化,你也能够使用Migrations去跟踪你数据库的变化。使用migration,你可以转移你已有的数据库到另一个状态中,反之亦然:这些状态转移将会被记录在migration文件中,用以描述如何得到新的状态和为了回到旧的状态要如何恢复变化。
你将需要 Sequelize CLI。命令行界面支持迁移和项目引导
The CLI
Installing CLI安装命令行界面
Let's start with installing CLI, you can find instructions here. Most preferred way is installing locally like this
$ npm install --save sequelize-cli
Bootstrapping引导程序
在这之前还要安装:
npm install --save sequelize mysql2
To create an empty project you will need to execute init command
执行init命令来创建空项目
$ node_modules/.bin/sequelize init
终端返回:
userdeMacBook-Pro:test-sequelize user$ node_modules/.bin/sequelize init

Sequelize CLI [Node: 11.1.0, CLI: 5.4.0, ORM: 4.41.2]

Created "config/config.json"
Successfully created models folder at "/Users/user/test-sequelize/models".
Successfully created migrations folder at "/Users/user/test-sequelize/migrations".
Successfully created seeders folder at "/Users/user/test-sequelize/seeders".
This will create following folders
将会生成下面的文件夹
config, contains config file, which tells CLI how to connect with database包含配置文件,它告诉CLI如何连接数据库models, contains all models for your project包含你的项目的所有模型migrations, contains all migration files 包含所有迁移文件seeders, contains all seed files包含所有种子文件
Configuration配置
Before continuing further we will need to tell CLI how to connect to database. To do that let's open default config file config/config.json. It looks something like this
在继续更远的操作之前,我们需要告诉CLI如何连接数据库。首先需要打开默认的配置文件config/config.json,如下:
{
  "development": {
    "username": "root",
    "password": null,//改成自己数据库的密码
    "database": "database_development",//改成sequelize_development
    "host": "127.0.0.1",
    "dialect": "mysql"
  },
  "test": {
    "username": "root",
    "password": null,
    "database": "database_test",//改成sequelize_test
    "host": "127.0.0.1",
    "dialect": "mysql"
  },
  "production": {
    "username": "root",
    "password": null,
    "database": "database_production",//改成sequelize_production
    "host": "127.0.0.1",
    "dialect": "mysql"
  }
}
Now edit this file and set correct database credentials and dialect.
现在编辑此文件并设置正确的数据库凭据和语言。
Note: If your database doesn't exists yet, you can just call db:create command. With proper access it will create that database for you.
注意: 如果你的数据库还不存在,你可以调用 db:create 命令。 通过正确的访问,它将为你创建该数据库。
Creating first Model (and Migration)创建第一个模型(和迁移)
Once you have properly configured CLI config file you are ready to create your first migration. It's as simple as executing a simple command.
一旦你正确配置CLI配置文件,你就可以创建你的第一个迁移了。它就像执行一个简单的命令行一样简单
We will use model:generate command. This command requires two options
你将使用model:generate命令。该命令需要两个选项
name, Name of the model模型的名字attributes, List of model attributes模型属性列表
Let's create a model named User.创建模型名为User
$ node_modules/.bin/sequelize model:generate --name User --attributes firstName:string,lastName:string,email:string
终端返回:
userdeMacBook-Pro:test-sequelize user$  node_modules/.bin/sequelize model:generate --name User --attributes firstName:string,lastName:string,email:string

Sequelize CLI [Node: 11.1.0, CLI: 5.4.0, ORM: 4.41.2]

New model was created at /Users/user/test-sequelize/models/user.js .
New migration was created at /Users/user/test-sequelize/migrations/20181205064731-User.js .
This will do following这将发生如下事情:
- Create a model file
userinmodelsfolder 在models文件夹中创建了一个user.js模型文件 - Create a migration file with name like
XXXXXXXXXXXXXX-create-user.jsinmigrationsfolder在migrations文件夹中创建了一个名字像XXXXXXXXXXXXXX-create-user.js的迁移文件
Note: Sequelize will only use Model files, it's the table representation. On the other hand, the migration file is a change in that model or more specifically that table, used by CLI. Treat migrations like a commit or a log for some change in database.
注意: Sequelize 将只使用模型文件,该文件是表描述。另一边,迁移文件是该模型的更改,或更具体的是说 CLI 所使用的表。 处理迁移就像是提交或日志数据库中的更改。
Running Migrations运行迁移
Until this step, we haven't inserted anything into the database. We have just created required model and migration files for our first model User. Now to actually create that table in database you need to run db:migrate command.
直到这一步,我们没有将任何东西插入数据库。 我们刚刚为我们的第一个模型 User 创建了必需的模型和迁移文件。 现在要在数据库中实际创建该表,需要运行 db:migrate 命令
$ node_modules/.bin/sequelize db:migrate
终端返回:
userdeMacBook-Pro:test-sequelize user$ node_modules/.bin/sequelize db:migrate

Sequelize CLI [Node: 11.1.0, CLI: 5.4.0, ORM: 4.41.2]

Loaded configuration file "config/config.json".
Using environment "development".
sequelize deprecated String based operators are now deprecated. Please use Symbol based operators for better security, read more at http://docs.sequelizejs.com/manual/tutorial/querying.html#operators node_modules/sequelize/lib/sequelize.js:242:13
== 20181205064731-create-user: migrating =======
== 20181205064731-create-user: migrated (0.020s)
This command will execute these steps:此命令将执行这些步骤
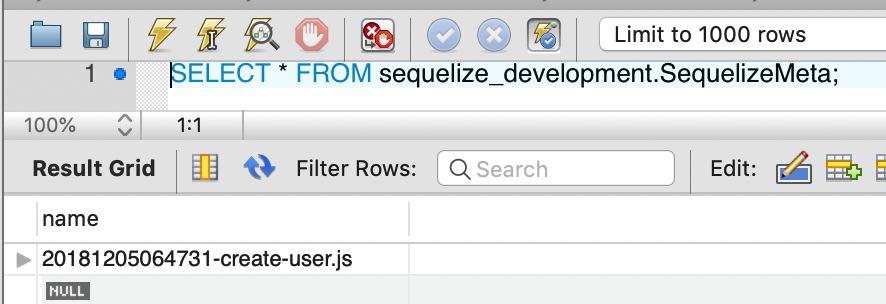
- Will ensure a table called
SequelizeMetain database. This table is used to record which migrations have run on the current database 将在数据库中确保一个名为SequelizeMeta的表。 此表用于记录在当前数据库上运行的迁移 - Start looking for any migration files which haven't run yet. This is possible by checking
SequelizeMetatable. In this case it will runXXXXXXXXXXXXXX-create-user.jsmigration, which we created in last step.开始寻找尚未运行的任何迁移文件。 这可以通过检查SequelizeMeta表来实现。 在这个例子中,它将运行我们在最后一步中创建的XXXXXXXXXXXXXX-create-user.js迁移 - Creates a table called
Userswith all columns as specified in its migration file.创建一个名为User的表,其中包含其迁移文件中指定的所有列
可以查看连接的数据库中的确生成了对应的表:


Undoing Migrations撤消迁移
Now our table has been created and saved in database. With migration you can revert to old state by just running a command.
现在我们的表已创建并保存在数据库中。 通过迁移,只需运行命令即可恢复为旧状态
You can use db:migrate:undo, this command will revert most recent migration.
你可以使用 db:migrate:undo,这个命令将会恢复最近的迁移。
$ node_modules/.bin/sequelize db:migrate:undo
终端返回:
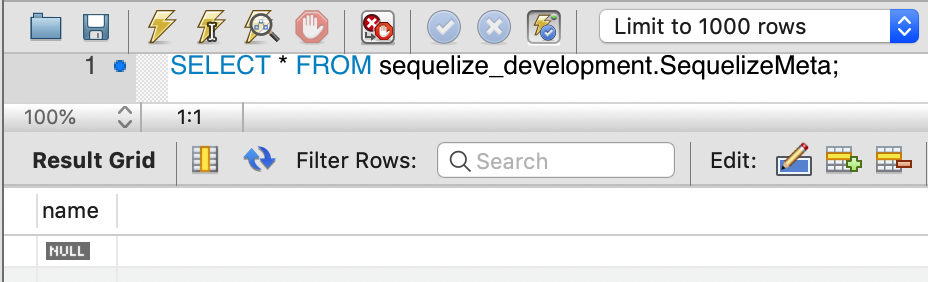
userdeMacBook-Pro:test-sequelize user$ node_modules/.bin/sequelize db:migrate:undo

Sequelize CLI [Node: 11.1.0, CLI: 5.4.0, ORM: 4.41.2]

Loaded configuration file "config/config.json".
Using environment "development".
sequelize deprecated String based operators are now deprecated. Please use Symbol based operators for better security, read more at http://docs.sequelizejs.com/manual/tutorial/querying.html#operators node_modules/sequelize/lib/sequelize.js:242:13
== 20181205064731-create-user: reverting =======
== 20181205064731-create-user: reverted (0.129s)
数据库将变成:

You can revert back to initial state by undoing all migrations with db:migrate:undo:all command. You can also revert back to a specific migration by passing its name in --to option.
通过使用 db:migrate:undo:all 命令撤消所有迁移,可以恢复到初始状态。 你还可以通过将其名称传递到 --to 选项中来恢复到特定的迁移。
$ node_modules/.bin/sequelize db:migrate:undo:all --to XXXXXXXXXXXXXX-create-posts.js
Creating First Seed创建第一个种子
Suppose we want to insert some data into a few tables by default. If we follow up on previous example we can consider creating a demo user for User table.
假设我们希望在默认情况下将一些数据插入到几个表中。 如果我们跟进前面的例子,我们可以考虑为 User 表创建演示用户
To manage all data migrations you can use seeders. Seed files are some change in data that can be used to populate database table with sample data or test data.
要管理所有数据迁移,你可以使用 seeders。 种子文件是数据的一些变化,可用于使用样本数据或测试数据填充数据库表
Let's create a seed file which will add a demo user to our User table.
让我们创建一个种子文件,它会将一个演示用户添加到我们的 User 表中(注意,如果你上面撤销了迁移,要记得恢复回来)
$ node_modules/.bin/sequelize seed:generate --name demo-user
终端返回:
userdeMacBook-Pro:test-sequelize user$ node_modules/.bin/sequelize seed:generate --name demo-user

Sequelize CLI [Node: 11.1.0, CLI: 5.4.0, ORM: 4.41.2]

seeders folder at "/Users/user/test-sequelize/seeders" already exists.
New seed was created at /Users/user/test-sequelize/seeders/20181205071424-demo-user.js .
This command will create a seed file in seeders folder. File name will look something like XXXXXXXXXXXXXX-demo-user.js. It follows the same up / down semantics as the migration files.
这个命令将会在 seeders 文件夹中创建一个种子文件。文件名看起来像是 XXXXXXXXXXXXXX-demo-user.js。它将像迁移文件一样遵循相同的 up/down 语义。
Now we should edit this file to insert demo user to User table.
现在我们应该编辑这个文件,XXXXXXXXXXXXXX-demo-user.js文件初始为:
'use strict';

module.exports = {
  up: (queryInterface, Sequelize) => {
    /*
      Add altering commands here.
      Return a promise to correctly handle asynchronicity.

      Example:
      return queryInterface.bulkInsert('People', [{
        name: 'John Doe',
        isBetaMember: false
      }], {});
    */
  },

  down: (queryInterface, Sequelize) => {
    /*
      Add reverting commands here.
      Return a promise to correctly handle asynchronicity.

      Example:
      return queryInterface.bulkDelete('People', null, {});
    */
  }
};
将演示用户插入User表:
'use strict';

module.exports = {
  up: (queryInterface, Sequelize) => {
    return queryInterface.bulkInsert('Users', [{
        firstName: 'John',
        lastName: 'Doe',
        email: 'demo@demo.com'
      }], {});
  },

  down: (queryInterface, Sequelize) => {
    return queryInterface.bulkDelete('Users', null, {});
  }
};
Running Seeds运行种子
In last step you have create a seed file. It's still not committed to database. To do that we need to run a simple command.
在上一步中,你创建了一个种子文件。 但它还没有保存到数据库。 为此,我们需要运行一个简单的命令。
$ node_modules/.bin/sequelize db:seed:all
终端返回:
userdeMacBook-Pro:test-sequelize user$ node_modules/.bin/sequelize db:seed:all

Sequelize CLI [Node: 11.1.0, CLI: 5.4.0, ORM: 4.41.2]

Loaded configuration file "config/config.json".
Using environment "development".
sequelize deprecated String based operators are now deprecated. Please use Symbol based operators for better security, read more at http://docs.sequelizejs.com/manual/tutorial/querying.html#operators node_modules/sequelize/lib/sequelize.js:242:13
== 20181205071424-demo-user: migrating =======

ERROR: Field 'createdAt' doesn't have a default value
ERROR: Field 'updatedAt' doesn't have a default valu
所以在XXXXXXXXXXXXXX-demo-user.js文件中显示插入createdAt和updatedAt:
createdAt: new Date(),
updatedAt: new Date()
然后再运行就成功了:
userdeMacBook-Pro:test-sequelize user$ node_modules/.bin/sequelize db:seed:all

Sequelize CLI [Node: 11.1.0, CLI: 5.4.0, ORM: 4.41.2]

Loaded configuration file "config/config.json".
Using environment "development".
sequelize deprecated String based operators are now deprecated. Please use Symbol based operators for better security, read more at http://docs.sequelizejs.com/manual/tutorial/querying.html#operators node_modules/sequelize/lib/sequelize.js:242:13
== 20181205071424-demo-user: migrating =======
== 20181205071424-demo-user: migrated (0.082s)
查看数据库可见:
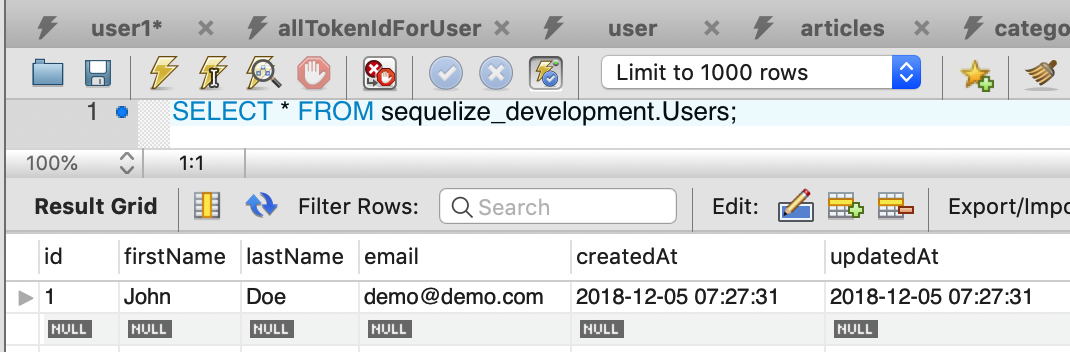
This will execute that seed file and you will have a demo user inserted into User table.
这将执行该种子文件,你将有一个演示用户插入 User 表。
Note: Seeders execution is not stored anywhere unlike migrations, which use the SequelizeMeta table. If you wish to override this please read Storage section
注意: seeders 执行不会存储在任何使用 SequelizeMeta 表的迁移的地方。 如果你想覆盖这个,请阅读 Storage部分
Undoing Seeds撤销种子
Seeders can be undone if they are using any storage. There are two commands available for that:
Seeders 如果使用了任何存储那么就可以被撤消。 有两个可用的命令
If you wish to undo most recent seed
如果你想撤消最近的种子
node_modules/.bin/sequelize db:seed:undo
终端返回:
userdeMacBook-Pro:test-sequelize user$ node_modules/.bin/sequelize db:seed:undo

Sequelize CLI [Node: 11.1.0, CLI: 5.4.0, ORM: 4.41.2]

Loaded configuration file "config/config.json".
Using environment "development".
sequelize deprecated String based operators are now deprecated. Please use Symbol based operators for better security, read more at http://docs.sequelizejs.com/manual/tutorial/querying.html#operators node_modules/sequelize/lib/sequelize.js:242:13
但是好像没有实现什么操作,数据库没有变化,试着调用下面的命令看看
If you wish to undo all seeds
如果你想撤消所有的种子
node_modules/.bin/sequelize db:seed:undo:all
终端返回:
userdeMacBook-Pro:test-sequelize user$ node_modules/.bin/sequelize db:seed:undo:all

Sequelize CLI [Node: 11.1.0, CLI: 5.4.0, ORM: 4.41.2]

Loaded configuration file "config/config.json".
Using environment "development".
sequelize deprecated String based operators are now deprecated. Please use Symbol based operators for better security, read more at http://docs.sequelizejs.com/manual/tutorial/querying.html#operators node_modules/sequelize/lib/sequelize.js:242:13
== 20181205071424-demo-user: reverting =======
== 20181205071424-demo-user: reverted (0.108s)
数据库变成了:

Advance Topics高级专题
Migration Skeleton迁移框架
The following skeleton shows a typical migration file.以下框架显示了一个典型的迁移文件。
module.exports = {
  up: (queryInterface, Sequelize) => {
    // logic for transforming into the new state转变为新状态的逻辑
  },

  down: (queryInterface, Sequelize) => {
    // logic for reverting the changes恢复更改的逻辑
  }
}
The passed queryInterface object can be used to modify the database. The Sequelize object stores the available data types such as STRING or INTEGER. Function up or down should return a Promise. Let's look at an example:
传递的 queryInterface 对象可以用来修改数据库。 Sequelize 对象存储可用的数据类型,如 STRING或 INTEGER。 函数 up 或 down 应该返回一个 Promise 。 让我们来看一个例子
module.exports = {
  up: (queryInterface, Sequelize) => {
    return queryInterface.createTable('Person', {
        name: Sequelize.STRING,
        isBetaMember: {
          type: Sequelize.BOOLEAN,
          defaultValue: false,
          allowNull: false
        }
      });
  },
  down: (queryInterface, Sequelize) => {
    return queryInterface.dropTable('Person');
  }
}
The .sequelizerc File
This is a special configuration file. It lets you specify various options that you would usually pass as arguments to CLI. Some scenarios where you can use it.这是一个特殊的配置文件。 它允许你指定通常作为参数传递给CLI的各种选项。 在某些情况下,你可以使用它。
- You want to override default path to
migrations,models,seedersorconfigfolder.你想要覆盖到migrations,models,seeders或config文件夹的路径 - You want to rename
config.jsonto something else likedatabase.json- 你想要重命名
config.json成为别的名字比如database.json
- 你想要重命名
And a whole lot more. Let's see how you can use this file for custom configuration.还有更多的, 让我们看一下如何使用这个文件进行自定义配置。
For starters, let's create an empty file in root directory of your project.对于初学者,可以在项目的根目录中创建一个空文件。
$ touch .sequelizerc
Now let's work with an example config.现在可以使用示例配置
const path = require('path');

module.exports = {
  'config': path.resolve('config', 'database.json'),
  'models-path': path.resolve('db', 'models'),
  'seeders-path': path.resolve('db', 'seeders'),
  'migrations-path': path.resolve('db', 'migrations')
}
With this config you are telling CLI to通过这个配置你告诉了CLI
- Use
config/database.jsonfile for config settings使用config/database.json文件来配置设置 - Use
db/modelsas models folder使用db/models作为模型文件夹 - Use
db/seedersas seeders folder使用db/seeders作为种子文件夹 - Use
db/migrationsas migrations folder使用db/migrations作为迁移文件夹
Dynamic Configuration动态配置
Configuration file is by default a JSON file called config.json. But sometimes you want to execute some code or access environment variables which is not possible in JSON files.
配置文件是默认的一个名为 config.json 的JSON文件。 但有时你想执行一些代码或访问环境变量,这在JSON文件中是不可能的。
Sequelize CLI can read from both JSON and JS files. This can be setup with .sequelizerc file. Let see how
Sequelize CLI可以从“JSON”和“JS”文件中读取。 这可以用.sequelizerc文件设置。 让我们来看一下怎么实现
First you need to create a .sequelizerc file in root folder of your project. This file should override config path to a JS file. Like this
首先,你需要在项目的根文件夹中创建一个 .sequelizerc 文件。 该文件应该覆盖 JS 文件的配置路径。 就像
const path = require('path');

module.exports = {
  'config': path.resolve('config', 'config.js')
}
Now Sequelize CLI will load config/config.js for getting configuration options. Since this is a JS file you can have any code executed and export final dynamic configuration file.
现在,Sequelize CLI将加载 config/config.js 以获取配置选项。 由于这是一个JS文件,你可以执行任何代码并导出最终的动态配置文件。
An example of config/config.js file
一个 config/config.js 文件的例子
const fs = require('fs');

module.exports = {
  development: {
    username: 'database_dev',
    password: 'database_dev',
    database: 'database_dev',
    host: '127.0.0.1',
    dialect: 'mysql'
  },
  test: {
    username: 'database_test',
    password: null,
    database: 'database_test',
    host: '127.0.0.1',
    dialect: 'mysql'
  },
  production: {
    username: process.env.DB_USERNAME,
    password: process.env.DB_PASSWORD,
    database: process.env.DB_NAME,
    host: process.env.DB_HOSTNAME,
    dialect: 'mysql',
    dialectOptions: {
      ssl: {
        ca: fs.readFileSync(__dirname + '/mysql-ca-master.crt')
      }
    }
  }
};
Using Environment Variables使用环境变量
With CLI you can directly access the environment variables inside the config/config.js. You can use .sequelizerc to tell CLI to use config/config.js for configuration. This is explained in last section.
使用CLI,你可以直接访问 config/config.js 内的环境变量。 你可以使用 .sequelizerc 来告诉CLI使用 config/config.js 进行配置。 这在上一节中有所解释。
Then you can just expose file with proper environment variables.
然后你可以使用正确的环境变量来暴露文件。
module.exports = {
  development: {
    username: 'database_dev',
    password: 'database_dev',
    database: 'database_dev',
    host: '127.0.0.1',
    dialect: 'mysql'
  },
  test: {
    username: process.env.CI_DB_USERNAME,
    password: process.env.CI_DB_PASSWORD,
    database: process.env.CI_DB_NAME,
    host: '127.0.0.1',
    dialect: 'mysql'
  },
  production: {
    username: process.env.PROD_DB_USERNAME,
    password: process.env.PROD_DB_PASSWORD,
    database: process.env.PROD_DB_NAME,
    host: process.env.PROD_DB_HOSTNAME,
    dialect: 'mysql'
  }
Specifying Dialect Options指定语言选项
Sometime you want to specify a dialectOption, if it's a general config you can just add it in config/config.json. Sometime you want to execute some code to get dialectOptions, you should use dynamic config file for those cases.
有时你想指定一个 dialectOption,如果它是一个通用配置,你可以将其添加到 config/config.json中。 有时你想执行一些代码来获取 dialectOptions,你应该为这些情况使用动态配置文件。
{
    "production": {
        "dialect":"mysql",
        "dialectOptions": {
            "bigNumberStrings": true
        }
    }
}
Production Usages生产用途
Some tips around using CLI and migration setup in production environment.
有关在生产环境中使用CLI和迁移设置的一些提示。
1) Use environment variables for config settings. This is better achieved with dynamic configuration. A sample production safe configuration may look like.使用环境变量进行配置设置。 这是通过动态配置更好地实现的。 样品生产安全配置可能看起来像
const fs = require('fs');

module.exports = {
  development: {
    username: 'database_dev',
    password: 'database_dev',
    database: 'database_dev',
    host: '127.0.0.1',
    dialect: 'mysql'
  },
  test: {
    username: 'database_test',
    password: null,
    database: 'database_test',
    host: '127.0.0.1',
    dialect: 'mysql'
  },
  production: {
    username: process.env.DB_USERNAME,
    password: process.env.DB_PASSWORD,
    database: process.env.DB_NAME,
    host: process.env.DB_HOSTNAME,
    dialect: 'mysql',
    dialectOptions: {
      ssl: {
        ca: fs.readFileSync(__dirname + '/mysql-ca-master.crt')
      }
    }
  }
};
Our goal is to use environment variables for various database secrets and not accidentally check them in to source control.我们的目标是为各种数据库秘密使用环境变量,而不是意外检查它们来源控制
Storage存储
There are three types of storage that you can use: sequelize, json, and none.可以使用三种类型的存储:sequelize,json和none
sequelize: stores migrations and seeds in a table on the sequelize database将迁移和种子存储在 sequelize 数据库的表中json: stores migrations and seeds on a json file将迁移和种子存储在json文件上none: does not store any migration/seed不存储任何迁移/种子
Migration Storage迁移存储
By default the CLI will create a table in your database called SequelizeMeta containing an entry for each executed migration. To change this behavior, there are three options you can add to the configuration file. Using migrationStorage, you can choose the type of storage to be used for migrations. If you choose json, you can specify the path of the file using migrationStoragePath or the CLI will write to the file sequelize-meta.json. If you want to keep the information in the database, using sequelize, but want to use a different table, you can change the table name using migrationStorageTableName.
默认情况下,CLI 将在你的数据库中创建一个名为 SequelizeMeta 的表,其中包含每个执行迁移的条目。 要更改此行为,可以在配置文件中添加三个选项。 使用 migrationStorage 可以选择要用于迁移的存储类型。 如果选择 json,可以使用 migrationStoragePath 指定文件的路径,或者 CLI 将写入 sequelize-meta.json 文件。 如果要将数据保存在数据库中,请使用 sequelize,但是要使用其他表格,可以使用 migrationStorageTableName.
{
  "development": {
    "username": "root",
    "password": null,
    "database": "database_development",
    "host": "127.0.0.1",
    "dialect": "mysql",

    // Use a different storage type. Default: sequelize
    "migrationStorage": "json",

    // Use a different file name. Default: sequelize-meta.json
    "migrationStoragePath": "sequelizeMeta.json",

    // Use a different table name. Default: SequelizeMeta
    "migrationStorageTableName": "sequelize_meta"
  }
}
Note: The none storage is not recommended as a migration storage. If you decide to use it, be aware of the implications of having no record of what migrations did or didn't run.注意: 不推荐使用 none 存储作为迁移存储。 如果你决定使用它,请注意将会没有任何移动记录或没有运行的记录.
Seed Storage种子储存
By default the CLI will not save any seed that is executed. If you choose to change this behavior (!), you can use seederStorage in the configuration file to change the storage type. If you choose json, you can specify the path of the file using seederStoragePath or the CLI will write to the file sequelize-data.json. If you want to keep the information in the database, using sequelize, you can specify the table name using seederStorageTableName, or it will default to SequelizeData.
默认情况下,CLI 不会保存任何被执行的种子。 如果你选择更改此行为(!),则可以在配置文件中使用 seederStorage 来更改存储类型。 如果选择 json,可以使用 seederStoragePath 指定文件的路径,或者 CLI 将写入文件 sequelize-data.json。 如果要将数据保存在数据库中,请使用 sequelize,你可以使用 seederStorageTableName 指定表名,否则将默认为SequelizeData。
{
  "development": {
    "username": "root",
    "password": null,
    "database": "database_development",
    "host": "127.0.0.1",
    "dialect": "mysql",
    // Use a different storage. Default: none
    "seederStorage": "json",
    // Use a different file name. Default: sequelize-data.json
    "seederStoragePath": "sequelizeData.json",
    // Use a different table name. Default: SequelizeData
    "seederStorageTableName": "sequelize_data"
  }
}
Configuration Connection String配置连接字符串
As an alternative to the --config option with configuration files defining your database, you can use the --url option to pass in a connection string. For example:作为 --config 选项的替代方法,可以使用定义数据库的配置文件,你可以使用 --url 选项传递连接字符串。 例如:
$ node_modules/.bin/sequelize db:migrate --url 'mysql://root:password@mysql_host.com/database_name'
Connecting over SSL通过SSL连接
Ensure ssl is specified in both dialectOptions and in the base config.确保ssl在 dialectOptions 和基本配置中指定。
{
    "production": {
        "dialect":"postgres",
        "ssl": true,
        "dialectOptions": {
            "ssl": true
        }
    }
}
Programmatic use程序化使用
Sequelize has a sister library for programmatically handling execution and logging of migration tasks.Sequelize 有一个sister library,用于以编程方式处理迁移任务的执行和记录。
Query Interface查询界面
Using queryInterface object described before you can change database schema. To see full list of public methods it supports check QueryInterface API
使用 queryInterface 对象描述之前,你可以更改数据库模式。 查看完整的公共方法列表,它支持 QueryInterface API