本篇和大家分享的是springcloud-config配置中心搭建,写到这里突然想起自己曾今开源过基于Redis发布订阅编写的一个配置中心,刚看了git星数有点少哈哈,这里顺势发个连接欢迎大侠们点赞:https://github.com/shenniubuxing3/IConfCenter
- springcloud版本说明
- config-server配置中心
- config-client配置客户端
- eureka注册中心实现配置高可用
springcloud版本说明
由于市面上其版本比较多,版本不一可能造成了读者尝试时版本问题,所以这里指明当前作者写文章时使用的cloud版本,springboot版本:
1     <parent>
2         <groupId>org.springframework.boot</groupId>
3         <artifactId>spring-boot-starter-parent</artifactId>
4         <version>2.0.7.RELEASE</version>
5         <relativePath/> <!-- lookup parent from repository -->
6     </parent>
springcloud版本:
    <properties>
        <java.version>1.8</java.version>
        <spring-cloud.version>Finchley.SR2</spring-cloud.version>
    </properties>
config-server配置中心
config配置中心主要是用来获取要发布的配置文件信息,并开放接口被其他调用者使用,先上maven配置:
1         <dependency>
2             <groupId>org.springframework.cloud</groupId>
3             <artifactId>spring-cloud-config-server</artifactId>
4         </dependency>
通常在程序入口处添加注解 @EnableConfigServer 然后我们还需要知道开放那些配置文件作为配置信息来源,因此需要在application.yml文件中配置如下信息:
 1 spring:
 2   application:
 3     name: config-server  #springcloud-config默认采用application作为name
 4   cloud:
 5     config:
 6       server:
 7         native:
 8           search-locations: file:///D:/my_study/study_java/springcloud_3/config-server/src/main/resources/config
 9   profiles:
10     active: native
11 server:
12   port: 4020
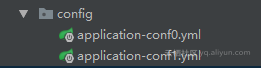
这里我使用本地的配置文件目录 src/main/resources/config 来提供配置文件,如果在windows上其实不用写file:///,不过官网还特别标注了windows上file后面要多一个 '/' 这里需要大家注意;这里我config文件夹下有两个配置文件,如下:
此刻我们最简单的配置服务就搭建好了,启动程序并访问如下地址:http://10.0.75.1:4020/config-server/conf1,conf0;值得注意的时候这里用 ',' 分割了下,在浏览器中得到如下两个配置文件合并后的信息:

可以去掉其中任何一个conf1或者conf0,得到的就是对应配置文件的信息,这里通过浏览器访问的路径规则是:http://xx.xx.xx/{application}/{profiles}/{label} label默认null
config-client配置客户端
同样先来看pom的config-client对应的配置,这里多了个web依赖因为我打算在api接口信息看配置效果
1         <dependency>
2             <groupId>org.springframework.boot</groupId>
3             <artifactId>spring-boot-starter-web</artifactId>
4         </dependency>
5         <dependency>
6             <groupId>org.springframework.cloud</groupId>
7             <artifactId>spring-cloud-starter-config</artifactId>
8         </dependency>
然后在Application入口处增加注解 @EnableDiscoveryClient 下面就是配置文件中的信息了,要注意的是这个版本config-client的config相关配置要放在名称为 bootstrap.properties 的文件中(这是默认的配置文件名),如下bootstrap.yml信息:
1 spring:
2   cloud:
3     config:
4       name: config-server    #application
5       profile: conf1,conf0   #profile 后来者覆盖,没有合并
6       label:                 #label
7       uri: http://10.0.75.1:4020
需要注意的是uri配置的是刚才上面我们访问的config-server地址,其他的几个配置对应刚才说的url规则
application.yml配置:
1 spring:
2   application:
3     name: config-client
4 server:
5   port: 5020
再来定义个api接口:
 1 @RestController
 2 public class ConfigController {
 3
 4     @Value("${shenniu.author}")
 5     private String author;
 6
 7     @Value("${shenniu.des}")
 8     private String des;
 9
10     @GetMapping("/getPort")
11     public String getPort() {
12         return "作者:" + author +
13                 "描述:" + des;
14     }
15 }
此时运行config-client,通过开放的api接口返回映射的配置信息如下:

eureka注册中心实现配置高可用
高可用通俗来讲就是部署多个服务,当某个挂掉的时候其他的顶上去,这里使用Eureka注册中心(后面可能会分享关于zk和consul);先创建个eureka-server项目并运行起来:
1         <dependency>
2             <groupId>org.springframework.cloud</groupId>
3             <artifactId>spring-cloud-starter-netflix-eureka-server</artifactId>
4         </dependency>
在Application入口处添加 @EnableEurekaServer 注解启动eureka服务,这里我分别启动1020,1021,1022三个eureka服务端口,使其自身是高可用的,相关配置:
 1 spring:
 2   application:
 3     name: eureka
 4 server:
 5   port: 1020
 6 eureka:
 7   instance:
 8     appname: ${spring.application.name}
 9   client:
10 #    register-with-eureka: false  #开启自动注册到eureka中心,高可用
11 #    fetch-registry: false
12     service-url:
13       defaultZone: http://localhost:1020/eureka/,http://localhost:1021/eureka/,http://localhost:1022/eureka/
14   server:
15     eviction-interval-timer-in-ms: 30000  #检测失效信息的时间
16     enable-self-preservation: false  #关闭自我保护
17     use-read-only-response-cache: false
下面需要分别改造下config-server和config-client的配置,可以遵循如下信息:
config-server
pom增加:
1         <dependency>
2             <groupId>org.springframework.cloud</groupId>
3             <artifactId>spring-cloud-starter-netflix-eureka-client</artifactId>
4         </dependency>
application.yml增加:
1 eureka:
2   client:
3     service-url:
4       defaultZone: http://localhost:1020/eureka/,http://localhost:1021/eureka/,http://localhost:1022/eureka/
5   instance:
6     appname: ${spring.application.name}
7     prefer-ip-address: true
config-client
pom增加:
1         <dependency>
2             <groupId>org.springframework.cloud</groupId>
3             <artifactId>spring-cloud-starter-netflix-eureka-client</artifactId>
4         </dependency>
bootstrap.yml改造:
 1 spring:
 2   cloud:
 3     config:
 4       name: config-server    #application
 5       profile: conf1,conf0   #profile 后来者覆盖,没有合并
 6       label:                 #label
 7 #      uri: http://10.0.75.1:4020
 8       discovery:
 9         enabled: true
10         service-id: CONFIG-SERVER
11 eureka:
12   client:
13     service-url:
14       defaultZone: http://localhost:1020/eureka/,http://localhost:1021/eureka/,http://localhost:1022/eureka/
15   instance:
16     appname: ${spring.application.name}
17     prefer-ip-address: true
如果可以吧config-server多开几个端口,都注册到eureka中心,成功后如下信息:

同样访问api接口时得到如下获取配置成功信息
