因为电脑以前安装过pip
所以直接cmd 管理员权限运行:pip install pyinstaller
安装successfully之后就可以转换.py程序了.
cmd管理员权限打开,cd到你要转换的文件目录下。
比如,文件在D:TEST下,CMD默认打开C:。执行:
D:
cd TEST
pyinstaller yourprogram.py
教程:
https://pyinstaller.readthedocs.io/en/v3.3.1/usage.html
https://wizardforcel.gitbooks.io/py-sec-tutorial/content/zh-cn/0x4.html
举例:
pyinstaller.py --console --onefile sync.py
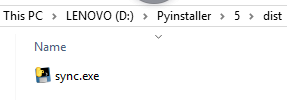
成功后如下:

在dist文件夹下的sync.exe就是我们最后需要的文件。
Issue:
程序中可能引用了pandas包,编译时报错如下:No module named timedeltas not build. If you want import pandas from the source directory, you may need to run 'python setup.py build_ext --inplace --force' to build the C extension.

我们到文件目录下,看到之前pyinstaller为我们生成了sync.spec文件。

打开之前生成的【文件名.spec】文件:在hiddenimports=[] 中添加对应的pandas命令。如下黄色部分。
再运行:
pyinstaller sync.spec
 1 # -*- mode: python -*-
 2
 3 block_cipher = None
 4
 5
 6 a = Analysis(['sync.py'],
 7 pathex=['D:\Pyinstaller\5'],
 8 binaries=[],
 9 datas=[],
10 hiddenimports=['pandas', 'pandas._libs.tslibs.timedeltas'],
11 hookspath=[],
12 runtime_hooks=[],
13 excludes=[],
14 win_no_prefer_redirects=False,
15 win_private_assemblies=False,
16 cipher=block_cipher)
17 pyz = PYZ(a.pure, a.zipped_data,
18 cipher=block_cipher)
19 exe = EXE(pyz,
20 a.scripts,
21 a.binaries,
22 a.zipfiles,
23 a.datas,
24 name='sync',
25 debug=False,
26 strip=False,
27 upx=True,
28 runtime_tmpdir=None,
29 console=True )

在dist文件夹下的sync.exe就是我们最后需要的文件。